")
52896WA Advanced Diploma of Civil and Structural Engineering (Materials Testing)
Investigation of the properties of construction materials, the principles which…Read more")
Graduate Diploma of Engineering (Safety, Risk and Reliability)
The Graduate Diploma of Engineering (Safety, Risk and Reliability) program…Read more
Professional Certificate of Competency in Fundamentals of Electric Vehicles
Learn the fundamentals of building an electric vehicle, the components…Read more
Professional Certificate of Competency in 5G Technology and Services Overview
Learn 5G network applications and uses, network overview and new…Read more
Professional Certificate of Competency in Clean Fuel Technology - Ultra Low Sulphur Fuels
Learn the fundamentals of Clean Fuel Technology - Ultra Low…Read more
Professional Certificate of Competency in Battery Energy Storage and Applications
Through a scientific and practical approach, the Battery Energy Storage…Read more
52910WA Graduate Certificate in Hydrogen Engineering and Management
Hydrogen has become a significant player in energy production and…Read more
Professional Certificate of Competency in Hydrogen Powered Vehicles
This course is designed for engineers and professionals who are…Read more
Practical HV Cable Jointing and Terminations for Engineers and Technicians
THIS BOOK WAS DEVELOPED BY IDC TECHNOLOGIES
WHO ARE WE?
IDC Technologies is internationally acknowledged as the premier provider of practical, technical training for engineers and technicians.
We specialize in the fields of electrical systems, industrial data communications, telecommunications, automation and control, mechanical engineering, chemical and civil engineering, and are continually adding to our portfolio of over 60 different workshops. Our instructors are highly respected in their fields of expertise and in the last ten years have trained over 200,000 engineers, scientists and technicians.
With offices conveniently located worldwide, IDC Technologies has an enthusiastic team of professional engineers, technicians and support staff who are committed to providing the highest level of training and consultancy.
TECHNICAL WORKSHOPS
TRAINING THAT WORKS
We deliver engineering and technology training that will maximize your business goals. In today’s competitive environment, you require training that will help you and your organization to achieve its goals and produce a large return on investment. With our ‘training that works’ objective you and your organization will:
- Get job-related skills that you need to achieve your business goals
- Improve the operation and design of your equipment and plant
- Improve your troubleshooting abilities
- Sharpen your competitive edge
- Boost morale and retain valuable staff
- Save time and money
EXPERT INSTRUCTORS
We search the world for good quality instructors who have three outstanding attributes:
- Expert knowledge and experience – of the course topic
- Superb training abilities – to ensure the know-how is transferred effectively and quickly to you in a practical, hands-on way
- Listening skills – they listen carefully to the needs of the participants and want to ensure that you benefit from the experience.
Each and every instructor is evaluated by the delegates and we assess the presentation after every class to ensure that the instructor stays on track in presenting outstanding courses.
HANDS-ON APPROACH TO TRAINING
All IDC Technologies workshops include practical, hands-on sessions where the delegates are given the opportunity to apply in practice the theory they have learnt.
REFERENCE MATERIALS
A fully illustrated workshop book with hundreds of pages of tables, charts, figures and handy hints, plus considerable reference material is provided FREE of charge to each delegate.
ACCREDITATION AND CONTINUING EDUCATION
Satisfactory completion of all IDC workshops satisfies the requirements of the International Association for Continuing Education and Training for the award of 1.4 Continuing Education Units.
IDC workshops also satisfy criteria for Continuing Professional Development according to the requirements of the Institution of Electrical Engineers and Institution of Measurement and Control in the UK, Institution of Engineers in Australia, Institution of Engineers New Zealand, and others.
CERTIFICATE OF ATTENDANCE
Each delegate receives a Certificate of Attendance documenting their experience.
100% MONEY BACK GUARANTEE
IDC Technologies’ engineers have put considerable time and experience into ensuring that you gain maximum value from each workshop. If by lunchtime on the first day you decide that the workshop is not appropriate for your requirements, please let us know so that we can arrange a 100% refund of your fee.
ONSITE WORKSHOPS
All IDC Technologies Training Workshops are available on an on-site basis, presented at the venue of your choice, saving delegates travel time and expenses, thus providing your company with even greater savings.
OFFICE LOCATIONS
AUSTRALIA • CANADA • INDIA • IRELAND • MALAYSIA • NEW ZEALAND • POLAND • SINGAPORE • SOUTH AFRICA • UNITED KINGDOM • UNITED STATES
idc@idc-online.com www.idc-online.com
Visit our website for FREE Pocket Guides
IDC Technologies produce a set of 6 Pocket Guides used by thousands of engineers and technicians worldwide.
Vol. 1 – ELECTRONICS
Vol. 2 – ELECTRICAL
Vol. 3 – COMMUNICATIONS
Vol. 4 – INSTRUMENTATION
Vol. 5 – FORMULAE & CONVERSIONS
Vol. 6 – INDUSTRIAL AUTOMATION
To download a FREE copy of these internationally best selling pocket guides go to: www.idc-online.com/downloads/
On-Site Training

All IDC Technologies Training Workshops are available on an on-site basis, presented at the venue of your choice, saving delegates travel time and expenses, thus providing your company with even greater savings.
For more information or a FREE detailed proposal contact Kevin Baker by e-mailing:
training@idc-online.com
IDC TECHNOLOGIES
Worldwide Offices
AUSTRALIA
Telephone: 1300 138 522 • Facsimile: 1300 138 533
West Coast Office
1031 Wellington Street, West Perth, WA 6005
PO Box 1093, West Perth, WA 6872
East Coast Office
PO Box 1750, North Sydney, NSW 2059
CANADA
Toll Free Telephone: 1800 324 4244 • Toll Free Facsimile: 1800 434 4045
Suite 402, 814 Richards Street, Vancouver, NC V6B 3A7
INDIA
Telephone : +91 444 208 9353
35 4th Street, Kumaran Colony, Vadapalani, Chennai 600026
IRELAND
Telephone : +353 1 473 3190 • Facsimile: +353 1 473 3191
PO Box 8069, Shankill Co Dublin
MALAYSIA
Telephone: +60 3 5192 3800 • Facsimile: +60 3 5192 3801
26 Jalan Kota Raja E27/E, Hicom Town Center
Seksyen 27, 40400 Shah Alam, Selangor
NEW ZEALAND
Telephone: +64 9 263 4759 • Facsimile: +64 9 262 2304
Parkview Towers, 28 Davies Avenue, Manukau City
PO Box 76-142, Manukau City
POLAND
Telephone: +48 12 6304 746 • Facsimile: +48 12 6304 750
ul. Krakowska 50, 30-083 Balice, Krakow
SINGAPORE
Telephone: +65 6224 6298 • Facsimile: + 65 6224 7922
100 Eu Tong Sen Street, #04-11 Pearl’s Centre, Singapore 059812
SOUTH AFRICA
Telephone: +27 87 751 4294 or +27 79 629 5706 • Facsimile: +27 11 312 2150
68 Pretorius Street, President Park, Midrand
PO Box 389, Halfway House 1685
UNITED KINGDOM
Telephone: +44 20 8335 4014 • Facsimile: +44 20 8335 4120
Suite 18, Fitzroy House, Lynwood Drive, Worcester Park, Surrey KT4 7AT
UNITED STATES
Toll Free Telephone: 1800 324 4244 • Toll Free Facsimile: 1800 434 4045
7101 Highway 71 West #200, Austin TX 78735
Website: www.idc-online.com
Email: idc@idc-online.com

Presents
Practical
Process, Electrical and Instrumentation Drawings and Documentation
HV Cable Jointing and Terminations
for Engineers and Technicians
Revision 3.2
Website: www.idc-online.com
E-mail: idc@idc-online.com
IDC Technologies Pty Ltd
PO Box 1093, West Perth, Western Australia 6872
Offices in Australia, New Zealand, Singapore, United Kingdom, Ireland, Malaysia, Poland, United States of America, Canada, South Africa and India
Copyright © IDC Technologies 2011. All rights reserved.
First published 2006
All rights to this publication, associated software and workshop are reserved. No part of this publication may be reproduced, stored in a retrieval system or transmitted in any form or by any means electronic, mechanical, photocopying, recording or otherwise without the prior written permission of the publisher. All enquiries should be made to the publisher at the address above.
Disclaimer
Whilst all reasonable care has been taken to ensure that the descriptions, opinions, programs, listings, software and diagrams are accurate and workable, IDC Technologies do not accept any legal responsibility or liability to any person, organization or other entity for any direct loss, consequential loss or damage, however caused, that may be suffered as a result of the use of this publication or the associated workshop and software.
In case of any uncertainty, we recommend that you contact IDC Technologies for clarification or assistance.
Trademarks
All logos and trademarks belong to, and are copyrighted to, their companies respectively.
Acknowledgements
IDC Technologies expresses its sincere thanks to all those engineers and technicians on our training workshops who freely made available their expertise in preparing this manual.
Table of Contents
1 Overview 1
1.1 Introduction 1
1.2 Need for high voltage cables 3
1.3 Advantages over overhead transmission lines 4
1.4 Disadvantages of cables in power transmission 4
1.5 Various types of high voltage cables 5
1.6 Need for cable jointing (splicing) 5
1.7 Need for termination kits 7
1.8 Summary 8
2 Constructional aspects of cables 9
2.1 Introduction 9
2.2 PVC insulated high voltage cables 10
2.3 Polyethylene insulated Cables 11
2.4 Cross- Linked Polyethylene (XLPE) Cables 11
2.5 Paper insulated lead sheathed cables (PILC) 17
2.6 Oil-filled cables 18
2.7 Application Areas 19
2.8 Good Installation practices 20
2.9 Summary 21
3 Cable connections in joints and terminations 23
3.1 Introduction 23
3.2 Types of connectors used in cables 23
3.3 Current Path 25
3.4 Methods of conductor connections 26
3.5 Contact resistance 34
3.6 Preferred methods in practice for different cable ratings 35
3.7 Galvanic Corrosion and use of Bimetals 35
3.8 Summary 36
4 Joints and terminations–theory 39
4.1 Basic Approach 39
4.2 Classification of joints 40
4.3 Pre-moulded (slip on) joints 43
4.4 Slip-on terminations 46
4.5 Cold shrink terminations 48
4.6 Heat shrinkable joints 52
4.7 Extrusion molded joints 53
4.8 Additional requirements for outdoor terminations 53
4.9 Reconstitution of cable properties 54
4.10 Connectivity for cable screen and armour 57
4.11 Mechanical protection of joint and terminations 57
4.12 Special joints 57
4.13 Summary 62
5 Stress control in cable joints and terminations 63
5.1 Stress gradients in cable joints and terminations 63
5.2 Areas requiring stress control 68
5.3 Terminations 69
5.4 Joints 70
5.5 Basics of stress control approach 70
5.6 Summary 73
6 Practical aspects of cable jointing and termination work 75
6.1 Kits for joints and terminations 75
6.2 Shelf Life 80
6.3 Issues with prefabricated kits 81
6.4 Preparation of cable for termination and jointing 81
6.5 Connection and Reconstitution of cable properties 88
6.6 Continuity and grounding aspects 92
6.7 Sealing, Healthiness of joint/termination & Repairs 92
6.8 Installation aspects for cables and joints 95
6.9 Safety issues and access for repairs 96
6.10 Summary 98
7 Cable termination to equipment 99
7.1 Basics of equipment terminations 99
7.2 Termination to indoor switchgear 111
7.3 Termination to electrical machines 104
7.4 Termination of outdoor HV installation 106
7.5 Terminations to GIS installation 107
7.6 Importance of correct orientation of terminations 109
7.7 Summary
8 Standards and testing 111
8.1 International/National standards 111
8.2 Standards for high-voltage and extra high-voltage cables 112
8.3 Type tests 114
8.4 Routine tests 119
8.5 Field Tests 122
8.6 Limitations 123
8.7 Training and certification 123
8.8 Summary 124
9 Failures and analysis 125
9.1 Reasons for failures in high voltage cables 125
9.2 Documentation of work done 126
9.3 Documentation of failures 127
9.4 Analysis of failures 128
9.5 Predictive approach 131
9.6 Summary 137
10 New trends 139
10.1 Increasing use of underground cables 139
10.2 New technologies for very high capacities and voltages 142
10.3 EHV XLPE cable systems 144
10.4 High temperature superconductivity cables 145
10.5 Summary 150
Self Assessment quiz with answers 151
Appendices – Technical papers 169
1
Overview
In this introductory chapter, we will discuss the need for power transmission and distribution through HV cables, as well as their advantages and disadvantages compared with overhead power lines. We will also discuss the different types of high voltage cables, the need for jointing/termination, as well as various types of jointing/termination kits that are available in the market.
Learning objectives
- Need for high voltage cables
- Advantages of using cables over overhead transmission lines
- Disadvantages of cables
- Various types of high voltage cables
- Need for cable jointing
- Need for termination
- Various types of jointing kits and termination kits
1.1 Introduction
Utility companies produce power from electrical generators, also called alternators, driven by prime movers. The prime movers that drive the generators are steam turbines in the case of thermal and nuclear power plants; water wheels and water turbines in the case of hydro power stations; and wind turbines in the case of windmill generating stations. The power thus produced needs to be evacuated or sent to the users’ factories or houses for their use/consumption. This is made possible by the use of overhead transmission lines or by the use of electric cables, which connect the utility station and the users’ loads. Overhead transmission lines comprise of an open system of conductors made from steel and aluminum, or copper wires strung over porcelain or ceramic insulators. Figure 1.1 shows a typical high voltage overhead transmission line system terminating at a substation:
Typical view of an overhead transmission line terminating at a substation
Electric cables comprise of copper or aluminum wires with layers of insulating materials over the conductors. Figure 1.2 shows a typical view of a high voltage cable for 33kV application:

Typical view of a 33kV, Cross-linked polyethylene cable
Overhead transmission lines cannot be installed at all applications due to reasons attributable to environment, space requirement etc. Likewise, cables cannot be used in all applications due to reasons such as voltage levels, distances etc.
Cable manufacturers produce cables in standard lengths ranging from 300m to 1000m. The above lengths depend on the type and unit weight (kg/m) of the cable that is being manufactured. Therefore, if our requirement for cable exceeds the standard length, we need to use an additional length of cable to complete our work: hence the need for joints. Cable joints as the name implies, join the tail end of the first cable to the head end of the second cable. Cable companies, or some other manufacturers who specialize in joints, offer “jointing kits”. We use these kits whenever we need a joint.
Cables also need special kits for the purpose of their termination at sending end and at receiving end. These are called “termination kits”, which can be either procured from the cable manufacturers or from the specialized manufacturers of jointing kits. Cables need to be installed with care as per manufacturer’s recommendation and as per installation codes with regard to their voltage class. Cables also need to be jointed and/or terminated by skilled technicians who use standard jointing/termination kits.
1.2 Need for high voltage cables
Normally power produced by the generators at the utility stations varies from 6600V to about 15000V depending on the output rating. Because of this, power produced at the above voltage can be used at the same voltage level for consumers living in the same or nearby localities through the use of a properly designed distribution system. For consumers living in far off places or for consumers situated in a huge factory facility, such as an integrated iron and steel works, it is not economically possible to make the above connections (called transmission of power) at the generated voltage, due to increase in energy losses.
Transmissions at higher voltages say 33kV, 66kV, 110kV, 132kV, 220kV etc. mitigate the above drawback and bring down the energy loss levels significantly. In order to achieve a higher transmission voltage level, the voltage level of the generated power needs to be stepped up or increased using step-up transformers. At the consumer end, step-down transformers are used to bring back or change the voltage to a lower value suitable for the consumer.
In addition, loads such as electric motors operate at higher voltages and at higher output ratings. In general, the following table gives the relation between motor ratings in kW and their voltage level of operation:
Motor output and commonly used voltage rating
| Motor rating in kw | Operating voltages in Volts |
| Up to 200kw | 415V |
| Between 200 to 500kw | 3300V |
| Between 500kw to 2500kw | 6600V |
| Above 2500kw | 11000V |
From the above table it can be seen that large motors need a power supply at higher voltages and therefore need to use high voltage cables. There are other examples of loads, which would also need to operate at high voltages, such as furnace transformers, electrostatic precipitators in dust control systems etc.
Therefore, we can see that for the basic needs of power distribution inside a factory or for transmitting to far off consumers, high voltage cables are needed.
1.3 Advantages over overhead transmission lines
In general, we can note that high voltage cables have the following advantages over the overhead transmission lines:
- In crowded cities, overhead transmission lines occupy large areas. Apart from looking grotesque, they also pose safety problems. Overhead transmission lines require large areas of land space, as well as further areas of clearances around the conductors calling for a power alley. This is becoming increasingly difficult to provide in today’s crowded metropolitan cities and their satellite townships. In such cases, high voltages cables offer the advantage of installation in cable trenches or underground cable tunnels thereby freeing valuable land space over ground. The cables can also be buried directly in the ground preferably routed in the space provided along side the roads called the “berm”. Furthermore, the freeing of land space has helped in the reduction of cumbersome land acquisition procedures and associated litigation issues.
- Ecological restrictions, as well as very high real estate costs, favor the installation of high voltage cable systems. The ecological objections include the visual pollution of an area of natural scenic beauty or the invasion of an historic site by the incongruous transmission structures. Another problem is the high electromagnetic interference associated with exposed electrical lines.
- In areas prone to atmospheric lighting discharges, the overhead transmission lines would suffer frequent breakdown causing power outages. High voltage cables are not affected by atmospheric discharges, as they are safe either buried in ground or routed inside a tunnel or trench.
- Due to higher surge impedance, high voltage cables offer increased protection from switching surges to various equipment, mainly transformers in installations, such as outdoor switchyards.
- For power supply to small islands, it is possible to transmit power only through underwater high voltage cables as overhead transmission lines are obviously ruled out in such applications.
1.4 Disadvantages of cables in power transmission
While we saw that high voltage cables have some notable advantages over overhead transmission lines, they also suffer from a few disadvantages:
- It is more difficult to locate a fault in a high voltage cable system than in an overhead transmission line system.
- High voltage cable systems are expensive in voltage levels higher than 33kV when compared to overhead transmission line systems, either for the purpose of intra-plant distribution or for interplant transmission of power.
- High voltage cables of the oil filled type, call for monitoring and inspection schedules which need to be implemented strictly. In the case of overhead transmission lines, such schedules are less stringent and rectification, if needed, is easier when compared with the cable systems.
- Cable joints and terminations are expensive and require factory trained and skilled technicians for their installation. In comparison, jointing and termination in overhead transmission line systems are straightforward and simple.
- The joints and terminations in the high voltage cable system are a constant worry to the maintenance personnel, since they are the weakest links in an otherwise robust electrical system. This calls for constant monitoring of the joints and terminations.
- Testing of high voltage cable systems is a time consuming process compared to the testing of overhead transmission line systems.
Thus, we can conclude that the selection of a transmission system needs to be examined carefully, and the ultimate choice of high voltage cables or overhead system should be made judiciously.
1.5 Various types of high voltage cables
We can classify high voltage cables broadly into different types based on the insulation medium used. These are:
- Low pressure oil filled cables
- High pressure oil filled cables
- Paper insulated cables
- Cross linked polyethylene (XLPE) cables
Cables can also be classified according to the voltage grades, such as low voltage cables, medium voltage cables, high voltage (HV) cables and extra high voltage (EHV) cables, which in turn are decided by the system voltage where a cable is used. In fact, the type of insulation discussed above is very much dependent on the voltage grade of the cable. The voltage grade based classification can, however, vary between different countries as no uniform classification is followed internationally. In the forthcoming chapters, we would learn more about the construction and use of these various cables. While MV and HV cables are very common in industrial plant applications, use of EHV cables is almost restricted only to utilities and further restricted in distribution circuits.
Power cables are grouped according to the number of cores: single-core, 2-core, 3-core and so on. Multi-core cables are commonly used only up to MV levels. HV and EHV cables are always of the single core type.
1.6 Need for cable jointing (splicing)
Cables are manufactured in standard lengths and delivered to customers wound on drums. The weight of the cable drums is substantial and a typical drum with 500m of 3cx240 sq. mm. XLPE insulated cables can weigh up to 7500 kg. This introduces a bottleneck in terms of handling capacity at the cable factory. In addition, large unwieldy drums can pose problems during transportation and installation of the cables at the site. Therefore, joints are needed in order to install large lengths. In the case of cable failure in an existing installation, it would also be prudent to remove the damaged portion and replace this section with a new length, by jointing with the healthy portions of the cables.
Every user would prefer to install their cables without joints, but due to inevitable reasons such as those explained above, cable joints become a necessity. In general, users feel that a cable joint is a weak point in the distribution chain. On the contrary, jointing kit manufacturers vouch that a properly made joint is as good as the original cable. In addition, joints are required when two cables of dissimilar construction are to be jointed. This happens when an expansion takes place in an existing factory. Likewise, “T” joints are required in certain distribution schemes. Another type of joint is the “Branch Y” joint which is used in a few applications.
We can group the various types of joints broadly as:
- Straight through
- Branch Y joints
- T joints
- Transition joints
Depending on the type of insulation of the cable under use, there are further variations of the above types. Also, sometimes a distinction is made on the location of the joints, for example, whether they are an indoor type or an outdoor type. We will study the various types of jointing kits in the forthcoming chapters.
Figure 1.3 shows typical cable joints:

Various types of cable joints
1.7 Need for termination kits
Every cable, whether it is a low-tension type or a high-tension type, needs proper termination so that a cable run can be connected to a piece of equipment, usually a circuit breaker, a transformer, or a motor and so on. There are basic requirements such as cable boots, cable lugs and consumables like insulation tapes and cable glands used for low voltage cables etc. In the case of high voltage cables, there are other accessories related to sealing, stress control etc. These aspects will be discussed in detail in the forthcoming chapters. In addition, basic types of termination kits vary with respect to their location: indoor or outdoor.
Proper termination kits with proven test results are of great importance in order to provide faultless terminations. An improperly made termination would result in the heating of the joint and eventual flashover and outage in the systems.
The manuals supplied with the kits do give a systematic procedure for going ahead with the preparation and completion of the termination. Apart from the manual, some amount of hands-on training is also needed to carry out a sound job.
Figure 1.4 shows a typical high voltage cable termination arrangement:
Typical HV cable termination
We can group the various types of termination kits broadly as:
- Indoor termination kits
- Outdoor termination kits (the arrangement shown in the figure above)
- End sealing kits
The first two types explained above are for active terminations. The third type, the end sealing kit, is used whenever cable ends are to be left without use for a long time. We will study the various types of termination kits in later chapters.
1.8 Summary
High voltage cables play an important role in power distribution in the modern world. There are continuous improvements occurring in material science, which results in a better quality of materials and accessories which go into the manufacture of cables and the various jointing and termination kits.
Over a period, overhead transmission lines will be eliminated from our cities for various reasons (some explained above) and high voltage cables will replace them. Due to ecological restrictions, all outdoor substations will be converted into compact gas insulated indoor substations. In fact, all new substations will be of the indoor type in the future. High voltage cables would play a crucial role in such cases i.e., for interconnections to and from indoor substations. As with the cables, there is also a continuous improvement in the field of cable accessories, such as jointing and termination kits. There are new composite type insulator designs, which have greatly reduced weights and provide extra creepage distances. These insulators are self-cleaning types with excellent properties in areas of fire resisting capability and UV radiation resisting capability. Testing is an important area once the cables have been installed, jointed and terminated. Testing is crucial, as it reveals the quality of the work performed. We will be investigating the above aspects in detail in the later chapters.
2
Constructional Aspects of Cables
In this chapter, we will discuss the various types of cables that are manufactured. We will also learn the advantages and disadvantages of each type of cable as well as their specific application areas. In the last part of this chapter, we will also investigate some good installation practices.
Learning objectives
- Various types of high voltage cables
- Polyvinylchloride (PVC) insulated cables
- Polyethylene (PE) insulated cables
- Cross linked Polyethylene (XLPE) insulated cables
- Paper insulated lead sheathed cables
- Oil-filled cables
- Application areas
- Good installation practices
2.1 Introduction
We have come a long way since the year 1880, when the first conductor covering was made with India rubber (also called as Vulcanized India Rubber), Dry Paper, Gutta Percha and Vulcanized Bitumen. In the year 1887, Ferranti made the first paper covered conductor, which people started to refer to as “cable”. In the year 1914, Hochstadter patented the screened H type cable. This paved the way for the manufacture of cables for use in 11kV, 22kV and 33kV systems. Another important milestone was created in the year 1917, when Emmanuelli introduced oil filled paper cables, which helped the design of high voltage paper insulated cables in the 66kV voltage class and 132kV voltage class and beyond.
Polyvinylchloride was developed in the 1930s. Also during this period, another useful insulation compound called Polyethylene, was developed. PVC started to replace vulcanized India rubber cables as PVC had excellent properties in many areas when compared with rubber cables. It took two decades of continuous research and development work which resulted in the industrial use of polyethylene insulation in RF applications and in telephone applications. Shortly thereafter in the year 1953, Cross Linked Polyethylene (XLPE) insulation was developed in the GEC Labs (USA). Ever since this development, XLPE technology has made a slow and steady climb: today XLPE cables are available for use in high voltage systems up to 760kV.
2.2 PVC insulated high voltage cables
Polyvinylchloride (PVC) cables, which are extensively used in low voltage cable applications (up to 1.1kV level), can also be used in high voltage systems up to 3.3kV. PVC is thermoplastic in nature.
Composition of PVC insulation
PVC insulation is comprised of the following components:
- Polyvinylchloride
- Plasticizer
- Fillers
- Lubricants
- Colouring agents
The basic material, vinyl chloride, is produced by the chlorination of ethylene. It can be converted into polyvinylchloride by any one of the following processes: emulsion (E-PVC), suspension (S-PVC) or the mass polymerization method (M-PVC). For cables, PVC obtained through the suspension process is normally used.
Construction of PVC cable
PVC insulated cables are generally constructed as follows. The individual bare conductors (either electrical grade pure stranded aluminum or stranded and annealed copper conductors) are first insulated through the application of insulation over the conductors, through a process of extrusion. For power cables, either four conductors up to 25 sq. mm. area of cross section or three and half core conductors for cables above 25 sq. mm area of cross section are used. All the conductors are then laid together and with the help of fillers, the cable cross section is made into a circle on top of which an inner sheath of PVC compound is either taped or extruded over the circular mass thus formed. Over these sheathed cables, additional mechanical protection is offered by forming a layer of galvanized wires – either in strip form or in circular conductor form. Next, an additional outer layer is formed over the armoring: this is called the outer sheathing. The outer sheathing can be applied either by taping or by extrusion. Different grade PVC compounds are used for the inner conductor insulation and for the inner and outer sheaths.
Advantages of PVC Cables
The following are the advantages of PVC insulated cables:
- Simple process and easy installation
- Good fire resistance
- Low cost
- Available in bright colours, facilitating easy core identification
- Unaffected by dampness – does not support mould growth
- Are easier to handle and strip
- Good resistance to chemicals that include acids, alkalis, detergents etc
- Resistant to vegetable and mineral oil and petrol
Disadvantages of PVC Cables
The following are the disadvantages of PVC insulated cables:
- Deformation at high temperatures
- Emission of pungent chlorine fumes in case of fire
- Limitation in dielectric properties
- Stiffness in low temperatures
PVC cables are extensively used in low voltage (1kV or lower) systems. Though PVC cables are also manufactured for higher voltages by some vendors, their use is not very prevalent above the LV range. Nowadays XLPE insulated cables are also manufactured in 1.1kV grade. XLPE insulated cables have many advantages compared to PVC insulated cables. The entry of XLPE cables will slowly start affecting the manufacture and use of PVC cables in the future.
2.3 Polyethylene insulated Cables
Polyethylene (PE) cables, which are quite popular in low voltage instrumentation systems, are used in systems up to 3.3kV. PE is thermoplastic in nature and is similar to that of PVC.
Composition of PE Cable
The composition of PE insulation is a mixture of the following compounds:
- Polyethylene
- Stabilizers
- Coloring agents
Advantages of PE Cables
The following are the advantages of PE insulated cables:
- Simple process and easy installation
- Good electrical properties, such as high insulation resistance, high break down voltage, good electrical stability and lower permittivity
- Highly suitable for installation in low temperature areas and thus recommended for weather-resistant applications
- It is unaffected by most acids
- Exhibits high water absorption resistance
- Insoluble in most organic solvents
Disadvantages of PE Cables
The following are the disadvantages of PE insulated cables:
- Deformation at high temperatures
- Sensitive to partial discharge
- Limitation in dielectric properties when exposed to water
- Inflammable and support combustion
PE insulated cables are extensively used as control cables in low voltage instrumentation systems. Nowadays halogen free fire resistant low smoke emitting polymeric compounds are used in the manufacture of these cables, which enhance their resistance to fire. The use of PE insulated cables in high voltage cables is limited and somewhat rare due to the availability of XLPE insulated cables with better properties.
2.4 Cross- Linked Polyethylene (XLPE) Cables
Brief review of PE cables
In this section, let us once again briefly review the PE insulation discussed in the last section. The electrical properties of PE insulation are outstanding and nearly approach that of an ideal dielectric. However, its somewhat poor physical and chemical properties limit their application areas. PE is a compound of Carbon and Hydrogen with a linear molecular structure. PE is a synthetic thermo plastic material in existence since the year 1933. It is built up from unsaturated hydrocarbon, namely ethylene (CH2 = CH2). The double bond “=” indicates weakness in structures: an indication of a tendency towards easy chemical reaction. Above 110 deg C, PE insulation becomes thermally unstable. Thus, the use of PE insulation in power cables was not initially successful. However, application in control circuits, which do not cause overheating of the cable due to inherent low current passage, accepted the PE insulated cables. Therefore, from 1940, PE insulated control cables became very common in telephone and RF circuit applications.
The birth of cross-Linked polyethylene cable
The disadvantages of polyethylene cables (listed above) were overcome after about two decades of research, which saw the birth of cross-linked polyethylene cables.
Similar to the process of vulcanization of rubber, the polyethylene molecules can be vulcanized or cross-linked. The process involves producing chemical bonds at intervals between the long molecular chains to give a ladder effect, which prevents slippage between the molecules. Cross-linking means the formation of links between carbon atoms of neighbouring chain molecules, which effectively restricts the mobility of the molecules. The original linear structure of PE now stands transformed into a three dimensional structure. The cross-linking is carried out by using organic compounds (peroxides) which are chemicals containing oxygen at high temperatures. Commonly used standard peroxide is “dicumyl peroxide” and this is introduced at the extrusion stage of the compound and is activated by heat and pressure after extrusion. Different manufacturers use different types of peroxides or special mixtures which are patented by them. These peroxides break up into alkoxy radicals. These radicals displace hydrogen from the chain and create a vacant position, which pave the way for the formation of a C-C link. Figure 2.1 illustrates the idea of cross-linking at the molecular level as compared to a thermoplastic insulation:

Formation of cross-linked PE molecules
Thus, polyethylene which is a thermoplastic material is converted into a thermosetting material by cross-linking. In the process described above, suitable anti-oxidants are also used to control the process of oxidation.
Curing methods
Steam curing is commonly used for cables up to 33kV level to bring the required heat and pressure to enforce the cross-linking process. After treatment in the steam bath, the cables are cooled by means of immersion in water at room temperature for a fixed time, at the end of which the process of cross-linking is completed. Due to exposure to water, micro-voids are formed in the insulation, which lead to partial discharges. This results in premature failure of cables.
As an alternative to this classical method of cross-linking, silicon oil or molten salts are uses as media for heat transfer. Compared to steam bath methods, these methods provide cross-linking at higher temperatures, but at lower pressures.
Other methods of cross-linking are through bombardment by electron beams or with the use of siloxane bridges.
For very high voltage cables, nitrogen gas curing system (dry cure process) with dry cooling is adapted. This method provides the following advantages over the steam curing process:
- Freedom from void and moisture
- Higher AC and Impulse breakdown characteristics
- High Design stress
Advantages of Cross-linking
The advantages of cross-linking are many, including:
- Higher current carrying capacity as higher (90 deg C) temperature is permitted for the conductor
- Higher short circuit current rating of the cables
- Low dielectric losses
- Low charging current permitting installation of long cables
- Environmental friendly
Constructional features of a typical XLPE cable
Figure 2.2 below shows the details of construction of typical XLPE cables (as shown in a manufacturer’s technical leaflet:

Typical XLPE cable construction shown in a manufacturer’s catalog
The details of the major components making up an XLPE cable are described below:
- Conductor: Stranded, compacted circular, sector shaped conductors of electrical pure grade aluminum or annealed copper wires in required size are made ready foremost.
- Conductor shield: Extruded semi-conducting compound is applied over the conductors in tandem with the insulation. The requirement of this shield is described separately below.
- Insulation is high quality extremely clean XLPE compound free from air, water and other foreign particles. Thickness shall vary as per relevant specifications.
- Insulation shield: A semi-conducting shield comprising a layer of extruded semi-conducting compound in tandem over the insulation. This is required for all cables rated above 3.3kV. The insulation shield comprises of a non-metallic semi-conducting part, in combination with a metallic part over the insulation. The non-metallic part of the shield consists of a layer of extruded semi-conducting compound applied directly over the insulation. This part can also be helically applied in the form of a tape in place of the extrusion method. The metallic part of the shield consists of a bare annealed copper tape applied with an overlap over the semi-conducting insulation shield. The requirement of this shield is described separately below.
- Laying up: The multi core cables are laid with plastic fillers in the interstices.
- Common covering (inner sheathing): The cable thus laid is wrapped up in an inner sheath made of PVC compound, which can be either extruded or helically applied in tape form.
- Armor – Mechanical Protector: Galvanized wire or strip is next provided over the inner sheath to guard against mechanical damage. In case of single core cables used in alternating current systems, armoring would be made from non-magnetic hard drawn aluminum wire or strip.
- Outer sheath: Single and multi core cables would be subsequently given a final exterior sheathing made of PVC compound, which can be either extruded or helically applied in tape form.
The use of conductor & insulation screening (shielding)
In all HV cables, the conductor and insulation screens, which are semi-conducting, play a useful role in providing a smooth transition from a conducting surface to an insulating surface. Both the screens (one over the conductor and below the insulation and the other above the insulation) need to be very close to the insulation in order to ensure uniform distribution of the electric field in a radial fashion throughout the length of the cable. This eliminates an accumulation of electrical stress at any one point leading to failure of that portion. Togetherness of the screens with the main insulation also ensures close contact over all periods of expansion and contraction of the insulation, due to passage of varying load current and due to ambient temperature variations and external damage to the insulation.
The application of Bonding System
In high voltage systems, whenever bulk power is to be handled, single core cables offer large conductor sizes and therefore are used extensively. However, electrical potentials are induced in the sheaths due to electromagnetic induction. The permissible values of voltage rise are to be adhered to as per prevailing regulations connected with communication cables to avoid interference. There are various methods available for reducing the induced voltages in the sheaths. This is an important aspect of HV cable systems. The various bonding systems are described below:
- Single point bonding: Figure 2.3 explains graphically the single point bonding method. In this method, the three sheaths are bonded and earthed at one end of the cable. Due to this, a voltage appears from sheath to earth at the farthest point of the cable (non-earthed end). There would not be any induced current and hence no sheath loss would occur.
- Mid-point bonding: In this system, the three sheaths of the cable are bonded and earthed at the centre of the cable route. Due to this, equal voltages appear from sheath to earth at both ends of the cable installation. There would however, be no induced current as there is in a single point bonding system. By mid-point bonding, the cable length can be increased to twice that of single point bonding system.
- Both end bonding: Figure 2.4 explains graphically the both end bonding system. In this system, the sheaths are bonded and earthed at both ends of the cable installation. In this method, there would not be any sheath voltage induced at either end of the cable. However, sheath current flows, would call for nominal de-rating of the current rating of the cable.
- Cross bonding: Figure 2.5 explains graphically the cross bonding system. This method is followed in long cable circuits. In this system, the sheaths of adjoining cables are connected so that the sheaths are electrically 120 degrees apart. In cross bonding systems, the sheaths are sectionalized into minor sections, which are cross-bonded. The minor sections together make up a major section. When single core cables are laid in trefoil formation (triangle formation in which two cores from a bottom layer enables the third core to be laid centrally over them), the cross bonding system would ensure equal sheath voltage across a major section with a phase displacement of 120 degrees. The vector sum of this voltage is zero which eliminates circulating current and hence sheath losses.

Single Point Bonding method

Both Point Bonding method

Cross Bonding method
The induced sheath voltage variation of the above arrangement is shown in figure 2.6 below.
Induced sheath voltage
2.5 Paper insulated lead sheathed cables (PILC)
The paper insulated lead sheathed power cables are quite popular and even today PILC are extensively used especially in mines, quarries and metalliferous mines. Cable paper is comprised of pure long staple cellulose. Let us quickly go through the construction features of PILC cables. The conductors are insulated with high quality paper with a required thickness appropriate to the rated voltage. In the case of HV cables, conductive papers are provided on the conductor and a screen of matallized paper on the core. Either single or multi-core assembly can be formed this way. This is then dried in an impregnating tank and then impregnated with a degassed and dried impregnating medium. Paper insulated cables are divided according to their method of impregnation into mass-impregnated cables and oil-filled cables. The cables, whose insulation is filled after installation with nitrogen under pressure, are known as internal gas pressure cables.
Low voltage, medium voltage and external gas pressure cables are impregnated with high-viscosity polybutene compounds. These compounds have the following properties from low to high operating temperatures:
- Low dielectric losses
- Excellent ageing properties
The viscosity of the impregnating compounds is selected in such a way that small differences in level do not cause the compound to migrate. Non-draining compounds are used for special cables to be installed on steel slopes, internal gas pressure cables and for non-draining cables. The compound comprises of a mixture of polybutene with certain waxes. The wax prevents the flowing of the compound. For extra high voltage low-pressure oil filled cables, a low viscosity gas absorbing impregnant is used. This ensures good gas absorption in an electric field at all service temperatures, especially in relation to hydrogen.
Construction of PILC cable
Now let us see a typical construction of PILC cable suitable for mining application at 11kV:
- Conductors: These are high conductivity copper wires. For small sizes, these are circular in shape but for sizes over 16 sq. mm. in multi-core cables, the conductors are sector shaped and are pre-spiraled. The pre-spiraling eliminates internal mechanical stresses and creasing in the insulation during subsequent laying up the cores.
- Insulation: The insulation comprises of high quality and high-grade paper tapes applied helically with simultaneous control over the gap, lay and tension. In belted type multi core cables, the individual cores are laid up together with jute worming or paper fillers in the interstices to make up a circular formation and a belt comprising of paper tapes is applied over all to build up the insulation level between the conductors and lead alloy sheath.
- Screening: Each individual core is screened by lapping of aluminum tape backed with a tape. The laid up cores are formed into a circular cross section with the use of fillers. Another layer of copper woven tape is inserted on top of this formation. The copper strands ensure contact between the sheath and core screens.
- Impregnation: The laid up cores are dried under vacuum and impregnated under controlled conditions with special non-draining compound comprising mineral oil, wax and required resins.
- Sheath: Lead or lead alloy sheath forms a seal over the impregnated cable for excluding moisture completely.
- Bedding: Two layers of paper tapes are applied over the sheathed cable to form bedding. Sometimes another layer consisting of fibrous materials is applied over the bedding. PVC tapes are also used in place of paper tapes, in case the user needs better protection against corrosion.
- Armoring: Cables are armored to provide mechanical protection. Armoring is carried out with the application of a layer of galvanized steel wires. Sometimes a double layer of armoring is applied: in this case, a special fabric is inserted between the two layers of steel wires.
- Serving: If fibrous serving is needed, bitumen impregnated tapes made from jute is applied over the armored cable with free bitumen applied over the armor and over the jute tapes. Finally, the cable is white washed to prevent the sticking of layers between themselves and the cable drum. Alternatively, in place of whitewashing, a flame retardant PVC jacket is inserted over the cable.
A typical 15kV Paper insulated cable is shown in figure 2.7 below:

PILC Cable construction
2.6 Oil-filled cables
In this section, we will cover briefly low-pressure and high-pressure oil-filled cables.
Low-pressure oil-filled cable
These cables are successfully used up to 132kV systems. The paper insulation is impregnated with thin oil. When heated, the expanding oil can flow through longitudinal channels to oil expansion vessels. On the other hand, when the current passing through the cable reduces, the cable cools off. This in turn results in the oil being forced back to the cable from the vessel.
Cavities do not occur in oil-filled cables, thereby making the cables insensitive to variation in temperature cycles. Thus, the oil-filled cables are thermally stable which leads to the use of these cables at higher operating temperature. In addition, the voltage withstand capacity is considerably higher when compared to that of mass-impregnated cables. This means that the insulation of oil-filled cables requires to be comparatively lower (one half) compared to the insulation of mass-impregnated cables for a given rated voltage. From the above, it can be seen that the oil-filled cables can carry higher currents for the same cross-section of the conductor when compared to mass-impregnated cables.
High-pressure oil-filled cable
For application at much higher voltages, namely 220kV and beyond, high-pressure oil-filled cables can be used successfully. In this type of cable, the paper-insulated cores are impregnated with low viscosity synthetic oil. Over this, a helical layer of copper tape is applied, completely blocking the path for any leakage of the synthetic oil. Over this tape, a non-magnetic shielding wire is applied in helical form which provides protection to the cores when being inserted into steel pipes. The cable is then inserted into a steel pipe of the required length. The pipe is then evacuated and filled with low viscosity insulating oil. Pressure to the extent of 16 bars is maintained inside the pipe through a pressure regulating mechanism. The pressure regulating mechanism comprises of oil expansion/contraction tanks, pressure monitors, pumps and valves. Care is taken to duplicate the above components in order to avoid any failure and consequent damage to the main power cables, which is under high-pressure oil. In addition, power supply for the above mechanism is also duplicated: one source is the power supply network and the other source is an emergency supply point.
The pressure of 16 bars maintains the cable insulation void free during all conditions of operation. There is an enhancement in the voltage withstand capacity: to the tune of 60kV per mm and the peak voltage withstand capacity at 130kV per mm. These values are higher than those of low-pressure oil-filled cables.
Like in low-pressure oil-filled cables, oil flows out to the expansion tank when heated due to passage of load current and flows back into the pipe containing the cable when the load current decreases.
Figure 2.8 shows a typical modern 400 kV cable installation and its important components:
A typical oil-filled 400 kV Cable installation- Source: Hitachi Cable Review (Oct. 1999)
2.7 Application Areas
In this section, let us examine some of the areas where the various type of cable we have discussed in this chapter can be effectively used.
PVC insulated cables
PVC insulated cables find applications extensively. In the low voltage systems up to 1.1kV, PVC insulated power cables are widely used. The use of control cables with PVC insulation is also very well accepted. However, nowadays, PVC insulated power cables are challenged in the market by XLPE insulated cables in the 1.1kV segment. This is due to the recent decrement in the cost of the manufacture of XLPE cables, which are produced through the economical steam curing process. Because of higher operating temperatures, XLPE insulated cables can carry higher power than PVC insulated cables for the same conductor size. Due to this development, many consumers prefer to use XLPE insulated power cables. However, PVC insulated control cables continue to rule the market, as there is no challenge from XLPE insulated control cables thus far.
PE insulated cables
PE insulated cables are quiet popular and well sought after in applications as control and signal cables in instrumentation and control systems, apart from telephone circuits. PE insulated jelly filled (PIJF) cables are extensively used in telecommunication systems, offering wide-ranging advantages to the consumer. Chief among these advantages are trouble free performance, even in waterlogged areas, the absence of cross talk and operation in extreme hot and cold weather conditions.
XLPE insulated cables
XLPE insulated cables are now being manufactured up to 760kV levels and these cables have practically replaced all other types of cables in the market. They can be used almost in any application over land or under the sea. Due to their lightweight, small dielectric losses and higher current carrying capacity as well as simple construction, XLPE insulated cables are easy to install and maintain.
Paper insulated cables
Paper insulated cables are still used in many applications throughout the world. Hitherto, these cables were used in all the applications including in the mines. However, due to advancements in XLPE technology, XLPE insulated cables are slowly replacing the existing paper insulated cables.
2.8 Good Installation practices
Supply of cables from cable factory: Cables are generally supplied wound on wooden drums. The size of the cable drum depends on the length, weight and overall diameter of the finished cable. The diameter of the drum core should be a minimum multiple of the outer diameter of the finished cable. This is to avoid stress to the cable in the wound condition.
Transportation to work site: Normally transportation of the cable drum is achieved through rail or through road. Normally, the services of a crane may be needed to lift the cable from the railway wagon or truck onto the job site. In case a crane is not available, a suitable ramp should be made up to ground level. Then, the drums should be lowered by rolling on the ramp to ground level. From the wagon / truck end, the movement of the drums should be restrained (using braking) with the help of ropes secured to the drums. This is to ensure a soft landing of the drums and to minimize damage to the drum. Next, the drum can be manually moved by rolling the drum on the ground following the arrow symbol given on the drum.
Removal of cable (paying out) from the cable drum: When paying out the cable from the drum, the inner end moves. Hence, it is required to stop frequently, with the paying out and the inner end secured. If this is not done, cable kinking occurs during transition to the next layer. Paying out should be performed at a steady pace to avoid entanglement of the cable inside the drum.
Difference in level in the cable route: Care should be taken while using mass impregnated paper insulated cables in case the difference in level exceeds the permissible limit.
Statutory regulations shall be fully adhered to, whenever cables have to cross roads, railway line, waterway installations etc. Sufficient space should be kept while negotiating areas near post and telegraph offices, from which huge numbers of signal and telecommunication cables emerge.
While laying cables in the ground, it is normal to allocate separate trenches for high voltage cables and low voltage cables. If this is not possible due to constraints in space, the same trench can be used for both the cables; the higher voltage cables shall be laid first and embedded in sand. Thereafter, suitable separators shall be provided on top of the sand cushion over which the LV cables can be laid. The thickness of sand cushion should be sufficient to prevent the drying and shrinking of the sand mass due to heat created by the current passing through the cable.
The bending radius as prescribed by the cable manufacturers needs to be meticulously followed. For the laying of cables indoors over cable trays, the cables need to be laid on the floor near the trays and thereafter lifted in several stages before being placed on the trays. Cable should never be laid on trays and pulled: this would injure the cable outer sheath, sometimes beyond any repair.
Depending on the quantum of cables to be installed, one of the following methods of cable laying can be chosen:
- Use of a cable trailer to pay out the cable
- Manual laying: physically rotating the drum and paying out the cable
- Use of rollers driven by motors for pay out and laying of the cable on the ground before the same can be either put inside a trench or installed over a cable tray
- Pulling through winches
In all the above methods, training is needed apart from the development of basic skills: cable-laying work is quite hard and needs a lot of patience.
2.9 Summary
In the year 1880, the first conductor covering was made with India rubber (also called as Vulcanized India Rubber), Dry Paper, Gutta Percha and Vulcanized Bitumen. From that time, there has been a steady improvement in the insulation materials used and manufacturing techniques adopted. Polyvinylchloride (PVC) was developed in the 1930s and started to replace vulcanized India rubber cables as PVC had excellent properties in many areas when compared with rubber cables. The use of impregnated paper however continued for a long time, particularly for high voltage cables and many cables of this type remain in service to this day. Apart from paper-impregnated insulation, oil filled cables of low pressure and high-pressure types were extensively applied in high voltage (HV) and extra high voltage (EHV) systems. Polyethylene (PE) and subsequently Cross Linked Polyethylene (XLPE) insulation have now become almost universal for almost all applications: in particular XLPE has found wide use for all ranges of HV and EHV cables.
Cables require careful installation while being installed, as improper handling may result in damages and premature failures. Particular attention is needed to limit the bending radii of cables to avoid the cracking of insulation.
3
Cable Connections in Joints and Terminations
In this chapter we will review the standard methods of connections adopted for different conductors and how these methods translate to cable termination practices. We will discuss the basic types of cable connectors and terminations commonly adopted. A study of connection methods such as soldering, welding, brazing, etc. will provide an insight into the connection practices and their comparative merits. We will discuss the importance of contact resistance and the need for prevention of galvanic corrosion.
Learning objectives
- Materials
- Types of connectors for cable terminations and joints
- Method of connections (Soldering, Brazing, Welding. Crimping, Bolting)
- Comparison of the methods
- Contact resistance
- Preferred methods in practice for different cable ratings
- Galvanic effects; use of bi-metal accessories
3.1 Introduction
We have discussed the need for cables joints and terminations in the previous chapters. It is a primary requirement that the materials used for making cable joints (and terminations) should match the properties of the material used in the construction of the cable itself in order to provide an efficient and long lasting connection with minimum power losses at the connecting point. The other requirement of a cable connection is that it needs to have at least the same life as the cable itself if not more, and should not deteriorate during the entire service life of the cable, either due to the normal current flow or short circuit currents which the connection may have to carry occasionally. Therefore, it is very important to ensure that the materials used for making the joints are selected and applied with great care. Cable joints and terminations are very important accessories in a cabling system and therefore adequate attention must be paid to their design and construction.
As we have seen in the earlier chapter, conductors used in cables are invariably made of copper or aluminum. Hence, the joint used should also have a conducting part made of the same material as that of the main conductor. In addition to the conductor, the cable also consists of insulation, armor and screen along the full length. Normally overhead conductors are not insulated: hence they can be joined to each other by using only metallic connectors. However, the main purpose of a cable is to have an insulation cover over its surface and a healthy insulation is a pre-requisite for safe and continuous operation of the electrical system. Therefore the joints should also be in a position to provide the same insulation level as the cable. In addition, the cables are provided with armor and screens for mechanical protection and safety as seen in the earlier chapter. The armor is made up of steel or aluminum while the screen is generally made of copper. Accordingly the cable joint should also have parts that ensure a continuous electrical path for the armor and screen of the cable (if used in the cables being connected) on both sides of the joint in addition to the conductors.
The joints also use hardware such as bolts and nuts, mainly when a cable is terminated to the equipment. Both connector hardware and the method of connection should be designed to accomplish a lasting connection.
To summarize, the parts used in a cable joint generally match the characteristics of the materials used in a cable as noted below, but need not be made exactly of the same materials.
- Conducting part made of aluminum or copper, called by specific names such as cable connector, cable lug and so on
- Insulation matching PVC or XLPE cable insulation
- Screen material made of copper to provide continuity of screen
- Armor material made of aluminum or steel to provide continuity of armor
- Bolts and nuts made of galvanized steel, stainless steel, etc.
3.2 Types of connectors used in cables
HV cables may use joints either along their length or at equipment terminations. Accordingly, cable connections are broadly classified as:
- Straight-through joints (or joints)
- End terminations
A straight-through joint is simply the connection between two straight lengths of a cable. Assume that an overhead line is to be replaced with insulated cable. A cable is generally supplied in drum lengths (a certain length of cable wound on a steel or wooden drum). It is usual to limit the length of the cable in each drum to limit the size and weight of the drum to avoid problems in handling and transportation. The exact length permissible (say 1 to 2 KM maximum) may vary with the cable size, voltage rating (due to insulation thickness), etc. Since route lengths in a transmission or even distribution system feeder can be much higher than the normal drum length of cables, it becomes necessary to make several cable joints for covering the entire route length of the overhead feeder to be replaced. These joints are called straight-through joints, which are necessary in any long distance cable distribution system.
Termination (or more exactly, end-termination) refers to the connection of a cable to the terminals of a piece of equipment (examples: a cable terminating on a circuit breaker panel or to the terminal of a motor). In electrical distribution systems it is common to use cables for connecting transformers with switchgear panels as well as switchgear to utilization equipment such as motors, lighting/heating systems etc. In all these cases, both ends of a cable feeder need to be terminated onto some equipment or panels. Normally the terminal ends of the equipments are provided in a metal enclosure to provide safety to the personnel moving in the vicinity of the equipment. The nature of the termination will depend on the available electrical clearances and the dimensions of the enclosures within which the termination has to be placed. Smaller size enclosures provide difficulties for access and safety clearances and the joints chosen need to be able, in some cases, to overcome these issues.
Both terminations and joints need appropriate connectors. It is a normal practice to tie the strands of a house wiring cable conductor and cover the joint with insulation tape as a protective cover. This is also adopted in small LV motor terminal boxes where terminal blocks are not provided (Typical North American motor terminal box). However the same approach will not help in a HV cable due to the involvement of high voltages and also the importance of service continuity. A HV connector comprises of an intermediary conductive compound placed between the two ends of the joint or the termination to form a good continuous electrical connection. In the case of straight through joints both sides of cables being joined will be in contact with the component. Here both cables can be independently supported. However, in the case of an end termination, the joint should be connecting the cable that can be moved/placed in any position at one end, while the equipment terminal should be fixed and cannot be adjusted or moved like the cable. This arrangement introduces stress on the compound (cable joint) and hence proper care needs to be taken to avoid the stress while in service.
There are several techniques available for making terminations and joints depending upon the type of the cable, its voltage level etc. We will describe these techniques in later sections. The cable conductors and equipment terminal pads are either made of aluminum or copper. Accordingly, a few common types of connections employing compatible materials are:
- Tinned AL Crimp Type
- AL Migweld Type
- Unplated CU Crimp Type
- Aluminum Crimp Type
- Bi-metallic Crimp/Migweld Type
- Silver plated CU Crimp Type
3.3 Current Path
Cables provide the primary path for flow of current in any electrical system. Under normal conditions, the cable insulation (PVC, Paper, XLPE etc.) presents a very high resistance to the flow of current and thus the current is constrained to flow through the conductors from the source to the load and back. Any problem with these insulating materials at any point in the cable-run will result in what is called a ‘fault’ or a short circuit. When that happens, the current will try to flow back to the source along other extraneous paths and not through the designated current path. A healthy insulation is thus a pre-requisite for the proper operation of the electrical system.
When a joint or termination is required in a cable-run, it is necessary to make sure that no additional resistance is introduced in the current flow path because of this work. This is where connectors used in joints and terminations play a major role. Both connector hardware and the method of connection must take this into account. The connection should not deteriorate in any way during the entire service life of the cable either due to the normal current flow itself, any environmental or other influence as well as the flow of high magnitudes of fault currents resulting from short circuits anywhere in the system. An overheating at the joint will cause failure of insulation within the joint and will lead to its failure.
Strictly speaking, there will be a current flow through the insulation although the values are extremely small. This is because the insulation does represent a finite amount of resistance (albeit a very high resistance). In AC systems, the insulation also behaves like a capacitance and creates a flow of leakage current. While for LV systems we can choose to ignore these effects, they warrant due consideration in MV and HV systems. This means that these leakage currents must also be provided with a path back to the source. This is achieved by the use of a metallic screen around the outer surface of the insulation. The screens have other purposes too. If there is an insulation failure, the screens provide a path for the flow of fault currents, which means that they must be sized so that they do not get excessively heated when doing so. The screens also act as a barrier against electromagnetic induction (arising from the cable as well as prevention of induction in the cable from external sources of induction). The cable screens are also grounded (earthed) and thus act just like those metal enclosures that surround the live parts in other electrical equipment. Grounding ensures that even when a fault takes place, the screen is at the ground potential and protects the operators from electric shock.
In many cable installations, particularly the directly buried variety, cables can suffer mechanical damage due to work in the vicinity. Such cables have a metallic tape or wire armor as a protection against mechanical damage. In addition, cable armor is also used as a ground continuity conductor and provides a metallic path between the ground system of upstream and downstream installations. Thus, one more level of safety is available against electrocution during an insulation failure.
Cable joints should therefore necessarily ensure electrical continuity, not only to the conductor, but also to both screen and armor (where provided). This will be clear when we discuss the methodology of making cable joints in later chapters.
Cable joints and terminations have two distinct requirements:
- Establishing (mechanically and electrically) good connections in the main conducting path in a way that the materials used will not deteriorate during its service
- Arranging the outer layers of the cable in the same way as the main cable so that the operating conditions and the purpose of the cable parts are not adversely affected. This includes establishing proper connection of the screen and armor, reestablishing proper insulation and providing the required mechanical/weather protection at either end of the joint/termination
While cable faults/short circuits in a straight length may be due to unexpected reasons, the faults at the joint or termination invariably reflects the poor quality of termination. Therefore, all care needs be taken to ensure that the joint is not the source of such faults. The joint should be able to withstand the temperature fluctuations that may occur during operations. In addition, when a fault occurs, the cable joint should have the sufficient mechanical strength to withstand the resulting stresses. The field distribution due to the current path is uniform in the straight length, while it gets disturbed at the joints. The disturbance is predominant in higher size conductors, as demonstrated in figure 3.1, necessitating proper care in such joints:

Field distribution with variations to conductor diameters at joints (schematic representation)
Connections between conductors must satisfy certain minimum requirements. These requirements are as follows:
- The joint (or termination) must not attain excessively high temperatures while carrying rated current as well as rated short circuit currents for the specified duration. The temperature at the point of connection should not be higher than that of the general run of the cable. In short, the smallest transfer resistance possible must be ensured. Effort should also be made to achieve a lower level of heat generation through reduced ohmic losses, because, in the area of the accessory, heat dissipation is normally more difficult and unacceptable high temperatures may develop locally
- It must possess sufficient mechanical strength to withstand stresses due to the self-weight of the cable and stresses arising from temperatures fluctuations and short circuits that may occur during operations
- It must be easy and fast to install, even under difficult conditions, as in construction sites, without being overly expensive
3.4 Methods of conductor connections
Connections may be thermal or mechanical. In the case of thermal connection, the compound or material used at the joint shall be heated to a higher temperature to achieve the desired connection. In the case of mechanical connection, it is normally the use of bolts and nuts along with the use of cable crimping devices. Different methods of connections for high and extra high-voltage cables adopting thermal and mechanical methods are discussed below. We will now briefly discuss the theoretical basis of the connection techniques detailed above. The details of connecting methods presented here are not specific to cables: rather, they are meant for gaining a better understanding of the basic principle behind these techniques so that the correct procedure of applying them to cable installations and precautions required can be appreciated.
3.4.1 Thermal Connections
Solder connection:
In this connection, a special material, called solder, flows over two isolated pre-heated pieces and bridges/attaches them. The solder is the intermediate material between the two items being connected and provides the current path at the connecting point from one cable to the other.
Though soldering is tricky and intimidating in practice, it is easy to understand in theory. It requires a soldering iron: a prong of metal that gets heated to a specific temperature through electricity, like an iron box. The solder is often an alloy of aluminum and lead which is also known as soldering wire, due its size and shape. The main advantage is that it melts at a much lower temperature compared to any other metal or cable conductor. A cleaning resin called flux is used to ensure that the joining pieces are incredibly clean before soldering is applied, to avoid the presence of foreign particles with higher resistance in the current path. Flux removes all the oxides on the surface of the conductor metals that otherwise would interfere with the molecular bonding and ensures that the solder flows into the joint smoothly. The connections using soldering sleeves are usually equal to the connecting part or wider. With equal diameter, the outer strands of the multi-wire conductor should be cut back in several steps. This is the preferred technique, especially with extra high voltage cables, as the field disturbance for joint insulation is less pronounced than with larger diameter sleeves as shown in figure 3.2. In order to limit the thermal stress on the adjoining insulation, the connection is normally performed at <45ºC and is called soft soldering. But if there is a possibility that short-circuit temperatures above 160ºC may develop, then the connection must be hard soldered at a higher temperature.
Soldered connection using a sleeve, equal-diameter and larger-diameter version
Welding connection
This method is preferable for aluminum conductors, as sleeves are not required in welding. This technique always produces conductor joints with an even diameter. Since high temperatures are applied for a long period, conventional welded connections are not appropriate for PE or XLPE insulated cable conductors.
The welding process involves joining two metals by melting and then fusing them together with the addition of a filler metal. The joints produced are strong enough and require higher mechanical force to disintegrate. A concentrated high temperature is applied directly to the joint area to melt the “base” metals (the metals being joined) and the filler metals. Welding temperature should not be less than the melting point of the base metals. As intense heat is produced while welding, it is impractical to apply it uniformly over a broad area at the joint. Welding heat is typically generated by electrodes that introduce an arc at the joint. The method adopts a localized pinpointed heat as shown in figure 3.3:

Spot welding
Welding is a fast, economical way to make strong and permanent joints. However, if the metal parts are interconnected without an overlap, problems may arise in a welded joint due to the localized heat at the welded joint. Figure 3.4 illustrates another common method adopted by using a filler material at the joint:

Welding with filler
Properly made, the welded joint is at least as strong as the metals joined. On the other hand however, the high temperatures melt both base metals and filler metal causing possible distortion and warping of the base metals, or introduce stresses around the weld area. Welding is more efficient when the metals being joined are thick and are comparatively weaker when the base metals are thin. Also, the cost of welding is comparatively more because of the high temperatures needed to melt the metals.
Cad weld
This is used in prefabricated shapes and power metals. This is also suitable for synthetic insulation as the operation only lasts for a few seconds and therefore a relatively small amount of heat is developed. This technique can be used both in aluminum and copper conductors. This has proved itself, particularly with large cross sections, because of its excellent mechanical capability. However, it has a drawback when used for extra high voltage cables in that equal-diameter connection cannot be produced.
Brazing
This is similar to welding using heat and a filler metal but the main difference is that the adopted temperature is above 840°F (450°C) but below the melting point of the metals being joined. In most cases, the filler metal used is a silver alloy. Brazing doesn’t melt the base metals. It joins the metals by creating a metallurgical bond between the filler metal and the surfaces of the two metals being joined as shown in figure 3.5:

Brazing Principle
The filler metal is drawn through the joint to create this bond in a capillary action. In a brazing operation, heat is applied to base metals. The filler metal is then contacted with the heated parts. It is melted instantly by the heat in the base metals and drawn by capillary action completely through the joint. Refer to figure 3.6:

Method of brazing
There are many kinds of brazed joints. However, the two basic types are: the butt and the lap. The rest are modifications of these two. The butt joint, both for flat and tubular parts, is shown below. It basically has the two ends of the metals side by side without an overlap and the connecting material bridging the two parts as shown in figure 3.7. Preparation of this type of joint is usually simple and gives the advantage of a single thickness at the joint. The joint will have sufficient tensile strength for a good many applications.

Butt joints
Figure 3.8 shows a butt joint between a vertical member and a horizontal member, where it can be noted that the maximum bonding surface is limited to the thickness of the thinner member. Accordingly, the strength of the butt joint could vary with the amount of bonding surface.

Bonding surface of a butt joint
Unlike butt joints, the lap joint needs an over lap of the two parts being connected. Figure 3.9 shows the lap joint, both for flat and tubular parts:

Lap joints
For a given thickness of base metals, the bonding area of the lap joint is usually larger than that of the butt joint which ensures that lap joints carry larger loads. Refer to figure 3.10:

Bonding areas of a butt joint and a lap joint
The lap joint can provide twice (or the sum of) the thickness of the connecting metals at the joint. The lap joint is generally self-supporting during the brazing process. Resting one flat member on the other is usually enough to maintain a uniform joint clearance: in tubular joints, nesting one tube inside the other holds them in proper alignment for brazing. However, a combination of lap joint and butt joint by altering the jointing surfaces provides maximum tensile strength including the advantage of being self supporting, as shown in figure 3.11:

Combination Butt-Lap joint
Brazing is probably the most versatile method of metal joining today due to a number of reasons, including the following:
- Strong joints: Brazed joints are strong. In the case of stainless steel, it is possible to develop a joint whose tensile strength is 130,000 pounds per square inch. (896.3 mega Pascal [MPa]).
- Ductile joints: As brazed joints are ductile, they are able to withstand considerable shock and vibration.
- Ease of operation: Brazed joints are usually easily and rapidly made. Brazing can easily join assemblies that combine ferrous with nonferrous metals, as well as metals with widely varying melting points.
- One-operation process: Brazing is essentially a one-operation process: there is seldom any need for grinding, filing or mechanical finishing after the joint is completed.
- Requires low temperatures: Brazing is performed at relatively low temperatures. It reduces the possibility of warping, overheating or melting the metals being joined.
- Economical: Brazing provides a better joint at a lower cost.
Brazing depends on the operator’s designing and engineering skills. However, even a properly designed joint can become imperfect if correct brazing procedures are not followed. Brazing uses the principle of capillary action to distribute the molten filler metal between the surfaces of the base metals. Therefore, clearance between base metals should be maintained throughout the process to ensure effective capillary action. The other need is a good bonding surface/thickness. The following chart shown in figure 3.12 is concerned with the butt joints of stainless steel, using Handy & Harman’s Easy-Flo filler metal. It illustrates how the tensile strength of the brazed joint varies with the amount of clearance between the parts being joined.

Tensile strength of joints
Further care needs to be taken during the cleaning of the metals being joined. Capillary action will work properly only when the surfaces of the metals are clean, i.e. contamination such as oil coating, grease, rust, scale or just plain dirt must be removed first. If they remain, they will form a barrier between the base metal surfaces and the brazing materials. An oily base metal leaves bare spots that oxidize under heat and result in voids. Oil and grease will carbonize when heated. This forms a film over which the filler metal will not flow: therefore, the brazing filler metal will not bond to a rusty surface. The cleaning process can be speeded up by using an emery cloth, grinding wheel, file or grit blast, which is followed by a rinsing operation. It is recommended to flux and braze as soon as possible once the parts are thoroughly cleaned.
3.4.2 Mechanical Connections
Crimping (Compression)
In this method conductors are connected by compressing their ends. This technique does not involve any thermal stress for the insulating material. This is generally used at the lower end of the high voltage field and where the conductor diameters are not too large. A distinction is made between two compression techniques:
- Hexagon crimping: The prefabricated, originally round crimp sleeve, which is matched to the diameter of the conductor, is changed to a hexagonal shape by the hydraulic tool. The intensive reshaping of the material results in very solid and conductive, yet essentially larger-diameter, connections. In order to avoid dangerously enhanced fields at the pressed edges, the sleeves are covered with an additional smooth protective tube that is pushed on to the conductor. In the case of oil filled cables, a steel tube with an axial drilling is provided. Figure 3.13 shows the use of a hexagonal crimped connector:
- Round crimping:A larger diameter protective cover can be avoided by the use of special tools for round crimping. The connections are generally arranged in such a way as to have the same diameter as the conductor. Hence they are advantageous for field distribution in the area around a joint. As with equal diameter soldering sleeves, the outer conductor wires must be cut back in steps for this purpose. Sleeves for oil-filled cables have an axial drill hole.

Hexagon crimp with a field-smoothing protective sleeve over the crimped connector
Plug-in Systems
Plug-in systems occupy a special place amongst conductor connection techniques; these systems were developed originally for medium voltage applications, but meanwhile have been improved for entry sealing ends in switchgear and transformers for polymer-insulated high-voltage cables up to 150 kV. Firstly, a sealing end comprising of prefabricated components is fitted, and then a laminated contact capable of high current is welded to the conductor. The dimensions of this contact are matched to an integral coupling socket in the entry insulator of the switchgear or transformer. The actual conductor connection is formed by plugging in the sealing end into the socket and securing the contact. The typical arrangement is illustrated in figure 3.14:

Plug-in system for polymer insulated high voltage cable entry sealing ends for switchgear and transformer
Bolting
Split types are now very popular in the UK, as this design comes in two halves which are easy to apply to three-core cables where the conductors do not have to be bent. The heads shear off at a given torque; therefore, no compression tooling or die combinations are necessary. As this connector is ‘blocked’, it is also suitable for transition jointing for paper to plastic and helps the migration of paper oils. There are several disadvantages of this type of connector: the ends of connector are non-tapered, resulting in high ‘step downs,’ and the conductor insertion is non-centric (as shown in figure 3.15). These two conditions result in areas of high electrical stresses leading to probable discharge.

Bolting connection
Shrink polymer systems have now standardized a shear-bolt connector design where these critical areas of high stresses are removed by tapering the ends and centralizing the conductors as show in the photograph in figure 3.16:
Shear-bolt connection
3.4.3 Comparison of the connection methods
Most of the characteristics explained in the earlier clauses provide the different features of the thermal and mechanical connections. Some of their major features are compared in table 3.1 below:
Thermal and mechanical connections – Comparison
| Thermal connections | Mechanical connections |
|
|
|
|
|
|
|
|
|
|
|
|
|
|
|
|
3.5 Contact resistance
The joint, in addition to providing a long life, should have a negligible resistance so that the system is able to provide the required current to the load connected at the end. Hence the quality and characteristics of joints are defined in terms of the resistance offered by the joint at the contact point (also known as the contact resistance). Contact resistance has been measured on a number of metal finishes at low values of current/voltage with currents in the 1 mA to 100 mA range. In the cases of clean tin, silver and gold finished contacts, the contact resistance is found to be independent of either magnitude or direction of the current. A measurement of contact resistance at the 100 mA level should adequately assure performance at any lower level of current. However, for the case of stainless steel, the contact resistance is characterized as being current invariant only when the contact voltage is below a critical value. In this case, a measurement at a specified current level may not assure performance at other current/voltage levels. There are connectors that may operate in an extremely low current environment. In some cases, this current level may be considerably less than any value applied in the product test/qualification program. It is generally a very demanding process to make meaningful measurements of connector contacts when using test currents at or below a few milli-amperes. Contact resistance values are usually on the order of mΩ , and contact voltages corresponding to such currents could be less than 1 μV. For such testing, equipment requirements and test duration are burdensome.
In the case of cable joints, it is the contact resistance while conducting normal currents (or even occasional short circuit currents) that is really important, rather than the values at low currents. Higher contact resistance leads to localized heating and results in contact degradation while in service. Therefore, it is necessary to ensure low contact resistance at the connecting ends. It must be remembered that most of the cable joints are done in the field and resistance measurement needs to be done in the field. It is usual to have low voltage high current combinations to measure the contact resistance as it is difficult to arrange for high currents at high voltages, which may demand higher input power.
3.6 Preferred methods in practice for different cable ratings
Table 3.2 shows the different methods of connection for different cable ratings:
Connections for different cable ratings
| Category | Process | Application | Characteristics |
| Produced thermally | Soldering with sleeves | Cu conductors for paper-insulated cables | Larger or equal diameter |
| Welding | All conductors of paper cables without hollow channel | Always equal diameter; too much heat for XLPE; not used in Germany for HV | |
| Cad weld | All conductors without hollow channel | Always large diameter; connection suitable for XLPE | |
| Produced mechanically | Hexagon Crimp | All conductors | Protective tube required to protect six-sided crimp, therefore always large diameter. |
| Round Crimp | All conductors | Always equal diameter |
3.7 Galvanic Corrosion and use of Bimetals
Galvanic corrosion tends to occur when dissimilar conducting materials are connected electrically and exposed to an electrolyte in between them. Normally a good contact has negligible resistance and the voltage across the materials in contact is supposed to be zero. However galvanic corrosion is due to a localized voltage between the dissimilar materials leading to localized current flow and localized heat. If continued for a longer time, this can cause the joint to fail. Following are the causes of galvanic corrosion at the joints:
- Joining dissimilar metals or conductors
- Electrical path between the dissimilar conducting materials. (Can be direct contact or a secondary connection such as a common grounding path)
- A corrosive medium (electrolyte) in contact with these dissimilar conducting materials
When placed in an electrolyte, different metals/alloys assume different corrosion potentials. Take the case of batteries with anode and cathode separated by an electrolyte: here, the continuous flow of current leads to the corrosion of the anode plates and the potential difference between anode and cathode is the driving force for the current flow and the corrosion. A similar phenomenon occurs while connecting dissimilar materials resulting in what is called a galvanic current flow. The less noble material in the galvanic couple becomes the anode and tends to undergo accelerated corrosion, while the more noble material (acting as a cathode) will tend to experience reduced corrosion effects. However, in some cases, chemical species produced at the cathode can also degrade certain cathode materials. Therefore, efforts need to be made to reduce the occurrence of such galvanic corrosion while joining dissimilar materials.
It is not only the potential difference that controls the magnitude of galvanic current flow – the total resistance to current flow also needs to be considered. This can be broken down further into the following individual resistance components:
- Resistance to (ionic) current flow of the electrolyte
- Resistance to current flow (by electron conduction) in the conducting materials and in the connection between them
- Resistance associated with the polarization behavior of the anode
- Resistance associated with the polarization behavior of the cathode (cathode efficiency)
Any cable connection where dissimilar metals are in contact requires special attention. This is especially true in the case of terminations where the end connector terminates on the equipment terminal, which can be of a different material.
Take the example of copper and aluminum: it is quite common to have copper cables connected to aluminum bus bars and vice versa. In theses cases, galvanic corrosion is also common. Special bi-metallic plates and bi-metallic washers are commonly used to mitigate galvanic effects in such cases. The plates and washers are made by bonding the two materials being connected as a single piece having two ends. These pieces are used at the terminations and joints and are positioned to be in contact with the respective materials being joined. This ensures that there is no galvanic effect and consequent corrosion at such joints.
It is also a practice to design the cable connection kit itself to avoid galvanic corrosion possibility in the case of high voltage cable terminations. The other method is to use special anti-corrosive grease at the joints to minimize the galvanic corrosion effects.
3.8 Summary
Maintenance of insulation quality is a pre-requisite for any cable system and hence all cable terminations and joints used should adopt materials that are similar to the ones used in the main cables to ensure longer life without compromise on the basic properties. Straight through joints and end terminations (or splices) are the two types commonly adopted in the cable connections. Straight through joints are unavoidable in longer length feeders, while end terminations are a basic necessity in cable systems for connections to equipment terminals at either end. The joint and terminations need to establish a mechanically and electrically good conducting path between the conductors being joined, while at the same time, providing the interconnections for the armor and the shield. The purpose of any joint is for it not to attain high localized temperature during operation; the joint should also withstand the stresses due to mechanical forces and electrical fields as well as permitting fast installation in the field.
The joints can either be by thermal connection (requiring external heat source) or by mechanical connection (no external heat source). Soldering, welding and brazing are the common examples of thermal methods employed for the interconnection of metals. Soldering employs a melting method at a nominal temperature of around 50 deg C with the end points joined using a filler material (lead) called solder. Welding requires a concentrated localized pin pointed heat with generated temperature of more than the melting temperature of the metals being joined. Brazing involves the introduction of a third metal between the two metals being joined, avoiding direct connection between the two metals. Lap joint and butt joint are the two common brazing methods adopted. A combination of lap and butt joint provide better mechanical strength.
Mechanical connections involve crimping the conductor or interconnection with bolts. Compression type crimping, plug in type connections and bolting are the common methods adopted. There are some specific advantages in thermal connections; however, for cable systems, bolted mechanical connections are more common with thermal connections being used in limited applications.
While performing interconnections, it is very important that the contact resistance at the joint should be as low as possible to provide uninterrupted/smooth current path for the designed system to ensure that no local overheating takes place. This needs the avoidance of foreign materials entering into the gaps and joints. While connecting dissimilar materials such as copper and aluminum, galvanic corrosion can result since these two metals form an anode-cathode combination. Bimetal connectors/pads and/or special grease can be adopted at the jointing surfaces to overcome such galvanic corrosion.
4
Joints and Terminations–Theory
In this chapter we will review the different types of joints and terminations with the theory and issues related to them. Prefabricated and site assembled kits are the two broad categories and we will study the various types available under these two categories including their comparative merits. We will also review some of the special types of joints adopted for specific applications, such as joining different types of cables, etc.
Learning objectives
- Basic approaches
- Broad classification of joints/termination approach
- Prefabricated
- Site fabricated
- Additional requirements of outdoor terminations
- Reconstitution of cable properties
- Connectivity for cable screen and armor
- Mechanical protection of joints and terminations
- Special joints
4.1 Basic Approach
A ‘cable joint’ is a term generally applied when more than one cable is connected or joined together, and the joint should be able to “join” all the parts of the cables being connected. The object of the jointing is to replace all the materials that were removed to interconnect the cable conductors in such a way as to replicate the cable construction as closely as possible to its original state. A joint may have two or more branches with all the conductors of respective phases joined together, although it is normally not considered good practice to have more than two cables terminated to a joint. In close conjunction with ‘joint’, ‘connector’ is another term that is used frequently. A ‘connector’ is a mechanical device for connecting two or more conductors or connecting a cable and equipment pad and the interconnection/power transfer is achieved through this mechanical device. In most of the connectors, the cable ends are provided with “end termination” for each phase similar to a joint, to ensure homogeneous surface at the cable end; then, the end termination is terminated to the connector/equipment pad using bolts and nuts. The joints, end termination and mechanical connectors generally provide interconnections as shown in figure 4.1:

Typical use of joints, termination and connector
Cables are normally supplied in drums which limit the maximum length of cable per drum. Therefore, in case of longer cable networks, joints are an essential accessory to connect these limited individual lengths together. There are basically two types of joints in these cases, depending on the cables being joined together:
- Where cables of the same type are to be joined together a normal ‘straight joint’ is used
- Where different types of cables are to be joined like paper insulated to PVC insulated cable, a ‘transition joint’ is used to connect these cables with extruded dielectrics
The end terminations are also known as “sealed ends” as they physically seal the cable conductor at the end where they are terminated to equipment, etc. Terminations are available for indoor, outdoor and equipment applications, depending on whether the cable is terminated to an outdoor bushing or an indoor switchgear, etc.
4.2 Classification of joints
The high voltage cable end joints and end terminations can be broadly classified into the following categories depending on the feasibility/approach planned for a project:
- Prefabricated
- Site fabricated from kits
In the case of prefabricated types, the field works are minimized and the termination involves little work to complete the end joint or termination. In the case of site fabricated kits, the kits are available in broken components and normally require an experienced jointer to put together these components to complete the termination. Irrespective of the type of cable and accessories, their main task is to transmit the conductor current and to provide insulation between the conductor phases and the ground under all operating conditions that might arise in the network, including test conditions and short-circuit conditions. Therefore, all these joints comprise of accessories to insulate the conductors during service in a permanent way, so that the joints perform the task of transferring power without failure.

Installation in progress of a 230 kV straight joint in Australia
4.2.1 Prefabricated Joints/Terminations
Prefabricated joints are manufactured at established factories meeting the requirements of international standards specifications (such as DIN VDE, SS, IEEE, IEC etc) and are tested under laboratory conditions before they are ready to use in conditions involving minimum re-works in the field. The joints/terminations are supplied with prefabricated adapters and screw clamps. A typical arrangement of these joints and terminations is shown in figures 4.3 (a) and (b):

Prefabricated joint

Prefabricated termination
Prefabricated joints consist of an outer casing to protect the internal parts; the main features of these joints are listed below:
- The screw technology facilitates the joining of the conductor
- At installation, the protective casing is filled with an insulating compound
- Prefabricated joints/terminations are safe and easy to install, safe connection with screw technique and easy jointing of cables with different sizes
- Prefabricated terminations require a minimum amount of stripping of the cables being joined or terminated
- Other advantages include maximum shelf life; can be used in small places; no special tools are required to ensure easy installation
The major types of prefabricated joints are listed below and involve slightly different technologies. They are supplied as a full assembled unit to the field:
- Pre-moulded (slip-on)
- Cold shrink joint
Push on, pre-stretched tube, and grease applied slip-on types are also referred to as cold joints as they do not use any external heat for jointing purposes. These have been in use since the 1960s and are still specified by specific authorities; however, heat shrinkable kits are preferred in many of the installations today.
4.2.2 Site fabricated kits
The site fabricated kits can be simple tapes that are wrapped around the conductors to kits that comprise of components and are put together using special tools and devices at the joints/terminations. The main difference in these joints compared to prefabricated types is that the components of a joint may be tested individually for physical properties, but the full joint is completed and tested with electrical voltage in the field only. Some of the common types of site fabricated kits are listed below:
- Taped and compound sealed
- Taped and cast resin sealed
- Heat shrinkable
- Extrusion molded joints
Typical components of the Raychem heat shrinkable joint which uses a gas burner for heat shrinking the outer sleeve are given in figure 4.4:

Components of a heat-shrinkable site fabricated joint (Courtesy: Raychem)
4.2.3 Relative merits of prefabricated joint and site fabricated kit
It is very important to match the insulation diameter for prefabricated joints/terminations. If the diameter does not match, much re-work will be required at the site. Therefore, it is important to choose the correct diameter of the joint for the conductor and cables being used in the field. Often, the temperature at the site and the temperature at laboratories where these prefabricated joints get tested are different, and could give rise to poor performance in the field. The joints/terminations should meet the following requirements before they can be used:
- Must not heat up to a greater extent than the conductor in the non-disturbed area of the cable while carrying the rated current and the maximum permissible short-circuit current, i.e. the joint should be with the smallest transfer resistance possible
- Should have enough mechanical strength to withstand stresses during assembly and also to withstand the stresses of temperature fluctuations during operation and short circuits
- Must provide a cost effective solution with features for quick and reliable installation for the difficult conditions on construction sites
The ‘site-fabricated’ joints/terminations are prepared at site from joint/termination kits. With site-fabricated joint/terminations it is easy to configure the conductors at site and testing occurs under practical conditions where the joints are to be installed. This results in less re-work. On the flip side, these are time consuming and expensive also. There are many advantages of using heat shrinkable techniques, such as:
- There is a large shrink ratio, which ensures one kit assembly to cover numerous ranges
- Heat concept dries out moisture during the joint offering better sealing against moisture
- Mastic seals are activated by heat, so sealants are usually visible at sleeve ends
- They are not size sensitive and can be used on all types of conductors including sector-shaped conductors
4.3 Pre-moulded (slip-on) joints
Recent developments in the cable industry are moving towards prefabricated and factory tested slip-on units even for straight joints (for polymer-insulated cables). The components needed for field control are already built into these units. The requirement for the field control in the joints can be concentrated on the conditions of two opposing cable ends with the conductor connection between them. The slip-on units need a couple of opposing control deflectors and a field smoothing covering for the conductor connection, unlike the sealing ends.
4.3.1 Components of slip-on joints
As the name implies, the conductors are slipped on to the sleeves with the joint portion provided in the form of electrodes to control the field. The protection for a slip-on joint against ingress of moisture and mechanical damage are provided by installing it within a metal housing. The housing is treated for protection against corrosion and then buried directly in the soil. In order to bring down the manufacturing cost for slip-on joints, deflectors with the same structure are used with different field conditions, unlike sealing ends. The tangential component of the electrical field, which is locally strengthened at the interface between the cable dielectric and joint insulation, becomes more significant relative to the maximum field strength within the body of the joint. Separate field calculations are required in order to avoid unacceptably high stress and to optimize the shape of the joint.
The thickness of the joint insulation significantly exceeds the wall thickness of the cable insulation in the area around the junction, which results in the possibility of local overheating in prefabricated slip-on joints which must be counteracted in an appropriate way. Typical slip-on joint construction and its components are shown in figure 4.5:

Prefabricated slip-on joint
Slip-on technology needs a higher degree of permanent elasticity alongside good electrical and thermal characteristics in the material involved. These are needed in order to ensure that the control force of the control elements on the surface of the conductor is sufficient under all circumstances, despite thermal load cycles and accompanying contraction/expansion of the polymer-insulated cables. There are two materials that can meet the requirements: Silicone rubber (SIR) and Synthetic rubber (EPR or EPDM). Between the two components, silicone rubber is more flexible. Being a two component system it is also self hardening, whereas EPR is more mechanically resistant, less sensitive to the effect of liquid embedding media in sealing ends and considerably less expensive than silicone rubber. However, it requires a very costly pressure resistant vulcanizing mold. In the case of XLPE for extra high voltage cables ≥ 400 kV, both silicone rubber and EPR/EPDM are widely used, as shown in figure 4.6:
Slip-on joint with EPDM insulation
A few years ago it was unimaginable to use one piece slip-on joints, from both the manufacturing and installation point of view, because of their dimensions. Installation methods for slip-on joints were also perfected by designing suitable electro-hydraulic push fitting tools which enabled even large joint bodies to be positioned successfully, with millimeter precision and without subjecting the elastomer to any excessive mechanical strain.
4.3.2 Assembly of slip-on joints
Slip-on joints on XLPE cables are installed in seven steps as shown in Figure 4.7.
Step 1:
The sheath is stripped back as far as the outer conductive layer to different lengths on the two cable ends. The body of the joint must first be put in a ‘park position’ at full length on one side before the conductor connection is produced.
Step 2
The conductor is exposed by cutting back the cable insulation in a straight line.

Assembly of slip-on joint
Step 3
Outer conductive layers are removed over the same length from both cable ends. The stripped edges and core surfaces are carefully prepared in the area in which they come in contact with the joint insulation.
Step 4
The body of the joint is pushed on one cable end to the specified ‘park position’.
Step 5
The conductors are connected.
Step 6
The body of the joint is placed centrally over the conductor connection using electro-hydraulic pushing devices and a compatible lubricant.
Step 7
The outer conductive layers of both ends of the cable are connected with the conductive coating of the joint body and the housing is assembled.
The core surfaces should be prepared with great care. Most important is the quality of the stripped edge and the contact area between cable insulation and joint insulation, which ultimately determines the long term electrical behavior of the interface. It is influenced by a number of factors:
- Surface roughness of the core insulation and joint insulation
- Type and quantity of lubricant used
- Care taken and precision achieved in the process of pushing the joint on and the final positioning of the joint body
- Contact force and material characteristics of the body of the slip-on joint
When the installation operation is actually performed with care and the mechanical and electrical design of the joint is perfect, the operational stress on the outer conductive layer of the joint should not exceed 6 to 7 kV/mm. This should be taken into consideration when dimensioning the thickness of the insulation walls of the cable and joint body.
4.4 Slip-on terminations
These are factory assembled cable terminations designed for ease of installation and adaptability to a wide range of cable types and sizes. They also have standardized quality. They incorporate a built in stress relief device and are pre-filled at the factory with an insulating dielectric which eliminates the need for field pouring of hot compounds. A typical termination is illustrated in figure 4.8:

Slip-on termination
4.4.1 Components of slip-on terminations
Following are the main components used in these terminations:
- Bodies
- Adapter kits
- Connectors
- Aerial lugs
- Brackets
- Cable Centering plugs
4.4.2 Assembly of slip-on terminations
Figure 4.9 identifies the various steps to be followed during the assembly of slip-on termination. The steps are described below:
Step 1
After cable preparation, crimp on the connector and insert the cable into the termination.
Step 2
Tighten the locking screw.
Step 3
Secure the ground wire to the ground connection on the bracket and mount the termination.
Step 4
Secure the aerial conductor. The installation is complete.

Installation of slip-on termination (Source: G&W Electric Company)
4.4.3 Application of slip-on termination
Slip-on terminations are designed for single conductor, extruded dielectric or PILC insulated cable on distributed systems. Adapter kits are used for termination of shielded, jacketed cables having rubber or polyethylene insulation and paper or varnished cambric insulated, lead sheath cables. All terminations are applicable to both copper and aluminum conductor cables. The major features/benefits of slip-on termination are given below:
- Maximum external insulation: porcelain is the industry standard for providing maximum insulation that is unaffected by weathering elements. It is especially appropriate for highly polluted and coastal areas. Slip-on terminations utilize a high strength, non tracking wet process porcelain with excellent mechanical and electrical characteristics.
- Construction: slip-on terminations are made with cast aluminum bodies as standard. Brass is optional for corrosive environments. The terminations include an integral eyebolt connector style aerial conductor. A bracket or flange mount is built into the body. There are no pipe plugs or gasketed joints.
- Built-in stress control: factory installed, the stress control is cast as part of the body of the termination, eliminating the need to install a secondary stress relief device. The only contact with the cable is a diaphragm seal against the cable semi-conductive layer below the cable insulation, minimizing mechanical stress against the cable.
- Versatility: slip-on terminations will accept a wide range of cable diameters and accommodate minor variations in cable shape. This is accomplished by an extremely flexible silicone rubber diaphragm seal used at the cable entrance of the termination.
- Ease of installation: field cable preparation is simplified by a generous tolerance of cable cut-off lengths. After cable preparation simply insert the cable into the termination and attach the ground and aerial connections. Cable centering plugs are used to guide small size cables into the termination.
4.5 Cold shrink terminations
These terminations are called cold shrink to basically differentiate them with respect to the popular heat shrinkable termination. Cold shrink terminations are easy to install and offer reliable performance while terminating indoor and outdoor high voltage cables. With its unique step-core design combined with the built in Hi-K stress control and silicone sealing compounds, it offers easy installation in all type of cables. Figure 4.10 illustrates the arrangement of a typical cold shrink termination:
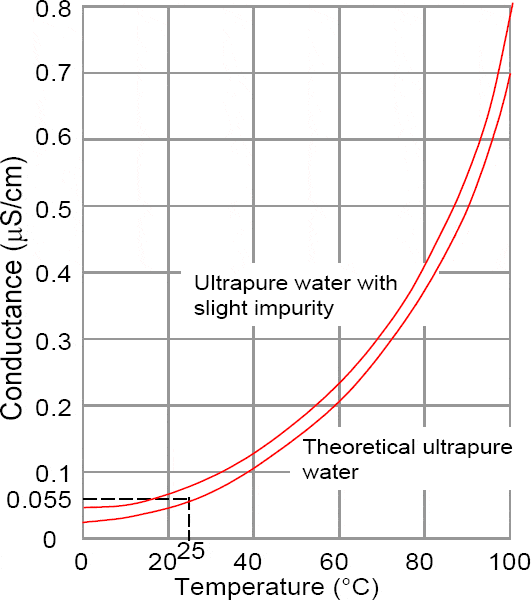
Cold shrink terminations
While pre-molded joints mainly use ethylene- propylene rubber (EPR), cold shrink type employs silicone rubber, which has lower elasticity than the EPR thereby offering a permanent set in the cold shrink joints. The silicone rubber is used to form the main sleeve and is fitted onto a carrier pipe in the spiral form. These spiral pipes are pulled out to complete the termination. Cold shrink termination ensures a long-term reliability with its improved silicone rubber body which enhances hydrophobic recovery, UV stability and track and erosion resistance. With its Hi-K stress control design it offers an excellent BIL performance and lower surface stress resulting in a more compact termination.
4.5.1 Components of cold shrink joint
The basic components of a cold shrink straight through joint are identified in figure 4.11:


Cold shrink termination components
4.5.2 Installation of Cold shrink joint
Figure 4.12 illustrates the steps involved:
Step a:
Components of cold-shrinkable joints are expanded in the factory and shipped in expanded form fitted with an inner spiral core that also acts as support for the expansion.
Step b:
The insulated cable is inserted through the sleeve inside the spiral core and brought out on the other side.
Step c:
The conductor insulation is removed and the joint is completed.
Step d:
Finally, shrinking and installation are completed simply by pulling out the inner pipe without using heat or insertion force, thereby eliminating any special tools for expansion or shrinking.

Installation of cold shrink termination
4.5.3 Insulating tape joint
These types of joints are useful for jointing XLPE-insulated cables with Al and Cu conductors and different sheath types. In this type of joint the cable joint consists of tapes with different properties, cone oil, copper net, and heat shrink outer sheath. Basically taped joints have two versions: with connector, or alternatively provision for thermite welding. Moreover there are accessories to reinstate most types of screens, armoring and outer sheaths.

Tape joint
The taped joint consists of different materials such as cone oil, heat shrink outer sheath and copper net. It also includes accessories to reinstate most types of screens, armoring and outer sheaths. A benefit of the taped joint is that it does not require any special tools and it involves a minimal amount of cable stripping. While selecting a proper taped joint the following aspects should be taken into consideration:
- Voltage
- Conductor cross section
- Conductor material Cu or Al
- Diameter across prepared insulation
- Screen, cross section and type
- Cable outer diameter
One of the most popular companies producing a taped joint is Kabledon Cable Accessories.
4.5.4 Tape joint with cast resin sealing
The joint requires a plastic mesh, a spiral, a funnel with a holder, transparent tape and cast resin. The mesh and spiral are placed over the joint and sealed with the tape. The cast resin, which contains a base and hardener in a partitioned bag, is mixed and poured into the funnel until the mesh is full. The maximum storage temperature for the cast resin is 30°C. Following are the other components:
ARM
For restoring the armoring when jointing armor cables.
Use of ARM
Cast resins are generally used to ensure that the joint is sealed. They can also be used as filler tape. It is made of a fairly soft composition and interleaving allows easy separation from the tape. The interleaving is a double-sided siliconized paper. Cast resins can protect cable joints from water and humidity for a longer time period, provided the joint is correctly prepared. There are two types of resins: epoxy and polyurethane resins. The optimal ratio between the resin and the hardener is provided by the use of a precise measuring system to ensure the required electrical and mechanical characteristics of the polymerized resins. The resin can be cast, injected by gun or inserted by a funnel. After mixing, the remaining product is inert. The cast resin joints have the following features/ advantages:
- Easy handling due to snap lock two part body
- Transparency of cast mould allows for correct positioning of connectors before and during pouring
- Can be directly buried in the earth or placed in ducts, or in trunking
- High reliability
Cast resin joints (Source: Tyco Electronics)
Resins can protect cable joints from water and humidity for a very long duration, given the joint is correctly prepared. Resins are used to protect low and medium voltage taped and cast joints. There are two types of resins available in the market. They are epoxy and polyurethane resins. The optimal ratio between the resin and the hardener is provided by the use of a precise measuring system to ensure the required electrical and mechanical characteristics of the polymerized resins. The resin can be cast, injected by gun or inserted by a funnel. After mixing, the remaining product is inert. The polyurethane resin is supplied either in bags or tins. It provides exceptionally high adhesion to PVC and PE. It can be used for casting large joints and in very hot and humid climates. It can also be used for mechanical and water protection of cold shrink joints.
4.6 Heat shrinkable joints
As seen earlier, these are popular types of site fabricated joints/terminations used in many installations because they can be suitably selected during the end periods of the project. They are selected as alternative because prefabricated kits need to be ordered well in advance and may pose difficulties to accommodate unexpected changes in the field. Straight joints can be used for shield break or grounded applications. Joints can be buried if properly protected with a sleeve or coffin. Hydraulic assisted installation tools are used to speed up installation. Components of joints include:
- Single piece, silicone rubber molded body without sheath interruption
- Built-in stress control
- Copper or aluminum crimp-type or aluminum migweld connector
- Connector collar
- Heat shrinkable protection jacket
Standard components in these joints are as below.
Standard components of heat shrinkable straight joint
4.7 Extrusion molded joints
The Extrusion Molded Joints (EMJs) are based on the concept that optimum accessory insulation should be structured exactly in the same way as the cable insulation itself. In the case of XLPE cables, the joint dielectric in the form of cross-linkable polyethylene is extruded on-site onto the prepared conductor connection, which has been spread with a semi-conductive layer of XLPE. For this purpose an external form or mold is used. The dielectric is subsequently cross-linked thermally under external pressure. It is important to install this equipment in clean room conditions in order to avoid impurities in the joint dielectric which would consequently reduce its strength.
This technology was first conceptualized and applied in Japan for 275 kV cables, which has been successfully transferred to 500 kV. One quality that sets it apart from the others is its slim construction. The insulation thickness for 500 kV is only 36 mm. On the flip side, it requires a fair amount of onsite investment and the time required to install is unusually long. As no manufacturers outside Japan manufacture these joints, its use is limited to within Japan only. Figure 4.17 shows the components and the extrusion adopted during the joint:

Equipment used for extrusion molded joints
4.8 Additional requirements for outdoor terminations

Outdoor terminations
Generally outdoor designs include entrance housing with heat shrink for jacket sealing and system ground provisions, base plate, stress cone, insulator, cap plate, corona shield, threaded hood and threaded connector. For outdoor terminations, a composite insulator with silicone rubber sheds is used in standard and extra creepage designs. Composite insulators are less than one-third the weight of comparable porcelain insulators and are easy to handle. Insulators are self-cleaning, fire and UV resistant and will not fracture or break if dropped. Porcelain terminations are used to terminate shielded and concentric neutral power cables for outdoor locations with conductor sizes ranging from 2AWG to 75- kcmil copper or 500 kcmil aluminum. A porcelain insulator is used. It does not require any additional heat.
Outdoor terminations are designed to operate under severe environmental conditions which require that the fittings be made from corrosion resistant alloy. In addition, rain shields are used for protecting the outer surface to ensure a higher creepage distance like the insulator. Compression lugs fitted to outdoor terminations of the compression tube type with inspection holes may allow moisture to penetrate the conductor cores. Therefore, care must be taken to select proper sized lugs with proper bolting arrangements in outdoor terminations.
Typical heat shrinkable joint with its shields are illustrated in figure 4.25:

MV Outdoor heat shrinkable type cable end termination
4.9 Reconstitution of cable properties
The joints normally should have the same properties as the main cable but some minor damages cannot be ruled out at the joints. Hence some accepted methods are adopted to reconstitute the cable properties without any major replacements. These are also used as added protection to a finished joint as a protective shield, so that the main termination life is enhanced. Following are some of the accepted practices:
4.9.1 Insulating Tape
PVC tapes provide a cost effective solution for protecting joints and terminations. It has been designed for all splicing, cable bundling, color coding and primary electrical insulation up to 600 volts. It exhibits excellent electrical properties as well as being tough, flexible and conformable. It combines the high flexibility and elastic memory of excellent quality, soft PVC backing with the high grab and adhesion of an aggressive, pressure-sensitive rubber-based adhesive system and a continuous operating temperature of 90ºC. It provides highly aggressive adhesion and good resistance to chemical agents along with flexible and conformable backing.
Self amalgamating tapes are also widely used. Tapes based on PIB (polyisobutylene rubber) have strong self-amalgamating properties. Tapes based on EPR (ethylene-propylene rubber) are particularly resistant to high temperatures and these can be used for the following applications:
- Jointing
- Termination
- Waterproofing
- Insulation
- Repair
- Protection against corrosion
- Barrier to migrant oil and grease
They are also used for the protection and repair of MV cable terminations. Self amalgamating tape can operate in extremely low temperatures and up to 180ºC (class H). It is resistant to water, tracking and UV. It exhibits excellent barrier to grease and oil and excellent heat aging characteristics.
4.9.2 Semi conducting tapes
Semi conducting tapes are used for reconstitution of the semi-conducting screens of MV and HV cables. This tape has all the normal benefits associated with self-amalgamating tapes, providing void free homogeneous wrapping. These are used for smoothing electrical stresses and for the following requirements:
- For ensuring the continuity of conductor and core screens at cable joints in a variety of polymeric and elastomeric insulated cables
- For stress cone construction, where it provides the conducting layer
- For smoothing electrical stresses on irregular shaped lugs and connectors
- For smoothing electrical stresses in joints and terminations using pre-moulded components
- For smoothing electrical stresses on overhead power lines, reducing discharges and consequent interference to local radio and telephone communications
These offer the following benefits:
- Good long term stability of the physical and electrical properties
- Improved resistance to the lubricating oils or grease used in the pre-moulded components of joints and terminations
- Good water resistance. Excellent heat aging characteristics
- Excellent physical and electrical properties without the application of heat or pressure. Embossed or smooth interleaving
- Good water resistance
- Excellent heat aging characteristics
4.9.3 High Permittivity Stress Control Tape
These are similar to insulation tapes and are available with thicknesses of 0.75mm to 1.0 mm and about 25 mm wide. These are available in standard lengths of 5 metres and are oil resistant. These are used in applications where a high permittivity material is required with good conformability and self amalgamation. They are wrapped around the insulation or joint to provide a homogeneous protection and do not require any additional procedures such as heating, etc. They can be applied very quickly and provide a reasonably good stress control at the joint/repair.
This type of tape generally has values of permittivity between 7 and 13. This does not necessarily mean that a value of 13 will perform better than a value of 7, as void-filling characteristics are equally important. Shrink polymer systems use a stress control tape possessing high tack, high stretch and low viscosity void-filling qualities with a value of minimum 9 for permittivity. Whichever type of connector is selected, stress relieving tape must be used in conjunction with heat shrinkable installations. This is applied in a half width overlap with stretch and must also be applied to any indents left by the tooling. Gaps between the end of primary insulation and connector must also be filled in. Some times, use of high forces during crimping of conductor lugs may leave void holes at the termination ends which should preferably be filled with high permittivity stress relief tape to avoid premature failures.
Typical wrapping around the cable is performed as per the figure 4.26. FCI, France and 3M, USA are some of the leading manufacturers of tapes used in joints and terminations.

Application of adhesive tapes
Impregnated paper is also used for the reconstitution of cable insulation. It provides easy taping for cable joints even in winter. Tapes do not become stiff at low temperature. There are different types of impregnated papers for protection of cable joints, including:
- Impregnated creped paper sets
- Impregnated semi-conductive creped paper
- Impregnated cold applied crepe paper
- Impregnated cold applied semi-conductive crepe paper
- Allows quick reconstitution of the main part of the joints
- Vacuum sealed packaging
4.9.4 Sealing against moisture
Moisture trapped inside a joint when left unnoticed can produce serious damages and threats depending on the demands of the system. The shields and conductor can suffer corrosion, especially if cleaning is less than meticulous when the joint is applied. However, even if corrosion were not to develop, moisture present in the connector or dielectric can change the characteristic impedance of the cable.
Moisture can become trapped inside the joint/termination as a result of repeated exposure to significant swings in temperature and atmospheric pressure in the presence of significant relative humidity. To protect against the moisture a special purpose heat shrink tubing is used. These are semi-flexible, moisture proof, general purpose adhesives. Reltek LLC, has come up with an extremely popular solution called Bondit1 for this purpose. This new single system technology produces a long life cable termination with water blocked conductors as a primary seal, and a secondary seal boot that is highly resistant to cathodic attack. It allows for a much wider selection of materials in both connectors and cable/wire insulation. It provides flexibility in termination design.
4.10 Connectivity for cable screen and armor
While the cable conductors carry the main power, there will be a current flow through the insulation although the values are extremely small. This is because the insulation does represent a finite amount of resistance (very high resistance). In AC systems, the insulation also behaves like a capacitance and creates a flow of leakage current. While for LV systems we can choose to ignore these effects, they warrant due consideration in MV and HV systems. This means that these leakage currents must also be provided with a path back to the source. This is achieved by the use of a metallic screen around the outer surface of the insulation. The screens have other purposes also. If there is an insulation failure, the screens provide a path for the flow of fault currents, which means that they must be sized so that they do not become excessively heated when doing so. The screens also act as a barrier against electromagnetic induction (arising from the cable as well as prevention of induction in the cable from external sources). The cable screens are also grounded (earthed) and thus act just like those metal enclosures that surround the live parts in other electrical equipment. Grounding ensures that even when a fault takes place, the screen is at the ground potential and protects the operators from electric shock. The actual detail of how a screen should be grounded (one side, both sides or mid-point) is a separate subject.
In many cable installations, particularly the directly buried variety, cables can suffer mechanical damage due to work in the vicinity. Such cables have a metallic tape or wire armor as a protection against mechanical damage. In addition, cable armor is also used as a ground continuity conductor and provides a metallic path between the ground system of upstream and downstream installations. Thus, one more level of safety is available against electrocution during a cable failure. Cable joints should therefore necessarily ensure electrical continuity of both screen and armor (where provided).
4.11 Mechanical protection of joint and terminations
Normally armoring of a cable provides some degree of mechanical protection during handling and installation. However, they can not be considered as a foolproof protection because a crowbar can pierce into the armored cable avoiding or breaking the armor. Furthermore, where joints are made, the armor is removed before connecting the conductor. Hence, the sealant at the termination or joint needs to offer sufficient mechanical protection to overcome any mechanical forces. This is achieved by the use of strong materials for the jointing kits which can withstand higher mechanical forces without failure. The sleeves for heat shrinkable terminations are proven to have better mechanical strength. Nevertheless, it is preferable that the joint locations are identified or covered with additional protection to avoid any unexpected damages, as they are undoubtedly the weakest links along the cable lengths.
In the case of termination to indoor equipment, the enclosure itself offers the mechanical protection but in the case of outdoor termination the terminations may be exposed to varying environmental conditions such as wind forces. In such cases the external support to the termination is vital to protect the joint against failures and also to avoid any faults.
4.12 Special joints
Apart from performing conventional tasks such as linking conductors and screens with screens, the special version of joints perform certain extra functions. The special joints can be categorized into three types:
- Stop joints for oil-filled cables
- Transition joints for XLPE/Paper-insulated cables
- Separating joints (Cross-bonding technology)
4.12.1 Stop joints for oil-filled cables
The basic function of stop joints in low pressure oil-filled cables is to maintain the pressure of the insulating oil within the specified limits, which are approx 2 bar ≤ p < 8 bar. It is achieved by splitting up the whole run into several hydrostatically individual shorter connections.

Stop Joint for oil-filled cables
Design wise, stop joints are similar to back-to-back joints for XLPE extra high-voltage cables. It includes two cable sealing ends linked back to back in a common grounded joint housing. The dielectric and field control systems that are used in this technology are suitable for the technology used with accessories for paper-insulated cables, i.e.:
- Both sealing end insulators contain capacitor cones made of impregnated paper.
- The insulation on the conductor connection which is on the other side of the common joint housing is also paper. For better field control a special system of capacitive layers is required. In this case, each of the bushing insulators deviates from its usual shape and has a cylindrical external contour for accommodating the controlled paper insulation. The impregnating medium of the lower insertion insulator is in contact with the low viscosity impregnating medium. The system pressure is approximately 2 bars.
Stop joints are expensive and extremely complicated but at the same time they contain three complete, integrated and largely controlled insulation systems between high-voltage and ground potential. These types of components are not in use any more.
4.12.2 Transition joints between XLPE/paper insulated cables
Appropriate straight joints should be used when XLPE cables are connected with existing paper-insulated cable systems in the course of network extensions or in the case of replacing damaged sections. One side of this must be compatible with the ‘paper’ insulation system and the other side with XLPE. This is achieved by ‘transition joints’. Depending upon the kind of paper insulated cable to be connected with the XLPE side, diverse solutions have been developed. These can be categorized into three groups:
- Three-phase transition joints
- Single-phase transition joints between XLPE and paper-insulated cables with no hollow channel in the conductor
- Single-phase transition joints between XLPE and paper-insulated cable with hollow channel in the conductor

Single-phase transition joint between XLPE & paper-insulated cables
The first two types are mainly used for gas pressure cables, while the third version is used for joining XLPE with low-pressure oil-filled cables. The construction of transition joints is similar to back-to-back joints where two sealing ends are connected in opposition. On the XLPE side, the field control is taken care of by a conventional slip-on stress control element with a geometric capacitive acting deflector as shown in figure 4.28, whereas on the paper insulated cable side, prefabricated capacitor cones with conductive layers are used. A cast resin insulator on XLPE cables sealing end is used to separate the XLPE side and the paper insulated cable side. The conductor connection between the two cable sealing ends is insulated from the grounded joint housing. The joint housing is filled with the impregnating medium from the paper-insulated cables side and it’s also under the system pressure of that side.
These joints have the following advantages/ features:
- Corrosion-resistant stainless steel enclosure with tinned copper wiping sleeve
- Time proven stress control for both cables
- Superior thermal properties
- Prefabricated components for fast, reliable quality installation
- Wide cable size tolerance
- Elastomeric diaphragm and retained ‘O’ ring double sealing system
- Internal fluid expansion compensating device
Standard components for a transition joint (figure 4.29) include:
- Epoxy support insulator
- Built-in stress control for extruded cable and perforated paper roll for SCLF cable
- Polybutene dielectric fluid for extruded cable and cable fluid for SCLF cable
- Copper or aluminum crimp-type or aluminum migweld connector
- Stainless steel enclosure
- Aluminum corona shields
- Cable entrances

Transition joints for low pressure oil filled cables
Figure 4.30 identifies the components of a high pressure installation cables; the spreader heads adopted for the same is shown in figure 4.31:

Standard components of transition joints for high pressure

Spreader heads of transition joints for high pressure

Completed installation of a 138 kV transition joint in Hungary
4.12.3 Separating joints
These joints are used to ensure the cable sheaths or screens on the two sides are electrically isolated and sufficiently surge proof in order to reduce the current loss from the sheath by applying the cross bonding technique as shown in figure 4.33. These joints are also known as transposition joints or cross-bonding joints.

Separating (Cross-bonding) joint
In order to reduce the current loss, separating joints are different from other conventional versions in the following design features:
- The screen or sheath on both the sides is of sufficient size to carry the induction current occurring, even under the short circuit conditions. Screen or sheath on both sides is accessible from outside
- Field smoothing layer is on the joint surface and separator on the outer
- Separator in the metal joint housing
Though the joint housing is easily provided with a separator (by installing a sufficiently wide cast-resin insulating flange), the positioning and type of separation for the conductive layer must be tailored in an appropriate way depending upon the structure of the joint insulation. ‘Appropriate’ in this case means the separation point must in no way adversely affect the virtually cylindrically symmetrical field distribution within the joint insulation. This is performed in the following ways:
- In case of lapped joints by overlapping the outer conductive layer with a thin intermediate layer of insulating material as shown in Figure 4.34
- In case of prefabricated joint bodies (for polymer-insulated cables) by discontinuing the outer conductive layer in the weak-fielded or virtually field-free area behind one of the control deflectors on the cable ends

Lapped joint
In both the cases the insulating flange of the joint housing is placed properly over the separation point in the conductive layer.
4.12.4 Back-to-back joints
Back-to-back joints basically represent more than two switchgear sealing ends joined to each other. So far this technology has been used in France for 225 kV and, more importantly, in an extensive PE cable system at 400 kV. The main advantage of this joint is that existing components can be used. This eliminates the need to develop separate joints or to maintain the associated manufacturing equipment.

Back-to-back joint
4.13 Summary
Joints and terminations are unavoidable in cable installations and provide a homogeneous end before two cables are joined, or when one cable is terminated to an equipment end. These are available in the form of prefabricated and site fabricated, with the prefabricated joints saving considerable time due to the speed of installation. However, site fabricated kits are still more widely adopted due to their easy availability and suitability for a wide range of cable sizes. There are two major types of prefabricated terminations: pre moulded and cold shrink. These do not require special tools but require a selection of correct sizes to avoid site issues. The site fabricated types can be taped and sealed with compound or cast resin. Heat shrinkable terminations provide the advantage of drying out the moisture providing better sealing against moisture. The extrusion moulded joints is another type used in limited situations, requiring extrusion carried out in the field with a special tool.
We also reviewed the additional requirements for outdoor terminations to protect them against moisture and environmental conditions. This includes the provision of additional shields similar to outdoor insulators. It is also necessary to consider the reconstitution of cable properties by PVC tapes, semi conducting tapes, high permittivity stress control tape and impregnated paper for quick and cost effective joints/repair. In cable joints, the continuity of armor and screen of the two cables being joined is important to ensure human safety during earth faults. Mechanical protection is also a preferred way of enhancement of the life of the joint. In addition, we also reviewed special joints: stop joints for oil filled cables, transition joints between cables using different types of insulation and separating joints that ensure electrical isolation of sheath and screens. Back to back joint is another special type which interconnects two switchgear sealing ends.
5
Stress Control in Cable Joints and Terminations
In this chapter we will review the effects of stress at joints and terminations and investigate how they are overcome, covering the use of stress control applications such as stress control tubes, cones, high permittivity tapes, etc.
Learning objectives
- Effect of stress gradients on joints and terminations
- Areas requiring stress control
- Terminations
- Joints
- Basics of stress control approach
- Geometric solutions; use of stress control tubes, cones
- High permittivity solutions; use of stress control tapes
5.1 Stress gradients in cable joints and terminations
The insulation of any cable, particularly those rated for medium voltage and high voltage systems, is subjected to large voltage stresses across a relatively small thickness of material. In a cable run, the voltage stress is applied in the radial direction between the conductor and the earthed outer layers (such as insulation screen). When a cable is jointed with another cable or is terminated on equipment, the alterations that are made to the cable’s insulation affect the distribution of stress considerably. Unless this is properly controlled it can result in premature failures. Unfortunately, the stress distribution along the thickness of the insulation is not uniform, even in a normal cable run. The temperature differences between the innermost and outermost parts of the insulation can distort the uniformity of electrical stress on the insulation. We will discuss these topics in further detail in this chapter.
Electrical conduction and space charge accumulation within a material system are two important and related processes. Together they contribute to the gradient of the electrical stress within a cable. The voltage stress is the maximum at the surface of the conductor. The voltage stress G in a high voltage cable at a distance of S from the conductor centre line at an operating voltage V is determined by the following exponential relationship:

Where:
r = Radius of the conductor
R = Inner radius of the sheath
r = Radius of the conductor
The continuous application of voltage stress as well as the normal ageing process leads to the failure of an insulation. The time (T) in years is found to be inversely proportional to the power of the voltage to an ageing coefficient. It is generally determined by the following empirical formula:

Where:
V = Electric stress at the time of failure in kV/mm
N = Ageing/endurance coefficient (8 to 12 for AC and 12 to 15 for DC)
K = Constant based on the type of insulation
The distribution of electrical stresses inside the cable is related to the following phenomenon across the insulation from the surface of the conductor:
- Temperature and temperature gradients, which may vary with the load and fluctuations due to external factors.
- The electrical voltage and voltage gradients across the cable and joints during the service and their frequent changes.
We will review both these aspects in this chapter. Since DC is also one of the HV transmission modes, the stress effects of DC voltages on HVDC transmission conductors are also covered during the course of this discussion.
5.1.1 Temperature dependency of voltage gradients
The resistivity of an insulation system largely depends upon the electrical stress and the temperature. The consequence of the temperature and the electrical stress is that thermal gradients will significantly modify the resistance distribution and thus the electrical stress under voltage application. Calculations show that an inverse situation (the largest stress transfers from the conductor to the core screen) can occur when a cable is sufficiently loaded. The magnitude of the inversion depends on the load and the electrical properties of the insulation under operating conditions, for a design that aims to achieve a “flat” stress distribution at equilibrium. However, achieving thermal equilibrium can take some time and the electrical stress distribution may get complicated within this period. The stress adjacent to the conductor screen falls rapidly with the resistance and causes a compensating increase in stress over the remaining portions. This analysis shows that within the heating period, the central portions of the insulation experiences stresses of magnitudes higher than those during the two equilibrium conditions. Furthermore, when a DC cable is not on load, the radial field distribution differs from the AC case. This difference between AC and DC fields is small and arises from the stress dependency of the electrical conductivity. When the DC cable is on load the heating within the conductor causes a temperature gradient across the insulation. This, in turn, gives a resistivity gradient different from the one with AC supply that can significantly change the electric stress distribution in a DC cable.
Figure 5.1 shows the relative electric stress with respect to the average stress of a cable at different load conditions. It can be seen that the electric stress could be quite high when the cable is not carrying the load and the full voltage applied to the conductor; there is more stress very close to the screen. It can be seen that the stress level tends to flatten with increasing load and is almost constant for up to 20 mm distance from the screen surface at or near the full load:
Electrical stress (relative to the average stress) distribution for a 20mm wall cable
5.1.2 Inhomogeneous resistivity
The resistivity is not homogeneous across the cable insulation and can considerably vary during actual service conditions. In addition, the resistivity is also influenced by other external factors. This results in sudden changes to local resistivity values and thereby causes disturbances to the normal electric stress distribution. It is possible to consider a number of scenarios which result in this kind of condition: intercalation of more conducting species (external water or components from the semicons) or extraction of species which promote conduction (removal of peroxide decomposition byproducts). It is quite clear that these effects are most likely to affect the outermost layers of the insulation as they are more vulnerable to getting exposed to possible contaminants than the internal parts. At the same time, the possibility of contaminants getting removed at the surface may be faster than those which settle in internal surfaces. These factors result in changes to the resistivity values upwards or downwards, affecting the stress distribution.
A computer simulation has been conducted to study the varying resistivity factor across the cable with each modification related to certain conditions. These simulations show that the local resistivity changes significantly; thereby modifying the electrical stress. Interestingly the stress distribution is much more sensitive to increases in the value of resistivity rather than decreases in its value. The simulations have been carried out for the unloaded case. However it is likely that there will be a different kind of impact when the cable is under load. This is because any intercalation is likely to affect the stress and temperature dependencies of the resistivity as well as the level of the resistivity.
These simulations show that care needs to be taken in the region of the semi-conductive screens. The care extends both to the engineering of the screen materials and the removal of peroxide byproducts (often described as degassing). Figure 5.2 shows the effects of increase and decrease in resistivity values during unloaded conditions:
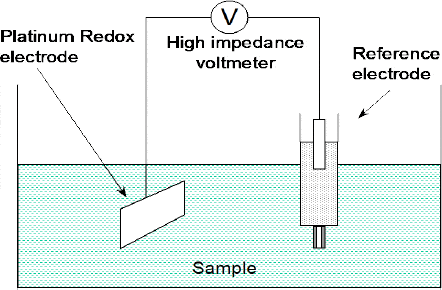
Effects of changes in local resistivity values close to inner and outer semicon screens
5.1.3 Charge accumulation
In addition to the effects that may be attributed to electrical conduction, the application of continuous voltage generates charges within the insulation in the case of DC. These charges may be a consequence of injection or separation. Over the last few years there has been considerable interest in the measurement of the space charge distributions within dielectrics under DC stress conditions. The importance of these studies arises from two sources:
- The dynamic nature of the accumulation, increase and decrease, and
- The persistence of their effects after the voltage is removed or changed.
Consequently, it has been concluded that the normal electric stress distribution might be time dependent. On the other hand, excessive stresses could result during any voltage reversals or transients. The concern associated with space charge is that it is likely to change with time making the electrical stress distribution time variant. The consequence of this can be seen with a particular cable where the stress at initial application can be two times the predicted value. Under such cases, it is found to rise to 4–8 times after 48 hours with charge accumulation. The electrical stress is sufficiently high at this point to cause failure of the cable through electrical treeing. However, this type of performance would not be appropriate for a conductor that is used under DC. Such effects have been found to depend more upon the materials used in cable construction. Essentially identical constructions with different combinations of insulation and semicon have been tested for space charge evolution. These findings show that the selection of the material combination may influence the response to charges either positively or negatively. Determining the optimum combination is clearly an important part of the material engineering process. In addition to the material selection, research has proven that there is an effect from the byproducts of peroxide cross linking. Experimental work has shown that by reducing the levels of the byproducts from the peroxide decomposition and using thermal treatments similar to those employed for AC cables, flammable gases are removed and the propensity of insulations to develop space charges is reduced. It has been shown that samples where the byproduct levels have not been addressed show higher charge concentrations and higher electrical stresses at the interfaces.
5.1.4 Task of cable accessories
It is the task of cable accessories to reinstall the required insulation at a connection of cables (straight joint, branch joint) as well as at the end of cables (terminations, plug-in connectors). The customer wants accessories that are simple and safe to install, which also cover a wide range of cross-sections and consists of a low number of components. Prefabricated and tested single piece-solutions are preferred. Accessories for a given range of cross-sections need to enclose cable insulation and connectors with different diameters. That is why elastic insulating materials have been used to manufacture cable accessories for medium voltage applications for more than 40 years. Rubber insulations are always installed with a determined stretch which results in a permanently existing radial pressure on the insulating layer of the cable. Heat-shrinkable tubes, sheds and spreader caps become elastic under the effect of heat (flame) enclosing the cable end or the splice.
Interfaces are required for medium voltage cable accessories. It is highly recommended that interfaces should be without a chemical bonding, at least between the termination and the surface of the cable insulation. By using stretched elastic insulating material and interface pressure, the required insulating ability can also be achieved. However, the main problem is the need to avoid gaseous enclosures (air bubbles) in the interfaces. The most dangerous place for such a possibility is the cut edge of the outer conducting layer of the cable. Here, silicon is advantageous for its high degree of gas-permeability. Gas bubbles enclosed in the interfaces between the PE-insulation and the stretched silicone shell will penetrate into the insulation against its radial pressure. Therefore, the interface becomes free of air enclosures very soon after assembling giving a high value of PD inception. Because of this, it is advantageous to make tubes for stress relief of a special silicone compound with high permittivity (εr > 10). Two tip electrodes made of aluminum foil were arranged between 2 insulating plates. Pressure tests have been carried out on the insulation plates at pressure levels p = 0.02 to 0.2 MPa, with the aid of a pneumatic pressure device. The insulating plates have been made of silicone rubber and silicone stress control compound. The breakdown experiments were carried out with AC- and DC-voltage. The plotted results are mean values of 10 measurements each. Refer to figure 5.3. As was expected, the DC breakdown voltage at silicone-silicone-interfaces is much higher than the AC breakdown voltage. However the DC breakdown voltage is found to be much lower at the combination with stress control compound.

Breakdown voltage of interface
With DC voltage, the space charge generated in front of the electrode tips lowers the field intensity and results in a fairly high value of the breakdown voltage compared with the peak value of the AC breakdown voltage. The alternating polarity of the AC voltage avoids the space charge to be stored. In the case of the combination with stress control compound, the low specific resistivity of the stress control material does not allow storage of a space charge in front of the electrode. This is why the breakdown voltage for AC (peak) and for DC stress is nearly equal.
Life-time curves for silicone-silicone-interface and silicone-stress-control compound- interface were measured with stepwise increasing voltage with different step duration. (Figure 5.4) With both insulation systems, the same life-time characteristics showing the well known excellent behavior of silicone were discovered. Obviously, no electrical aging takes place below a stress of 48 kV for the arrangement used. This excellent resistance of silicone to electrical aging was published by Oesterheld in 1996 and has been proved in the meantime by other authors using different arrangements, compounds and stress conditions. The investigated models represent the worst case. Otherwise the breakdown voltage shows silicone-silicone interfaces for an application in medium voltage cable accessories can be designed with very small gap – distances, if permanent pressure would be applied. This may particularly open new ways for the design of medium voltage joints.

Life-time curves of interface
In summation, the following advantageous properties of silicone can be taken into account for joints, which make it the preferred material for stress control applications:
- High degree of gas permeability avoids enclosed gas bubbles in interfaces
- High electric strength even in the range of interfaces
- Very low decrease rate of the life characteristic at fairly high electric stress
- Transparency of silicone used for joints allows visual checks to discover impurities inside the insulation
- Permanent elasticity
5.2 Areas requiring stress control
There are some major weaknesses in the area of termination and joints of HV cables, which require stress control. These are:
- Compression lugs fitted to outdoor terminations of the compression tube type with inspection holes allowing moisture to penetrate the conductor cores
- Failure to eliminate air pockets on paper-insulated, lead covered (PILC) three-core “belted” cables in the crotch area
- Core crossing resulting in discharge if cores are too close to each other in an unscreened area at the core cross point. This results in the air “breaking down” electrically at approximately 4 kV on an 11 kV cable, 6 kV on a 24 kV cable, and 9 kV on 36 kV cable. The anti-track shrink material then begins to erode due to the ionization of the air, which over time, will inevitably cause failure of the termination
- Poor cable preparation, in particular on extruded dielectric types where insufficient care is taken on semi-conductive screen removal at the crucial area of the screen cutoff. Cable jointers are generally reluctant to purchase engineered screen removal tools and rely on knives, blades, and homemade tools for removal. This can result in cutting through the screen into the primary insulation, leaving voids which result in the discharge phenomena described in the third item above. Even well prepared screen removal at the cut-off point can result in a possible void, as the stress control tube may not follow the semi-conductive edge profile
- Moisture penetration due to poor sealing techniques
- Inadequate phase-to-phase and phase-to-earth clearance
- Tracking
- Poor jointing instructions
5.3 Terminations
Resistive paints are used as a mechanism for limiting partial discharge at a cable termination. The cable insulation shield should be cut circumferentially at a certain distance from the cable end to apply this method. Caution must be taken to cut completely through the insulation shield without damaging the insulation. The insulation shield is then removed from the cable end to expose the insulation surface. A thin layer of resistive paint is then applied over the exposed insulation surface. This layer of resistive paints provides a resistive current path, which results in a linear distribution of the electrical stress along the cable end, and limiting partial discharge at termination.
The stress-cone method is less frequently practiced in the cable industry. A stress cone is a prefabricated cable termination device made of a high permittivity material. Once applied to a cable of an appropriate design, a stress cone provides stress relief. To install the stress cone, the cable end is prepared in the same way as for the resistive paint. In preparing the cable end, the insulation shield is cut circumferentially at a certain distance from the cable end. After the cable is prepared, the stress cone is slipped over the cable and sits over the insulation shield cutback. When installing the stress cone, silicon grease is normally used as a lubricant and as a filler for the voids that may be present between the cable and the stress cone. Stress-control sleeves are designed to control the high electrical stress at the end of the cable insulation shielding. When the stress-control sleeve with adequate volume resistivity and dielectric constant is applied to the cable, the corona extinction level to ensure reliable performance of the termination and the joint is increased. Figure 5.5 illustrates how the stress is controlled, providing the relief at the insulation end with the use of stress relief cone:
Typical stress control
The drawbacks of stress cones are:
- They are available in limited voltage ranges
- They must be kept in inventory, thus increasing inventory costs
- They have poor range-taking capability. Each drawback tends to increase the testing process cost
5.4 Joints
Many of the points discussed regarding terminations are also relevant to joints. The object of the jointing exercise is to replace all the materials that were removed to joint the conductors and replace them in such a way as to replicate the cable as closely as possible to its original state with minimum stress. There are many techniques used in conductor jointing from “sweating” the weak-back ferrule (normally associated with the original cast iron paper joints) to compression and the present popular “shear bolt” designs to control stress at the time of joining. Connector jointing is a complex subject due to the variety of designs for copper and aluminum conductors in circular-solid, circular-stranded, and sector-shaped styles. There is also the consideration of copper being jointed to aluminum, cables of unequal cross sectional area being jointed to them, and transition jointing where paper is being jointed to polymeric.
5.5 Basics of stress control approach
The stress control component is designed to take care of the geometric shape of the joints and terminations without any voids and air gaps that lead to other problems. This requirement necessitates the application of external heat to follow the external geometrical shape so as to keep the sleeve intact. Methods include control tubing, stress cone, use of flexible tapes, etc. which are covered in the following paragraphs.
5.5.1 Geometric solution
Stress control tubing
Shrink Polymer Systems employ the heat shrinkable, high permittivity, and low resistivity stress control tubing which is shrunk onto the stress relief tape that has previously been applied. This has the effect of achieving a more uniform distribution of the field lines. This tube extends over the ferrule and onto the prepared screen cut-off points. Refer to figure 5.6.
When designing jointing systems, the thickness of the insulation over the bare conductor (i.e., ferrule) should have a safety factor in excess of 15 percent of the original cable. Shrink Polymer Systems employ a one-piece, combined dual wall (insulation/semi conductive) tube of appropriate diameter to match this insulation at voltages to 12 kV. At 17.5, 24, and 36 kV additional insulation tubes are added to meet these cable specifications. The installer must remember to shrink this material all around the tube in order to avoid inconsistent wall thicknesses on full recovery.

Stress tubes
Stress cones
In geometric-capacitive field control, the volume capacitance Cv at the end of the conductive layer is greatly reduced by emphatically lengthening and widening the outer conductive layer in the shape of a so-called control funnel or control deflector. This results in an increase in the creepage inception voltage Ua. The deflector, made from an elastic conductive compound based on silicone rubber or EPDM, is generally integrated into a similarly elastic insulator and the two components together form a prefabricated stress cone. This results in the field being moved simultaneously into the solid insulation material; the particularly critical sliding arrangement cable insulation/air no longer plays a part. Figure 5.7 shows the cut view of the arrangement:

Cutaway of a 69 kV composite insulator termination showing the latest technology rubber stress cone
Prefabricated stress cones with geometric-capacitive stress control were initially developed for medium voltage cables; now they represent the standard solution for sealing ends on all types of polymer-insulated cables and for all voltage levels up to 500 kV. Unlike capacitive control with concentric conductive layers, the effect that the deflectors have on the field distribution at the cable end depends to a certain extent on environmental factors (partially ‘open’ field pattern). Therefore the optimum mounting position for the control element must be determined and, if necessary, checked for each type of sealing end.
The improvement of geometric-capacitive field control for extra high-voltage applications was only made possible by the logical use of mathematical field calculation methods. With the help of such methods, it was possible to limit the overall dimensions of the stress cones for sealing ends and joints whilst maintaining maximum field strengths. In this way, the system could demonstrably support long-term at levels that could be controlled during manufacture and installation.
Figure 5.8 shows the software output giving the field distribution for a typical application. It identifies three Edef/ Eo characteristic loading operations along the deflector contour of a sealing-end stress cone for 400 kV, as they were determined in the context of a large number of calculations using the simulated charging method (Edef = field strength at deflector; Eo = value of the cylinder field at the outer conductive layer of the cable):
- Curve 1 exceeds the specified maximum field strength Eo on the front side of the deflector by more than 20%, combined with the danger of accelerated aging
- Curve 2 fails to take sufficient advantage of the insulation, remaining virtually 20% below the permissible field strength over long sections of the deflector contour; the associated stress cone is unnecessarily long
- Curve 3 comes closest to the optimum solution; at no point is the maximum field strength exceeded, while on the other hand well over 90% is utilized over virtually the whole contour

Field strength pattern along the stress cones contours with numerical field calculations
5.5.2 High permittivity solution:
Stress-relieving tapes
As we have seen in the earlier chapters, this type of tape generally has permittivity values between seven and thirteen (test method IEC 250). Shrink Polymer Systems is an established manufacturer of this stress control tape, reference number TS 31785Y, and colored yellow. This tape possesses high tack, high stretch, and low viscosity void-filling qualities with a permittivity value of minimum nine. Stress-relieving tape must be used in conjunction with heat shrinkable installations. This is applied in a half width overlap with stretch and must also be applied to any indents left by the tooling. Gaps between the end of the primary insulation and a connector must also be filled in. Push-on molded components are also widely used, eliminating the need to fill voids and use of stress tapes. They rely on the Faraday cage principle, where conductive rubber-ribbed moldings are in contact with the connector. As the potential difference across the air is very low, discharge should not occur. Push-on molded components have several disadvantages. On three-core cables the molded components prove to be very bulky and have no design features to eliminate moisture penetration unless used in conjunction with large diameter shells and resins. On large aluminum conductor sizes, the ferrule could possibly be longer than the molded component. The positioning over the ferrule is critical. Figure 5.9 indicates the typical application of this sleeve:

Application of Stress relieving tape
The use of stress control tape is an accepted practice with results showing improvement of AC breakdown voltages with the use of a normal tape. However stress control sleeve gives comparatively better AC breakdown voltages as shown in figure 5.10:

Advantage of stress control sleeve
5.6 Summary
Cables, and more specifically medium and high voltage cables are constantly subjected to voltage stress across the insulation material. Stress produced by the electric field affects the insulation in the long run. The voltage stress is the maximum at conductor surface and decreases exponentially. The conductor insulation is affected by both voltage gradient and temperature gradients. The temperature gradients affect the resistivity of the cable across it surface, thereby producing more electric stresses. The increase or decrease in value of resistivity also varies the electric stress. The cable accessories are expected to overcome such stress by using special features. Since terminations and joints are the most vulnerable parts, applying stress control at such locations is almost mandatory. Considering the excellent elasticity characteristics and certain other advantages, silicone rubber is used for stress cones. Stress control sleeves are available in the form of control tubing, stress cone and tapes with high permittivity. Stress control sleeve is comparatively better than the relieving tape due to the higher AC breakdown voltage values obtainable with a sleeve.
6
Practical Aspects of Cable Jointing and Termination Work
In this chapter we will review the practical aspects of providing the joints and terminations, mainly covering the procedures and practices related to the prefabricated and site assembled termination kits. We will also discuss the other accessories used in cable termination. A review will be made of some of the common types of jointing tapes used to reconstitute the cable properties. The study will also include the recommended practices to be followed covering identification of parts needing repairs, providing markers, safety practices during installation, etc.,
Learning objectives
- Kits for joints and terminations
- Shelf life issues
- Importance of matching diameter of insulated conductor with kit specifications in prefabricated kits
- Preparation of cable for termination and jointing
- Connection and reconstitution of cable properties
- Continuity and grounding aspects
- Sealing, healthiness of joint/termination
- Installation aspects for joints and identification
- Safety issues and access for repairs
6.1 Kits for joints and terminations
As discussed in chapter 4, there are different types of terminations and joints available on the market for various voltage grades and types of cables commonly adopted. These are generally supplied as kits, which need to be assembled in the field to complete the joints and terminations. It is necessary that all the parts are received in the field so that the terminations can be completed without any delay and/or compromise. Generally, the manufacturers send the parts, together with a detailed part list and part numbers, so that the person receiving the same in the stores fully checks the items and informs of shortages, if any. A typical material list for MV heat shrinkable terminations for indoor and outdoor (ID/OD) applications is displayed in table 6.1:
Typical components of heat shrinkable kits (Courtesy: Asahi)
| MATERIAL LIST OF TERMINATIONS FOR 6600V~15 kV 3 CORE XLPE / SWA(STA) / PVC CABLES | ||||||||
| Name of materials | Quantity | |||||||
| 6.6~11KV | 15KV. | 22KV. | 33KV. | |||||
| ID | OD | ID | OD | ID | OD | ID | OD | |
| Terminal lug | 3 pcs | 3 pcs | 3 pcs | 3 pcs | ||||
| Anti-track shroud | 3 pcs | 3 pcs | 3 pcs | 3 pcs | ||||
| Anti-track tubing | 3 pcs | 3 pcs | 3 pcs | 3 pcs | ||||
| Weather shed | —- | 3 pcs | —- | 3 pcs | 3 pcs | 6 pcs | 6 pcs | 9 pcs | ||||
| Stress control tubing | 3 pcs | 3 pcs | 3 pcs | 3 pcs | ||||
| Insulating glove | 1 pc | 1 pc | 1 pc | 1 pc | ||||
| Tinned annealed copper wire | 1 roll | 1 roll | 1 roll | 1 roll | ||||
| Earthling braid | 1 pc | 1 pc | 1 pc | 1 pc | ||||
| Impregnated jute cloth | 1 roll | 1 roll | 1 roll | 1 roll | ||||
| Bracket | 1 set | 1 set | 1 set | 1 set | ||||
| External protective tubing | 1 pc | 1 pc | 1 pc | 1 pc | ||||
| Silicone grease | 10 g | 10 g | 20 g | 20 g | ||||
| Conducting paint | 1 tin | 1 tin | 1 tin | 1 tin | ||||
| Jointing solder | 1 roll | 1 roll | 1 roll | 1 roll | ||||
| Soldering flux | 1 tin | 1 tin | 1 tin | 1 tin | ||||
In addition to these kits, there are other accessories used in field terminations and joints to enhance their life and characteristics, which are covered below. Figure 6.1 gives a broad spectrum of products available in the market:

Typical kits for termination (Courtesy: Gala Thermo shrink pty Ltd)
Creepage Extension sheds
Heat Shrinkable Creepage Extension Sheds are manufactured from high quality cross linked polyolefin material that offer low tracking behavior, exceptional insulation and long term service reliability. They possess advantageous physical properties, excellent aging stability and very good resistance to chemicals. Due to the excellent inbuilt character of the base polymer, these items find proven application in areas where creepage distances are critical, such as coastal/polluted areas and areas with space limitations. Figure 6.2 gives the typical arrangement of these sheds:
Creepage Extension sheds
The following are a few typical applications where these extension sheds are used:
- As an integral part of Heat Shrinkable terminations up to 72kV class for indoor & outdoor applications, where they provide extension to the creepage path of the cable terminations
- To provide extension creepage length and to avoid continuity during rainy season; and to avoid short circuiting of the electrical net work on a case to case basis as per system requirement
Anti Tracking Breakouts
Heat Shrinkable Anti Tracking Cable Breakout are manufactured from a high quality cross linked polymer compound that offers exceptional insulation and long term service reliability. Figure 6.3 displays a picture of these breakouts:
Anti Tracking Breakouts
Dimensions of anti tracking Breakouts
Figure 6.4 identifies the typical dimensions of these components. The types are chosen based on cable sizes. They possess advantageous physical properties, excellent aging stability and very good resistance against resistance inbuilt character. These breakouts are used as an integral part of Power Cable termination Kits for indoor and outdoor applications. They provide a positive environmental seal to the cable crutch. The breakouts are supplied with or without anti-tracking adhesive coating.
These components offer the following advantages:
- Quick and easy to install
- Non Carbon Material
- Continuous Operating Temperature – 40 to 125°C
- Excellent weather/UV resistance
- Good chemical & solvent resistance
- Excellent corrosion resistance
- Corrosion free
- Excellent flame retardant properties
- Unlimited storage life
- 100% water proof/perfect moisture seal
Stand-off Insulators/Shield Break
Stand-off insulators are available as an option for outdoor terminators to isolate the cable shield from system ground. Figure 6.5 illustrates the typical insulator used for this purpose:

Standoff insulators
Stress control tubing
Heat Shrinkable Stress Control Tubes are used extensively for stress control arrangements in power cable joints and terminations up to 36kV voltage class. Its main feature is the high level of permittivity.
Stress Control Tubing
Heat Shrinkable medium wall tubing has a wide range of applications in the electrical and electronics segment of industries due to its excellent physical, chemical and thermal properties. The tubes have flame retarded low halogen as their prime inbuilt property. The following are a few typical applications where these sleeves are used:
- For Mechanical Protection & Sealing of Heat Shrinkable Straight Through joints up to 36 KV voltage class
- For insulation, sealing of core connections of low voltage joints
- For Sealing, mechanical Protection of telecommunication cable joints for under ground applications
They have the following characteristics and advantages:
- Excellent physical properties
- Weather proof and good UV resistance
- Excellent adhesion to plastic and metals
- Large shrink ratio -small number of size required
- Unlimited shelf life
- Good chemical resistance to salts, acids, oils, fats and solvents
- Quick, simple and safe applications
- Outstanding sealing properties
- Available with or without adhesive coating inside
- Outstanding sealing effectiveness with coated tubing
6.2 Shelf Life
It is quite common that some electrical items lose their insulation strength due mainly to the possibility of moisture absorption. Because of this, there are methods used to revive the insulation, such as direct heating and passing rated current at low voltages (equipment with windings), etc. In these cases it is not considered that equipment had lost its life. However there are some components/materials which undergo irreversible changes to their physical and chemical properties over long periods of storage. These components are regarded as having a limited shelf life.
In the case of termination kits, the shelf life is not generally a major issue provided proper care is taken during the storage. The termination components for different cable sizes are normally different for different voltages and ordering of any standard kit necessarily includes all items standardized by the manufacturers. Sometimes it may not be practically possible to use each and every component that is supplied with the kits as standard and a few components would be left over after the job is completed. The question of shelf life normally does not arise in such cases, as it is definitely not of much benefit to keep such items in the stores. The shelf issue becomes critical when:
- The components are ordered well in advance
- The erection works are delayed
- Stockists tend to keep standard items in their stocks and supply to clients who need them urgently
In all the above cases, the shelf life of HV cable dry type termination kits can be considered to be longer provided the items are well covered in proper cartons and are kept in dry conditions. The manufacturers’ catalogues generally indicate unlimited shelf life for all the cable kits. However, there are possibilities that the different materials used for such termination kits may lose their properties if kept idle for a long time. This is especially true in the case of materials that can easily absorb moisture if kept open (for example: tapes). ABB kabledon supplies outdoor XLPE termination types APECB 170 (highest system voltage of 170kV); their catalogue states the following regarding the shelf life of the main kit and its accessories:
The termination is packed in two wooden boxes, one for the termination parts, including the filling compound, and one for the insulator. When stored at temperatures in the range of -30°C to 40°C in original, unopened packaging, the termination components have a shelf life of ten years from date of manufacture/purchase. The tape and cleaning kit shall be exchanged after five years.
Therefore, the manufacturer’s recommendations/guarantee need to be taken into account when making purchases, to avoid against situations where there may be a chance of storage periods exceeding 2 years.
6.3 Issues with prefabricated kits
While selecting a termination kit, the following needs to be taken into account:
- Time required to complete the installation
- Thermal characteristic of joint vis-à-vis the main cables
- Dimension restrictions, if any
It is very important to ensure that the diameter of the conductor is matched to the kit specifications in the case of prefabricated kits, except for a very small tolerance. If the diameter does not match, it involves much re-working at the site. Often, the temperature at the site and the temperature at laboratories where these prefabricated joints get tested are different and this difference could give rise to poor performance in the field. Therefore, it is also important to specify the anticipated temperature range experienced in the place of use, so that the manufacturer takes care of the design changes/considerations as needed.
6.4 Preparation of cable for termination and jointing
Heat shrinkable joint
Figure 6.7(a) illustrates the preparatory arrangement needed for heat shrink termination of two cable ends with both the end parts kept open to the required lengths for overlapping/ connection purposes. The procedure involved for completing the heat shrinkable joint for MV application is outlined below in the figures that follow:

Preparation for MV termination (Courtesy: Shrink Polymer systems, UK)
- Ensure that the cables overlap at the jointing end. The required overlap dimensions are normally provided by the kit manufacturer as part of the installation document accompanying the kits
- The Armor shall be exposed to about to 75mm and its Bedding to about 30mm
- The copper tape screens are removed for a distance of about 220mm + 50% of the Connector length with some tolerance of not more than 5 mm
- The Black Semi-Conductive layer should be exposed for about 10mm without damaging the ‘Nick’ the Primary
- The Conductor is also exposed to about half the Connector length + 5mm and its typical dimension X, as per figure above, are provided in table 6.2 which depends on the cable conductor size:
- De-grease the Primary Insulation and remove all traces of Carbon/Semi-Con
- Push the Star shaped Mastic Wedge well into each cable crutch; wrap the Mastic Tape around each Cable Bedding
- Slide the Outer Shrink Sleeve/s and Armor Clamps over one or both of the Cable ends. Position the “Nested” Connector Insulation Tube sets onto the Cores on the Long side of the Joint
- With an approved Tool, crimp the Connectors and remove any sharp points
- De-grease the Connectors with the tissues provided before proceeding
- Stretch and Wrap the Stress Tape around the Connector area with ½ width overlap
- Important: Fill in the gap between Primary Insulation and Connector. Extend the tape onto Primary Insulation by 10mm only
- Apply one piece of stress tape over the end of each Conductive Screen point. Extend it onto the Copper Tape Screens by 15mm and Primary Insulation by 10mm
- Position the Stress Control Tubes (SCT) centrally over the Connectors overlapping the end of Screen points and onto the Copper Tape Screens
- With a suitable heat source, shrink all three Tubes at the same time, starting from the centre, working all around the Tubes to one end at a time. Allow the Tubes to cool before cleaning the surfaces with the tissues provided. This improves electrical performance
- Shrink the required quantity of Red GMT Tubes centrally over the Stress Control Tubes. Two GMT Tubes are required at 36kV, one at 17.5-24kV with none being required at 12kV or below. Finally, position the GIS combined Red Insulation/Semi Conductive Tubes and as before, shrink into place and ensure an even wall thickness is obtained. Remember to clean each layer with a tissue.
- Take the pieces of HV Grey Mastic Tape and apply to the ends of the GIS Tubes and Copper Tape Screens by approx 10mm each as shown:
- Wrap the Copper Screening Bandage with slight overlap on each Core extending onto the Copper Tape Screens by approx 50mm and secure with Binding Wire
- Secure the six Earth Braids to the Copper Tape Screens with the Constant Force Springs provided (The Braids should be clamped to the Armors at a later stage)
- Bend back the Armor Wires and apply the Black Mastic Tape onto the Bedding directly under the Sheath cut (SWA only)
- Position the Armor Support Rings and fold back the Armor Wires upon them. Armor Support Rings do not need to be fitted if Cable is Steel Tape Armored
- Wrap the Armor Protection Cage around the joint gap and use the PVC Tape to hold it in place. Using the Armor Clamps, clamp the Cage down onto the Armors at each end ensuring that the Flat Earth Braids that are attached to the Copper Tape Screens are also clamped down with it. Tape over the Clamp buckles and Cage fingers with the PVC Tape.
- Depending on the Conductor size, an additional Earth Strap may be needed to be clamped down with the Armor
- Make a mark at 100mm on the Outer Cable Sheath on the Long side of the Joint and position one of the Shrink Tubes to this point. With a suitable heat source, start shrinking from the centre of the Tube to one end at a time. Keep the flame on the move to ensure an even wall thickness. Apply a turn of stress control Grey Tape approx 40mm in from the end of the Tube
- Make a mark at 100mm on the Outer Cable Sheath on the Short side of the joint and position the second Tube at this point. Shrink as before, keeping the flame on the move. Once fully shrunk, Sealants should be visible at Tube ends
- Allow the completed Joint to cool before applying any mechanical strain
Preparation for MV termination (Courtesy: Shrink Polymer Systems, UK)
| SIZE mm2 |
A | B | C | D | X | MAX CONNECTOR LENGTH |
| 35-95 | 1200mm | 750mm | 220mm | 220mm | HALF | 110mm |
| 120-185 | 1300mm | 750mm | 220mm | 220mm | LENGTH | 150mm |
| 240-300 | 1375mm | 700mm | 220mm | 220mm | CONNECTOR +5mm |
220mm |

Preparation for MV termination (Courtesy: Shrink Polymer systems, UK)

Preparation for MV termination (Courtesy: Shrink Polymer systems, UK)

Preparation for MV termination (Courtesy: Shrink Polymer systems, UK)

Preparation for MV termination (Courtesy: Shrink Polymer systems, UK)
Transition Joint
Transition joints are employed where the most common old Paper insulated cables are jointed to today’s most commonly used XLPE cables. Figure 6.8 illustrates the step by step method to be followed for completing a transition joint. (Figures courtesy: nkt Cables GmbH)
As shown in figure 6.8(a), the paper insulated cable is sealed with a sealing tape, with a shrinkable tube inserted for the next stage:

Sealing paper insulated cable with oil-proof sealing tape and shrinkable tube
The next step involves assembling the stress cones around the sleeve as per figure (b)

Assembly of stress cone
The conductor portion should be properly opened and bolted/crimped to the connector end as shown in figure (c). The subsequent figures demonstrate the connections of screens with braided tape:

Preparation of conductor connection

Joint body in parking position Installed joint body with Cu braid tape to connect the screens

Installed joint body with Cu braid tape to connect the screens
The outer sleeve is applied and flame is used to get the uniform shrinkage to complete the joint.

Application of outer sleeve
Heat Shrinkable end termination
Installation of a high voltage termination for a single conductor cable consists of the following easy steps:
- Remove the cable sheath, screen, and insulation
- Set up the connector
- Set up the stress-control sleeve from the end of the cable screen to the insulation, then shrink it down
- Set up the protective sleeve from the cable sheath to the connector, then shrink it down
- In case of outdoor use, install a skirt
- It is highly recommended that a tool suitable for the removal of the semi-conductive screen is used to provide a reliable discharge free termination screen point
- Use a propane gas torch with a soft flame
- Avoid a pencil like blue flame which is caused by unregulated supply
- Keep the flame on the move to ensure even shrinkage of all the materials and also helps to reduce scorching
- Ensure that all components are kept clean and grease free during installation
- Allow to cool before applying any mechanical strain

Preparation for MV end termination (Courtesy: Asahi, Thailand)
Push on Terminations (outdoor)
The following figures list the step-by-step procedures adopted in the preparation and completion of typical outdoor push on terminations:
Preparation for MV push on termination (Courtesy: Yamuna Gases, India)
ABB manufactures prefabricated cable joint with cold shrink outer sheath type SOJ for 12-24kV applications. The body of the joint is made of three layers of rubber: a conducting outer layer, insulating and conducting inner layers. A mounting kit is included. The joint also contains a cold-shrink outer sheath which is slipped over the cable before jointing and shrinks when the internal spiral is pulled out. There are two versions: one containing screw connectors for conductor and screen and the other without connectors.
6.5 Connection and Reconstitution of cable properties
As seen in earlier chapters, for small repair and reconstitution of cable properties, self-amalgamating tapes are used for sealing and electrical stress control in various applications. The tapes are available on two bases viz., PIB and EPR. Those based on PIB (Polyisobutylene rubber) have strong self-amalgamating properties while those based on EPR (Ethylene-propylene rubber) are particularly resistant to high temperatures in addition to the self amalgamating properties. These tapes are used for various applications:
- Jointing
- Termination
- Waterproofing
- Insulation
- Repair
- Protection against corrosion
- Barrier to migrant oil and grease.
Scapa Polymerics, Italy, is one of the leading manufacturers of these tapes and they have products of different characteristics for different applications.
Insulating Tapes
Table 6.3 lists the types and properties of various insulating tapes that are used to reconstitute the cable properties in an easy and effective way:
Self amalgamating Insulating Tapes Types and Range
(Courtesy: Scapa Polymerics, Italy)
| Type number & Description | Thick mm |
L m |
W mm |
Specific application |
| 75 Silicone self-amalgamating tape |
0.4 | 9.1 | 25 | Normally available in the color grey and is used for protection and repair of MV cable terminations. This tape can operate in extremely low temperatures and up to 180ºC (class H) and has following features: a) Migrant oil and grease barrier for impregnated paper insulated cables. b) Includes an extruded blue centre line for perfect overlapping. c) Resistant to water, tracking and UV. d) Excellent barrier to grease and oil. e) Excellent heat ageing characteristics. |
| 2501 PIB self-amalgamating tape – Black |
0.5 | 3 5 10 |
19 25 38 50 |
Normally available in the color white and is used to join and repair a wide range of power and distribution cables up to 46 kV and has the following features: a) Good physical and electrical properties. b) Excellent heat ageing characteristics. c) Water-resistant. |
| 2504 PIB self-amalgamating tape – Black |
0.75 | 3 5 10 |
19 25 |
This is thicker than 2501 and is used for similar applications and is applied for protection against corrosion at welds or joints and for the waterproofing of many electrical components and has the following features: a) The tape amalgamates rapidly when applied under tension. b) Good physical and electrical properties. c) Water-resistant. d) Excellent heat ageing characteristics. |
| 2515 | 0.5 | 3 5 10 |
19 25 38 50 |
These are available in white and black colors. These are used for jointing and repairing a wide range of solid dielectric power cables up to 132kV and also as protection for the insulation, waterproofing and electrical components. These have, a) Excellent physical and electrical properties, with a high degree of stability. b) Excellent water and ozone resistance. |
| 2517 | 0.75 | 3 5 9.1 10 |
19 25 38 50 |
Generally used for joint and repair a wide range of solid dielectric power cables up to 69kV. Used for the insulation, waterproofing and protection of electrical components. These have: a) High insulation resistance. b) High dielectric strength. c) Low electrical losses. |
| 2513 | 0.3 | 10 20 |
25 | Available in the color black and is used for jointing and repairing a wide range of solid dielectric power cables up to 132kV. It is thinner than the version 2515 and 2517 but has the same excellent physical and electrical properties as these tapes. Extra thin tape. Non-tacky and easy to handle and apply. High dielectric strength. Low electrical losses. Good long term stability of physical and electrical properties. |
| Linerless EPR tape – Black |
0.75 | 9.1 10 |
19 38 |
These are supplied without interleaving and are used for jointing and repairing of a wide range of electrical cables up to 69kV. It can be used for insulation, waterproofing and protection of electrical components. a) Non-tacky and easy to handle and apply. b) Has excellent electrical properties and can be used up to 130°C. |
| 2547 High temperature EPR self-amalgamating tape – Black |
0.75 | 3 5 9.1 10 |
19 25 |
For reconstitution of MV cable insulation up to 69kV. The product meets the temperature requirements of XLPE cables where high overload temperatures can be encountered. Ozone, water and UV resistant. Excellent temperature resistance. |
Self amalgamating semi conducting Tapes Types and Range
(Courtesy: Scapa Polymerics, Italy)
| Type number & Description | Thick mm |
L m |
W mm |
Specific application |
| Semi-conducting EPR self-amalgamating tape – Black | 0.3 | 10 20 |
25 38 |
Used for the reconstitution of the semiconducting screens of MV and HV cables. These have a) Good long term stability of the physical and electrical properties. b) Good water resistance. Excellent heat ageing characteristics. |
| Semi-conducting EPR self-amalgamating tape – Black | 0.75 | 3 5 |
19 25 38 50 |
For reconstitution of the semi-conducting screens of MV and HV cables. Gives void free homogeneous wrapping and are used for smoothing electrical stresses. These have: a) Excellent physical and electrical properties without the application of heat or pressure. b) Embossed or smooth interleaving. Good water resistance. . c) Excellent heat ageing characteristics. |
Sealing Putties
Sealing Putties Types and Range
(Courtesy: Scapa Polymerics, Italy)
| Type number & Description | Thick mm |
L m |
W mm |
Specific application |
| 30 Electrical sealing putty – Black | 3.2 | 1.5 | 38 | Used for the waterproofing of taped joints, repair of cable sheaths and reconstitution of insulation for LV cables. All-purpose thick putty tape. The interleaving overlaps the edges of the coil, allowing easy separation from the tape. Particularly suitable for hot climates. Good electrical properties. Low cold flow, i.e. it does not sag at room temperature or in hotter climates. |
| 31 Electrical sealing putty – Yellow | 2 | 0.2 | 25 | Used in cast resin joints to ensure that the joint is sealed. Used also as a filler tape. Fairly soft composition, with the advantage of being very conformable. Overlapping interleaving allows easy separation from the tape. The interleaving is a double-sided siliconised paper. |
| 34 Electrical sealing putty – – Tape – Black | 3 | 1.5 | 25 38 |
Used for the waterproofing of taped joints, repair of cable sheaths and reconstitution of insulation for LV cables. |
| Electrical sealing putty – – Pad – Black | 3 | 0.2 0.25 0.35 |
140 | Overlapping interleaving allows easy separation from the putty. The interleaving is a double-sided siliconised paper. This is a softer product than Scapa 30, making it particularly suitable for colder climates. It also offers high water resistance and good electrical properties. |
| 35 Electrical sealing putty – Tape – Grey | 3 | 7 | 25 | Used for waterproofing under heatshrink, coldshrink and slip-on tubes; used also as a filler tape. |
| Electrical sealing putty – Pad – Grey | 0.2m 0.12m |
x x |
25mm2 25mm2 |
Provides high adhesion to connectors and plastic materials. It also offers high water resistance. |
| 36 Electrical sealing putty – Grey | 1.2 3 |
30 14 |
25 25 |
Used for the sealing of silicone tubes and components within the termination. No migration of the low molecular weights through the silicone rubber. Self-healing. |
| 2561 Electrical Sealing Compound – Black | 3 | 1.5 2 |
38 | Used for filling in voids and irregularities in the joints and terminations of polymeric and elastomeric cable insulation and sheathing. Suitable for sealing LV and MV joints. Supplied in easy to handle tape form. Excellent electrical properties. Ozone, water and corrosion resistant. |
| 2573 Electrical sealing putty – Black | 2 | 5 | 40 | Used for the waterproofing of taped joints, repair of cable sheaths and reconstitution of the insulation on LV cables. Provides a moisture proof seal on telecommunication networks and distribution systems. Supplied in easy to handle tape form interleaved with a silicone paper liner. |
| 2588 Vinyl mastic tape – Black | 0.85 | 3 6 |
19 38 |
For LV and MV cable repair. Sealing in and around electrical connection boxes. Laminated to a PVC backing. Easy and accurate to use with little waste and no mess. |
Stress Control Products
Stress Control Products Types and Range
(Courtesy: Scapa Polymerics, Italy)
| Type number & Description | Thick mm |
L m |
W mm |
Specific application |
| 85 Stress control linear putty (RLT) – Grey roll | 1.2 | 30 40 |
25 188 |
For MV termination of polymeric cables. Used on the conductor and insulation for control of the electric fields. Used on joints or terminations up to 33kV. Elimination or reduction of partial discharges in MV joints or terminations. Very efficient and versatile. |
| 2527 High permittivity stress control tape – Grey | 1 | 3 5 |
19 25 |
For use in applications where a high permittivity material is required with good conformability and self-amalgamation. Used in a variety of MV cable jointing and termination applications. When the tape is applied, it provides a void free homogenous wrapping, having high permittivity characteristics, which provide effective stress control in all types of joints and terminations for power cables. No external heat or pressure is required. |
| 2528 High permittivity stress control tape – Grey | 1.5 | 5 | 120 | For use in applications where a high permittivity material is required with good conformability and self-amalgamation. Thicker than Scapa 2527. Used in a variety of cable jointing and termination applications. Supplied in easy to handle tape form. Malleable over a long service life and can be used over a wide temperature range. Good ozone resistance. |
6.6 Continuity and grounding aspects
To ensure safe power distribution, all non-current-carrying conductive materials in the conductor routes such as transmission towers, conduits, cable supporting structures and any metallic enclosures must be properly grounded. It is also necessary to ensure proper bonding which includes the metallic sheath or armor of all cables, cable shields, man-hole hardware, tanks of all equipment and apparatus, and the secondary neutral of transformer installations. Where non-metallic-sheathed cable having a ground wire is used, the ground wire is usually brought out at the joint. These neutral ground wires should be grounded to the neutral and the driven ground rod.
6.7 Sealing, Healthiness of joint/termination & Repairs
Most of the faults in the cable systems are found to be generally either in an existing joint or a termination. In such cases, the repair to the system may be comparatively simple. In case the fault is in the cable itself, it is first necessary to identify the location of the fault. The repair involves removing a part of the cable length at the defective part and splicing for a good length. The replacement joint should match the type of the cable comparable or compatible with the original cable. Established manufacturer’s slice kits and termination kits should be used as much as possible, without doing a patch work to ensure that the fault is not repeated. After the repair is completed (and before backfilling for direct-burial cable) insulation resistance and potential tests should be carried out to determine that the cable, including the new repair, is suitable for use.
Most damage to duct systems results from new unrelated construction and settling of ducts. Too often, the new construction fails to locate an adjacent duct line accurately and damages the line. Ducts sometimes settle where they cross older understructures, whose overlay was completed without adequate backfilling and tamping. Duct settling is often not apparent unless cable failure results or an empty duct is rodded in preparation for pulling in new cable. In either event, the condition must be investigated and repaired. A new structure at the point of settlement may possibly be the quickest and cheapest repair.
Hazardous substances, such as lead or asbestos, should be replaced when the cable repair work requires their removal; this would apply to situations such as pulling new cable in ducts sealed with lead or asbestos or splicing cables having asbestos fireproofing. Encapsulating materials are available which will prevent asbestos fibers from becoming airborne.
As corrosion often results in deteriorated equipment leading to electrical outages, its control is necessary. While corrosion can occur because of many reactions, underground corrosion of metallic cable sheaths and grounds is the most common and costly type of corrosion found in electrical distribution systems. There are two basic types of corrosion. One is purely chemical in nature and is the reaction between elements, such as water and iron to cause rust. The other is galvanic corrosion and is an electrochemical reaction between dissimilar metals in an electrolyte. An example of the first type is rusting of a steel nail in a glass of water with no other metal involved in the reaction. An example of the second type is corrosion between copper and aluminum conductors, where moisture serves as the electrolyte. Maintenance personnel must be alert to minimize the effects of corrosion inherent in exposure to the elements or resulting from installation methods that did not properly address galvanic effects. Prevention of chemical corrosion is relatively easy to accomplish by proper painting or other surface protection. In electrical systems, galvanic corrosion is caused primarily by protective metallic cable coverings, such as lead or steel; by the grounding system, which is usually copper or copper coated; and by metal conduit, either galvanized or ungalvanized.
Solid dielectric cable repairs
The majority of the cables used in most of the installations are solid dielectric cable. Solid insulation for power cables is divided into two main categories: thermosetting and thermoplastic. A thermosetting material is one that requires heat to vulcanize or crosslink. This process causes a chemical reaction and the insulation will have little tendency to soften if reheated. Thermoplastic insulation will soften repeatedly when heated. Ethylene-propylene rubber and cross-linked polyethylene solid dielectric cable which are both thermosetting, should be considered when replacing any old medium-voltage cable. Most utility cables are the single conductor type installed in concrete ducts. Direct-burial concentric-neutral cables that are usually installed in housing areas may be single-phase or three-phase. Direct-burial or submarine cable, armored or gas pressurized, is usually three-conductor cable.
The repair of solid dielectric medium voltage cables may be accomplished by the use of preassembled splice kits, which are available for the various types of cables and their protective coverings (where applicable). Particular attention should be given to ensure that the material used for the repair is compatible with the cable insulation. Low-voltage cables which do not have cable shields and are not provided with armors or metallic sheaths can be repaired with jacket repair sleeve kits which seal and repair insulation damage. These sleeves may be appropriate on medium-voltage cables when only the jacket is damaged.
Other cable insulation and covering repairs
Cable insulations other than solid dielectric compositions are now being installed only where special circumstances justify their use. Varnished cambric and paper insulated cables, however, may still be in service in some areas.
a. Varnished-cambric insulated cable. Varnished-cambric insulation requires little or no maintenance where cables terminate in potheads. Some varnished-cambric insulated cables are provided with lead sheaths. However, where terminations are not in potheads, the terminal ends should be checked periodically for leakage of compound and breaks in insulation where moisture can enter and cause deterioration. Where the cable is not terminated with potheads, leakage of compound may occur. In such instances, an electrical adhesive tape, designed for medium-voltage splices, should be applied over the varnished cambric and should be painted with a sealer paint to stop the flow of compound. If it is suspected that the varnished-cambric insulation has absorbed moisture, a moisture test should be carried out. Should the insulation become damaged, it may be replaced with varnished-cambric and covered with friction or adhesive tape; alternatively, the ends of varnished-cambric tape can be secured with cotton tape and painted with an insulating paint.
b. Paper-insulated lead-covered cable. A paper-insulated lead-covered (PILC) cable always has a lead sheath and therefore requires little maintenance. Testing at regular intervals will indicate the condition of the insulation. A break in the lead sheath will expose the paper to moisture and a moisture test should be taken. If several layers of paper have been removed, they should be replaced with varnished-cambric tape. In order to do this, it may be necessary to remove a longer section of lead sheath. The section of lead sheath removed should be replaced with a new lead sheath and wiped in place in the same manner as a splice. The repairs described above can only be made in a structure. If it appears there has been a break in the lead sheath within a duct, it will be necessary to replace a length of cable between structures or between terminals. Should a PILC cable fail again shortly after a repair or lengthy de-energization, the cable may be completely unusable. However, prior to replacing, it is recommended to try for “drying out” the cable by forcing a low-voltage, high current through the cable (via an arc welder) for not less than 12 hours. Current should be as high as possible but must not exceed 80 percent of rated cable ampacity. Also during installation, it is recommended to avoid supporting the PILC cables by using metal straps or supports, or by laying them on metal trays, because of the possibilities of galvanic action that can deteriorate the cable and joints.
c. Lead-sheathed cable. Lead sheaths may crack or suffer other damage as a result of fatigue due to cable movement or bending. If a section of lead sheath is seriously damaged or badly cracked, the section of sheath should be removed and this area should be covered with a lead sleeve. The sleeve should be wiped in place in the same manner as a splicing sleeve. Where the damage is not too serious, repairs may be made as follows:
- Scrap the lead in the vicinity of the damage
- Preheat the area using an acetylene or gas blow torch. Care should be taken not to melt the lead
- A good flux such as stearine shall be applied
- Apply solder and heat to a point where it is pliable
- Work solder into sheath with a paddle or stick and smooth
- Wipe with wiping pad
d. Concentric-neutral cable construction. The neutral conductor of this type of cable consists of equally spaced strands of wire or flat strap wrapped spirally around the outside of the cable insulation. Concentric neutral cables may be of single or multiple conductor configurations and may have an outer protective jacket covering the neutral conductors. Care must be taken when handling the cable to prevent the concentric-neutral conductors from loosening or bunching together in one place around the cable circumference. If this occurs, it may cause tracking of the insulation or affect the voltage stress distribution within the insulation. The number and size of the concentric conductors are determined by the manufacturer in accordance with ICEA standards. Repairs should ensure that the operating characteristics of the concentric neutral are not adversely affected.
e. Gas-pressurized cable. Repairs may be required for this cable because of a loss of pressure from a leak in the outer covering or conduit or a puncture in the solid dielectric cable. The high density of the gas may result in a zero gage reading even though sufficient gas is still present to keep out air and moisture. The SF gas used is nontoxic and odorless. However, any arcing produced by the fault will result in the gas producing toxic materials that smell like sulfur and rotten eggs. Avoid breathing this gas and allow it to be naturally ventilated out. If a cable were to fail and burn a hole through the insulation and then be re-energized, a very small amount of gas in the hole could arc and may be noticeable. The smell and toxic gas will dissipate fast.
f. Armor. There are various types of armor to provide mechanical protection for the cable insulation; some armor is provided with a protective jacket. When flat metal armor is broken, it can be repaired in place by soldering the broken part or by overlapping a short piece of armor and soldering. The armor should be thoroughly cleaned and tinned before soldering. If the armor becomes loose at the ends of the cable, it may be wired to the lead sheath or a lead sleeve installed at each end. In case it is an interlocked armor sheath, short sections of this armor can usually be worked into place (one section at a time) by using a hammer and screwdriver or another blunt instrument. The armor may sometimes become dented. When not too seriously dented, no repair should be attempted. However, if the dent is serious enough to cause possible injury to the cable, a section of armor should be removed and replaced with a sleeve. In the case of wire armor, the armor should be replaced, bound with wire, and soldered. The binding wires should be of a metal similar to that of the armor. If the wire armor is broken, it can be repaired in a similar manner. After the link has cooled it should be painted with a heavy coat of insulating compound to reduce any possible dissimilar metal corrosion. Sometimes a protective jacket such as rubber, thermoplastic, or braid is placed over the armor for protection against corrosion. Should these jackets become damaged, the damaged area can be repaired by wrapping with thermoplastic tape or self-vulcanizing tape.
Other cable component repairs
Potheads and terminations should be checked along with any cable fireproofing. The insulators should be kept clean, and bodies of the compound-filled terminations, such as potheads, should be checked for leaks. A leak will usually be indicated by oozing out of the compound. In such instances, the leak should be repaired and the pothead refilled. A power factor test of the termination and cable will give some indication of the condition of the termination so far as electrical leakage and losses are concerned. Where cables of more than one circuit is passing through the structures, any fire proofing material around the cable sheath should be maintained to prevent damage from adjacent cables.
6.8 Installation aspects for cables and joints
Underground cables may be installed in conduit, in duct banks, or by direct burial in the earth; submarine cables are usually submerged directly in the water and lie on the bed of the waterway. The terminal ends of both underground and submarine cables are often above ground. However, the joints normally lie along the route and joints could be provided either due to failure of insulation or due to interconnection of long lengths of cables limited by the drum size. When joints are made below ground levels, care should be taken to ensure that the area is properly isolated from future growth and is identified with clear marking. Since the joints are the most vulnerable parts for failures, proper mechanical protection is warranted at termination areas. These are some times achieved by using termination boxes also.
Although it may look easy enough to install several cables in one conduit and mechanically easy to withdraw them, the removal usually ruins the cable. Cables become impacted in a conduit, and, when one is drawn out, the sheath may be stripped either from the withdrawn cable or from one of the other cables; such kinds of stripping can also occur during installations. Therefore, proper care needs to be taken while laying the cables in conduits, since providing joint for a cable failed inside a conduit may not be feasible and it may be necessary to replace the entire length of the cable. It is also necessary to ensure that the direct burial cables and joints being replaced must be installed below the frost line.
Because underground cables cannot be visually traced between structure access points, it is important that they be marked at all points at which they are accessible. Any such cables should be identified by plastic or corrosion-resistant tags wherever they can be worked on and wherever they can possibly be mistaken for another cable. Identification tags should preferably be located at terminations and at least in every structure. Tags need to be inspected regularly; if tags become missing or illegible, they should be replaced as part of the maintenance program.
6.9 Safety issues and access for repairs
Cable repair safety
Due to the compact spacing of conductors and nearness to any grounded sheaths, it is prohibitive to work on energized conductors, even at low voltages. A voltage detection tester should be used to ensure that the cable is not energized. Materials such as a lead sheath, which will act as a shield, must not be between the tester and the conductors of the circuit being tested. To prevent a de-energized circuit from being energized while it is being worked on, good safety practice requires that the disconnecting means at each end be tagged and locked in the open position and ground clamps applied. Cable repair will involve working with other cables which may or may not be energized; it also involves ensuring that the grounds and bonds essential for safe operation are in good condition; furthermore, in some cases, cable repairs deal with hazardous substances.
Repair work on electric cables should be undertaken unenergized. However, other cables in the manhole may be energized and inspections will usually be carried out with cables energized. Moving cables while energized should be restricted to low-voltage cables in good condition and with adequate bending radii. When the condition of any insulation is questionable, or cables are installed to their permissible bending radius limits, a small change in radius to an energized cable could cause a fault. Inspection and maintenance of cable grounds are as important as the inspection and maintenance of cables, both for safety and for corrosion mitigation. Ground rods should also be inspected.
The major cause of electric failure is the breakdown of insulation. Even under normal conditions, an electrical cable experiences stress that will gradually weaken it, leading to failure. Cable tests provide data which permits the anticipation of cable failures. An understanding of items which can accelerate insulation deterioration should be necessary in determining inspection and testing intervals
Manhole Inspections
Subsurface structures such as manholes, hand-holes, equipment vaults, and splicing boxes are subject to accumulation of dangerous gases that may be combustible and/or explosive, toxic, or deficient in oxygen. Before entering any manhole or vault, it must be checked for these conditions. Combustible gases may be detected by means of a test instrument or safety lamp. When using this equipment, the precautions and instructions provided by the manufacturer should be followed. If combustible gases are discovered, it will be necessary to ventilate the manhole or vault before any work is undertaken. If these tests indicate the presence of an explosive mixture in the structure, an injection of carbon dioxide (CO2) into the structure may be performed, before ventilating, to reduce the possibility of an explosion. Ventilation is best provided by a power-driven portable ventilating blower. Before the structure is purged with a blower, or CO2 is injected into it, personnel in connecting structures should be warned, as the gas may be blown through the ducts into connecting structures. If CO2 is used, the structure must be purged with fresh air before it is entered by personnel. A calorimetric indicating gel tube is available to test for toxics. It is used by breaking the seals of the tubes and aspirating gas to it from the atmosphere to be tested. Chemicals within the tube change color when carbon monoxide is present. By comparing the change in color with the color chart furnished, the concentration can be determined. Tests of this type can be carried out in less than one minute.
Even when tests indicate there are no combustible or toxic gases, it is good practice to force-ventilate a manhole or vault whenever personnel are in it. This is especially important if cable splicing is being performed.
Open structures should never be left unguarded. A barricade should be placed around the structure opening prior to removing the structure cover.
Portable ladders used for access to manholes or vaults should be checked before use to ensure that they are firmly placed and will not wobble or tilt.
Frequency of underground system inspections
The frequency of inspection is largely determined by the importance of the equipment or facility it serves or contains. Inspections can vary in frequency from 6 months to 5 years, but a 2-year cycle of inspection is recommended. Records should be kept of each inspection.
Inspect structures and check their cleanliness and physical condition, such as cracking of walls, roofs, or floor slabs, spalling of concrete, and the condition of frames and covers. Inspect for corrosion of pulling eyes, driven grounds and other miscellaneous fixtures such as cable racks, arms, and insulators.
It is preferable to have a walk-through survey along the route of underground direct-burial cable circuits to inspect for changed conditions. Changes in grade caused by washouts can expose cables to damaging conditions. Adjacent new construction should be closely monitored. Examine connections to equipment terminals or cable terminations, whether in the structure or above ground. Check inside structures for the condition of duct entrances, fireproofing, splices, cable tags, and ground connections to cable shielding and sheathes. Anchors for submarine cables should be inspected occasionally to be sure they are in good condition and functioning as intended. Look for signs of traction on cable terminations or direct-burial cable which may be a result of expansion and contraction of the cable. Check mountings and supports to ensure their security. Remove rust and corrosion and clean and repaint supports with corrosion-resistant paint. End bells are usually used to prevent cable damage at duct entrances. If they were not installed, or are damaged, strips of hard rubber or similar material should be used to protect the cable at the duct entrance. Cable insulation integrity cannot be visually checked; it requires some type of insulation testing to determine whether the cable is reaching an insulation breakdown that will lead to a cable fault. Inspection alone may reveal the location of a cable fault or it may be a more complicated process requiring test equipment.
Maintenance and repair of structures is a continuous procedure but is seldom extensive. Pump out structures as necessary to allow complete inspection. Major breaks or settlement of structures causing large cracks require investigation of the structural condition and rebuilding to eliminate the cause. will bond against sound concrete. The hole can then be patched with calcium-chloride, putty or quick-setting cement mortar. Grout up chipped concrete at the mouth of the duct line as necessary. Heavily loaded cables will crawl because of expansion and contraction, which results from the alternate heating and cooling effects of changing loads. The mouth of the duct line must be kept clean and free of burrs and small patches of concrete that will damage cables.
If water is entering through the floor of the structure, clean the floor and remove accumulated silt. If the floor is generally sound except for the joints at the wall or for isolated cracks, repairs can usually be made as discussed above. Most structure repair requirements consist of stopping water leaks in the floor and walls of frequently entered structures. Depending on the terrain, the pumping of one structure may involve the removal of water from adjacent structures. In applicable locations, all vacant ducts should be plugged with standard duct plugs, and all occupied ducts should be sealed so as to prevent water or gas from entering vaults or any users’ premises. Water leakage through the walls of the structure will usually occur along joints or void areas. Some leakage may be found where the ducts enter the structure. Using a cold chisel and hammer, chip out the porous area so that the patch will bond against sound concrete. The hole can then be patched with calcium-chloride putty or quick-setting cement mortar.
6.10 Summary
A termination kit normally comes with many accessories along with the main termination kit; it is necessary to ensure that all these accessories are available in the correct quantities so that the termination can be completed in a complete and satisfactory manner. There are many polymer-made accessories that are used in the MV cable terminations and joints. Creepage extension sheds provide additional creepage distance in coastal and polluted areas. Anti-tracking cable breakouts made from cross linked polymer products are available for different sizes of MV cable sizes and are used as an integral part of outdoor termination to improve the reliability of the termination. Stress control tubes are used in MV terminations up to 36kV to provide higher permittivity. They also offer good mechanical protection and sealing of the joints,
The shelf life is generally not a major issue in case of joints and terminations. However, adequate care should be taken by storing them in proper packing under dry storage conditions as moisture could be the main cause affecting the life of the joint components. While planning prefabricated kits, it is necessary to ensure that the cable diameters and properties are matched. It is also necessary to ensure ambient temperature conditions are well compensated in the production facility and testing.
Manufacturers guidelines for preparation of cables and sequence of steps for different types of terminations and joints must be strictly followed. Temporary as well as permanent repairs and water proofing can be achieved by using self amalgamating tapes for different applications: covering insulation tapes, semi conducting tapes, sealing putties and stress control products. These provide quick and effective solutions in many cable installations/terminations.
Continuity of grounding and bonding is essential to ensure a safe termination and joint. It is also necessary to provide proper corrosion resistant identification tags that can help in preventing damage at the joints and also can help in the quick identification of the vulnerable parts along underground cable routes. Proper sealing of ducts to prevent fire escalation and ensuring prevention of chemical and galvanic corrosion, are some of the methods needed to ensure a healthy termination. There are various aspects of identifying and completing cable repairs. Periodic inspection is necessary to ensure that the life of the terminations is extended.
7
Cable Termination to Equipment
In this chapter, we will discuss the features and issues of termination to HV equipment, such as switchgear, outdoor transformers, motors, etc., as well as covering indoor, outdoor and GIS installations.
Learning objectives
- Basics of equipment terminations
- Terminations to indoor switchgear
- Need for coordination with manufacturer of switchgear
- Issues arising from multiple terminations: Design of switchgear terminals
- Terminations to electrical machines
- Termination of outdoor HV installations
- Terminations to GIS installations
- Importance of correct orientation of terminations
7.1 Basics of equipment terminations
We have discussed joints and terminations in the earlier chapters. Terminations are basically used for connection of either end of a cable to the terminals of sending and receiving end equipment. Cable terminations are undertaken using the appropriate cable termination accessories. The design of a termination depends upon the type of cable used, the location of use (indoor/outdoor), and the system voltage (among other factors). Terminations must ensure adequate contact between the cable and the equipment to which it connects, so that no localized heating occurs; this would cause gradual deterioration of the insulating components and could lead to a failure. The cable terminal lugs must also be connected to the conductors using approved techniques, as discussed in the earlier chapters; this, again, is to avoid overheating. Possible occurrence of galvanic corrosion must be considered and preventive methods adopted. Termination design must prevent electrical discharges between exposed leads of the cables, which in turn can erode the insulating parts of the termination and can result in gradual failure. Cable termination is a critical component in an electrical system. A poor quality termination can give rise to short circuit faults and result in severe damage to equipment, apart from posing a safety hazard to operating and maintenance personnel. The important thing to remember is that equipment terminal design and cable termination arrangement are interdependent and therefore must not be considered in isolation.
Equipment designs are normally provided with the following to enable termination of cables, whether indoor or outdoor.
- Entrance housing with system ground provisions
- Base plate
- Clamping ring
- Stress cone
- Epoxy insulator
- Cap plate
- Corona shield
- Threaded hood
- Threaded connector
- Connection per IEC 859
Equipment terminations may be broadly classified into two categories:
- Indoor termination
- Outdoor termination
7.2 Termination to indoor switchgear
HV and EHV cable terminations are basically designed for direct installation into indoor (air insulated) switchgear panel, power transformer (air insulated or oil-filled cable box) and gas-insulated switchgear (GIS) terminals. Cable cross-sections up to 2500 mm2 are applicable depending on the power being handled; although in most of the cases, the sizes are limited to less than 1000 mm². A typical GIS bay line up in figure 7.1 shows the ends where cables are to be terminated. This would require a clear barrier between the switchgear terminals which will be in SF6 atmosphere and the incoming cable coming in open atmosphere from outside.
A typical termination to indoor switchgear
The base plate provided in most of the cable termination chambers separates the cable and the internal part of the termination end. The cable armor and screen are separated before the base plate and the termination end is mechanically connected to the equipment end. The termination is expected to provide the same kind of reliability a switchgear panel is expected to provide. The termination is designed taking into consideration the following:
- Continuous operation at a High voltage
- Pressure-tight resin housing to protect from external factors
- Silicone oil filling in case of oil filled termination
- Prefabricated and tested Silicone rubber cone
- Should be corrosion-resistant
- Should meet the HV tests to match the cable and equipment operating voltage
- Matching of termination pad to get maximum contact area
- Torque-controlled conductor connectors at the equipment end
The key components/parts of a typical HV equipment termination are illustrated in figure 7.2:

Components of a switchgear termination
Epoxy-resin insulator with embedded electrode forms the gas pressure-tight interface at GIS cable termination and the oil pressure-tight interface at the transformer cable boxes. The cable outer serving is adapted through a gland system, which addresses the individual shielding, armoring and the sealant by heat-shrinking. The base plate including sealing gaskets provides the interface fit between the resin housing and cable entry. A torque-controlled shear-off bolt connector fits the cable conductor assuring the sealing to the top assembly without using special installation tools. Heat-shrinkable polymeric tubing containing oil resistant sealant encapsulates the connector barrel and the polymeric insulation transition. Silicone rubber stress cone provides the electrical field control and can easily be shaped by hand owing to its excellent elasticity. The interface between stress cone, cable insulation and inner resin-housing is filled with Silicone oil. Filling and release studs are available at the base plate and the top bolt assembly. For top-down or horizontal installations, an oil extension vessel can also be provided if needed. The same concept applies to a transformer cable entry, where a corona shield is added to the top upper resin-housing electrode.
Table 7.1 indicates the various parameters specified for a HV termination kit:
Parameters of a EHV switchgear cable termination (Courtesy: Tyco Electronics)
| Dimensions | ||||
| Max.voltage | kV | 123 | 145 | 170 |
| Base impulse level | kV | 550 | 650 | 750 |
| Cantilever force | N | 6500 | 6500 | 6500 |
| Creepage distance | mm | 650 | 650 | 650 |
| Oil volume | 1 | 12 | 12 | 12 |
| Weight | kg | 92 | 92 | 92 |
| Conductor size | mm2 (Cu/Al) | …1600 | ||
| Max. outer diameter of the insulation screen | mm | ?101 |
While most of the features are directly related to the components going into the termination, the last two points also depend on the switchgear end terminals; this requires proper coordination between the cable supplier and the switchgear manufacturer. We will review some of the major issues which need to be taken into consideration for this purpose.
Coordination with Switchgear manufacturer
It is invariably common that a cable manufacturer/supplier and switchgear manufacturer are different for a project as each of these items is likely to be ordered at different phases of the project. At times, it may be replacing a cable to existing switchgear. In all cases, it is normally the responsibility of a designer, interacting with the switchgear supplier/user and the cable supplier, to match the switchgear terminals with the cable to be ordered or vice versa. These efforts relate more to the technical issues which may involve one or more of the following:
- The cable selected for a particular application may be a single conductor cable or a multi conductor cable. It is necessary to have a non-magnetic base plate for single core cable terminations to minimize the eddy current losses. The switchgear manufacturer should be advised on the same to ensure longer life for the termination.
- The next important issue is the size of the cable. The switchgear manufacturer needs to be aware of the cable size to be terminated to a panel, so that he can provide the necessary space/clearance in the cable box for termination of large size cables. It is also essential that sufficient bending radius for the cable is provided inside the cable box with proper supports, in order to avoid or minimize the mechanical stress on the termination.
- It is also possible that the cables used may be with either aluminum conductor or copper conductor. In such cases the manufacturer should take preventive steps to avoid galvanic corrosion at the termination end.
- The switchgear protection may include sensitive ground fault/earth leakage protection using window type core balance current transformers (CBCT). These CTs are provided by the switchgear manufacturer and they have openings at the centre through which the cables enter before termination. The switchgear supplier needs to be informed about the diameter of the cable in order to obtain the window size matching the cable.
- Sometimes the exact size of the cables to be terminated may not be known and in such cases the manufacturer should be advised about the type of cable proposed to be used (PVC/XLPE/PILC, armored/unarmored, conductor used, etc.) so that the switchgear manufacturer takes note of the provisions needed based on past experiences.
- Terminating multiple cables to the termination pads of switchgear can be particularly tricky. The following aspects need attention:
- Adequate space must be available in the cable chamber to accommodate the required number of cables
- Terminal extenders must be provided so that the terminations do not get bunched too close
- Cables must be clamped so that they do not transfer their weight to these extended terminals
- Also, adequate electrical clearance must be available between different phase leads of any two cables
- It is also a practice that switchgear is supplied with cable lugs or bolted connectors for cable termination so that the cables are crimped and terminated with minimum time spent in the field. In such cases, the matching of cable sizes to the switchgear ends is all the more necessary, as otherwise the purpose of providing lugs could be defeated.
Design of Switchgear Terminals
The switchgear terminals by most of the manufacturers are standardized and are normally of a rectangular pad to which the cables are to be terminated. A typical end arrangement inside switchgear is illustrated in figure 7.3:
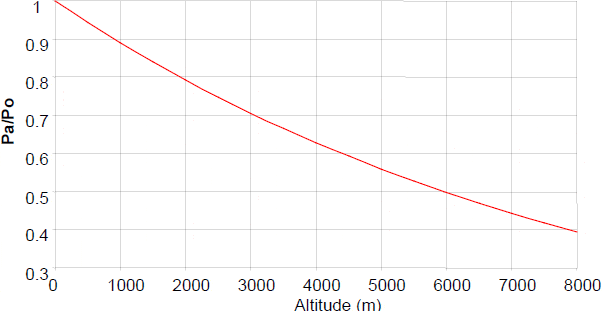
MV Switchgear Cable termination end
The switchgear terminals consist of three sets of terminals (S. No 4 in the figure) – one set per phase, to which the cable conductors are to be terminated. The terminals are normally extended from the breaker phase end of the switchgear. The three phase terminals are provided with sufficient clearances (phase to phase and phase to ground) and are disposed at equal intervals with the clearances depending on the separating medium and the system voltage. The clearances shall be maintained for the maximum operating voltage as per standards, even after the cable terminations to avoid flashovers and failures. For the purpose of cable termination, each of the terminals is designed to be identical and their design/orientation depends upon the following main factors:
- Whether the cables enter at bottom or at top
- The number of conductors to be terminated per phase
- The conductor material
- The clearance needed from the switchgear cable entry point to the switchgear termination end to provide the needed bending radii for the cables
Out of the above, the number of cables to be terminated has more influence on the terminal end design and also the depth of the cable chamber. Following are some of the issues to be taken note of during manufacturing stage, where multiple cables are to be terminated:
- A larger depth is needed where multiple cables are to be terminated inside a cable chamber. This is to provide sufficient space so that the jointer can do his work in a satisfactory manner, ensuring that the safety clearances are not compromised.
- Except where cables are pushed or bolted to a connector, the cable is mostly terminated to a lug, crimped with the conductor and this crimped lug with the conductor is bolted to the switchgear terminal pad. The terminal pad is normally a 90 degree vertical part and positioning the lug exactly in parallel to the terminal pad is the basic requirement. When multiple cables are terminated to a single terminal, ensuring full contact of both the lugs to each other and the terminal pad is very difficult. It usually introduces an air gap between the lugs and the pad with non-uniform contact between their surfaces. Therefore, it is normally not desirable to terminate more than one lug to a terminal, with the exception of maximum two in back to back arrangement.
- The switchgear manufacturer needs to be aware of the number of cables to be terminated to the terminals, so that suitable parallel extensions can be given to terminate one cable per pad and avoid multiple terminations to a single pad.
- In case more than one cable is terminated to a terminal, it also introduces stress on the bus bar due to the pulling weight of the cable. Unless proper supports are given, this could lead to failure/short circuits inside the cable chamber. Therefore, the switchgear manufacturer may be asked to provide additional support to take care of such problems.
- As a standard practice, some manufacturers provide pre-drilled plates to bring in maximum three single core cables per phase inside a cable chamber of a standard width. However, the bus bars are not extended to terminate three conductors per phase unless specifically asked for, because of the involvement of additional material and work at the factory. A proper instruction is needed to ensure such provisions.
- In the above case, if the number of cables per phase is more than three, then the switchgear supplier needs to increase the depth to accommodate the extra cables. This will in turn affect the building size to keep the minimum clearance behind the switchgear. The designer should take care of this same issue.
In all the above cases, a proper coordination between the substation designer (not the cable manufacturer) and the switchgear manufacturer is the only way to ensure that the switchgear terminals and the cable chamber depth are provided suitably to match the cable size and the number of cables to be terminated.
7.3 Termination to electrical machines
Unlike other equipments which can be located away from classified areas, in the case of machines it is necessary to check whether the machine is located in a classified (hazardous) area or a safe area so that the termination method is suitably adopted. The cable boxes are normally standardized in explosion proof machines and any change to the cable box design will violate the certification provided by the approved agency. Therefore, care must be taken to match the cable size to minimize the cost of certification and delivery of new type. Here again the ANSI and IEC designs are quite different and the user should be aware of the termination requirements. In the ANSI design, a conduit arrangement is normally provided; whereas in the IEC design, an increased safety (ex-e) design is accepted to terminate the cable.
The MV machines are located in the field away from the switchgear/starter and the cables are routed from the substation to the machine buried underground or over trays above ground. Most of these machines are located outdoor and the cable entries to the terminal boxes in MV machines are from the bottom. A machine is normally provided with a conduit or a gland plate at the bottom of the cable box to bring in the cable. Figure 7.4 shows the indoor XLPE cable termination in an electrical machine using heat shrinkable sleeves sealing the cable ends with lugs (barrels) to terminate to the terminal pad inside the motor terminal box.
MV Indoor heat shrinkable type cable end termination at motor/ switchgear end
The cable terminations for the machines should take care of all basic design features that are demanded in a switchgear termination; for example, as a minimum:
- The number of cables
- Single or multi core
- Size and material of the conductor
- Minimum space for bending the cable inside.
- Phase to phase and phase to ground clearances
One of the main differences for a termination in an electrical machine is that the machine will be rotating during operation, unlike stationary switchgear. This fundamental requirement imposes the chances of vibrations transferred to the cable box and the cable termination kit in the case of machines. Hence, the termination at a machine end should isolate the vibrations being carried to the terminals when the machine is in service to ensure that the termination life is not affected. It is also a good practice to cover the terminal ends of the motor with proper insulation tapes rated for the operating voltages once the cable joint is connected to the terminal pad, to minimize the chances of abrasion and flashovers within the cable box.
The other issue with the HV end terminals is the possibility of overheating and partial discharges. Hence, it is quite usual to take thermal signatures and partial discharge measurements in the HV machine ends. Partial discharge analysis also detects other similar phenomena such as surface tracking, corona and arcing. Here are examples of some of the problems that are possible:
- Surface tracking (for example, surface contamination showing up ‘treeing’)
- Partial discharge between the HV conductor and insulation (say, in the gap between bus and insulation)
- Arcing and sparking (A conductor under floating potential in a defective/faulty cable termination)
- Corona (Visible surface discharge or discharge from a sharp electrode into air or the air gap to be found in corona that lies between MV bus and the support window that leads to the deterioration of insulation)
If the partial discharge process is not suppressed, it can develop into a full-scale insulation failure, followed by arcing and complete failure of the termination. Corrective measures can be taken if insulation degradation is detected on time. Predictive maintenance or measures taken to modify operational conditions or environmental conditions to stop the destructive process and prevention of failure can be considered. In rotating machines (motors and generators), the situation is more complex.
7.4 Termination of outdoor HV installation
Generally, transformer and GIS outdoor bushings are terminated with overhead conductors; however, it is also a practice to have cables connecting such outdoor equipment in open areas. The termination of HV conductors in an outdoor area is influenced by environmental factors in addition to all the other standard issues, such as the clearances and operating voltage that are considered in any termination.
Standard components of outdoor terminations
Outdoor terminations are provided with the following components:
- Porcelain insulator
- Aluminum cap plate
- Stress control device
- Dielectric fluid
- Tin plated, aluminum or un-plated copper crimp type connector
- Threaded hood
- Aluminum corona sheet
- Aluminum entrance housing and heat shrink jacket seal
- Vertical mounting or tilted 45º from vertical
Figure 7.5 shows a typical outdoor termination with system voltages 72.5–245 kV for extruded dielectric cables of conductor sizes up to 2000 mm2, identifying its various components:

Standard components of the outdoor termination
Figure 7.6 examines the typical arrangement of heat shrinkable finished cable joint with protective shields.
Features of outdoor equipment terminations
Following are some of the main features that are relevant in an outdoor termination:
- The cores of all cables terminated outdoors should be completely covered with a shrunk-on protective layer against surface tracking, ultraviolet radiation and weathering
- Outdoor terminations should be designed to prevent flashover under wet or contaminated conditions. This is generally achieved with shrunk-on insulating spacers and rain shields
- Use of heat-shrinkable materials
- The electrical continuity of all the conductors, screens and armoring should not be impaired by the joints and earth continuity should be accomplished within/through the joint, i.e. an external earth continuity conductor that will be subject to corrosion, is not acceptable
- A watertight sheath should be used to prevent corrosion
- The joints need to withstand/pass the same electrical insulation test as applicable for the outer sheath of the cable
- Only inverted type boxes are used for outdoor termination. The insulators of inverted type boxes are angled downwards
- The boxes must be equipped with armor clamps, brass or gunmetal conical wiping glands for termination
- Cable boxes should be suitable for filling with bituminous, cold filling compound or resin oil semi-fluid compound
- The cable boxes for resin oil semi-fluid compound must be equipped with a sight glass for compound level indication
7.5 Terminations to GIS installation
Components
The standard components of a GIS termination are listed below:
- Epoxy insulator with built-in cable shield break
- Stress control device
- Dielectric fluid
- Retained ‘O’ ring seals on top and bottom
- Silver plated, copper or aluminum crimp-type connector
- Silver plated connection interface
- Aluminum base plate
- Aluminum clamping ring, aluminum entrance housing and heat shrink jacket seal
- Vertical mounting or tilted up to 45° from vertical
The Gas Insulated Switchgear (GIS) is normally used for high voltage applications where one end is to be joined with an oil filled transformer. The transformer cable boxes are generally the oil filled type in higher voltages above 33kV. It is now almost standard to use XLPE cables for high voltage applications. For direct-coupling type termination, a dry type using a compound prefabricated insulation structure is generally applied for 66-154 kV XLPE cables and a oil-immersed type insulation system using silicone insulation oil is applied for the 275-kV XLPE cables. Standard components of GIS termination for 72.5–245 kV (69–230 kV) extruded dielectric cables of size 127–2000 mm2 (250–4000 kcmil) are shown in figure 7.7:
Standard components of GIS termination
The oil-immersed type termination must have an oil pressure compensator equipped as ancillary facilities. The cable termination consists of an epoxy insulator standing on a base made of an aluminum casting. The field-controlling component is a stress cone made of rubber. The insulator is filled with synthetic insulating oil. A flange for insulated mounting is integrated in the epoxy insulator and a pressure ring is also included. A choice has to be made between a screw or a welding top bolt. Figure 7.8 shows the typical GIS termination and the internal parts (Courtesy: ABB kabledon). This termination is used for fixed connection in Gas Insulated Switchgear (GIS) and transformer outdoor bushing, or in the cable box filled with transformer oil; it is comprised of the following parts:
- Top fitting is usually silver-plated brass
- Top bolt/conductor connection with screw or alternatively press technique or weld made of aluminum or tinned-plated copper
- Epoxy insulator
- Filling Compound with Polybutene oil approximate volume 10 liters with expansion vessel included having a minimum dielectric strength of 50 kV at 2.5 mm gap
- EPDM rubber stress relief cone pre-molded type
- Stainless steel pressure ring
- Aluminum alloy flange
- Aluminum alloy body with earthing clamp made of nickel-plated brass and clamped with stainless steel bolts
- Aluminum alloy cable clamp
GIS installation components (Courtesy: ABB kabeldon)
7.6 Importance of correct orientation of terminations
Correct orientation of the terminations is important in cable terminations similar to bus ducts. Normally cables are laid underground or on overhead trays from one end to another with respective phase terminals terminated at either ends. While single core cables do not pose any issues, three core cables may have their orientations interchanged as the cables take different directions and the cable laying personnel are unaware of the internal conductor orientation while taking up the insulation. To ensure long term performance of medium voltage terminations, certain separation distances are required between phases and also between the top of the stress tube to the termination lug. Usual distances between phases start from about 15 mm for low voltage and can go up to 50 mm as the operating voltage increases. Similarly, the recommended distance from the top of the stress tub to the lug would be less than 50 mm for low voltages but the requirement is above 200 mm for higher voltages. Nevertheless, the termination kit manufacturers supply standard lengths of the tubes; it is the skill of the jointer that ensures that the kit components are used in an optimum manner.
Figure 7.4 on an earlier page illustrated the preferred arrangement of the termination at the equipment end. However, due to change in orientation of cable conductors at one end in relation to the other end, sometimes it may be necessary to have the stress cones and sleeves crossing the phases as per figure 7.9 for connection to the respective phases. In such cases, the available components should be judiciously used to achieve the minimum clearances. The bends should also be made smoother as per this figure to avoid premature failures of the termination. The additional efforts required can be avoided if the orientations are maintained, wherever possible. Core crossing may result in discharge if cores are too close to each other in an unscreened area at the core cross point. Electrical air breakdowns can occur at about 4 kV on an 11 kV cable, 6 kV on a 24 kV cable and 9 kV on a 36 kV cable. The anti-track shrink material will begin to erode due to the ionization of the air under such conditions and over time may cause failure of the termination.
Cable termination to match phase orientation
7.7 Summary
The equipment terminations can be indoor or outdoor depending upon the application. The components for indoor and outdoor terminations are almost standard, with some marginal extra features such as shield, etc. for outdoor types. Coordination with the switchgear manufacturer from early stages of a project is vital to minimize the issues of mismatch and other problems that could be encountered in the field. The cable chambers need to be adequately sized to enable multiple cable terminations when needed. In regard to rotating machines, all features relevant for indoor termination need to be adopted. In addition, care should be taken to minimize vibrations affecting the termination end.
It is necessary to maintain minimum clearances as per standards between phases while the cable joint is made. The cable terminator needs to be aware of all such requirements to ensure that the termination is free from undue stresses so that a longer life is obtained.
8
Standards and Testing
In this chapter we will review the currently available international and national standards of HV cables, cable terminations and accessories generally followed by manufacturers and users. We will learn about the routine and type tests required, their limitations on inference from the observed results, etc., We will also discuss the general outline of training and certification courses offered by some institutions for operating personnel to execute field terminations and joints.
Learning objectives
- International/National standards
- Type tests
- Routine tests
- Field Tests
- Limitations
- Training and Certification
8.1 International/National standards
In the course of the continuous opening up of markets for international competition, standardization is absolutely essential not only for defining the limits of the function and properties of products and services, but also for specifying the requirements to be met by such products and services in terms of safety, reliability and life expectancy; this will ensure a state of the art product for a particular application. In addition, the standards need to define a minimum measure of compatibility among similar products of different manufacturers with each product module broken up into components; hence, a module manufactured by different suppliers can be combined with one another or replace one another with minimum difficulty, to provide the same expected service.
In principle, this also applies to standardization for power cables and their accessories. Cables and cable accessories provide the vital connections between substations, transformers and end users, and are expected to provide reliable service for many years. However, the range of characteristics that are stipulated which are to be met by the manufacturers of cables and cable accessories varies considerably between the low voltage field on the one hand and the high-voltage and extra high-voltage field on the other:
- For low voltage and medium voltage cables, the various standards stipulate both the profile of characteristics in the form of binding test requirement and the design and dimension. The minimum thickness of the insulating wall is a prerequisite for the greatest degree of compatibility. This means that cables and accessories of the same type but from different suppliers can be used together in any combination as long as they all comply with these standards. In most cases the end users themselves take on the laying of the cables, installation of accessories and commissioning of the system.
- In the case of high-voltage and extra high-voltage cables, on the other hand, complete systems are generally contracted to individual suppliers, who tailor them and optimize them to match the specific customer requirements. The supplier alone is generally responsible for laying, installing and commissioning (system business). Standards apply to these practical operations to the extent that they only specify the test requirements for cables, accessories and systems but not other parameters like their dimensions, etc.,.
8.2 Standards for high-voltage and extra high-voltage cables
IEC 62067 is the applicable standard for extra/ultra high voltage (EHV or UHV) cables of extruded insulation material rated 170 kV and above. This standard was first introduced in 2001 and has been widely adopted by all manufacturers and utilities around the world. A special feature of this standard is the differentiation between the type test sequence and a pre-qualification test. The type test sequence applies to the cable and individual accessories, while the pre-qualification test is intended to test the long-term behavior of the system when installed in normal conditions: buried in the ground and/or in a cable gallery.
For oil-filled cables and accessories of EHV applications, other standards such as IEC 60141 are applicable. Oil-filled cables are used less often today. Repairs or extensions of old oil-filled cable systems are made with new XLPE insulated cables which necessitate special transition joints to separate the oil from the oil-sensitive XLPE.
IEC 60840 is the standard that applies to the voltage class between 36 kV and 170 kV. Cable and accessories in this voltage class are very popular nowadays. The standard includes a regular type test sequence for cables and a separate sequence for the cable accessories. The test sequence for the combination of cable and accessories in this standard is not as integrated as it is in IEC 62067 for Ultra high voltage cables.
On both the European and national levels there are just four standards corresponding to the cables of conventional design used today in high voltage and extra high-voltage systems: low-pressure oil-filled cable, internal and external gas-pressure cable and polymer insulated cable. On an international level, these are supplemented by an additional specification for high-pressure oil filled cables which are less commonly used in Europe now. All the standards apply to both cables and accessories (for polymer-insulated cable some of the specifications are still in preparation) and in accordance with the details in the preceding section, they specify only the test requirements. Table 8.1 highlights the most commonly applied IEC standards for various categories as noted:
Titles of IEC publication for high-voltage and extra high-voltage cables and accessories
| IEC Publ. no. | Title |
| 60141 | Test on oil-filled and gas-pressure cables and accessories |
| 60141-1 (1993) | Part 1: Oil-filled, paper insulated, metal-sheathed cables and accessories for alternating voltage up to and including 400kV. Amendment 1(1995) |
| 60141-2 (1963) | Part 2: Internal gas-pressure cables and accessories for alternating voltage up to 275kV. Amendment No.1 (1967) |
| 60141-3 (1963) | Part 3: External gas-pressure (gas compression) cables and accessories for alternating voltage up to 275kV. Amendment No.1(1967) |
| 60141-4 (1980) | Part 4: Oil-impregnated paper-insulated high-pressure oil-filled pipe type cables and accessories for alternating voltage up to and including 400kV. Amendment No.1 (1990) |
| 60840(1988) | Test for power cables with extruded insulation for rated voltage above 30kV (Um=36 kV) up to 150kV (Um=170kV). Amendment 2(1993) |
| 62067 (2001) | Test for power cables with extruded insulation for rated voltage above 150kV (Um=170 kV |
Apart from the regulations listed here (which are formulated specifically for high-voltage and extra high-voltage cables and their accessories, when they are applied), a large number of other specifications come into play (reference standards) which are referred to in detail in the individual regulations listed above. They concern, for example, the waveforms of the voltages that are to be used for various tests, the precision of measuring instruments, parameters for analyzing test results etc. However, it is beyond the scope of this manual to attempt to list all the reference standards.
Nevertheless, there are some other European standards that also cover important requirements of EHV cables and accessories, such as the recommendations produced on behalf of the Cigré study Committee SC 21 (175, 178) as well as the French national standard C33-253 (193). The test recommendations of Cigré SC-21, with the collaboration of many experts from around the world, have produced a scientific basis on which, from now on, the various standardization organizations can draw up regulations that may still be needed. At the same time, this research equips operators to formulate sensible requirements for technically meaningful pre-qualification tests on polymer-insulated extra high-voltage cables. The French standard C33-253 is noteworthy because of the fact that it has already integrated a pre-qualification test similar to that described as a fixed and compulsory part of the regulations and thus applies to all suppliers. This standard also differs from the international and European regulations for high-voltage cable described above, in that it indirectly stipulates certain constructional requirements concerning the thickness of the insulating wall by specifying compulsory maximum field strengths at the inner and outer conductive layers of the polymer dielectric. Therefore, a little more time and extensive harmonization work is required before the International cable market becomes a truly common market, with uniform norms and standards.
The Australian standards which are applicable for cable installations include:
- Australian/New Zealand Wiring Rules Standard – AS/NZS 3000 – 2000
- Australian/New Zealand Standard – Electrical installations – Selection of cables – AS/NZS 3008.1.1 : 1998
- Australian Standard AS 3147 – PVC Insulated Electrical Cables and flexible cables for working voltages of up to and including 0.6/1.0 kiloVolt (kV)
- Australian Standard AS 3198 – XLPE Insulated Electrical Cables for working voltages of 0.6/1.0 kV
- Australian Standard AS 1429.1 – Polymeric Insulated Cables for electricity supply at working voltages 1.9/3.3 kV up to and including 19/33 kV.
- AS 1125 Conductors in electric cables and flexible cords
- AS 1531 – Conductors – Bare overhead – Aluminum and aluminum alloy
- AS 1746 – Bare overhead – Hard drawn copper
- AS 3158 – Approval and test specification – Electric cables – Glass fibre insulated – For working voltages up to and including 0.6/1.0 kV
- AS 3178 – Approval and test specification electric cables – Silicone rubber insulated – for working voltages up to and including 0.6/1.0 kV
- AS 3560 – XLPE insulated – Aerial bundled – for working voltages up to and including 0.6/1.0 kV
- AS 3116 – Approval and test specification – Electric cables – Elastomer insulated – For working voltages up to and including 0.6/1.0 kV
- AS 3155 – Approval and test specification – Electric cables – Neutral screened – for working voltages of 0.6/1.0 kV
- AS 3187 – Approval and test specification – Mineral insulated, Metal sheathed cables
8.3 Type tests
Since cable systems are so widely used, it is very important to have a means of evaluating the quality level of each of the system components individually and in combination prior to selection and installation. This can only be accomplished by performing type tests on the cables and the various cable/accessory combinations. The international standards specify the procedures for each of the type tests to be performed. Various standards are applicable to the type testing of cables and cable accessories. The type test sequence specified by each standard includes initial electrical tests, followed by a load cycle test that may last for several days or even weeks. The load cycle test is then followed by electrical tests to determine whether the electrical and mechanical properties of the cable have changed since the initial tests were performed. Cables are then subjected to additional tests to evaluate the non-electrical properties of the conductor, insulation screens, armoring and outer sheath. Type tests are most commonly initiated by cable manufactures and carried out in their own laboratories. However, sometimes they are ordered by customers in connection with large orders to ensure that their products meet the finer specification requirements. Cable manufacturers also take up type tests independently as a basis for a new development or enhancements of their product range. The test criteria are defined directly in relevant standards (IEC, VDE etc). If binding norms for certain voltage classes or system components currently don’t exist, then they are derived sensibly from existing standards (for technically similar equipment).
KEMA is an approved laboratory internationally for conducting type tests of electrical equipments. KEMA has been type testing cables and cable accessories for many years, starting with the earlier oil and paper insulated cables to the present day XLPE materials and composite materials. The experience of KEMA on type test results is a measure of the quality of the finished products from the manufacturers. Though manufacturers claim compliance to all type test requirements as per standards, KEMA’s experience with cable and cable accessory type testing indicates that the number of failures experienced during type testing has not decreased during the last decade. Joints are obviously the most crucial component, but cables and terminations have a similar failure rate. The failure rate is high: nearly 20% of the cables do not pass the international standard, and in spite of the availability of better materials and more experience, the failures during type testing has not decreased in the last decade. Therefore, it must be realized that the termination practices should adopt the highest quality to ensure that the chances of failures during service are kept as low as possible.
Table 8.2 gives a summary of certain type tests on XLPE insulated and paper-insulated high-voltage cables defined in various standards:
Recommended type tests on XLPE insulated and paper-insulated high-voltage cables
| Type Test | Applied to . . . |
| Bending test |
|
| Thermal load cycles under alternating voltage |
|
| Measurement of dissipation factor at max conductor temperature |
|
| Impulse voltage test at 5-100C above max conductor temperature |
|
| Measurement of partial discharge |
|
| Measurement of conductor layer resistance |
|
| Corrosion protection test with impulse voltage and direct voltage |
|
| Test of separating points with impulse voltage and direct voltage |
|
Type tests have a number of features. They are as follows:
- Type tests are designed to gain the most complete picture possible of the electrical, thermal, mechanical and chemical characteristics of the cables and accessories that are relevant to their intended application. Reliable conclusion can then be drawn concerning their dependability and future operation in the power supply network.
- A prerequisite of the tests is that cables and accessories exist in a form ready for installation once their development is complete.
- The tests are carried out on short lengths of cable that are ready for mass production including appropriate accessories where relevant.
- The test objects, possibly following additional visual inspections, which require some parts to be opened and dismantled, are destined for scrapping rather than operational use.
- The mechanical, thermal and electrical stresses can therefore be increased to the point where the aging processes and other irreversible pre-damage occurs in the dielectric.
The tests are conducted in approved HV laboratories having full facilities, witnessed by personnel, fully documented and after a successful outcome, they are certified for records. Figure 8.1 shows a typical setup for the type test on a high-voltage cable with two sealing ends and a joint. The clauses that follow list the typical procedures and features for some of the common type tests.
Layout for type test on a high voltage cable with sealing ends and straight joints
Table 8.3 lists the typical instruments and methods adopted for some of the tests to evaluate the insulation condition of the cables and terminations:
Insulation Evaluation tests
| Test | Company | Instrument | Test Procedure |
| Dielectric spectroscopy | Programma | IDA 200 | To measure capacitance and dielectric loss from 0.0001 to 1000 Hz.(PILC and polymer type) |
| LipA TEST | Powertech Labs | LipATEST | Stepped voltage up to 1 times the rated voltage. Record measurements at each step (Polymeric and PILC) |
| Recovery voltage method | Seba KHT | CD-31 | 1-2kV DC and measure recovery voltage after discharge (PILC cables) |
| Reflection current | Seba KHT | KDA-1 | Apply 1kV DC and measure relaxation current after discharge period (PE and XLPE cables) |
| Tan Delta VLF | Baur | Apply HV AC at 0.01 Hz to 1 HZ and measure dissipation factor. Also measures PD (Polymeric and PILC cables). | |
| 60Hz PD | Imcorp | MV testing service | Energize the cable at 50/60 Hz at up to 3 times rated voltage. Measure and locate PD (Polymeric and PILC cables) |
| Oscillating wave PD | LDIC | CDA PD detection system | Cable is charged and discharged through a capacitance with an oscillating wave near operating voltage and frequency. Record and locate PD (Polymeric and PILC) |
| VLF PD | KEMA Power tests | Power cable diagnostic service | Energize cable at 0.1 HZ close to operating voltage (Polymeric and PILC) |
| VLF PD | Baur | PHG TD/PD | Apply HV AC at 0.01 Hz to 1 HZ (Polymeric and PILC cables) |
Tan delta test
Tan Delta, also called Loss Angle or Dissipation Factor testing, is a diagnostic method of testing cables to determine the quality of the cable insulation. This is undertaken to try to predict the remaining life expectancy in order to prioritize cable replacement. If the insulation of a cable is free from defects, such as water trees, electrical trees, moisture and air pockets, etc., the cable approaches the properties of a perfect capacitor. Figure 6.2 shows a typical representation of a cable with the current measured on applying an AC voltage. The tangent of the angle d is measured. This will indicate the level of resistance in the insulation. By measuring IR/IC, we can determine the quality of the cable insulation. In a perfect cable, the angle would be nearly zero. An increasing angle indicates an increase in the resistive current through the insulation, meaning contamination. The greater the angle, the worse is the cable.
Definition of dissipation factor
Water trees are small tree shaped channels found within the insulation of a cable, caused by the presence of moisture. They are very prevalent in service-aged XLPE and other solid dielectric cables, including PE and EPR cables. These tree shaped moisture channels, in the presence of an electrical field, eventually lead to the inception of partial discharge (PD), which eventually leads to the formation of electrical trees which grow to a point where insulation failure occurs. The tan delta test shows the extent of water tree damage in a cable.
Tan Delta Testing unit
The tan delta testing unit consists of a high voltage divider and a fiber optically linked measurement box. The high voltage divider measures the voltage and current input to the cable, sends this information to the controller, which analyzes the voltage and current waveforms and calculates the tan delta number. What is typically used is a Very Low Frequency (VLF) AC Hipot. The VLF shown in figure 8.3 is a 40 kV (peak) unit that is capable of testing from 1.1 uF of cable load at 0.1 Hz, up to 5.5uF at 0.02 Hz. Other models offer an output frequency of 0.01 Hz, used to test very long cables. VLF hipots are also widely used for testing newly installed and/or repaired cables before re-energizing to insure the cable is sound, and for testing critical cable runs. It is not practical and nearly impossible to test a cable of several thousand feet with a 60 Hz supply; therefore, a low frequency tester is used. At a typical VLF frequency of 0.1Hz, it takes 600 times less power to test the same cable compared to 60 Hz. Furthemore, the magnitude of the tan delta numbers increase as the frequency decreases as per the following formula, making the measurement values large and easily readable/comparable:
Tan Delta in radians = IR / IC = 1/(2pfCR)

Tan delta test equipment and set up
The cable to be tested must be de-energized with each end isolated. Typically, the applied test voltage is raised in steps, with measurements first taken up to normal line to ground operating voltage. If the tan delta numbers indicate good cable insulation, the test voltage is raised up to 1.5 to two times Un. The tan delta numbers at the higher voltages are compared to those at lower voltages and an analysis is made.
Interpretation of results
If a cable’s insulation is perfect, the loss factor (tan delta) will not change as the applied voltage is increased. The capacitance and loss will be similar with 1 kV or 10kV applied to the cable. If the cable has water tree contamination, thus changing the capacitive/resistive nature of the insulation, then the tan delta numbers will be higher at higher voltages. Rather than a flat curve for the loss number versus voltage, the curve will typically be non-linear as shown in figure 8.4:
Typical dissipation factor values of new and old cables
Angle increases with increasing voltages, indicating a high resistive current element to the insulation. These results can be compared to other cables tested to determine which cables or terminations are in need of immediate replacement and which can wait a bit longer. Following are the limitations and considerations to be taken into account while performing this test:
- Much of the testing is carried out on a comparative basis and no established values exist for all cable types, accessories, and varying installation methods. There is no reliable consensus on what are good versus bad values. Splices can exhibit high values of tan delta and last for years, while those showing lower values might fail sooner.
- Since test voltages of up to 2Uo are used, there is a possibility of a cable failing during the few minutes needed to perform the test. This can usually be avoided if tan delta numbers are measured at several steps up to 1Uo and an inspection of the tan delta versus voltage curve is made to ensure there is no abnormal increase.
- It is generally advantageous to test shorter lengths rather than a long cable, because the more the sections the more precise we can be in determining where the cable is good or bad.
- The test may not exactly pin point the fault location. Tan delta value from point A to point B gives an assessment of the insulation quality between the points and a determination can then be made about whether and when to replace the cable. It is not a fault finding tool.
- Since we are measuring the loss angle of an insulating material, it is not advisable to test a cable length that contains more than one type of cable such as XLPE insulation spliced to an EPR or PILC cable. The only way that this is meaningful is when many tests are carried out on the same cable length over a period of time and the results are carefully trended.
- Since we are measuring the loss angle between the conductor and the outer shield, the outer shield must be intact. It is advisable to test the integrity of the concentric neutral before performing the test. If there are large gaps in the neutral, the tan delta numbers will not be as meaningful if there were no gaps.
8.4 Routine tests
The PD measurement, as a routine test for prefabricated HV and EHV cable accessories is the first important step for demonstrating the quality of the electrical long term robustness of high voltage cable accessories. Brugg Kabel AG uses special test equipment to carry out routine testing of all prefabricated stress-cone and slip-on joints to establish freedom from partial discharge. A typical test system for this operation is comprised of a short length of cable which has a water terminator at one end and a closed metal housing on the other for mounting the stress-cone to be tested (Figure 8.5):

Routine test on prefabricated stress-cones
The partial discharge test for slip-on joints is carried out using two short lengths of cable equipped with water terminators at one end of both. The other two ends of the cable are inserted into the slip-on joint and also encased with a metal housing.

Routine test on prefabricated joints
So-called directional coupler sensors (DCS) have proven extremely suitable for carrying out partial discharge measurements as a routine test for prefabricated slip-on joints in unscreened test rooms.
They are also ideal for carrying out tests and monitoring, following installation. In principle, a directional coupler can be understood as a mixed capacitive and inductive PD sensor with two outputs.

Setup and signals of directional coupling
Two directional couplers are mounted to the left and right of the joint adjoining the outer semi-conducting layer of the high voltage cable. An impulse propagating from left to right is coupled at outputs A and C whilst an impulse propagating from right to left is coupled at outputs D and B. This output coupling configuration is typical for external noise or partial discharge of other successive accessories. PD from the joints is coupled at outputs B and C. This method is used to accurately measure and localize PD in joints.
A summary of tests normally conducted on a 420kV XLPE are listed in table 8.4:
Tests conducted for EHV cables
| Type of tests | Acceptance criterion |
| Partial discharge test | Should be 5% or lower at AC 330 kV, after a loading of AC 385 kV for 1 min |
| Tan delta | Should be 0.1% or lower at a conductor temperature of 95~100°C |
| Heat cycle test | Voltage: AC 440 kV Heat cycle: 8hr on/16hr off x 20 cycles Conductor temperature: 95~100°C Should be 5 % or lower at AC 330 kV, after a loading of AC 385 kV for 1 min |
| Impulse voltage withstand test | AC 550 kV x 15 min |
| Long term reliability tests as per CIGRE | AC 375 kV x 1 year Heat cycle: 16hr on/32hr off Conductor temperature: 90±3°C |
| ±1425 kV x 10 repetitions Conductor temperature 95~100°C |
8.5 Field Tests
Some of the minimum field tests to be carried out on MV and HV cable terminations are as below:
- Cable continuity and phase identification check
- DC Hi-pot test
- Insulation resistance test with megger
All primary distribution voltage cables should be given a DC high potential test prior to all permanent connections being made. However, it is not recommended to subject the cables and terminations to more than one high potential test at full value as per acceptance tests defined in International standards, based on the system voltage. Successive tests are normally at reduced voltages: say 75% to 80% of the original value. The test voltage should be applied gradually during the first minute with initial application being not greater than the rated voltage of the cable. The voltage is increased in incremental steps until the value reaches 80% of the manufacturer’s acceptance test voltage level. Then, 80% value must be held for fifteen minutes.
During high potential tests, leakage current readings should be taken at thirty (30) second intervals during the first two minutes of the test and at one (1) minute intervals during the remainder of the 15 minutes. If, after the first minute, the leakage current increases, it may be necessary to stop the test. Further tests will be made after thorough checks. No test will be accepted while there is continual increase in leakage current throughout the test. The cable must withstand the specified high voltage test without breakdown.
The test record should include the following:
- Complete identification of cable, including approximate length
- High potential value, leakage current value, and time data
- The approximate average cable temperature and humidity
- High potential versus leakage current plot
Figure 8.8 shows the megger test carried out normally with a 5 kV megger for MV cables rated 11kV and above with the IR values recorded for one minute application:
Typical megger test set up for cable
8.6 Limitations
Most of the failures in cable terminations and cables are due to earth leakages exceeding to an abnormal value compared to previous tests. Most of the tests measure the leakage currents before a cable is accepted to be continued in a service. However, the leakage values can increase later on, leading to failures. Some of the common problems are as follows:
- The leakage can be affected by external factors such as heat, humidity, wind, and water level, if unshielded and in ducts or conduits.
- It can also be affected by internal heating if the cable under testing has recently been heavily loaded. These factors make comparisons of periodic data obtained under different test conditions very difficult. (If other equipment is connected into the cable circuit, this makes it even more difficult).
- In the event hot poured compound filled splices and terminations are involved, testing should not be performed until they have cooled to room temperature; otherwise the results may be misleading.
It should be remembered that most of the tests are comparisons of previous readings; there are no established values for many of the tests and the user’s justification and interpretation of results have more weightage. Sometimes failure of cables and terminations occur if proper procedures are not followed. Therefore, it is always necessary to raise the voltages in steps and observe the trend before attempting the full test.
8.7 Training and certification
Training is an essential pre-requisite for a person before a termination at high voltages is taken up. Manufacturers such as Raychem provide training and certification for field installation contractors for the range of terminations and cable accessories manufactured by them. It is recommended to ensure that terminations are executed by trained personnel so that all aspects of terminations are well known by the person involved in the job and the resultant finish is achieved. Sometimes it is also necessary that the personnel supervising the jobs are fully aware of the do’s and dont’s of a job. Institutions such as IDC provide classroom and practical training for personnel where there is generally no restriction on the product manufacturer. A typical training module may extend for a period of around 40 to 48 hours (over a week) and the module generally imparts the knowledge and skills required by industry workers for jointing high voltage polymeric cables. The training covers the correct procedures and practices involved in preparing for and carrying out installation and maintenance of high voltage polymer underground cables. All procedures and practices generally comply in accordance with electricity supply industry standards, Supply Authority regulations, relevant Australian standards, enterprise conditions and OH&S regulations, as listed below:
- NE162 Electrical Principles
- NUE207 Power line Safety Practices
- NE175 Workshop Practice
There is a National Technical Certificate in electrical maintenance and installation work which includes a module for cable jointing having a duration of 216 hours. On completion of this module, the trainee should be able to:
- Make simple joints and terminations
- Be aware of various types of armored cables, their applications, jointing and terminations
- Know the installation of underground cables
- Understand the installation of overhead wires and cable for distribution/transmission system.
There is National Technical Certificate course provided in Australia for a total duration of 216 hours (over 4 to 5 weeks) which includes both classroom and practical works simultaneously. Typical portions covered are as below:
Classroom sessions:
- Identification of all materials used for jointing, termination including soldering bit, blow lamp, strippers, soldering lugs, electric soldering iron, pot and ladle, pliers etc.
- Recognize the properties of insulating materials, conductors, armoring, etc. and their features
- Shaping of conductors to avoid strain
- Selection of cable types based on applications; Laying underground cables
- Continuity testing
- Cable joints/terminations e.g. tee, straight, finals terminations using prepared cable end
- Prepare cable joints for insulation using rubber tape and PVC tape
- Prepare service cable ready for soldering and brazing using different type of soldering methods
Practical training:
- Prepare PVC taped and braided cables for termination
- Joint two length of cables and use related materials for joints
- Joint and terminate armored cables at intermediate positions
- Prepare cable joints for insulation using rubber tape and PVC
- Dig and prepare ground for laying of underground cable
- Use of pot and laddle in soldering/joining underground armored cable
- Repair damaged underground armored cables
- Lay cable in prepared trench using appropriate methods. Jack and Roller and Winches etc.
- Make proper joints and terminations where applicable
8.8 Summary
As with any other equipment, standardization is important in cables and cable terminations, to ensure interchangeability and choice of multiple quality products. IEC have developed many standards for cables; however, for HV and MV cable accessories, the quality and manufacturing requirements are met by manufacturers and standards do not normally specify all requirements for HV and MV cables. IEC 60141 defines cable requirements of the earlier types, oil filled/gas pressure types. IEC 60840 and 62067 defines the applicable tests for XLPE cables, which are increasingly used. However, there are some European standards which define the material requirements of HV and EHV cables that are not normally covered in the IEC standards.
Type tests, routine tests and field tests are the major tests which need to be successfully passed to ensure their compliance to the service conditions. Laboratory type tests have higher levels of failure rates of HV joints and terminations; this implies that we need to go a long way to meet consistent quality standards. Type tests, such as tan delta tests, provide indirect representation of contaminants inside the cables and joint surfaces; however, the tests may not exactly pin point the fault locations. Most of the tests are compared with previous results for consistency and to ascertain that the cables are healthy. DC Hi-pot tests and megger tests are the common tests carried out on the field before charging.
Jointing is a specialized subject and it requires proper practical training to meet the requirements of HV services. There are many manufacturers who train personnel on the range of products manufactured by them. Technical training certification courses help the installation personnel to study and understand the termination jobs and provide practical training on the field works involved.
9
Failures and Analysis
In this chapter, we will review the possible reasons of common failures of HV cables and terminations and how documentation of various parameters helps in analyzing these failures. One accepted approach is predictive maintenance practices, such as partial discharge measurement, will also be reviewed along with other general practices.
Learning objectives
- Reasons for failures
- Documentation of work
- Documentation of failures
- Analysis of failures
- Predictive approach
- Common tests and inference
9.1 Reasons for failures in high voltage cables
High voltage cable networks represent a major capital asset in electricity companies, industry and commerce. Failures of cable systems are disruptive, expensive and hazardous to personnel. They disrupt business processes and increase the overall life time cost of the system. While some of the failures are not so common, it is invariably possible to identify some shortcomings in design, installation, operation and maintenance practices being the reasons for such failures. The prompt and thorough investigation of failures is an essential part of management of power cable network to ensure such faults are not repeated. Due to operational pressure, it is understood that the focus of the staff is often directed to the expeditious reinstatement of the supply. Unfortunately, this objective often results in loss of vital evidence. Therefore, it is imperative that a failure management procedure is adopted in tandem with the supply restoration objective. This will ensure that the failure is not a total loss.
Failures are usually caused by one or more factors and these can be generally classified as the following:
- Design related to sizing
- Material selection for the application
- Fabrication and processing
- Operating and service conditions
- Human error during operation
- Vandalism and illegal activity
Irrespective of the reasons, the types of failures may be primarily classified as mechanical damages and insulation failure. Mechanical damage is mostly due to the work near underground cables (directly buried type) which inadvertently leads to damaging the cable insulations and/or conductors. This can be mitigated to a large extent by proper mechanical protection and route markers. Cables that are laid in formed concrete trenches and tunnels are largely immune to this kind of damage, but it is not always practical to have such arrangements over long lengths of cable networks. The other most common failure mode is insulation failure which occurs for reasons, including the design of the accessories, especially where a joint or termination has been made. The insulation failures may be attributed to one or more of the following reasons:
- Incorrect sealing
- Improper core clearances
- Poor workmanship
- Failure to restore the electrical and mechanical properties of the joint/termination to those of the original cables (attributable to design of accessory kits or failure to follow manufacturer’s instructions)
Cable accessories, including splices or joints and terminations or elbows, are some of the most vulnerable parts of an underground cable installation that can easily fail. The most common cause of failure in accessories is generally found to be improper installation in addition to the above reasons. It is difficult to check the quality of the termination immediately after installation, because most of the tests are relative in nature i.e. they are related to some values, and if found satisfactory, the terminations are considered acceptable. Furthermore, visual inspections do not show any major defect. Sometimes poor installation may not result in failure for many years. Within the termination, the cable’s metallic and semi-conducting shields must also be properly terminated; otherwise this could cause failures in the long run.
Figure 9.1 gives the statistical results of the reasons for failures of a large utility system adopting longer cable networks:

Reasons for cable system failures
9.2 Documentation of work done
Most modern cables have a polymeric insulation, either polyethylene (PE) or Ethylene-Propylene Rubber (EPR). Older design medium voltage cables were Paper-Insulated Lead-Covered (PILC). It is very important that clear documentations are available on the cables and the terminations carried out over a long length to assess the conditions of the cable to locate the fault or to take predictive maintenance. The type of cable is also important since any diagnostic testing must take into account cable design and construction. Cable condition assessment testing can be broadly divided into five parts:
- Check on quality of insulation material
- Checking of metallic shield or neutral
- Check on jacket materials
- Check on accessories including splices and terminations
- Local environment and operating conditions
Documentation of following on a continuous basis can help in assessing the condition of the installation, which is one of the major cause of failures in termination.
- Temperature measurements
- Partial discharges
Operating temperatures can easily be measured on an energized, current carrying accessory using hand-held, infrared detectors. The load current must be recorded during the temperature measurement test to ensure that future readings are compared. Obviously, the higher the current, the higher the temperature. It is also necessary to record the surface temperature of the incoming cable. In general, the surface temperature on a splice or termination should be lower than the surface temperature on the incoming cable. If not, an accessory problem is indicated.
Partial discharges (PD) in accessories can be located using a number of off-line or on-line techniques and many equipment/devices are available to conduct the tests in the field with minimum efforts. Ultrasonic or Radio Frequency detectors are very useful in measuring and locating partial discharges in terminations or accessible splices. Non-contact probes can find only surface discharges, which may indicate contamination at the surface that may lead to a breakdown. A contact sonic probe or RF detector is required to detect internal discharges. Since cables must be energized for PD testing, contact probes should be electrically isolated from the person doing the test for safety.
Some points of the operating environment, which must be documented are:
- Cable current loading compared to cable ampacity
- Ambient temperature
- Type of backfill around direct buried cables or ducts
- Moisture or chemicals in contact with the cables and accessories
- Lightning impulses and other system induced over-voltages
- Switching operations
9.3 Documentation of failures
Initially, a failure investigation should be directed to collecting all the relevant background and historical information. This information should include reconstruction of the events leading to the failure, manufacturing histories, service records, operational conditions and details of any repairs, maintenance or modifications. This information can be of great help in understanding the failure mechanism. The major documents that are needed during assessment are
- Current loading and duty cycle
- Fault levels
- Previous failures
A record on the failures should identify:
- Date of fault
- Nature of fault
- Location of fault
- Tests and investigations carried out
- Results of such tests and investigations
- Rectification carried out
- Test results after rectification
Such records will help in minimizing the time needed to decide the possible location of the fault leading to delay in restoration of power supply to the affected area.
It is also possible that the same types of faults may not repeat at the same locations. However, a clear documentation of past failures and/or case studies will definitely help in narrowing down the search in case of new faults. Utility and distribution companies, in particular, as well as testing agencies, will have more access to data on different types of faults and the solutions adopted. Documentation of past records will help very much in fault analysis and quicker rectification.
To investigate a failure in an accessory, in addition to the usual visual examination and gathering of environmental and operating information, other work specific to accessory failure analysis may include:
- Comparison of failed accessory with healthy accessories in adjacent phases in terms of visual appearance and the installation practice
- Contact resistance measurements in connectors
- Comparing dimensions with assembly drawings of the accessory
- Signs of poor workmanship, if any
- Signs of surface tracking, if any
- Electrically floating metal electrodes, if any
If the failure occurred in a polymeric cable, the following documentation will greatly help:
- Detailed examination of the conductor including possible metallurgical examination
- Dissecting the insulation close to the failure and cutting wafers
- Insulation resistance measurements
- AC breakdown level tests on a long sample near the failure site
- Chemical tests on the insulation
- Semicon resistivity at elevated temperature near the failure site
- Metallurgical tests on the shield or sheath if present
- Chemical tests on the jacket if present
9.4 Analysis of failures
The three most commonly seen problems in PILC cables are:
- Partial discharge (in cable itself and in joints)
- Moisture ingress
- Thermal aging
A cable failure is normally detected as either an open circuit or a short circuit. Open circuits are more common in low voltage cables than at medium or high voltage due to the magnitude of voltage which can survive with minimum clearance to ground. However, in case of higher voltage systems, conduction continues with arcing in the conduction path, ultimately leading to localized overheating, failure of the insulation at the arcing area and consequently a short circuit.
Analysis of various failures in the PILC and XLPE cables and cable termination generally indicate the combination of various factors, as per table 9.1:
Typical reasons for cable insulation and accessories failures
| Cable type | Accessories | Insulation |
| PILC | Low oil level Sharp edges on connectors Moisture penetration Bad hardened resin |
Damage outer sheath Tracking Air/gas bubbles Internal damage (as a result of bending) |
| XLPE | Sharp edges on connectors Interface problems Remaining semicon Moisture penetration Air/gas bubbles Field grading movement Bad hardened resin |
Damage outer sheath |
Analysis of failures for PILC cables indicate that moistening of the PILC cable is one of the factors leading to premature aging and even to failure. There are instruments available to measure the moisture content using the tan delta measurements. Table 9.2 shows the typical values of the dissipation factor and the corresponding average moisture content for PILC cables. If the cable is estimated having a moisture content of 2% and higher, it can be concluded that cable replacement may be necessary in the near future (assuming that the cable is loaded to its full capacity).
Moisture analysis in PILC cables
| Minimum tan d | Estimated moisture content | Inference |
| 0.002–0.0035 | < 1% | Good |
| 0.0035–0.005 | 1–2.5 % | Moderate age/moisture |
| 0.005–0.01 | 2.5–3.5 % | Considerably aged/moistened |
| > 0.01 | > 3.5% | In bad condition / moist |
In any failure analysis it is recommended to conduct a close visual examination of the failed part at and near the failure site; talking to or reading accounts of the failure from the personnel involved is also recommended. Depending on the circumstances and the observations, more investigations or tests may be required, or more information may be requested from the cable user. Overheating may indicate a possible root cause of failure of the system. The other possible reasons that should be checked during the analysis are:
- Back-up protection
- System ampacity
- Thermal runaway
- Lack of cooling
Signs of over heating may warrant further chemical or metallurgical tests to determine the maximum temperature reached. It may be necessary to undertake further investigation of the system operations to determine the root cause of this type of failure. In case of overheating, the possible root causes could be any one of the following or something unrelated:
- Poor initial ampacity calculations leading to selection of undersized cables
- Improper backup protection which does not isolate the cable during higher currents
- Removal of proper back-fill leading to unfavorable conditions
- Change in environment, such as the running of a hot pipe in close proximity
The other possible root cause is the manufacturing defects in the cables and accessories, which can be detected by visual examination after some period of service, but which may not be visible when the items are fresh and newly installed. During visual inspection, after some time or after faults, voids or inclusions in the insulation or protrusions from the semicon may be noticed. Voids could be simply bubbles in the insulation, while inclusions are the presence of some foreign matter. Protrusions could be the sharp points extending from the semicon into the insulation. Any of these observations indicate a manufacturing defect as the cause of failure. Any or all of these lead to highly localized electrical fields, which may lead to partial discharge at the site or rapid growth of water or electrical trees near the defect. Unfortunately, the defect, which may have caused the failure, is mostly destroyed at the time of fault, but generally can be observed in the nearby phases which can provide sufficient evidence of poor manufacturing. However, modern cables are produced in highly controlled environments which should not lead to such defects; these defects, when occurring in newly purchased cables, may point out poor specifications or acceptance testing as the possible root cause. If the cable is supposed to have strand blocking, water absorbing tape, or a hermetically sealed LC shield, and develops extensive water treeing in a short time, the possible root cause could be a manufacturing problem or mechanical damage or shield corrosion.
Another type of failure is noticed by signs of burning or arcing on the surface of the semicon. If the burning or arcing becomes extensive, the cable shield can get corroded. The cause is generally found to be the jackets getting damaged by arcing allowing corrosive ground water to enter the cable leading to severe corrosion of the metallic shield. Corrosion is found to be a serious form of shield damage in both copper and lead, even in fully jacketed cables. Figure 9.2 shows the extent of damage due to arcing at the surface of XLPE cable splice:
Failure of XLPE cable surface due to arcing
Copper shields or neutrals over polymeric cables may suffer mechanical damage during installation or experience damage from temperature cycling over a period, particularly near cable clamp locations. The lead sheath on a PILC cable may be subjected to fracture and creep, resulting in cracks and breaks. Breaks in the metallic shield on polymeric cables may lead to points of high electrical stress, which, in turn, could result in local partial discharge and ultimately failure.
9.5 Predictive approach
Like any electrical system, the cable system management calls for maintenance and these can fall under any of these categories:
- Corrective Maintenance (CM): Reaction only when failures occur
- Time Based Maintenance (TBM): Preventive maintenance in fixed time intervals
- Condition Based Maintenance (CBM): Predictive maintenance approach after assessing the actual working conditions
The first is more due to economic restrictions, but present day requirements do not allow such a casual approach for the high cost cable systems. Failures of MV and HV electrical equipment such as switchgear, transformers, cables and overhead lines are often sudden and catastrophic, causing considerable collateral damage to other equipment and sometimes resulting in injury and death. Operators therefore should be fully prepared for the possibility of prosecution under health and safety regulations, as well as apportioning financial responsibility. Charges may even include corporate manslaughter. Cables are passive items that are subject to damages to external factors with the internal issue mostly restricted to normal aging. It is not always possible to control the external factors; because of this, preventive maintenance may not always lead to good results. Therefore, in order to ensure adequate coverage for unexpected failures, predictive analysis is the best way of safe guarding the cable and its accessories.
The predictive maintenance basically refers to conduction of recommended tests either on-line or off-line. The main economic advantage of on-line diagnostics compared to off-line diagnostics is that no switching costs are incurred in the case of field measurements. Furthermore, the diagnostic tool is often less expensive and the measurement time is shorter than off-line diagnostic tools. The main disadvantage of on-line diagnosis is the inability to increase/decrease test voltages during diagnostic testing.
For many years, DC withstand testing was the only testing method applied in the MV power cables network which requires the power to be switched off and tests conducted on actual cables and accessories under use. With the advent of on-line tests, such as Partial Discharge tests, the DC pressure test combined with the PD test is found to be the best option. DC test provides information about moisture penetration while the PD test identifies sharp edges for corrective actions. Moisture penetration in the resin insulation, from the outside to the inside, does not always result in PD. Because the wet part of the insulation material is conducting, the rest (dry part) of the resin is stressed with almost 99% of the applied DC voltage and breaks down. For the other types of joints and termination, PD testing at AC voltage stressing is the best diagnostic option; it is also the preferred choice.
Partial discharge in the insulation is the main cause of ageing in high voltage paper insulated cables. The discharges are responsible for much of the deterioration seen in the insulation wall (such as pin holing and electrical treeing) eventually leading to the breakdown of insulation. Joint defects in polymeric cable circuits also give rise to partial discharge. The technique uses quantitative analysis of partial discharge activity to provide an assessment of condition and to identify specific areas of deterioration, defect and risk. As shown in table 9.3, partial discharges (PD) are sensitive symptoms of possible discharging weak spots (insulation defects, degradation products) in the HV insulation and therefore are more widely adopted for predictive maintenance:
Power Cable Insulation degradation processes
| Parts | Failure Process |
| Accessories | Interface problems »PD » tracking; Bad hardening » Cracking » PD; Conductors overheating » Cracking » PD; Local field concentrations » PD |
| Extruded Insulation | Water trees » Electrical trees » PD; Insulation voids » Delamination » Electrical trees » PD; Local field concentrations » PD; |
| Paper/Oil Insulation | Oil leaks » Dry regions » Overheating » PD; Water ingress » Load effects » Overheating » PD; Local field concentrations » PD; |
For water-tree aged cables, PD detection is not an effective diagnostics tool. Other methods based on dielectric responses e.g. return voltage, dissipation factor, dielectric spectroscopy or isothermal relaxation current, are the better analysis methods to be recommended.
Infrared spectrometry is used to identify the fingerprints of organic samples, including plastics such as polyethylene used in cable insulation. Recommendations following a failure investigation are aimed at ensuring that similar failures do not occur in the future. Depending on the failure mechanism, numerous actions can be taken, including employing condition assessment techniques in order to identify if the remaining population of a failed asset are prone to failure. Useful diagnostics include visual examination, partial discharge monitoring, electrical testing and thermal imagery. In some instances, changes in the design of equipment or the materials used is required.
Partial discharge detection for high voltage cables
Partial discharge tests have been in use for many years. However in earlier days the major purpose of PD measurements had been to find the manufacturing faults during acceptance tests and was mostly restricted to higher voltage and higher cost systems. Nowadays, the situation is undergoing changes, as listed below:
- Advanced digital and portal PD analyzers are available
- Computerization and transfer/study of data with software
- More knowledge about the materials and aging processes
- Acceptance of condition based maintenance (CBM) to measure actual condition of components in service
The use of digital PD measuring techniques for quality assurance in the works during on-site testing (as well as for monitoring purposes during service life of HV components such as cables) has received increasing attention. Table 9.4 lists some of the major instruments used in PD measurement techniques and the possible information that is readily obtainable for the HV cable systems:
PD test methods and information
| Test Voltage | PD detection | PD information |
| On-line at service frequency | VHF PD detection at power line frequency voltages | PD activity in the whole circuit at UN |
| Off-line at service frequency | IEC defined PD detection at power line frequency voltages | PD occurrence and location in the selected cable section at different voltage levels |
| Off line VLF (0.1 Hz) | IEC defined PD detection at sinusoidal 0.1Hz frequency | PD occurrence and location in the selected cable section at different voltage levels |
| Oscillating Wave Test System (OWTS) method | IEC defined PD detection at damped sinusoidal voltages at 5O/60Hz….. 500/600Hz frequencies | PD occurrence and location in the selected cable section at different voltage levels |
High voltage cable networks represent high capital investment and therefore decisions concerning replacement, repair, continued use or acceptance of new installations, should be based upon good engineering data. By carrying out testing from an end of the underground cable section, valuable information can be provided on the insulation condition for the whole length of the cable circuit without the need for excavations. Since cable deterioration is often found to be localized, information provided by partial discharge mapping may allow for deferment of replacement or a decision to replace only suspect cable sections.
It is difficult and impractical to de-energize and disconnect all the high voltage equipment from the system for off-line tests. On-line partial discharge (PD) measurements are an effective method for detecting insulation defects; they effectively assess and monitor the insulation of high voltage equipment to prevent the possibilities of failure during service. Cost effective, non-invasive and widely applicable portable on-line PD measurement techniques are preferred by industries and utilities for quicker results. The portable on-line PD measurement system consists simply of inductive clamp-on PD sensors and a portable digital storage oscilloscope (DSO).

Portable PD sensor (Courtesy: Industrial Research Ltd., New Zealand)
The sensors can be either temporarily clamped or permanently placed non-invasively in several locations at the termination of live high voltage apparatus, avoiding the need for expensive shutdown and disconnection. The DSO displays real time phase-resolved PD signals directly and dynamically. With the clamp-on PD sensor, on-line PD measurements can be made easily at either end of a cable at switch ends or in the middle joints, without power interruption or cable switch over. The clamp-on PD sensor can be placed while the cable is in operation, or with a minimum of power interruption. Previously, cables with defects were cut in half and tested to narrow down the PD location. Further bisections could be carried out to pinpoint defects. Considerable time and cost are involved as termination and rewind are required for every PD measurement after the wastage. Even if the fault is at the middle of a drum length, a half drum of cable may not be a saleable length. These can be avoided with present day instruments. The on-line clamp-on PD sensors are placed on the safe region above the sheath earthing at the heat shrink cable termination of either the incoming or feeder cables as shown in figure 9.4:

PD testing equipment set-up
The on-line PD measurement for a typical ring main switch, connected cables and transformer can be performed in about half an hour. It can be determined whether the PD is from the switch, or at the far-end of the cable by two PD sensors placed at the terminations of cables A and B (see figure 9.5). PD from the switch results in both sensors receiving signals with the same polarity. PD from the far end of cable A or B results in opposite polarities. Incident and reflected PD pulses can also be viewed to determine the PD location within the cable.
PD Test with combination of switchgear
Based on the results of off-line PD tests at line frequency and tan d measurements, the cable systems can be classified into different categories as per table 9.5 in line with CIGRE recommendations:
Off line 50/60Hz PD test and tan d test inferences
| Cable category | PD at UN [pC] | tan d at UN (× 10-4) | Remarks | |
| A | PD =250 | and | = 30 | Good |
| B | PD = 1000 | and | = 50 | Good |
| C | PD = 1000 or PD = 5000+ no localization |
and | tan d > 50 tan = 80 | Follow trend and reasonably good |
| D | PD > 1000+ localization | and | Tan d =80 | Inspect/replace PD location to take corrective action |
| E | PD > 5000+ no localization | And/or | tan d >80 | Cable may need to be replaced |
Based on the above categories of cables, their life assessment may be calculated in line with table 9.6:
Cable categories and life assessment
| Cable category | Description | Availability in service | Expected life time (years) |
| A | new cable in good condition | >99.9% | >30 |
| B | good condition but extra attention is required | >99% | >25 |
| C | stable situation, but moderate condition | >95% | >15 |
| D | Unstable situation | <50% | Based on rectification |
| E | End of life | <95% | <3-5 |
Typical values of PD measurements for healthy cable systems are shown in table 9.7:
Typical PD values
| Cable Element | Type | Acceptable/Typical values |
| Insulation Type | PILC XLPE |
10.000pC <20 pC |
| Joints | Oil-joint Resin (Type1) insulation Oil insulation Oil/resin insulation Resin (Type 2) insulation |
5000pC 500pC (asymmetric) >10000 pC 5000 pC 4000 pC |
| Terminations | Oil-termination Dry termination |
6000 pC 3500 pC |
While conducting PD tests, all relevant information from a PD cable measurement should be recorded. PD tests with modern instruments generate several PD quantities, which can be divided into two groups:
- Basic quantities: e.g. PD level in [pC], [nC], PD Inception Voltage PDIV in [kV], PD Extinction Voltage PDEV in [kV], PD spectrum;
- Derived quantities: e.g. q-V curve, phase-resolved PD pattern, PD magnitude/intensity mappings.
The characteristic of these quantities measured on different cable sections may vary based on various factors such as cable type, age, service history and location of the elements used. All diagnostics actions are to be considered as the indispensable final step in the complete PD field testing process and corrective actions should be initiated; these actions are required in order to avoid service failures and consequently to contribute to improved reliability.
Other Tests
To determine the condition of the cable shield, an initial assessment is carried out with a DC resistance meter. If the resistance reading is high, Low Voltage Time Domain Reflectometry (LV TDR) can be used to locate the points along the cable where the neutral or shield is deteriorating. The LVTDR sends a low voltage, fast rise-time pulse down the cable, and an oscilloscope in the unit shows reflections when cable transmission characteristics change. Reflections reveal cable splices as well as shield breaks. The LV TDR test equipment is very small and easily transportable. If the neutral or shield is damaged or corroded at many points along the length of the cable, it may be necessary to replace the entire length of the cable. If the corrosion is found to be isolated to only a few points, these locations may be cut out and new sections of cable spliced in place.
In the case of PILC cable, cracks or breaks in the lead sheath normally lead to oil seepage or water entering the insulation. If the phase conductors are not individually shielded, the lead acts as the shield on a PILC cable, and lead breaks may cause high electrical stress points. An LV TDR check of the cable may show reflections at very large holes in the lead. With respect to duct installed PILC, it is generally possible that many lead breaks occur in manholes and at duct exits.
In jacketed cables, the jacket may be compromised during installation, or may age and crack, particularly when exposed to certain chemicals or soil conditions. A damaged jacket is often the first indication that further problems may be encountered. To test a cable jacket, the cable must be de-energized and the shield/neutral grounds must be disconnected. A DC voltage check with a multimeter between the floating shield and ground will indicate if the jacket is intact. A potential of several volts on the metallic shield will indicate corrosion activity and the jacket is likely the problem. Switching the multimeter to the micro-amp range and measuring the short circuit current can give an indication of the magnitude of corrosion and jacket damage. If the jacket appears to be intact, the jacket insulation resistance should be checked with a Megger.
9.6 Summary
There are many possible reasons for failures in cable systems but they may be broadly classified as mechanical damages and insulation failures. Mechanical damages can be restricted, to some extent, by underground networks with proper markers and protection. The more common reason for failure of terminations is found to be installation method and good termination and joint practices are vital to minimize the faults on terminations and joints. Corrosion is also found to be one of the factors for accelerated aging of cables and subsequent failures. Documentation of works and faults help in minimizing the time spent for locating and rectifying faults. All periodical inspection observations and rectification works needs to be properly documented for future reference.
The failures of HV cables are found to be the result of partial discharges, ingress of moisture and thermal aging. Past test results provide the trend values for acceptable dissipation factor to check the moisture content. Moisture content above 3.5% is diagnosed with tan d value of > 0.01. While analyzing the failures, it is necessary to review other factors also, such as backup protection, system loading, cooling provisions, etc. to decide the root cause. Manufacturing defects could also be a possible reason for failures which would require inspection of healthy phases after faults/ failures.
It is preferred that a condition based maintenance (CBM) or a predictive approach is adopted to monitor the cable systems. Though insulation resistance check was one of the most common tests, other tests such as PD measurements have gained acceptance due to the availability of portable instruments and the appreciation of results obtained with such instruments. There are different types of PD measurements (on-line, off-line, OWTS). On-line tests are preferred, as they maintain supply continuity. With the PD measurements obtained, it is possible to categorize the cables. Typical acceptable values are available to aid in decision making after the measurements have been taken. There are other tests such as LVTDR that can indicate the location of faults in splices and joints.
10
New Trends
In this chapter we will review the increasing preference for underground cables; they are beneficial in many ways, especially for their ability to carry high power at very high voltages. We will also review the new trends that are likely to impact on the current practices being adopted in underground cable transmission.
Learning objectives
- Reasons for increasing preference to underground cables
- New technologies for very high capacities and voltages
- High temperature superconductivity in cables and the likely impact on current practices
10.1 Increasing use of underground cables
10.1.1 Benefits of underground electricity lines
Overhead lines use air for insulation; it is cheap and available freely in abundance. It also helps to have overhead lines in the open atmosphere with the heat produced by the electricity flowing through the bare overhead conductors being removed naturally and efficiently by the air, without the need for spending energy. The major precautions that need to be taken are the minimum clearance to the ground and avoidance of overhead lines falling down. The live conductors are kept away from the earth by hanging them from porcelain or glass insulators suspended from steel structures which require considerable design inputs to carry the weight of the conductors and also to maintain the minimum safety clearances to ground in all weather conditions with ability to withstand other natural calamities. To ensure that the conductors are adequately supported, the structures should be spaced about 300 to 400 metres apart. However the provision of overhead lines and associated structures criss-crossing the country definitely affects the free flow of heavy transport and these are also susceptible to varying weather conditions such as snow, cyclones, wind velocities varying at different locations and elevations. All these considerations directed engineers to consider alternate power transmission methods, which has led to the development of cables that are now available even for higher voltages but at considerable costs.
The major benefit of underground cables is that they are not susceptible to storm damage and/or adverse weather conditions. Minor storm damage to overhead lines across Europe is a frequent event, particularly at low/medium voltages, but these could be localized problems. However, occasionally (as happened in France in December 1999) significant damage can occur to the EHV/HV network, which could affect many areas. The storms in France in December 1999 resulted in around 8% of the EHV/HV transmission network being put out of order. 90% of the affected substations were reconnected within 4 days, but it took six months to completely repair the lines. The total cost of damages amounted to €1.3 billion, but no estimates of economic losses were available because the interruption lasted about 15 million customer-days.
Another advantage of underground cables is that they are “invisible” in contrast to overhead lines with structures and transmission conductors causing visual intrusion. Underground cables present a strong advantage if constructed in place of overhead lines in urban areas, in environmentally sensitive areas, and in areas of aesthetic, cultural and historical value. A direct consequence is that property values in proximity to underground cables would be higher than where overhead lines are used. This is one additional benefit for local residents close to the location of electricity projects.
In the current age of globalization, the transfer/sale of power from one country to another country is increasingly taking place. When critical sections of cross-border electricity inter-connectors are laid above ground, there is always strong local opposition that leads to postponement or suspension of the project. Similar issues would be faced in historical areas. When these sensitive sections are laid underground near urban areas or rural areas of great aesthetic or historical value, the cross-border link has a better chance of acceptance from local authorities and inhabitants. Of course, this would have to be done at considerable extra cost due to the addition of new underground sections. However, there will be extra benefits to countries interconnected, as the trade of electricity may increase in the long run and both consumers and utilities might reap the benefits. Furthermore, the need to keep reserve capacities in interconnected countries may reduce leading to even lower prices of electricity in the country of production. The results of a cost benefit analysis comparing extra costs of underground sections as well as the resulting benefits are generally providing a positive factor for the use of underground cables over a reasonable length and are definitely not so for smaller lengths. More detailed studies for each link needs to be carried out, taking into account specific and local characteristics of the link, before deciding to construct a missing link. In Europe the use of underground cables in existing networks has not only resulted in benefits to the people but has also increased security in the transmission of electricity.
Underground cables generally experience lower losses than equivalent overhead lines. Of course, most losses occur within the lower voltage distribution network. Anyhow, the reduced losses in underground cables, when considered over the whole lifetime of a project, show that the ratio of overall costs between underground cables and overhead lines favors underground cables.
Finally, in terms of electromagnetic effects, local inhabitants prefer underground cables. Cables cause no electric field around them, while their magnetic fields present higher values on the ground level just above the trench were the cables are buried; however, their magnetic field is weaker at a distance from the closed trench in comparison to equivalent overhead lines. Table 10.1 highlights some of the benefits of underground cabling and the beneficiaries:
Benefits of laying underground cables

The above factors are mainly related to utility companies that transfer power for long distances. However there are many industrial estates and industrial units which cannot be imagined without use of underground cables.
10.1.2 Disadvantages
Though the underground cables have some advantages as brought out above, it is also necessary to understand the disadvantages/negative points that outweigh their use. It may be possible that these disadvantages could be overcome in the course of time (probably by next century) as more and more countries prefer underground cables and are looking for ways to avoid/overcome these disadvantages. The National Grid of U.K installs and maintains very long lengths of overhead line networks and their web site indicates some of the factors that are responsible for the preference for overhead lines. Following are the main issues:
- The volume of soil excavated for 400kV cable network is more than about 30 times that is to be excavated for the equivalent overhead line route. Disruption in both urban and rural environments is greater in extent and duration when laying these cables as compared to overhead lines.
- It costs between 15 and 25 times as much to install underground cable compared to building up of overhead line at 400kV level. This roughly means an extra £9,500,000 for every kilometre of 400kV overhead line that is put underground. Figure 10.1 illustrates the cost ratio (CR) for higher voltage cables compared to overhead lines, which seem to be narrowing down in the recent past:
- Fault locations and rectification works for UG cables take a longer time compared to their counterpart. For example, 400 kV underground cables are on average out of service for a period 25 times longer than that for 400 kV overhead lines. The repair costs are also significantly greater.
- Repairs in UG systems can result in repeated land disruption. Additional land is needed for sealing end compounds where 400 kV underground cables are connected to overhead lines.
- An underground conductor has to be bigger than its overhead counterpart to reduce its electrical resistance to keep the heat as low as possible. This leads to a conductor up to four times bigger for the same amount of electricity transmitted. As many as 12 separate cables may be needed for a 400 kV underground transmission circuit. Each cable needs to be well-spaced from others for good heat dissipation and installed at a depth of about a metre to ensure safety. Four separate trenches, each containing three cables, may be needed to match an overhead line.
- In service, there are constraints to farming operations when both overhead lines and underground cables cross agricultural land. In the former case, care is required in operating certain types of machinery and in observing height restrictions imposed by electrical clearances. In the latter case, deep cultivating equipment cannot be used; there is a greater threat to crop re-growth, and no trees or hedges can be permitted along the route occupied by the buried cables.

XLPE cable cost compared to OH lines. (Source: ABB)
It can be concluded that the use of cables in place of overhead lines in most of or all the cases is decided subject to the analysis of the following:
- Economical factors
- Operation and maintenance issues
- Environmental factors
When all the economic, operational and environmental factors are taken into account, overhead lines offer significant advantages compared to underground cabling in the high voltage transmission of electricity. In the present day systems it has to be agreed that underground cabling is generally an exception rather than the rule in many countries around the world. It is necessary that proper judgments should be made against consistent criteria, and a complete study of the disadvantages and advantages of underground and overhead transmission need to be considered on a case to case basis including economic feasibility before making the decision on the method.
10.2 New technologies for very high capacities and voltages
Since a major disadvantage of underground cables is their relative expense, it is important to consider how the application of new technologies might reduce cost, so that all the benefits of underground cabling can be achieved at an affordable cost. Therefore, considerable efforts had been made in this direction.
The three areas most likely to yield cost savings are improvements in the insulation, the conductor and the method of installation. Over the years, much research has gone into developing an improved electrical insulation for high voltage underground cables. There are two main options:
- Replacing the paper insulation with tapes which are a laminate of paper and polypropylene (PPL)
- Extruding a thick layer of polyethylene onto the conductor
Extruded polyethylene is used extensively worldwide at voltages up to 132 kV. The most commonly used form of polyethylene is chemically treated to improve its mechanical properties at high temperatures. This material is generally known as cross-linked polyethylene, or XLPE. As a result of extensive development and proving trials, some cable makers are now able to offer XLPE cables for use at 400 kV. Although the technology is not yet fully proven in service, two European utilities have recently installed transmission circuits using 400 kV XLPE cable. Both these insulating systems (PPL and XLPE) offer technical advantages over conventional paper insulation and yet they are unlikely to reduce the capital cost of underground cables significantly.
The well-established trend toward a smaller insulation thickness is continuing making cables leaner. This had resulted in longer drum lengths, reduced joints for longer lengths, easier installation, and reduced thermal contraction/expansion of the insulating material. Improvements in design of XLPE cables have reduced the thickness of cable insulation to 12-15 mm for 132-kV cable systems. This gives the XLPE cable systems a good advantage versus overhead lines.
In recent years, novel methods for installing cables have been developed. These include directional drilling, and ploughing in the cable without opening up lengths of trench. Whilst these techniques are often applicable to lower voltage cables, particularly over short distances, they are not generally suitable for high power transmission systems. In the case of PILC cables, the paper tapes retain the heat produced in the power conductors. Heat is also generated in the metal sheath and in the insulation, and the earth does not cool conductors as well as air. The result is that underground conductors would tend to run much hotter than overhead ones.
Table 10.2 highlights some of the developments taking place in the last few decades considering the issues involved and also the general trend of market interest on the developments taking place:
Further development in high voltage and extra high voltage cable system
| Field | Issues | Developments Planned | Market Interest |
| LPOF cables |
|
|
 |
| Cable in steel pipe |
|
|
 |
| Polymer insulated cables |
|
|
 |
| Accessories for polymer insulated cables |
|
|
 |
| System engineering |
|
|
 |
10.3 EHV XLPE cable systems
Since the development of HV and EHV paper insulated cables no dramatic advancements have been made in the engineering of cables. Most operators are extremely cautious when it comes to changing to new types of design, new dielectrics or new areas of technology. The well-known reliability of the paper-insulated oil-field cables and the service life of this type of cable, are the main reasons behind this. These cables have been proven in practice for over 40 years, the qualities that operators are anxious to retain.
However, the life cycle of oil-impregnated paper-insulated cable is now coming to an end, because of environmental reasons. XLPE insulated cables are clearly winning an ever-increasing market share even in the high voltage and extra high-voltage field, and their technical qualities, in particular reliability and safety in operation, have improved over time. The trend towards XLPE is clearly visible. By commissioning the first long 400 kV XLPE cable system in 1998 for supplying electricity to urban conglomerates in Europe, the polymer-insulated cable will make the final breakthrough and will gradually squeeze out the paper-insulated oil-filled cable for all voltages up to 500 kV. Despite this, it is to be expected that paper insulated oil-filled cables will continue to be ordered, manufactured and supplied for some time to come. With the availability of extruded insulated cables right through the range of voltage up to 500 kV, underground power transmission by cables has taken a major step forward. The advances that can be made by using the extruded dielectric are mainly connected with environmental compatibility and operating costs. Major improvements in cable systems include provision of external protection against mechanical impact and corrosion by a tough, extruded, laminated sheath made from HDPE (high-density polyethylene). A bonded metal foil on the inside of the sheath stops water from diffusing into the cable.
The only major remaining problems for developing high-voltage and extra high-voltage cables now lies in XLPE cables and the engineering of the related accessories and systems. The details can be found in the numerous publications of Cigré study committee 21 (195-199) and other specialist articles (e.g. 200-203).
Even paper-insulated cables (low-pressure oil-filled and gas pressure cables in steel pipes) which number amongst the fully developed means of transmission, still offer a certain amount of scope for technical enhancements. Examples are the use of polypropylene-paper laminates for oil-filed cables up to 500 kV (765 kV) and the planned retrofitting of 110 kV gas pressure cables by XLPE cables in steel pipe (203).
HVDC LightTM, is another ABB innovation in the T&D field that incorporates advanced HV cable technology. High Voltage Direct Current (HVDC) cables are employed for bulk power transportation over long distances, mainly underwater. With HVDC Light, ABB has introduced to the market an extruded cable system, together with new transistor-based converters, that makes HVDC transmission competitive even at low power ratings. The first commercial system, a link rated at 50 MW, was installed on the Swedish Island of Gotland, where it transmits power from a wind power plant to the town of Visby.
10.4 High temperature superconductivity in cables
Basic Theory
A metal consists of a lattice of atoms. Electrons can dissociate from these atoms and travel through the lattice making the metal a conductor of electrical current. The atoms within the metal are actually vibrating. The electrons, which are travelling through the lattice, collide with the vibrating atoms and this results in a reduction of the electrical current. This is known as electrical resistance. The current value inversely varies as the value of resistance and this is the fundamental Ohm’s law. Any metal if used for transfer of electrical power exhibits considerable resistance to the flow of current with copper and aluminum offering the lowest resistance values and hence these two are used most extensively for power transfer from generation /substation area to the utility ends. Though minimum, use of these conductors also results in considerable loss of power when large amount of power is getting transferred.
Superconductors are so-called because they do not exhibit electrical resistance and hence do not suffer from losses in electrical current and power while transferring power from one end to the other end. A superconductor becomes superconducting when it is cooled down under its critical temperature Tc. The phenomenon, called “Superconductivity” is found to occur in almost all the metals but at very low temperature equivalent to cryogenic temperatures in most of the cases. Ninety years ago a Dutch physicist Heike Kamerlingh Onnes showed that the electrical resistance of mercury when cooled below 4.2K (4.2 degrees above absolute zero) dropped to zero with mercury becoming a ‘superconductor’. In the following decades many other materials – mostly metals and alloys but also some unusual organic compounds – were found to have super-conducting states, but only at very low temperatures attained by expensive cooling with liquid helium. Exceptions are noble metals, magnetic metals and most good conductors like copper. However, aluminum being non-magnetic also reaches a superconducting state. Currently the record temperature at which superconductivity is observed is -110°C. Practical applications using super conductors include superconducting magnets for MRI scanners and magnetic levitation trains.
Basically the current carried by the conductor is limited by the allowable temperature rise. With superconducting conductor, the heat produced within the cable can be dramatically reduced which means higher currents can be carried with a nominal size. The results can be dramatic with considerable savings in the transmission losses and the structure weights. A prototype superconducting cable was made in the 1970s but it was not found to be economical at the power levels on the super grid and even today the economics are not favorable. The major issues with the discovered super conductors had been the low temperature (cryogenic levels) of operation which is difficult to employ for cables that can carry power at zero resistance. Hence the concentration is being focused to invent superconductors that can operate at higher temperature. Chemical compounds that super conduct at temperatures > -238°C are known as “high-temperature super conductors” (HTSC).
High Temperature Superconductors
The high-temperature superconductors present a major theoretical challenge. There is currently no complete theory for high-temperature superconductivity. However it is thought that once a final theory has been established it will be possible to design new superconducting materials which show no electrical resistance at higher temperatures – possibly at room temperature.
Superconductors, used for cables, are based on the superconducting BiSrCaCuO material and manufactured as tapes with lengths of up to 1 km or more. The tapes are approximately 0.2 mm thick and 3 mm wide. The superconducting tapes are made as a composite with superconducting ceramic fibers embedded in a silver matrix. The steps involved in the production of tapes are illustrated in figure 10.2:
HTS Tape manufacturing steps
Applications and advantages
Superconducting cables are foreseen to have four main advantages:
- Energy savings
- Reduced installation cost
- Reduced system cost
- Increased transmission capacity
One of the proposals to reduce system cost is a re-design of new or expanded substations. By using HTS cables with a high amperage rating, it is proposed that one or several transformation steps can be eliminated. The new substation is designed without a high-voltage section, and the power is fed into the station at distribution voltage instead of at transmission voltage, but at a correspondingly higher rated current. It is anticipated that this will lead to a reduction in the cost of buildings, switchgear, and transformers, reduced environmental and fire hazards due to the elimination of transformer oil, and more compact switchyards. However, detailed design and cost studies are currently not publicly available to demonstrate the economic feasibility and positive effects.
One of the unique characteristics of superconducting cables is the ability to transport very high currents with nearly zero energy losses. This ability to transport high current with low losses makes a superconducting cable ideal for a high-current connection for bulk power transport. A conventional cable system – which in such cases can consist of several cable systems in parallel – has high losses, and substantial loss saving and reduction of a number of parallel systems can be obtained by use of superconducting cables. Studies show that typical high-current connections with high load factors can result in a loss reduction of 40% compared to a conventional cable system. A typical loss comparison during a year is shown in the table 10.3 below:
Comparison of HTS cable with conventional cable
| Load (%) | Duration (hours) | Losses (MWh/km/year) | |
| Conventional cable | HTS cable | ||
| 100% | 200 h | 29 | 11 |
| 90% | 1,500 h | 177 | 66 |
| 60% | 3,00 h | 162 | 84 |
| 20% | 4,036 h | 35 | 79 |
| 1 year | 403 | 240 | |
In addition to energy loss, saving bulk superconducting power transmission offers the following beneficial possibilities:
- Optimal ratio between current and voltage than conventional cables (low voltage high current connections)
- Less or no need for reactive power compensation
- Less or no magnetic interaction with the surroundings
- No thermal interaction with the surroundings
Superconductors are very beneficial for DC power transmission because they can provide the following advantages:
- Very low losses (no AC conductor loss and induced losses)
- Better utilization of the superconducting tapes
- Simple superconducting tapes (no optimization for AC needed)
- Simple cable design
HVDC transmission is gaining importance for high power systems; therefore, the use of superconducting cables for DC application is expected to provide more benefits. A typical section of DC cable with HTS conductor is illustrated in figure 10.3:

HTS HVDC Cable
Demonstration Projects
The most important early application of high-temperature superconductors has been in communications. Combined with low temperature electronics at 60K, superconducting thin-film devices (microwave filters) enhance the performance of mobile telephone systems giving greater sensitivity, selectivity and protection from ‘drop-outs’. There are at least four American start-up companies successfully exploiting this technology, one of them using materials developed in the UK. A British company, Cryo systems, employing filters developed at Birmingham University, aims to commercialize such systems in Europe and Asia. Superconducting magnet technology using liquid helium was already well established for specialist applications.
Many demonstration/experimental projects are underway to show the utilization of HTS conductors. A project tested in the year 2000 for a 30kV system in Denmark is a clear sign of the progress being achieved in this technology. The single core cables were manufactured by NKT Cables and delivered to test facilities at Technical University of Denmark in December 2000 where tests have been carried out. The cables have been tested electrically and thermally with great success. All three cable conductors passed the test with no problems.
Figure 10.4 shows the cross section of the above 30kV cable:

30kV HTS Cable
Table 10.4 gives the specification of the above 30 kV superconducting cable tested 2 km from downtown Copenhagen in Denmark. The cable is installed in the substation AMK supplying a large part of Copenhagen. The cable is installed as a bus bar connection between two 30 kV bus bars and the cables provide power for approximately 50.000 consumers including households, offices and light industry.
Parameters of the 30kV HTS Cable
| Parameters | Specification |
| Nominal current | 2,000 Arms |
| Nominal voltage | 36 kV (30 kV system voltage) |
| Length | 30 m from termination to termination |
| Weight | 13 kg/m/phase |
| Cooling | Liquid nitrogen at 75-80K (-198 to 193oC) |
| Coolant flow | 800 kg/hour |
| Cooling capacity | 2 kW at 80K (-193 oC) |
| Former | stainless steel corrugated cooling pipe |
| Superconductor | about 160 tapes (3×0.2 mm2) wound onto the former |
| Conductor cross section | about 100 mm2, of which about 25% is superconducting |
| Ac loss | < 1 W/m/phase in superconductor at nominal current |
| Cryostat | Thermal insulation consisting of 2 concentric corrugated tubes. The space between them is evacuated and contains reflective multi layer insulation that suppresses transmission of thermal radiation from cold to warm |
| Dielectric | standard polyethylene extruded insulation, fabricated in a triple coextrusion onto the cryostat |
| Screen | 100 mm2 copper wire + standard PVC layer |
Nexans has been awarded the contract to manufacture the cable and cryogenic insulation system for the US Department of Energy’s (DOE) $30 million high-temperature superconductor (HTS) power transmission cable project in the Long Island Power Authority (LIPA) transmission grid. The 610m segment will be the world’s first installation of a superconductor cable in a live transmission grid. Nexans will fabricate the superconductor cable using HTS wire manufactured by American Superconductor (AMSC), a leading electricity solutions company.
A Nexans Cryoflex vacuum-insulated flexible cryogenic envelope will provide the thermal insulation required to maintain the cable core at its operating temperature of about -200C. Air Liquide will provide refrigeration equipment and oversee operation of the cryogenic cooling system. The 610m transmission circuit, capable of powering 300,000 homes, will be located underground in an existing right of way. With a capacity of 600MW, the 138kV superconductor cable system will be an integral part of the LIPA grid and was expected to be installed and operating by the end of 2005.
Pirelli and American Superconductor are involved in a major superconducting cable to replace old power lines going into the heart of Detroit. Fact sheets, press releases, and newspaper articles on the cable project are also available on Detroit Edison’s website at www.detroitedison.com/htscable.
Future Projections
With the discovery of the high-temperature superconductor and the search for an alternative to extra high-voltage overhead lines that was made necessary for environmental reasons, the range of products for bulk-power underground transmission was extended in the 1990s with the focus on gas-insulated lines (GIL) and HTSC cables. The transition in high voltage cables from copper conductor to high-temperature super conductor now looks to be achievable some time in the current century. 300 K superconductors would possibly revolutionize the whole field of electrical engineering. This could for example mean that cables would no longer require cooling and underground power transmission could conceivably achieve extremely high power levels at voltages of just a few kV. This vision would signify the transition from high-voltage to high-current technology.
Companies such as Oxford Instruments make powerful low-temperature superconducting magnets, based on conventional super-conducting alloys, for hospital scanners, analytical equipment and particle accelerators. The Japanese have already developed an ultra-high-speed train using superconducting magnets to levitate and drive the train. The high-temperature superconductors looked set to revolutionize not only these applications but also to create exciting new technologies.
The real superconductor revolution that everyone is awaiting is the application of the high-temperature materials in the power industry. Thanks to the development of suitable wires, superconducting power cables are on their way. Companies in the US, Europe, Japan and Australia are producing nitrogen-cooled multi-wire cables that can carry up to around five times more power than conventional copper wires of the same dimension.
High-temperature super-conductor coils are being developed for large industrial motors such as pumps and compressors which will be much more efficient, with much lower power losses. The compactness and lightness of these motors also makes them ideal for propelling ships. Other important applications include generators – a market worth $20-30 billion over the next 10 years – energy storage, transformers, and fault current limiters that protect power grids from current surges, such as lightning strikes which can lead to large areas of network failing. The future for all these superconducting technologies looks rosy. By 2020 they are expected to generate markets worth many tens of billions of dollars. In the meantime, continuing investment at the research level is essential – not only in developing new materials, improved processing routes and creative engineering design, but also in understanding what gives rise to high-temperature superconductors. Progress on all these fronts could lead to even brighter prospects for applications However, many practical problems remain to be solved, before high voltage superconducting transmission cables are a realistic alternative. For example, when a fault occurs in a superconducting transmission cable, it would take weeks for the cable to warm up sufficiently to enable repairs to be effected and a similar period of time for it to be cooled down again.
10.5 Summary
Underground cables have some specific advantages. They are capable of withstanding unforeseen climate conditions, wind loads and external factors such as snow, etc,. In the age of globalization, UG cables may be more beneficial for inter country transmission compared to OH lines. The other benefits include lower losses and reduced magnetic field emission. However, this method also has some specific disadvantages making their use limited to higher voltages. The major disadvantages include the cost, delay in location and rectification of faults, etc,. The environmental factors, maintenance requirements and cost are the main factors that need to be considered before deciding upon the power transmission method.
XLPE is replacing the oil filled and PILC cables to a great extent in modern installations. These are currently available up to 500kV and extensive research has greatly reduced the thickness of the XLPE cables.
Research on high temperature super conductors is on-going and the possibility of having super conductors at ambient temperatures can bring the transmission losses to zero. Currently, materials have been developed to provide super conductivity up to around 130K. These are employed in some applications which are not related to electrical power transmission. The super conductors currently developed need continuous cooling which is achieved by using liquid helium. The cost reduction includes use of a nitrogen cooling method.
SELF ASSESSMENT QUIZ
Questions
This quiz is meant to be a self-test of the participant’s comprehension of the course materials and lectures using a set of objective / fill-in-the-blank type of question. The course leader may request the participants to fill in the answers at the end of each module and spend a few minutes discussing them.
Chapter-1 Overview
| S. No | Statement/Question | Answer |
| 1.1 | Conductor materials used for cables are: …… and ….. | |
| 1.2 | Overhead lines are not preferred in historic sites because of …………. | |
| 1.3 | It is easier to locate and repair cable faults. compared to overhead lines (True/False) | |
| 1.4 | In a highly lightning and storm prone region which would you prefer for a critical power requirement? Overhead lines or cables? | |
| 1.5 | An extra high voltage cable is used more often in distribution circuits rather than ………circuits | |
| 1.6 | Explain PE and XLPE | |
| 1.7 | When three cables are to be connected at one point, the type of joint is called | |
| 1.8 | When two cable lengths are to be joined, it is called a ……..joint | |
| 1.9 | A joint between two dissimilar cables types is a ……. | |
| 1.10 | A cable connection to a switchgear is called …….. | |
| 1.11 | Cables are more likely to fail due to electrical reasons in………. | |
| 1.12 | End sealing kits are used to protect ……… from exposure |
Chapter-2 Cable construction aspects
| S. No | Statement/Question | Answer |
| 2.1 | Expand the term PVC | |
| 2.2 | What are the letters that are prefixed to PVC and what do they represent? | |
| 2.3 | Which is the type PVC used for electrical cable manufacture and what does the prefix stand for? | |
| 2.4 | The maximum voltage up to which PVC is used is ….. | |
| 2.5 | PVC releases …………… in the event of a cable fire which is toxic | |
| 2.6 | PE cables cannot withstand higher temperatures because it is a ……. material | |
| 2.7 | Cross-linking of PE converts it into a thermo-…….material | |
| 2.8 | Curing is another name for the…………….process | |
| 2.9 | Name the three substances used for curing | |
| 2.10 | The curing process used for EHV cables is …….. | |
| 2.11 | Semi-conducting shield is used in two layers of XLPE cable. These are ………. and …………..the insulation | |
| 2.12 | The purpose of insulating shield is to ensure uniform distribution of the ……… | |
| 2.13 | Bonding reduces the …… appearing along the metallic sheath of …..core cables | |
| 2.14 | Name the types of bonding | |
| 2.15 | In cross bonding each major section contains ……minor sections | |
| 2.16 | Insulation material used in a PILC cable is ……………… | |
| 2.17 | EHV cables use paper insulation with the cable immersed in ……… under ………pressure | |
| 2.18 | Installation should ensure that the bending radius is ……….than the recommended value |
Chapter-3 Cable connections in joints and terminations
| S. No | Statement/Question | Answer |
| 3.1 | Name the two most common connections employed for cables to transmit power. | |
| 3.2 | Name the two basic classifications of methods adopted for joining metals and cables. | |
| 3.3 | A bolted connection is an example of ………type. | |
| 3.4 | The temperature of the jointed portion of a cable is usually much higher than the rest of the cable when there is a fault current through the cable (True/False). | |
| 3.5 | What are the main functions of the screen provided in HV cables? | |
| 3.6 | An HV cable joint where the sleeve diameter is larger than the conductor section diameter is not desirable because of local disturbance to the …………. | |
| 3.7 | In welded connectors the conductor size remains uniform since no …….. are required. | |
| 3.8 | Welding is not preferred for cables with ……….insulation. The main reason is the application of ……….for long periods during the process. | |
| 3.9 | In soldered joints the cutting back of outer ……..is necessary to ensure uniform conductor diameter. | |
| 3.10 | CADWELD type connections are suitable only for copper cables (True/False). | |
| 3.11 | Crimping can either be round or ………. In the case of the latter, it is necessary to use additionally a smooth …….to avoid electric field concentration. | |
| 3.12 | Brazing uses a filler material usually an alloy of ……. and uses ……….action to join the filler with the base metal. | |
| 3.13 | The strongest brazed joints have a clearance of about 0.038mm. When the clearance becomes more, the tensile strength gets ………… | |
| 3.14 | Name the common methods of mechanical connections employed in cable joints. | |
| 3.15 | Improved version of bolted connection use two features: These are ……..and……….. |
|
| 3.16 | The contact resistance of a cable joint with rated current of 500 amps is measured using a milliohm meter and found to be very low. This does not necessarily mean that the joint is acceptable. (True/False) | |
| 3.17 | Corrosion can happen when two ………..are in contact. | |
| 3.18 | Above corrosion can be avoided by using ……….. and ……… |
Chapter-4 Cable Terminations and Joints: Theory
| S. No | Statement/Question | Answer |
| 4.1 | Joints connecting cables with different insulation types are called…………. | |
| 4.2 | Terminations and joints can be of …………. type or ………….type. | |
| 4.3 | Name two classifications each of the above joints and terminations | |
| 4.4 | …… … are required when a single length of cable is insufficient for a given route length. This is also called ……. | |
| 4.5 | Cable jointing can be done only if both cables being connected are of an identical type (True/False) | |
| 4.6 | What are the common materials used as the insulation in joints? | |
| 4.7 | The disposable component used in a cold shrink termination to facilitate jointing is ……… | |
| 4.8 | Both cold shrink and push-on terminations have built in ———-cone arrangement | |
| 4.9 | Sealing with ……………. is recommended for taped joints to protect from water and humidity | |
| 4.10 | When the joint insulating material should be of the same structure as the cable insulation, the type to be used is ……… and it requires external ……….. at site | |
| 4.11 | The main factors to be met by the outdoor terminations is the external ……….. | |
| 4.12 | ……… tapes are used for reconstitution of cable properties | |
| 4.13 | In HV and MV joints semi conducting tapes are used for reconstitution of ……… | |
| 4.14 | In oil-filled cables hydrostatic separation of sections is required for cables installed in a gradient (sloped terrain). The type of joint used for this purpose is called a …. | |
| 4.15 | A transition joint is generally used to connect the old ……… cable with ………cable | |
| 4.16 | If the metallic cable sheathes/screens of cables on both sides are to be kept isolated from each other, it is necessary to use ……joint. (also called ……. or ……..) | |
| 4.17 | Heat shrink and cold shrink terminations work on the same principle but use different insulation tapes (True/False) | |
| 4.18 | Site fabricated joints take more time and skill (True/False) to install compared to prefabricated joints. | |
| 4.19 | The diameter of cable insulation is not known. In this case it is preferable perform a a) Push-on termination b) Heat shrinkable termination | |
| 4.20 | Joints connecting two switchgear sealing ends are called ………. |
Chapter-5 Stress Control
| S. No | Statement/Question | Answer |
| 5.1 | The stress we are most concerned with in cable terminations is a) Thermal b) Mechanical c) Electrical. | |
| 5.2 | The above stress is directly proportional to the service ………. of the cable. | |
| 5.3 | The stress is maximum at the ……….. of the conductor. | |
| 5.4 | The stress distribution is the maximum at no load condition of the cable. (True/ False) | |
| 5.5 | The stress distribution near the thermal equilibrium point is more uniform than at intermediate instances. (True/False) | |
| 5.6 | Stress distribution is more sensitive to ……..in resistivity value. (Increase/Decrease) | |
| 5.7 | ………… compound is found to have better a lifetime and hence used in stress control material. | |
| 5.8 | Inadequate clearance between unscreened portions of the cable cores in terminations will cause breakdown of air and ……… of anti-track shrink material. | |
| 5.9 | There are two types of approach to stress control. One is the high permittivity solution. The other is the ………. solution. | |
| 5.10 | Stress reliving tape is an example of the …….. approach. | |
| 5.11 | Stress cone is made of ……… material. | |
| 5.12 | Space between stress cone and cable is filled by …….grease. | |
| 5.13 | Common cutting implements should be avoided as they can result in damage to the extruded dielectric insulation material and cause voids. This will give rise to ……… | |
| 5.14 | Stress control …………. provides better stress relief compared to a tape. |
Chapter-6 Cable Joints and Terminations: Practice
| S. No | Statement/Question | Answer |
| 6.1 | Name some of the components supplied for a typical MV heat shrinkable termination kit. | |
| 6.2 | Name a few kit components used in cable systems to improve their performance and life. | |
| 6.3 | ………… is the base material used in most of the above components. | |
| 6.4 | What is the main factor that decides the preference of pre fabricated kits over site fabricated kits? | |
| 6.5 | Name the two factors to be matched for pre fabricated kits. | |
| 6.6 | ……………… is used for sealing purpose in a transition joint. | |
| 6.7 | …………….. is used to provide controlled heating while heating the shrinkable sleeves at site. | |
| 6.8 | The shelf life of a cable kit and joint components are most likely to be affected by …………. if proper storage instructions are not followed. | |
| 6.9 | Tapes for cable reconstitution of cable properties are made of …….. and …….. | |
| 6.10 | Out of the above …………. is preferred for higher temperature applications. | |
| 6.11 | Name the few of the self amalgamating tapes more commonly used. | |
| 6.12 | What is the difference between thermosetting and thermoplastic insulation? | |
| 6.13 | ………………….. is the main reason for entry of moisture in a PILC cable. |
Chapter-7 Terminations to Equipment
| S. No | Statement/Question | Answer |
| 7.1 | An Epoxy bushing with ……………….conductor is required for a gastight seal in a cable termination to a ………….switchgear. | |
| 7.2 | Stress cone and cable interface in a HV termination is filled with …………….. | |
| 7.3 | Name three factors that are to be informed to the switchgear vendor with regard to the cables to be used. | |
| 7.4 | Name the factor that could change the depth of the MV switchgear panel. | |
| 7.5 | Name the two main factors to be taken care of in cable terminations to equipment. | |
| 7.6 | Name the common factor that can affect the tightness of termination to a machine. | |
| 7.7 | Outdoor terminations are fitted with …………..to prevent flashover under wet conditions. | |
| 7.8 | Earth continuity of cable insulation screens is ensured by a connection which is carried out a) external to the joint b) within the cable joint. | |
| 7.9 | Cables coming into/leaving EHV GIS installations are always of a) Multi-core type b) Single core type. | |
| 7.10 | Core crossing may result in ………………. if cores are too close to each other in an ……………..area. |
Chapter-8 Standards and Testing
| S. No | Statement/Question | Answer |
| 8.1 | Name some of the aspects covered in a standard for a manufactured product. | |
| 8.2 | Cable standards ensure interchangeable use of EHV cables and accessories from any vendor. (True/False) | |
| 8.3 | LV cable standards usually stipulate the insulation thickness to be used. (True/False) | |
| 8.4 | High pressure Oil filled paper insulated cables are covered both by European (CN) standards and International (IEC) standards. (True/False) | |
| 8.5 | Low pressure Oil filled paper insulated cables are covered both by European (CN) standards and International (IEC) standards. (True/False) | |
| 8.6 | Pre-qualification checks applicable to all suppliers form a compulsory part of the ……….national standard for HV cables. | |
| 8.7 | Partial Discharge test is a stipulated type test for Polymer insulated cables. (True/False) | |
| 8.8 | Absolute leakage current is not an indicator of cable quality in a HV test (True/False) | |
| 8.9 | Dissipation factor values are preferred to be taken at ………. frequencies. | |
| 8.10 | The dielectric loss factor values measured are ………. dependent for old cables. | |
| 8.11 | Partial discharge test for prefabricated cable accessories is a) Only a type test b) Type as well as routine test c) Only a routine test. | |
| 8.12 | Leakage current of a cable performed immediately after taking a loaded cable out of service will be the same as an unloaded cable. (True/False) | |
| 8.13 | Name some of the common field tests that are carried out to decide the healthiness of the cable. |
Chapter-9 Failures and Analysis
| S. No | Statement/Question | Answer |
| 9.1 | Clues to understanding a cable failure are often lost due to the pressure to restore power. (True/False) | |
| 9.2 | Name the few factors that can possibly lead to failure of a cable system. | |
| 9.3 | State the two most common causes of cable failures: 1) ………….. and 2)……………. |
|
| 9.4 | Route markers can be placed to avoid damage of cable due to ………… | |
| 9.5 | Placing cables in tunnel/concrete trench avoids …………… | |
| 9.6 | Cable joints are more prone to failures compared to end terminations. (True/ False) | |
| 9.7 | Name two important measurements that are recommended for periodical checks and documentation for cable joints. | |
| 9.8 | Name three common causes for failure of PILC cables. | |
| 9.9 | Value of tan d can give an indication of moisture content in a cable length. (True/ False) | |
| 9.10 | Name a few factors to be analyzed while studying the failure of a cable system. | |
| 9.11 | Cable shield corrosion could be the result of ………… and consequent …………. | |
| 9.12 | …… is recommended to ensure longer life of cable systems. | |
| 9.13 | Combined study of ………….. and …………. values help in deciding the condition of a cable system. | |
| 9.14 | Failure of polymeric cable joints can be avoided by quantitative measurement and analysis of …………… activity. | |
| 9.15 | Partial discharge test is carried out using a power supply unit of normal power frequency. (True/False) | |
| 9.16 | Acceptable PD values of XLPE cables are …………….. those of PILC cables (equal to/ more than/ lower than) |
Chapter-10 New Trends
| S. No | Statement/Question | Answer |
| 10.1 | One benefit of interconnection between electricity networks of different countries will be reduced …………. capacities. | |
| 10.2 | There is a better chance of acceptance of cable interconnections in rural areas where …………….. or ………………is of importance. | |
| 10.3 | Losses in underground cable transmission systems is higher than those of overhead lines. (True/False) | |
| 10.4 | Buried cables have negligible electric fields. (True/False) | |
| 10.5 | The magnetic field around cables buried in a trench are higher than those of overhead conductors at ……… level, but considerably lower as you move ……… the trench. | |
| 10.6 | PPL stands for ……………….. type of insulation | |
| 10.7 | One of the main reasons for holdup in commercialization of superconductive cables is their high .. even for large power transfer applications. | |
| 10.8 | High temperature superconductor cables operate at ambient atmospheric temperature. (True/False) | |
| 10.9 | In case of failures, a superconducting cable will have to be a) Cooled down to room normal temperature b) warmed up to normal. | |
| 10.10 | Superconductive cables will help to reduce transmission voltage level to lower voltages. (True/False) |
SELF ASSESSMENT QUIZ
Answers
| S. No | Chapter -1 | Chapter -2 | Chapter -3 |
| 1 | Copper, Aluminum | Poly Vinyl Chloride | Straight through joint and End termination |
| 2 | Visual pollution | E, S, M representing the conversion process | Mechanical and thermal |
| 3 | False | S type, denoting suspension process | Mechanical |
| 4 | Cables | 3.3 kV | False |
| 5 | transmission | chlorine | a) Like a grounded enclosure b) Flow of fault |
| 6 | Poly Ethylene and Cross linked polyethylene | Thermo plastic | Electrical field distribution |
| 7 | Branch Y | Thermo-setting | Sleeves |
| 8 | Straight through | Cross-linking | XLPE or PE, High temperature |
| 9 | Transition joint | Steam, Silicone oil and Nitrogen | Strands of conductor |
| 10 | Termination | Dry curing | False |
| 11 | Joints and terminations | Above, below | Hexagonal, protective tube |
| 12 | Cable ends | Electric field | Silver, capillary |
| 13 | ********* | Voltage, single | Reduced |
| 14 | ********* | One end, both ends, mid point and cross | a) Crimping b) Plug in and c) Bolted |
| 15 | ********* | three | Shear bolts, tapered sleeves |
| 16 | ********* | Impregnated paper | True |
| 17 | ********* | Oil, high | Dissimilar metals |
| 18 | ********* | less | Bimetals and special grease |
| S. No | Chapter -4 | Chapter -5 | Chapter -6 |
| 1 | Transition joints | (c) | Anti track shroud; Stress control tube; Earthing braid; |
| 2 | Prefabricated or site fabricated | Voltage | Creepage extension sheds; Anti tracking breakouts; |
| 3 | a) Pre-moulded, cold shrink and b) Tapes, Heat shrinkable |
Surface | Polymer |
| 4 | Joints, Straight-through joint | True | Installation time |
| 5 | False | True | Diameter of conductor; Site temperature |
| 6 | EPR and Silicone Rubber | Increase | Shrinkable tube |
| 7 | Spiral pipe | Silicone | Gas flame |
| 8 | Stress control | Erosion | Moisture |
| 9 | Cast resin compound | Geometric | EPR and PIB |
| 10 | Extrusion molded joint; Extruder | High permittivity | EPR |
| 11 | Weather conditions and associated corrosion | High permittivity | Tapes; Semi conducting tapes; sealing putties; |
| 12 | Self amalgamating | Silicon | Thermoplastic gets softened with repeated |
| 13 | Conductor screen | Partial discharges | Break in lead sheath |
| 14 | Stop joint | Sleeve | ********* |
| 15 | Paper-insulated, XLPE | ********* | ********* |
| 16 | Separation, transposition, cross bonding | ********* | ********* |
| 17 | False | ********* | ********* |
| 18 | True | ********* | ********* |
| 19 | (b) | ********* | ********* |
| 20 | Back to back joints | ********* | ********* |
| S. No | Chapter -7 | Chapter -8 | Chapter -9 |
| 1 | Embedded, GIS | Functional requirements, Properties, Safety, Reliability, Life expectancy | True |
| 2 | Silicone oil | False | Sizing design; Manufacturing defect; Material for an application; Human error; Operating conditions |
| 3 | Size, Entry point and material | True | Mechanical damage |
| 4 | Number of conductors/phase | False | Work in the vicinity |
| 5 | Overheating (poor ventilation) and partial discharges | True | Mechanical damage |
| 6 | Vibration | French | True |
| 7 | Rain shields | False | Operating temperatures; Partial discharges |
| 8 | Internal | True | Moisture; PD; Thermal aging |
| 9 | (b) | Low | True |
| 10 | Discharges / breakdown, unscreened | Voltage | Backup protection; Ampacity; Thermal conditions |
| 11 | ********* | (b) | Continuous arcing and moisture entry |
| 12 | ********* | False | Predictive maintenance |
| 13 | ********* | Continuity; IR Value; Hi-pot test | PD and Tan d |
| 14 | ********* | ********* | Partial discharge |
| 15 | ********* | ********* | False |
| 16 | ********* | ********* | Lower than |
| S. No | Chapter -10 |
| 1 | Reserve |
| 2 | Aesthetic, historic value |
| 3 | False |
| 4 | True |
| 5 | Ground level, Away from |
| 6 | Paper Polypropylene Laminate |
| 7 | Cost |
| 8 | False |
| 9 | (b) |
| 10 | True |
APPENDICES
Technical papers
APPENDIX-A
Water Treeing—Filled versus Unfilled Cable Insulation by Steven Boggs et al. from IEEE Electrical Insulation Magazine, January/February 2001 — Vol. 17, No. 1
APPENDIX-B
Installation of the World’s First 500-kV XLPE Cable with Intermediate Joints by Akira Suzuki et al. Furukawa Review, No. 19. 2000
APPENDIX-C
General Condition Assessment of XLPE and PILC Power Cables by Roberts Neimanis and Sarah Acker, GE Energy Publication GER-4252 (10/05)
 FEATURE ARTICLE
Water Treeing-Filled versus Unfilled Cable Insulation
Key Words: XLPE, EPR, water treeing, electro-oxidation
Electrochemical or water treeing in solid dielectric cable has been recognized for over 30 years, since first being reported in 1969 [1]. Water trees are generally observed as a dendritic pattern of water-filled microcavities in the polymer. Moreau, et al. [2] have shown that these microcavities are connected by oxidized “tracks,” probably about 0.01 µm (10 nm) wide. Water treeing is therefore best described as a self-propagating pattern of electro-oxidation. Self-propagation results from electro-oxidation of the hydro-phobic polymer to a substantially more hydrophilic state which, as recognized by Zeller [3], causes condensation of moisture from the surrounding hydrophobic polymer into the hydrophilic electro-oxidized region, which results in self-propagation of the electrochemical “water” tree. Such self-propagation (water treeing) is likely to occur in any polymer that can be oxidized to a substantially more hydrophilic state, which includes a wide range of organic polymers.
Various aspects of water treeing have been reviewed in numerous previous papers [4]-[7]. The purpose of the present article is not to review the broad base of previous knowledge but to examine how the difference in propensity toward water treeing between XLPE and EPR cable insulations can be understood.
The Physical Basis of Water Treeing
Water treeing can range from predominantly electromechanical in nature to essentially electrochemical. Agreat deal of the early laboratory work was carried out with “water needle” configurations, which produce extremely high electric fields at thetip of a needle-shaped, water-filled cavity. The electric field at the tip was usually high enough to produce an electrical tree if the cavity were not filled with water, and the water tree grows in hours to days, rather than months to years as for a water tree grown under utility operating conditions. Dorris, et al. [8] investigated electrical signals generated by the growth of such water trees. An analysis of their data suggests that the measured electrical signals could be produced by a sudden 0.01 to 0.1 µm extension of the water tree channel. This work provides clear evidence for the growth of essentially electromechanical trees at very high fields. Such trees probably grow through (i) electrochemical damage in the tree tip region, which weakens the polymer to the point that (ii) electromechanical forces cause a sudden yielding of the polymer and extension of the tree in the range of 0.01 to 0.1 µm. Because the electric field and resulting electromechanical forces are relatively large [9], relatively little damage to the polymer in the tree tip region is required to reduce the yield stress of the polymer sufficiently that the electromechanical forces cause yielding and extension of the tree channel. For high-field, water needle-induced water trees, micro-infrared spectra of the resulting water tree indicate relatively little electro-oxidation, which progresses slowly relative to the time frame (days) in which the tree growth takes place under these high field conditions. Under long-term utility service conditions, the electric field is quite low, typically 1-3 kV/mm, as are the resulting electromechanical forces. The polymer must undergo substantial electrochemical degradation to reduce the yield stress to the point that the water tree can extend, and micro-infrared spectra of service-induced water trees show evidence of appreciable electro-oxidation in the tree region [4].
Steven Boggs
Electrical Insulation Research Center, University of Connecticut
James Xu
Phelps Dodge Wire and Cable Group
The difference in water treeing characteristics of filled and unfilled insulations can be understood in terms of two basic properties, ion content and hydrophobicity.
The Electrochemical Basis of Water Treeing
The electrochemical oxidation of low molecular weight hydrocarbons, such as alkanes (CnH2n+2), has been studied extensively over the past 30 years. Partial oxidation of al-kanes occurs in fuel cells in the presence of aqueous electrolytes such as H2SO4 and H3PO4. The oxidation process involves adsorption on an electrocatalyst followed by the rapid formation of oxidized intermediates at approximately 1 eV. The chemical species of the intermediates could be either partially oxidized species such as alcohols and aldehydes or deeply oxidized species such as carboxylic acids, which can be oxidized slowly to CO2. Water treed regions in electrically aged polyolefin dielectrics such as XLPE contain significant amounts of oxidation species and ionic impurities [4], which suggests that propagation of water trees in solid polyolefin dielectrics involves an electrochemical process similar to that in a fuel cell. The similarity of the electrochemistry of water trees and such fuel cells does not provide insight into detailed electro-oxidation processes under the inhomogeneous solid/liquid state conditions of water treeing. Electro-oxidation-related water treeing is thus a unique phenomenon. In solid dielectrics, the extent of electro-oxidation—i.e., the population and growth rate of water trees—varies for different polyolefins and the type and concentration of “electrolytes.” XLPE and EPR dielectrics are such examples.

Zeller [3] took a thermodynamic view of water treeing and concluded that the water conductivity plays a very significant role. Zeller described the chemical potential that drives the electro-oxidation of water treeing as the derivative of the energy stored in the electric field with respect to the number density of ions inthe water ofthe water tree, i.e., where Eis the electric field, eis the permittivity, Vis volume, ni is the number density of ions in the water, Wis the energy stored in the electric field, ci is the number concentration of ions in the water (number of ions divided by number of water molecules), and σw is the conductivity of the water. Note that dci/dni is equal to one over the number of water molecules in the volume containing the ions. For NaCl,


A chemical potential, µ, greater than about 1 eVcan, in theory, drive electro-oxidation although in reality a somewhat greater chemical potential is likely to be necessary. For the case of an ellipsoid of variable asperity, Zeller [3] developed an analytic formula for µ from which we can compute the chemical potential for a large asperity (long, thin ellipsoid) as a function of water conductivity as seen in Fig. 1. The general nature of these data can be explained from the fundamental definition of the chemical potential. At very low water conductivity, a small change in the water conductivity makes negligible difference in the electric field distribution. Thus, the chemical potential will be small. For very high water conductivity, the water is a conductor, and a small change in its conductivity makes negligible difference in the electric field distribution. Thus, the chemical potential will also be small. The peak in the chemical potential occurs for intermediate water conductivity, basically when the electric field and current density in the water are 45o out of phase. This situation maximizes the change in the electric field with water conductivity and therefore maximizes the chemical potential. The chemical potential approach works especially well in interpreting water tree initiation in a homogeneous insulation system where ions are the major variable.
A large number of variables may be relevant to water tree formation and growth in filled materials, among which hydrophobicity, catalytic ion content, spatial variation in ion concentration, crystallinity, water absorption, oxidation induction time, and toughness differ the most from an unfilled material such as XLPE (Tables I and II). At best, chemical potential is a thermodynamic variable, which gives the “propensity” toward a chemical reaction. The larger the chemical potential, the more likely the reaction is to take place over a wide range of conditions. However, the chemical potential provides little guidance concerning reaction kinetics, i.e., the rate of the chemical reaction or the growth rate of the water tree.
Water Treeing in XLPE Insulation
As for most organic polymers, PE and XLPE meet all the requirements for water treeing, i.e., they are hydrophobic and can be oxidized to a substantially more hydrophilic state. However, polyethylene is normally very “clean,” with very low ion concentration. In a cable configuration, any water reaching the polyethylene must percolate through the semiconducting layers via the free volume around each carbon particle. This free volume percolates (connects through the semicon) as the carbon particles must percolate in order to conduct. The carbon-filled semicon layers may act as activated charcoal filters, which tend to absorb ionic impurities from the water. Thus the water in polyethylene cable dielectric normally has too low conductivity to create the chemical potential necessary for water treeing. In other words, under normal conditions in XLPE the system operates on the low conductivity side of the peak in the chemical potential (Fig. 1), where the chemical potential is too low to cause water treeing. However, the chemical potential will increase with any increase in water conductivity, so that an ionic impurity at the dielectric-semicon interface can increase the chemical potential and cause a vented water tree.
Water trees in XLPE take the form of a series of water-filled microcavities connected by oxidized tracks [2]. While the diameter of these tracks has not been measured, they are probably in the range of 0.01 µm, which is just a “wide spot” in the path between polymer chain backbones. (This estimate is based on the consistency of a substantial number of phenomena for a channel diameter in this range. For example, the water conductivity required to produce the necessary chemical potential is a function of the channel diameter, and the reasonable range of water conductivities is known.) Thus the electro-oxidized track may consist of a slightly wider than normal path between polymer backbones with a much higher degree than normal of oxidation of the polymer, which forms the boundaries of the track. The string of water-filled cavities, which is the visible manifestation of the water tree, is probably the result of three effects, viz.: (i) Statistical effects, in that if a water tree track meets a cavity and fills it with water, the track has a much larger surface and many more possible directions in which to propagate than a track which does not meet a cavity. Thus long track growth may be associated with strings of cavities for statistical reasons; (ii) Contribution of ions within the cavities to continued water tree growth; and (iii) Substantial water flow through a tree track required to fill a cavity may enhance electro-oxidation and track formation. A source of ions is necessary to provide the water conductivity (or as an electrolyte) required for water tree growth, and ions are “consumed” as the water tree grows through attachment to the tree walls. Thus sources of ions along the growth path must promote water tree growth, and cavities normally contain ionic impurities as a result of segregation of impurities during the solidification and crystallization of the cable dielectric after extrusion. The impurities come from the surface of the pellets, which are washed with clean, but not necessarily deionized, water at the time of manufacture, and only become more dirty prior to use.
Bowtie Trees in XLPE, Filled XLPE, and Filled EPR
A relatively large density of short bowtie trees is characteristic of water tree growth in unfilled XLPE in comparison to filled XLPE and EPR. Table II illustrates the typical difference observed in cable insulation samples aged for eight months at three times rated voltage. The EPR cable insulation has very low bowtie tree population density but relatively large average bowtie tree length. Initiation sites of bowtie trees in XLPE are associated with cavities, particle agglomerates, and flaws such as cracks. In unfilled XLPE, each “bow” is relatively spherical in nature, in contrast to the “bows” in EPR, which are longer and narrower (Fig. 2). In EPR, initiation sites are somehow associated with catalytic impurities such as iron oxides and vanadium compounds (catalyst residue).
| Property | XLPE Insulation | EPR Insulation |
| Chemical Structure | Hydrocarbon chains | Hydrocarbon chains |
| Clay Composition | Al2O3, SiO2(96%), TiO2, Fe2O3 (3%) | |
| Catalyst Residue | Little to none | V. Al, etc. |
| Chain Branch No. | 15-35 | 200 |
| Length of Branches | 2-4 | 1-4 |
| No. avg. MW before crosslinkomg | 1-4 x 10⁴ | 1-5 x 10⁴ |
| Crystallinity | 50-60% | 5-25% |
| Polymer Density | 0.91-0.93 g/cm3 | 0.85 g/cm3 |
| Density of Cavities (curing-dependent) | 103-104/cm3 | No data |
| Size of cavities | 15-30 µm | No data |
| Tg | -120 C | -60 C |
| Tm | 105-110 C | 45-65 C |
| Tensile Strength | 16MPa | 8-12 MPa |
| Elongation at Break | 500% | 300% |
| Thermal Expansion (20-130 °C) | 12% | 8% |
| Toughness | 140 J/cm3 | 80 J/cm3 |
| Hardness | Rigid thermoplastic | Soft, rubbery |
| Dielectric constant | 2.3 | 2.4-3 |
| Breakdown | 100 kV/mm | 22-44 kV/mm |
| Dielectric Loss | 10-4 | 10-3 |
Bow-tie Trees in XLPE, Filled XLPE and EPR Cable Insulation
| Material | BT Density (mm-3) | BT Length (µm) | OIT (minutes) | Water Absorption (ppm) |
| XLPE | >28 | 90 | 33 | 17 |
| Filled XLPE | 4 | 180 | >180 | 260 |
| Filled EPR | 0.3* | 390 | >180 | 470 |
*low tree density in EPR and filled XLPE is unrelated to the difficulty of detecting trees in filled insulation. With present techniques, trees with lengths as small as 10 μm can be detected with relative ase [10].

These characteristics combine to suggest that in XLPE, bowtie trees are relatively easily initiated but grow slowly. The decreasing growth rate of bowtie trees in XLPE over time provides strong evidence that growth is limited by (i) diffusion of water into the tree and/or (ii) available ions from the cavity. Bowtie trees initiate easily and at high density in steam cured XLPE as a result of the high cavity content and segregation of ionic impurities into such cavities. In newer, dry-cured XLPE cables, the bowtie tree density is much lower as a result of the much lower density of cavities in the insulation.
In EPR, and to a lesser degree in filled XLPE, bowtie trees are difficult to initiate but once initiated appear to grow quite aggressively, probably because (i) the much greater supply of water in the insulation and diffusion rate of water through the insulation, (ii) bowtie trees in EPR tend to be initiated by sources of highly active (catalytic) ions from catalyst residues in the polymer such as vanadium [10], and (iii) low crystallinity may also contribute to rapid water tree growth in EPR. The difficulty in initiating bowtie (and vented) water trees in EPR is probably the result of three factors, (i) the greatly reduced hydrophobicity of EPR (as demonstrated by the 25 times greater water absorption in Table II) relative to unfilled XLPE, which reduces the tendency of water to condense from the bulk into an electro-oxidized region and thereby cause a self-propagating tree and (ii) the much greater ionic content of EPR, which results from ions associated with the clay filler. While this ion content contributes to a greater dielectric loss, it may also contribute to water treeing resistance by increasing the water conductivity within the dielectric to the point that a water tree normally cannot grow, especially given the more hydrophilic nature of the dielectric. In other words, the dielectric either operates on the right hand side of the peak in the chemical potential of Fig. 1 or is so hydrophilic that water tends not to condense into electro-oxidized regions. Past research has demonstrated that adding finely powdered NaCl to XLPE will render it water tree resistant. (iii) However, when highly catalytic ions such as vanadium and iron are present [10-12], they can reduce the activation energy required for electro-oxidation resulting in a region of very strong electro-oxidation which results in a sufficient reduction in hydrophobicity that a self-propagating water tree initiates from such impurities. Such a water tree grows relatively rapidly as a result of the abundance of water in the dielectric and the heavy electro-oxidation caused by the catalytic action of such ions.
The case for filled XLPE is similar to that for EPR except that the moisture absorption is less than for EPR so that the hydrophobicity is greater than for EPR. This tends to place filled XLPE between unfilled XLPE and EPR in terms of water treeing characteristics. Thus filled XLPE grows bowtie water trees less readily than unfilled XLPE but more readily than EPR. The large oxidation induction time (OIT, Table II) of the filled insulations indicates that they are relatively difficult to oxidize which may also retard water tree formation.
Vented Trees in XLPE, and Filled XLPE and EPR
Table III illustrates typical vented water tree growth in unfilled and filled XLPE and EPR insulation. Despite every effort to locate vented trees in EPR, vented trees are very rarely observed. The scarcity of vented trees in EPR suggests very strongly that the typical ionic impurities at the semicon- dielectric interface cannot cause sufficient electro-oxidation to generate a self-propagating tree structure given the lower hydrophobicity, greater moisture concentration, and greater ionic content of the insulation system relative to unfilled XLPE.
Vented Trees in XLPE, Filled XLPE and EPR Cable Insulation
| Material | VT Density (mm-3) | VT Length (µm) |
| XLPE | 0.3 | 60±40 |
| Filled XLPE | 0.2 | 120±50 |
| Filled EPR | 0.01* | 45 |
*low tree density in EPR and filled XLPE is unrelated to the difficulty of detecting trees in filled insulation. With present techniques, trees with lengths as small as 10 μm can be detected with relative ease [10].
At the operating fields of distribution cables, vented water trees in XLPE (those growing from the semicon-dielectric interface) grow from ionic impurities, not from stress enhancements at the interface, because without ionic impurities at the semicon-dielectric interface, the ion concentration in the water will be too low to generate the chemical potential necessary for electro-oxidation and water tree growth. While the chemical potential increases with the square of the electric field, the typical roughness at the semicon-dielectric interface, even for older semicons, is not sufficient to generate the necessary chemical potential without a source of ionic impurities to increase the conductivity of the water. For example, experiments have been conducted in which an intentionally rough surface was created between the semicon and dielectric in a plaque configuration. Careful examination using an SEM and elemental analysis after water tree growth at moderate fields indicated an ionic impurity at the root of each water tree and no tendency of the water trees to grow from high field regions of the semicon electrodes [14,15].
Water Tree Resistance
As is well known, TR-XLPE insulation does not stop water tree growth, it impedes water tree growth, i.e., the number and size of water trees is reduced. As is also well known to those who have worked in the field, vented water trees grow from ionic impurities at the dielectric-semicon interface [14]. The reduction in the number of water trees is probably the result of the greatly improved cleanliness of modern semicons and reduced hydrophobicity of TR-XLPE discussed below.
TR-XLPE insulation consists of XLPE with a tree retardant additive. At least some varieties of TR-XLPE dielectric contain a dispersion of hydrophilic molecular clusters in the hydrophobic matrix. One logical assumption is that the hydrophilic clusters “stop” water tree channels, i.e., when a water tree channel “hits” a tree retardant cluster, it stops propagating, probably because the hydrophilic cluster impedes condensation of water into any electro-oxidized region near it, so that the water tree cannot propagate.
Based on the hypothesis that a water tree channel grows until it encounters a water tree retardant cluster, we can treat this as a mean free path problem. The tree retardant molecules represent a randomly distributed set of points in the polymer matrix which will stop a water tree, and the water tree (in the tip region) is a roughly 0.01 µm diameter channel propagating through the matrix. On this basis, we can compute the probability of a water tree channel propagating a distance, x, as a function of the mean distance between water tree retardant molecules, as seen in Fig. 3.
The typical mean distance between water tree retardant clusters in the polymer matrix is probably in the range of 0.2 to 0.3 µm, so that a typical water tree in TR-XLPE would grow to a length of about 0.3 to 1 mm (5% probability). This analysis provides a rational explanation and quantitative basis to estimate water tree growth in TR-XLPE insulation that is in reasonable agreement with reality.
Vented water tree channels are known to branch, and often numerous branches grow off a main branch, which is rooted at the ionic contaminant at the dielectric-semicon interface. Thus a limitation in the size of an individual branch would not necessarily stop extension of the water tree, as branches could form and extend until they hit a water tree retardant molecule, branch again, etc. The limitation in water tree growth probably comes from diffuse electro-oxidation and the high water concentration around the water tree retardant clusters after they stop a water tree channel. The water tree channel provides a supply of water, and the hydrophilic tree retardant cluster probably provides a site for diffuse electro-oxidation by creating a high water density region but suppressing water tree channel growth. Thus, the water tree grows to something like the 95-99% probability length (Fig. 3), at which point sufficient water tree channels have “hit” water tree retardant clusters to form a “surface” of diffuse water around the tree retardant clusters at the outer reaches of the tree, which impedes further growth.

The additives employed to make XLPE insulation water tree resistant increase its water absorption, i.e., make the polymer less hydrophobic. Some (but not all) such additives increase the polymer conductivity and increase the dielectric loss. Thus, in a sense, they make the XLPE more like EPR. While ionic additives to XLPE (e.g., NaCl) do provide water tree resistance, they have not proved practical.
EPR and, to a lesser degree, filled XLPE cable insulation have an inherent water tree resistance. A major statistical ageing study of EPR cable insulations predicated on the assumption that failure is caused by water trees concluded that water trees have little if any connection with failure of EPR insulations [16]. The water tree resistance of EPR insulations is caused by the reduced hydrophobicity (which reduces the tendency for water to condense from the bulk dielectric into electro-oxidized regions) and, possibly, relatively high ionic content (which may tend to render any liquid water in the dielectric too conductive to cause water tree growth). These properties tend to impede formation of water trees in EPR while at the same time contributing to the higher dielectric losses of EPR insulation.
Stability under Wet Electrical Ageing
Wet electrical ageing has differing effects on TR-XLPE and EPR dielectrics. As is well known, the ac strength of EPR cable insulation tends to drop fairly rapidly during wet electrical ageing and then level off in the range of 55 to 80% of initial strength depending on EPR formulation [17], while wet electrical ageing has less impact on the impulse strength of EPR insulations with a retained impulse breakdown strength ranging from 66% to 100% depending on EPR formulation after 48 months of field ageing under normal service conditions [17]. TR-XLPE cable shows the opposite tendency with a retained impulse strength of 50% under the same conditions [17]. However, the ac strength of TR-XLPE is nearly 100% relative to the strength of degassed, virgin TR-XLPE cable.
The above phenomena in TR-XLPE and EPR insulation can be understood on a common basis, which also explains the high reliability of EPR insulation in spite of a relatively low AC breakdown strength after wet electrical ageing.
In the case of EPR insulation, the reduction in ac strength during wet electrical ageing is probably caused by migration of water into gaps at the interface between the filler particles and the polymer. Although the filler is well treated (approximately 1 weight percent silane) to enhance adhesion to the polymer, coverage is never 100%, some “free volume” will always exist at the interface, and, in any case, some water will eventually penetrate the silane to reach the clay surface. The water in such regions will cause some diffuse electro-oxidation of the polymer, which enhances water absorption over time until a steady state is reached.
The water at the particle interfaces will polarize substantially at power frequency, which will cause some of the filler particles to “appear” to be conducting, which will increase the stress in the rest of the insulation and reduce the ac breakdown strength. However, this phenomenon occurs relatively uniformly throughout the insulation, not on an isolated basis as for water trees, with the result that it causes a predictable reduction in the ac strength of the insulation; i.e., while the mean breakdown strength drops, the variance in the breakdown strength is relatively small because this is not related to a “discrete” phenomenon which produces extreme value statistics. The result is an insulation with a relatively low but very reliable (low variance) breakdown strength. Under impulse conditions, the water at the particle interface does not have time to polarize and therefore acts as a dielectric. Thus the ac strength drops in a predictable way, but the impulse strength is less affected.
The situation in TR-XLPE involves the same phenomena but as related to the evolution of discrete water trees. As noted above, water trees will grow in TR-XLPE insulation but are limited in length by the tree retardant additive. For a water tree to grow, the small water tree channels in the tree tip (growth) region must polarize partially at power frequency. Thus under power frequency conditions, the electric field at the surface of the small, “ball-like” water tree in TR-XLPE is graded by the partial polarization of the water tree channels which provide RC grading with the result that the ac strength is little affected. However if the water tree channels are partially polarized at power frequency, as they must be to grow, they will not polarize appreciably at the much higher frequency associated with a risetime of a standard lightning impulse. Thus under lightning impulse conditions, the small water tree channels at the boundary of the water tree act as dielectric, which exposes the larger diameter water tree trunk (typically 1 µm diameter at its base at the ionic impurity from which the water tree initiates) to the electric field. The water tree trunk looks much more like a sharp point. As well, the rapid polarization of this larger diameter channel causes a temperature rise of 10-100 oC within a few microseconds, which causes a shock wave generated by the rapid thermal expansion of the water. As is well known, the dielectric strength of insulation under tensile stress is lower than that under compressive stress, and such a shock wave near the peak of the lightning impulse could well precipitate breakdown. Because the reduction in impulse strength is associated with discrete water trees, it is likely to follow extreme value statistics, which results in greater statistical variability than does the reduction in ac strength described above for EPR insulation. However, data from field ageing indicate that the impulse strength of TR-XLPE drops to about 50% of the initial strength during the first two years of in-service ageing and then levels off [17].
Conclusions
Attempts to make XLPE increasingly resistant to water tree growth have involved additives, which decrease hydrophobicity and make the XLPE more like EPR. EPS are evolving through improved processing, clay compatibilization, etc. to reduce losses while retaining the inherent water tree resistance. Thus in the end, the two technologies appear to be moving toward the “center” from opposite ends of a spectrum (filled versus unfilled) to achieve improved cable insulation performance.
References
- T. Miyashita, “Deterioration of water-immersed polyethylene coated wire by treeing,” Proc. IEEE-NEMA Elec. Ins. Conf., Boston, MA, 1969, pp. 131-135.
- E. Moreau, C. Mayoux, C. Laurent, and A. Boudet, “The structure characteristics of water trees in power cables and laboratory specimens,” IEEE Trans., vol. EI-28, no. 1, pp. 54-64, 1993.
- H.R. Zeller, “Noninsulation properties of insulation materials,” 1991 Annual Report of the Conference on Electrical Insulation and Dielectric Phenomena, p. 19-47.
- J.J. Xu and S.A. Boggs, “The chemical nature of water treeing: theories and evidence,” IEEE Electrical Insulation Magazine, Vol. 10, No. 5, pp. 29-37, Sept/Oct 1994.
- Xu, J.J. and S.A. Boggs, “Electric field-induced degradation of polymers,” Trends in Polymer Science, vol. 3, no. 7, pp. 234-241, 1995.
- M.T. Shaw and S.H. Shaw, “Water treeing in solid dielectrics,” IEEE Trans., vol. EI-19, p. 419, 1984.
- R. Ross and J.J. Smit, “Composition and growth of water trees in XLPE,” IEEE Trans., vol. EI-27, pp. 519-531, 1992.
- E.F. Steennis and F.H. Kreuger, “Water treeing in polyethylene cables,” IEEE Trans., vol. EI-28, no. 1, pp. 54-64, 1993.
- D.L. Dorris, M.O. Pace, T.V. Blaleck, and I. Alexeff, “Current pulses during water treeing, procedures and results,” IEEE Trans., vol. DEI-3, no. 4, pp. 523-528, 1996.
- J. Kuang and S.A. Boggs, “Computation of thermal, electrical, and mechanical fields at a defect in polyethylene,” 1997 Annual Report of the Conference on Electrical Insulation and Dielectric Phenomena, IEEE Publication No. 97CH36046, pp. 162-165.
- J.J. Xu, “Electrochemical degradation of mineral-filled polyolefins,” Ph.D. Dissertation, Dept. of Polymer Sci., University of Connecticut, Storrs, CT, 1994.
- J.J. Xu and A. Garton, “Water trees in epr cable insulations,” 1993 Annual Report of the Conference on Electrical Insulation and Dielectric Phenomena, pp. 648-652.
- J.J. Xu, “Morphology and chemical composition of water trees in mineral filled insulations,” EEIC/ICWA, pp. 579-583, 1993.
- T. Uematsu, Z. Iwata, S. Irie, and O. Fujii, “Bow-tie tree in EPR cables after accelerated water treeing test,” IEEE Trans., vol. PD-7, no.4, pp. 1667-1674, Oct. 1992.
- S.A. Boggs and M.S. Mashikian, “Role of semiconducting compounds in water treeing of XLPE cable insulation,” IEEE Electrical Insulation Magazine, vol. 10, no. 1, pp. 23-27, p. 56, Jan/Feb 1994.
- M.S. Mashikian and J.H. Groeger, “Ageing phenomena at cable-shield interface affecting the propensity of the insulation to develop water trees,” Proc. JiCable Conf., 1991.
- M.S. Mashikian, J. Groeger, U. Koehn, J. Ronzello, A. Jeffrey, and W. Yin, “Role of formulation on the long term wet electrical performance of ethylene-propylene rubber (EPR) cable insulation,” EPRI Report TR-106680, 2899-02, 1996.
- W. Banker and C. Katz, “Update on field monitoring and laboratory ageing of EP and TR-XLPE distribution cables,” Minutes of the Fall 2000 meeting of the IEEE PES Insulated Conductors Committee, Nov. 2000.
Steven Boggs was graduated with a B.A. from Reed College in 1968 and received his Ph.D. and MBA degrees from the University of Toronto in 1972 and 1987, respectively. He spent 12 years with the Research Division of Ontario Hydro working in the areas of soil thermal properties, partial discharge measurement, high field-induced degradation of solid dielectrics, and SF6-insulated systems. He was elected a Fellow of the IEEE for contributions to the latter field. From 1987 to 1993, he was Director of Research and Engineering at Underground Systems, Inc. He is presently Director of the Electrical Insulation Research Center and Research Professor of Materials Science, Electrical Engineering, and Physics at the University of Connecticut as well as an Adjunct Professor of Electrical Engineering at the University of Toronto.
James J. Xu holds a B.S. in Polym. Eng. from East China University of Technology (1982), an M.S. in Polymer Materials from Shanghai Jiao Tong University (1986), and a Ph.D. in Polymer Science from the University of Connecticut (1993). He was a postdoctoral research fellow at the Electrical Insulation Research Center of the University of Connecticut (1994) and since 1995 has been a senior scientist with the Phelps Dodge Wire & Cable Group.
Installation of the World’s First 500-kV XLPE Cable with Intermediate Joints
by Akira Suzuki *, Shin’ji Nakamura *, Moriaki Matsuda *, Hiroshi Tanaka *2, Masaaki Shiomitsu *3, Kiyoaki Hiraga *4, Kiyomi Adachi *3, Katsuyoshi Hiratsuka *3, Kazuhiko Matsuda *2, Masashi Yagi *2, Akihisa Sudo *5 and Kimiji Sugawara *6
ABSTRACT Tokyo Electric Power’s Kazunogawa Power Station will, when completed, be Japan’s largest pumped-storage hydroelectric power station, with an output of 1.6 GW. The first phase is currently under construction, with two 400-MW machines and one cable circuit. Using leading-edge technology Furukawa Electric has provided 500-kV XLPE cable and associated extrusion-molded joints (EMJs) and horizontal gas-immersed sealing ends (EBGs) for the No. 1 and No. 2 machines. Construction was completed in November 1998 and voltage withstand tests have also been performed.
The cable for this line is 2300 m in length, longer than has ever been used in a power station interconnect. Because of transportation constraints, insulation-type EMJs are installed at intermediate points. The line is being built under the same basic design concept and installation conditions as the Shin-Keiyo-Toyosu Line now under construction, and reflects the expertise and knowhow acquired there.
The equipment covered here is scheduled to go into service in December, 1999.
1. INTRODUCTION
Tokyo Electric Power’s Kazunogawa Power Station was planned for Yamanashi Prefecture to provide the capacity to satisfy future power requirements, and, when completed, will be Japan’s largest pumped-storage hydroelectric power station. Work is currently under way on the No. 1 and No. 2 machines (together with one cable circuit), and construction of the No. 3 and No. 4 machines (with one cable circuit) is scheduled.
Each of machines No. 1 through No. 4 will have an output of 400 MW for a maximum of 1.6 GW. Output of 400 MW is scheduled to go on line in December, 1999 with a further 400 MW in July, 2000, followed by the remaining 800 MW at a future date.
Furukawa Electric received an order for the interconnect for the No. 1 and No. 2 machines, comprising approximately 7000 m of 1 x 1000-mm2 flame-retardant XLPE cable with reduced insulation thickness, together with six gas-immersed sealing ends (three of which are horizontal) and three extrusion-molded joints (EMJs).
Basic and developmental research on the cable and accessories was begun in 1988, and long-term loading cycle verification research targeted at overall verification of the reliability of technology for the manufacture, shipment inspection and installation of long-span cables, together with on-site verification tests, have been carried out, confirming that technology for on-site application is in place.
Accepting these research results, Tokyo Electric Power made a decision to apply them to the Shin-Keiyo-Toyosu Line, which is the world’s first long-distance, large-capacity line into a metropolitan center, and construction has been under way since 1996 with Furukawa Electric’s participation.
The experience gained is fully reflected in the equipment for the Kazunogawa power station, with suitable improvements in installation conditions to match the environment at the site. Furukawa Electric thus approached the actual installation work after conducting full-scale inhouse tests to confirm performance.
The following describes the cable, accessories, construction methods and so on.
2. GENERAL DESCRIPTION OF THE ROUTE
As can be seen from Figure 1, the 2.3-km route—from the horizontal gas-immersed sealing end (EBG) of the underground power station to the outdoor (vertical) EBG–is covered by a 2.3 km cable, laid entirely within a tunnel in a phase-spaced parallel configuration. EMJs are provided at intermediate points. The route has a continuous gradient of 9% and a difference in elevation of 190 m. There is no danger to the cable from falling objects and a flame-retardant anti-corrosion sheath is used. Thus a snaked method of installation is adopted, constrained when exposed on the supporting frames by cleats at points of curvature.

| Code | – | CAZV-F |
| Nominal voltage | kV | 500 |
| No. of cores | – | 1 |
| Conductor Nominal cross-sectional area | mm2 | 1000 |
| Configuration | – | Miliken type with shaped segments |
| Outer diameter | mm | 38.0 |
| Approx. conductor screen thickness | mm | 2.0 |
| Minimum insulation thickness | mm | 27.0 |
| Nominal outer diameter of insulation | mm | 102.0 |
| Approx. insulation screen thickness | mm | 1.0 |
| Approx. cushion and shielding layer thickness | mm | 3.0 |
| Aluminum sheath thickness | mm | 2.8 |
| Anti-corrosion (PVC) jacket thickness | mm | 6.0 |
| Nominal outer diameter of completed cable | mm | 141 |
| Nominal weight per meter | kg m | 25.0 |
| Maximum DC resistance of conductor at 20°C | Ω/km | 0.0187 |
| Dielectric resistivity of insulation at 20°C | MΩ.km | 4000 |
| Dielectric resistivity of anti-corrosion (flame-retardant) layer at 20°C | MΩ.km | 1 |
| Electrostatic capacitance | µF/km | 0.17 |
As a measure against problems arising after completion, the design provides for overage at each joint.

Installation was characterized by severe working conditions, in that there was a continuous gradient of 9%, laying was carried out in a temporary ventilation, and power outages could be expected during lightning strikes.
3. THE CABLE
3.1 Cable Structure
The structure of the cable used is shown in Table 1 and Figure 2.
The cable route lay in a mountainous area and transportation access was restricted in both width and height. Thus the 500-kV XLPE cable normally used for power station interconnects, which has a 32-mm insulation thickness, was found inconvenient to handle, and it was decided to adopt a cable with reduced insulation thickness (27-mm specification)1) that was developed for long-distance lines, was more compact, and had been confirmed to match the EMJs.
| Factor | QC concerns and preventive measure | |
| Impurities | Do not allow entry | Mesh of extruding machine screen |
| Not present | 100% inspection of polyethylene resin at extrusion | |
| Not present | Slice inspection (front and rear ends) | |
3.2 Cable Manufacture and Quality Control
The factor controlling the performance of 500-kV XLPE cable is impurities, and the countermeasures adopted in the manufacturing process are set forth in Table 2.
On this cable route, the maximum length of one span was approximately 1200 m, and using Furukawa Electric’s long-span manufacturing facilities it was possible to achieve 2-span (2400-m) continuous manufacture (extrusion).
Furthermore, at shipment from the factory the cable was subjected to electrical tests (465 kV AC for 15 min with partial discharge measurement at a detection sensitivity of 5 pC or more) to confirm quality.
3.3 Grounding Design
As has already been stated, the length of the cable was approximately 2300 m, making it impossible to transport it all at once. Based on the use of a single joint, and on an estimation of the voltage induced in the sheath and the partial discharge test to be conducted at the completion of installation, it was decided to use an EMJ with insulated flange (insulated joint).
To reduce the voltage induction in the accompanying communication and other cables, an IV 500-mm2 parallel grounding wire was installed.
4. ACCESSORIES
4.1 Accessory Performance
The performance characteristics of the accessories (gasimmersed sealing ends and mid-span joints) used on this line are shown in Table 3.
4.2 Mid-span Joints (EMJs)
4.2.1 EMJ Design
The mid-span joints represent an extension of the extrusion-molded joint (EMJ)3) previously developed for 500-kV XLPE cable.
(1) Designed breakdown stress (EL)
- For reinforcing insulation:
AC 27 kV/mm; Imp 60 kV/mm
- For treated portion of insulation screen:
AC 27.6 kV/mm; Imp 57.5 kV/mm
(2) Harmful level of impurities, voids and protrusions
There is a high probability that the presence of impurities or voids in the insulation or of protrusions from the semiconducting screen will give rise to tree formations. Accordingly the permissible dimensions have been calculated and the following limit values determined:
- For metallic impurities and protrusions:
100 µm or less
- For fibrous impurities:
2 mm or less
- For voids:
25 µm or less (Note: voids are controlled in the extrusion and curing stages)

4.2.2 EMJ Structure
The structure of the extrusion-molded joint (EMJ) is shown in Figure 3.
4.2.3 Installation Conditions
(1) Extrusion conditions
During preheating, the temperature of the conductor screen, the penciled portion of the cable and the cable surface is controlled so as to satisfy the conditions for void suppression. In addition the internal pressure in the mold after extrusion is controlled to suppress voids.
(2) Curing conditions
The pressure in the curing tube is controlled and the temperature is regulated in all areas to suppress voids.
4.3 Gas-immersed Sealing Ends (EBGs)
4.3.1 Structure of EBG
In these gas-immersed sealing ends, silicone insulating oil is used as the main insulation and an oil-impregnated stress relief cone is used in combination with an epoxy bell mouth. Figure 4 shows the structure.
In this underground power station the space available for the cable and machinery is restricted, and this required development of a new type of EBG to allow direct connection between machinery and the cable, which exits horizontally from the tunnel. This structure is shown in Figure 5.
There are thus two types of EBG structure, depending on the direction of installation, and for convenience the first described is referred to in this paper as “vertical”, and the second as “horizontal”.


4.3.2 Design of the Horizontal EBG
(1) Basic structure
The basic structure is an extension of that for the vertical type.
(2) Oil pressure compensation
With the built-in reservoir of the vertical type, there is a chance that the friction action of the built-in bellows tank could be impaired by deflection of the bellows. For this reason a separately installed cell oil tank was adopted for greater safety.
(3) Measures to prevent cable sag
The length of cable within this sealing end totals about 3 m, and there is comparatively large clearance between the outer diameter of the inner insulation and the inner diameter of the epoxy insulator. This raises concerns about deflection of the inner cable due to the weight of the inner insulation or to thermal expansion, and performance degradation due to distortion of the inner insulation.
In this sealing end, epoxy spacers are inserted into this clearance to suppress such deflection. Their effectiveness has been verified by long-term loading cycle tests (475 kV for 1 month) conducted at the factory.
(4) Miscellaneous
Because installation is horizontal, the mounting metal is provided with oil-filling connectors at top and bottom.
5. CABLE-LAYING WORK
5.1 Transporting the Cable Drum
Because of the large dimensions of the cable drum (flange diameter of 3.2 m, width of 8.1 m and cable length of 1184 m) part of the flanges were removed during overland transport from Furukawa Electric’s Chiba Plant to the outdoor switch yard of the Kazunogawa power station where cable-laying was to start (see Photo 1).
5.2 Laying the Cable
Because the cable length was so great and the cable laying site so small, the cable was paid out using a cable drum shifter and hauling machines.


To keep the lateral shift of the drum within the allowable angle of incidence of the hauling machine and thereby assure stable pay-out, a roller-type control device was used with the shifter (see Figure 6 and Photos 2 and 3).


5.3 Snaking
A method of snaking was employed because of the continuous 9% cable gradient to prevent the cable sliding down and to compensate for thermal expansion or contraction. The snaking configuration is shown in Photo 4.
6. INSTALLATION OF ACCESSORIES
6.1 EBG Installation Techniques
Techniques for adapting to 500-kV service and for the installation of the horizontal gas-immersed sealing ends (EBGs) are as described below.
6.1.1 500-kV Adaptation
Furukawa Electric installed the vertical EBGs in the outdoor switch yard and the horizontal EBGs in the underground power station. The use of horizontal EBGs was particularly effective underground in reducing the space required for installation and the cost of the work.
The working environment was particularly unfavorable in that the vertical (outdoor) EBGs had to be installed during the monsoon rains, and there was considerable dust generated by other construction during installation of the horizontal (underground) EBGs. Thus a “work room,” which prevented the adherence of moisture and impurities, was built for the installation work.
6.1.2 Horizontal EBGs
Installation of the horizontal gas-immersed sealing ends was attended by three main problems: 1) inserting the 350-kg insulator tube into the cable; 2) preventing the entry of impurities during insertion; and 3) sagging of the cable under its own weight during insertion of the insulator tube.
New equipment and methods were developed and adopted to overcome these problems. The specifics (see Photo 5) are described below.
(1) Adjusting dolly: An adjusting dolly was developed to allow fine adjustments (up-down, left-right and rotational) during insertion of the insulator tube. This also prevented the settling and adherence of impurities.
(2) Use of a holding device for the conductor: A holding device is attached to the conductor rod when the joint is made, preventing cable sag.
(3) Use of an assembly guide rod: An insertion guide rod is pre-attached, and the insulator tube is inserted along it.

6.2 EMJ Installation Techniques
Extrusion-molded joints have already been developed for 500-kV lines and are being installed for commercial service. Prior to installing the EMJs for the present project, we reconfirmed the installation conditions imposed by the difference in conductor size, checked installation procedures by creating a factory model of the work site, and confirmed electrical performance. The actual line was assembled based on these confirmations.
6.2.1 500-kV Adaptation
Cleanroom specifications were tightened over those used for 275 kV, for stricter control of impurities. A high-performance inspection system designed to eliminate impurities (see Photos 6 and 7) was also developed and applied.
(1) Development of a 100% inspection system for impurities in the polyethylene resin: A system was developed that inspects the resin being extruded for impurities by laser scanning. It was thus possible to confirm that there were no harmful impurities whatever introduced during extrusion.
(2) Development of an IP photographic inspection system: Joints are X-rayed after extrusion and curing to confirm that there are no harmful impurities present. In the new system, an imaging plate (IP) is used instead of film, providing a more sensitive and more accurate image, and improving the repeatability and efficiency of the inspection.
6.2.2 Adaptation to the Kazunogawa Power Station
The tunnel in which the cable is installed is also used as a temporary ventilation duct for the underground power station, creating air drafts with a velocity of 3-4 m/s. The tunnel also slopes at 9%, and a stable installation environment has to be maintained in it. Since assembly was carried out during the summer season, provision had to be made for power outages caused by lightning and typhoons.

(1) Measures to prevent drafts: PVC slate outer wall was erected, and a cleanroom was built inside for the jointing work.
(2) Measures against slope: A scaffolding was erected to provide a level area in which to work, thereby negating the effect of the 9% slope.
(3) Measures in the event of power outage: An electrical generator was installed that would start automatically in the event of power outages.
7. TESTING
7.1 Test Conditions
Partial discharge measurement tests using high-frequency tuning were conducted on two occasions. The first, during the dielectric strength test, involved application of 1.1 E for 10 min to each phase in turn; the second, during the preliminary charging test, involved a 3-phase (batched) test with preliminary charging voltage for 3.5 hrs.
7.2 Measuring Circuit
Local stations were set up near the measurement points (for outdoor EBG, EMJ and power station EBG measurement), and the measurement signal was converted into an optical signal for batched monitoring at the master station in the pit at the Kazunogawa power station (see Figure 7).
The circuit that was adopted provided for optical relaying of all frequencies from 1 to 50 MHz from foil electrodes mounted on the surface of each insulated joint to the master station. This allowed identification of noise, changing of measurement frequency, etc. to be accomplished easily, while bi-directional communication made it possible to change the phase being measured and insert simulated pulses.

7.3 Test Results
Measurements carried out on the 500-kV XLPE cable for Kazunogawa No.1 produced satisfactory results on both the first and second passes. Table 4 shows the respective measurement frequencies and detection sensitivities.
8. CONCLUSION
The on-site installation of 500-kV XLPE cable for the Kazunogawa power station was completed without misadventure or accident in November, 1998.
From basic research of 500-kV XLPE cable to its commercialization took approximately 10 years, and commercial operation is scheduled to commence in December, 1999. It is anticipated that the results obtained will be fully reflected in the Shin-Keiyo-Toyosu line, the laying of which is currently in progress, and that further use of these techniques will be made in underground trunk lines to be installed in the future.
In closing the authors would like to express their deep appreciation to persons involved at both Tokyo Electric Power Co.,Inc. and Furukawa Electric.

| 1st pass | Outdoor gas-immersed sealing end | ||
| Phase | Black | Red | White |
| Measurement frequency | 20.0 | 21.0 | 21.5 |
| Detection sensitivity | 1.8 | 1.8 | 1.6 |
| 1st pass | Extrusion-molded joint | ||
| Phase | Black | Red | White |
| Measurement frequency | 23.1 | 23.2 | 23.1 |
| Detection sensitivity | 1.9 | 2.1 | 2.6 |
| 1st pass | Power station gas-immersed sealing end | ||
| Phase | Black | Red | White |
| Measurement frequency | 21.2 | 23.2 | 21.2 |
| Detection sensitivity | 1.0 | 0.9 | 0.9 |
| 1st pass | 3 phases (batched) | ||
| Phase | Switch yard | EMJ | Power station |
| Measurement frequency | 21.5 | 23.1 | 24.4 |
| Detection sensitivity | 6.5 | 4.3 | 2.4 |
Unit of
Measurement frequency: MHz
Detection sensitivity: pC
REFERENCES
1) Tanaka et al.: Technology Advances in XLPE Cables: Part 3 — Development of Long-line 500-kV XLPE Cables and Joints, No 97, Furukawa Electric Review, 1995. (in Japanese)
2) Kaminaga et al.: Development of 500-kV XLPE Cables, March 1995, Transactions of IEEJ, Part B, 1995. (in Japanese)
3) Kaminaga et al.: Development of EMJs for 500-kV XLPE Cables, March 1995, Transactions of IEEJ, Part B, 1995. (in Japanese)
Manuscript received on June 28, 1999.
* Tokyo Electric Power Co., Inc.
*2 Underground Cable Engineering Dept., Power Cables Div.
*3 Power Cable Engineering Dept., Power Cables Div.
*4 Power Cable Manufacturing Dept., Power Cables Div.
*5 2nd Quality Assurance Dept., Power Cables Div.
*6 Underground Cables Dept., Power Cables Div.
GE Energy
General Condition Assessment of XLPE and PILC Power Cables
Roberts Neimanis and Sarah Acker
© 2005 General Electric Company.
All Rights Reserved
GER-4252 (10/05)
Abstract
GE Energy uses non-destructive diagnostic technology to measure the overall health of a power cable, to reveal existing cable defects through partial discharge testing, and to predict the future life expectancy of the cable. Cable testing helps our customers to be proactive in preventing costly forced service outages while optimizing their capital budgeting for replacement programs. This offering applies to medium and high-voltage shielded power cable (5-25 kV XLPE cables and 5-500 kV PILC cables) with a maximum length of 1.5 to two miles. The cables to be tested can be overhead, in cable trays, in duct bank, or buried. The GE Energy solution includes both general condition assessment and partial-discharge technologies. This paper will address only the general condition assessment technology.
Diagnostics of XLPE (cross-linked polyethylene) Cables
One of the major causes of failures in XLPE insulated cables is water-treeing (see Picture 1). Water-tree deterioration process is very slow (5-50 years) and can vary from cable to cable, among different designs, and also among individual cables of same design. Earlier studies [References1-3] have shown that the dielectric response, obtained by dielectric spectroscopy measurements performed at high voltage levels, is correlated to water-tree content and breakdown voltage. Higher losses and increasing non-linearity of frequency response are associated with lower breakdown voltage.

Picture 1: Water-Tree Damaged Insulation
Water-tree measurement on XLPE cable requires an IDA 200* insulation diagnostics unit with the IDA HVU (High Voltage Unit) option. The diagnostic approach is based on extent of non-linearity of XLPE cable insulation. In performing a general condition assessment on XLPE cable, the dielectric spectroscopy technology shows the severity of watertrees in the insulation. The water-tree aging process is very slow, but it is important to understanding the degree of damage to the insulation. A heavily aged cable can fail catastrophically if the insulation stress is increased quickly (i.e. lightning impulses or faults). The HVU is used with the IDA 200 system to increase the output voltage up to 30 kV (21 kVrms). The main application for this combination is for diagnosis of water-tree deteriorated extruded power cables. The system works equally well when other types of non-linear materials are to be characterized.
Diagnostics of Paper Insulated (PILC) Cables
The three most commonly seen problems in PILC cables are partial discharge (cable itself and joints), moisture ingress, and thermal aging and resulting increase of moisture content (not dangerous by itself).
In performing a general condition assessment on paper-insulated cable, the dielectric spectroscopy technology allows for estimation of average moistening of the insulation. Moreover, the presence of other defects, such as developing short-circuit due to carbonizing of paper, may be identified. Measurements on PILC cables are normally performed with the IDA 200 system only. Test voltage is by default 140 Vrms and frequency range 0.011000 Hz. Frequency response of a paper insulated cable can reveal worsening of insulation condition which is caused, for example, by an increase of moisture content.
Technical Description of IDA 200
The system (IDA 200) measures the impedance of a specimen at a variable voltage and frequency. A Digital Signal Processing (DSP) unit generates a test signal with the desired frequency. This signal is amplified with an internal amplifier and then applied to the specimen. The voltage over and the current through the specimen are measured with high accuracy using a voltage divider and an electrometer (ampere meter). Picture 2 shows the IDA 200*.
The diagnostic measurement is performed by applying a relatively low voltage (up to 140 Vrms). The IDA 200 system measures the capacitance and dielectric losses at discrete frequencies both above and below the main frequency (output signals with frequencies from 0.1 mHz to 1 kHz are available). By avoiding the main frequency and its harmonics, an efficient filtering of their corruptive effects is enabled.

The diagnostic measurement is performed by applying a relatively low voltage (up to 140 Vrms). The IDA 200 system measures the capacitance and dielectric losses at discrete frequencies both above and below the main frequency (output signals with frequencies from 0.1 mHz to 1 kHz are available). By avoiding the main frequency and its harmonics, an efficient filtering of their corruptive effects is enabled.
| Measurement Signal |
| Voltage/Current Low Range: 0 – 10 Vpeak/0-50 mApeak |
| Voltage/Current High Range: 0 – 200 Vpeak/0-50 mApeak |
| Frequency: 1000 Hz* – 0.0001 Hz (* = Upper frequency current limited) |
| Measurement Ranges |
| Capacitance Range: 10 pF – 100 uF |
| Dissipation Factor Range: 0 – 10 (with retained accuracy of capacitance – otherwise higher) |
Data Interpretation XLPE Cables
The IDA 200 system helps to identify water-treeing in an extruded power cable. There are four different responses that will help to determine the health of the cable: low losses and no voltage dependence, VDP response, TLC response and LC response.
Low Losses and No Voltage Dependence
Graph 1 is an example showing capacitance changes in a cable having good overall health (dry cable). The cable was frequency swept from 0.1 Hz to 1 Hz at 3kV and 6kV. When the voltage is varied from 3kV to 6kV, the capacitance remains relatively the same, thus indicating a good condition of the cable. Moreover, when the 3kV and 6kV tests were performed, the frequency response was repeatable showing that the cable behaves consistently when voltage is varied.

VDP Response (Voltage Dependent Permittivity)
A voltage dependent increase of capacitance and loss. Graph 2 displays the capacitance changes that show a dry cable (the green line on the graph) vs. a moist cable (the red lines on the graph). Both cables were frequency swept from 0.1 Hz to 1 Hz at 3kV and 6kV. When looking at the dry cable, the voltage is varied from 3kV to 6kV and the capacitance stays relatively the same, thus indicating a good condition of the cable. If we look at the moist cable, when the voltage is varied from 3kV to 6kV, the capacitance increases with voltage. Looking at the moist cable, when the 3kV, 4.5kV and 6kV tests were performed, the frequency response is also not repeatable indicating water-treeing is present in this cable.

TLC Response (Transition to Leakage Current)
A VDP response at initial low voltage levels. At higher voltage levels, the response changes characteristics due to appearance of a leakage current.
Graph 3 shows an example of the Loss (Tan Delta or Power Factor) of a dry cable (the black and blue lines on the graph) vs. a moist cable (the red line on the graph). The cables were frequency swept from 0.1 Hz to 1 Hz at voltages between 1.5 kV and 6 kV. When looking at the dry cable, if the voltage is varied from 1.5 kV to 4.5 kV, the losses stay relatively the same indicating a good condition of the cable. For the moist cable, when the voltage is varied from 3 kV to 6 kV, at 6 kV the losses at the second measurement point are higher compared to the first point – the insulation losses increase. It is an indication that the water-treeing is bridging the electrodes and insulation. The last frequency sweep at 3 kV has also significantly higher losses than initial 3 kV sweep (-1 slope indicating pure conduction).

TLC Response (Leakage Currents)
Leakage currents through water-trees are present already at low voltage levels. Graph 4 shows an example of Loss (Tan Delta) of a moist cable (the red line on the graph). The cable was frequency swept from 0.1 Hz to 1 Hz at 3 kV, 6 kV, and 9 kV. At 3 kV, 6 kV, and 9 kV the line should be at the same place on the graph (repeatable). The lines are not repetitive, indicating that there is probable water-treeing. In addition, the steepness of the slope (-1) reveals that there is electrical leakage in the cable (conductive path across the insulation).

Data Interpretation Paper Insulated (PILC) Cables
Moistening of the PILC cable is one of the factors leading to premature aging and even to failure. Using an IDA 200 measurement, it is possible to estimate moisture content in the PILC cable using the minimal value of dissipation factor (tan%o). In Table 2, values of the dissipation factor and the corresponding average moisture content are shown (based on [4].
| Minimum PF/tan‰ | Estimated average moisture content | Condition |
| 0.002–0.0035 | Below 1% | Good |
| 0.0035–0.005 | 1–2.5 % | Moderately aged/ moistened |
| 0.005–0.01 | 2.5–3.5 % | Considerably aged/moistened |
| Above 0.01 | Above 3.5% or a local defect | In bad condition/ moist |
If the cable is estimated having moisture content of 2% and higher, it is recommended that cable owner takes action for replacement of the cable in the near future (assuming that the cable is heavily loaded). When all three phases look the same and have a Power Factor/ tan‰ of 0.0023-0.0025% it indicates that the cable is in good condition. An example of differences between dry and moist PILC cable is shown in Graph 5.

An increase in losses should be less than the inverse proportional to frequency when the frequency is lowered. For example, if losses are 10 times higher at 0.01 Hz compared to those at 0.1 Hz it is an indication of a conductive path from conductor to outer sheath. Graph 6 shows an example of this below.

Conclusion
The IDA 200 test set can be used to help identify water-treeing in XLPE as well as moistening of the PILC cables. By identifying water-treeing in XLPE cables, increased moisture content in PILC cables and other defects in both types of cables, customers will have the ability to create a cost effective maintenance program for their cables and thus increase the reliability of their network.
References
- P. Werelius, P. Thärning, B. Holmgren and U. Gäfvert, “High Voltage Dielectric Response Analyser for Cable Diagnostics”, Conference. on Electrical Insulation and Dielectric Phenomena, Pocono Manor, USA, pp. 745-750, 1993
- P. Werelius, B. Holmgren and U. Gäfvert ”Diagnosis of Medium Voltage XLPE Cables by High Voltage Dielectric Spectroscopy”, ICSD’98, Västerås, Sweden, 22-25 June, 1998.
- S. Hvidsten, E. Ildstad, B. Holmgren and P. Werelius, “Correlation Between AC Breakdown Strength and Low Frequency Dielectric Loss of Water Tree Aged XLPE Cables “ Stockholm Power Tech, Stockholm, Sweden, June 18-22, 1995 and in rewritten form, IEEE Transactions on Power Delivery, Vol. 13, No. 1, January 1998
- R. Neimanis, T. K. Saha, R. Eriksson, “Determination of Moisture Content in Mass Impregnated Cable Insulation using Low Frequency Dielectric Spectroscopy”, IEEE Power Engineering Society Summer Meeting, Seattle, USA, 2000.
- Björn Holmgren, “Dielectric response, breakdown strength and water-tree content of medium voltage XLPE cables”. Licentiate thesis, Royal Institute of Technology, Stockholm, Sweden, May, 1997
* are trademarks of General Electric Company


Professional Certificate of Competency in Advanced TCP/IP-Based Industrial Networking
Designed for engineers and technicians who need practical knowledge in…Read more
Professional Certificate of Competency in Allen Bradley Controllogix / Logix5000 PLC Platforms
Designed for engineers and technicians who need practical knowledge in…Read more
Professional Certificate of Competency in Arc Flash Protection
Designed for engineers and technicians who work in the electrical…Read more
Professional Certificate of Competency in Chemical Engineering and Plant Design
Designed for engineers and technicians who need practical knowledge in…Read more
Professional Certificate of Competency in Circuit Breakers, Switchgear and Power Transformers
Designed for engineers and technicians who need practical knowledge regarding…Read more
Professional Certificate of Competency in Control Valve Sizing, Selection and Maintenance
Designed for engineers and technicians who need a solid understanding…Read more
Professional Certificate of Competency in Electrical Power System Fundamentals for Non Electrical Engineers
Designed for engineers and technicians who need to understand the…Read more
Professional Certificate of Competency in Electrical Power System Protection
Designed for engineers and technicians who need practical skills and…Read more")
Professional Certificate of Competency in Electrical Wiring Standards: AS/NZS 3000:2018 (Australia and New Zealand Only)
This professional development course is designed for engineers and technicians…Read more
Professional Certificate of Competency in Fundamental E & I Engineering for Oil and Gas Facilities
Designed for engineers and technicians who need to update their…Read more
Professional Certificate of Competency in Gas Turbine Engineering
Designed for engineers and technicians who need practical skills in…Read more
Professional Certificate of Competency in Hazardous Areas and Intrinsic Safety For Engineers and Technicians
Designed for engineers and technicians who need to understand the…Read more")
Professional Certificate of Competency in Heating, Ventilation and Air-Conditioning (HVAC)
Designed for engineers and technicians from a wide range of…Read more
Professional Certificate of Competency in IEC 61850 Based Substation Automation
Designed for engineers and technicians who need to understand the…Read more
Professional Certificate of Competency in Industrial Data Communications
Designed for engineers and technicians who need to understand how…Read more
Professional Certificate of Competency in Instrumentation, Automation and Process Control
Designed for engineers and technicians who need to gain practical…Read more
Professional Certificate of Competency in Machine Learning and Artificial Intelligence
This professional development course is designed for engineers and technicians…Read more
Professional Certificate of Competency in Mechanical Engineering
This professional development course is designed for engineers and technicians…Read more
Professional Certificate of Competency in Onshore and Offshore Pipeline Systems
Designed for engineers and technicians who need to gain an…Read more
Professional Certificate of Competency in Power Distribution
designed for engineers and technicians who need to gain a…Read more
Professional Certificate of Competency in Practical Machine Learning Using Python for Engineers and Technicians
Designed to use Python Programming to work with machine learning…Read more
Professional Certificate of Competency in Practical Python for Engineers and Technicians
Designed for engineers and technicians who need to understand the…Read more & SCADA Systems")
Professional Certificate of Competency in Programmable Logic Controllers (PLCs) & SCADA Systems
Designed for engineers and technicians who need to get practical…Read more
Professional Certificate of Competency in Project Management for Engineers & Technicians
This professional development course is designed for engineers and technicians…Read more
Professional Certificate of Competency in Safety Instrumentation Systems for Process Industries
Professional development course designed for engineers and technicians who want…Read more
Professional Certificate of Competency in Sewage and Effluent Treatment Technologies
Designed for engineers and technicians who need practical skills and…Read more
Professional Certificate of Competency in Structural Design for Non Structural Engineers
Professional development course designed for engineers and technicians who need…Read more")
Professional Certificate of Competency in Substation Design (Main Equipment)
Professional development course is designed for engineers and technicians who…Read more")
Professional Certificate of Competency in Substation Design (Control, Protection and Facility Planning)
Designed for engineers and technicians who need to gain practical…Read more
Professional Certificate of Competency in the Fundamentals of Process Plant Layout & Piping Design
Professional development course is designed for engineers and technicians who…Read more
Professional Certificate of Competency in Practical Mechanical Sealing
This professional development course is designed for engineers and technicians…Read more
Professional Certificate of Competency in Road Construction
This professional development course is designed for engineers and technicians…Read more
Professional Certificate of Competency in Specification and Technical Writing
Master the art of writing clear, accurate, and professional technical…Read more
Professional Certificate of Competency in Hydraulics and Pneumatics
Overview of all aspects related to the construction, design, operation,…Read more
Professional Certificate of Competency in Big Data and Analytics in Electricity Grids
This course explores the use of big data & data…Read more
Professional Certificate of Competency in Renewable Energy Systems
This course covers various renewable energy systems that are popular…Read more
Professional Certificate of Competency in Smart Grids
A smart grid is an electricity network that uses digital…Read more
Professional Certificate of Competency in Hydrogen Energy – Production, Delivery, Storage and Use
Hydrogen energy short course designed for engineers and professionals interested…Read more")
Professional Certificate of Competency in Building Information Modelling (BIM)
This professional development course is covering practical aspects of using…Read more
Professional Certificate of Competency in Industrial Internet of Things
Internet of Things (IoT) is the most sort after technology…Read more