")
52896WA Advanced Diploma of Civil and Structural Engineering (Materials Testing)
Investigation of the properties of construction materials, the principles which…Read more")
Graduate Diploma of Engineering (Safety, Risk and Reliability)
The Graduate Diploma of Engineering (Safety, Risk and Reliability) program…Read more
Professional Certificate of Competency in Fundamentals of Electric Vehicles
Learn the fundamentals of building an electric vehicle, the components…Read more
Professional Certificate of Competency in 5G Technology and Services Overview
Learn 5G network applications and uses, network overview and new…Read more
Professional Certificate of Competency in Clean Fuel Technology - Ultra Low Sulphur Fuels
Learn the fundamentals of Clean Fuel Technology - Ultra Low…Read more
Professional Certificate of Competency in Battery Energy Storage and Applications
Through a scientific and practical approach, the Battery Energy Storage…Read more
52910WA Graduate Certificate in Hydrogen Engineering and Management
Hydrogen has become a significant player in energy production and…Read more
Professional Certificate of Competency in Hydrogen Powered Vehicles
This course is designed for engineers and professionals who are…Read more
Electrical Maintenance for Engineers and Technicians
THIS BOOK WAS DEVELOPED BY IDC TECHNOLOGIES
WHO ARE WE?
IDC Technologies is internationally acknowledged as the premier provider of practical, technical training for engineers and technicians.
We specialize in the fields of electrical systems, industrial data communications, telecommunications, automation and control, mechanical engineering, chemical and civil engineering, and are continually adding to our portfolio of over 60 different workshops. Our instructors are highly respected in their fields of expertise and in the last ten years have trained over 200,000 engineers, scientists and technicians.
With offices conveniently located worldwide, IDC Technologies has an enthusiastic team of professional engineers, technicians and support staff who are committed to providing the highest level of training and consultancy.
TECHNICAL WORKSHOPS
TRAINING THAT WORKS
We deliver engineering and technology training that will maximize your business goals. In today’s competitive environment, you require training that will help you and your organization to achieve its goals and produce a large return on investment. With our ‘training that works’ objective you and your organization will:
- Get job-related skills that you need to achieve your business goals
- Improve the operation and design of your equipment and plant
- Improve your troubleshooting abilities
- Sharpen your competitive edge
- Boost morale and retain valuable staff
- Save time and money
EXPERT INSTRUCTORS
We search the world for good quality instructors who have three outstanding attributes:
- Expert knowledge and experience – of the course topic
- Superb training abilities – to ensure the know-how is transferred effectively and quickly to you in a practical, hands-on way
- Listening skills – they listen carefully to the needs of the participants and want to ensure that you benefit from the experience.
Each and every instructor is evaluated by the delegates and we assess the presentation after every class to ensure that the instructor stays on track in presenting outstanding courses.
HANDS-ON APPROACH TO TRAINING
All IDC Technologies workshops include practical, hands-on sessions where the delegates are given the opportunity to apply in practice the theory they have learnt.
REFERENCE MATERIALS
A fully illustrated workshop book with hundreds of pages of tables, charts, figures and handy hints, plus considerable reference material is provided FREE of charge to each delegate.
ACCREDITATION AND CONTINUING EDUCATION
Satisfactory completion of all IDC workshops satisfies the requirements of the International Association for Continuing Education and Training for the award of 1.4 Continuing Education Units.
IDC workshops also satisfy criteria for Continuing Professional Development according to the requirements of the Institution of Electrical Engineers and Institution of Measurement and Control in the UK, Institution of Engineers in Australia, Institution of Engineers New Zealand, and others.
CERTIFICATE OF ATTENDANCE
Each delegate receives a Certificate of Attendance documenting their experience.
100% MONEY BACK GUARANTEE
IDC Technologies’ engineers have put considerable time and experience into ensuring that you gain maximum value from each workshop. If by lunchtime on the first day you decide that the workshop is not appropriate for your requirements, please let us know so that we can arrange a 100% refund of your fee.
ONSITE WORKSHOPS
All IDC Technologies Training Workshops are available on an on-site basis, presented at the venue of your choice, saving delegates travel time and expenses, thus providing your company with even greater savings.
OFFICE LOCATIONS
AUSTRALIA • CANADA • INDIA • IRELAND • MALAYSIA • NEW ZEALAND • POLAND • SINGAPORE • SOUTH AFRICA • UNITED KINGDOM • UNITED STATES
idc@idc-online.com www.idc-online.com
Visit our website for FREE Pocket Guides
IDC Technologies produce a set of 6 Pocket Guides used by thousands of engineers and technicians worldwide.
Vol. 1 – ELECTRONICS
Vol. 2 – ELECTRICAL
Vol. 3 – COMMUNICATIONS
Vol. 4 – INSTRUMENTATION
Vol. 5 – FORMULAE & CONVERSIONS
Vol. 6 – INDUSTRIAL AUTOMATION
To download a FREE copy of these internationally best selling pocket guides go to: www.idc-online.com/downloads/
On-Site Training

All IDC Technologies Training Workshops are available on an on-site basis, presented at the venue of your choice, saving delegates travel time and expenses, thus providing your company with even greater savings.
For more information or a FREE detailed proposal contact Kevin Baker by e-mailing:
training@idc-online.com
IDC TECHNOLOGIES
Worldwide Offices
AUSTRALIA
Telephone: 1300 138 522 • Facsimile: +27 86 6924368
West Coast Office
1031 Wellington Street, West Perth, WA 6005
PO Box 1093, West Perth, WA 6872
East Coast Office
PO Box 1750, North Sydney, NSW 2059
CANADA
Toll Free Telephone: 1800 324 4244 • Toll Free Facsimile: 1800 434 4045
Suite 402, 814 Richards Street, Vancouver, NC V6B 3A7
INDIA
Telephone : +91 444 208 9353
35 4th Street, Kumaran Colony, Vadapalani, Chennai 600026
IRELAND
Telephone : +353 1 473 3190 • Facsimile: +353 1 473 3191
Caoran, Baile na hAbhann, Co. Galway
MALAYSIA
Telephone: +60 3 5192 3800 • Facsimile: +60 3 5192 3801
26 Jalan Kota Raja E27/E, Hicom Town Center
Seksyen 27, 40400 Shah Alam, Selangor
NEW ZEALAND
Telephone: +64 9 263 4759 • Facsimile: +64 9 262 2304
Parkview Towers, 28 Davies Avenue, Manukau City
PO Box 76-142, Manukau City
POLAND
Telephone: +48 12 6304 746 • Facsimile: +48 12 6304 750
ul. Krakowska 50, 30-083 Balice, Krakow
SINGAPORE
Telephone: +65 6224 6298 • Facsimile: + 65 6224 7922
100 Eu Tong Sen Street, #04-11 Pearl’s Centre, Singapore 059812
SOUTH AFRICA
Telephone: +27 87 751 4294 or +27 79 629 5706 • Facsimile: +27 11 312 2150
68 Pretorius Street, President Park, Midrand
PO Box 389, Halfway House 1685
UNITED KINGDOM
Telephone: +44 20 8335 4014 • Facsimile: +44 20 8335 4120
Suite 18, Fitzroy House, Lynwood Drive, Worcester Park, Surrey KT4 7AT
UNITED STATES
Toll Free Telephone: 1800 324 4244 • Toll Free Facsimile: 1800 434 4045
5715 Will Clayton #6175, Humble, TX 77338, USA
Website: www.idc-online.com
Email: idc@idc-online.com

Presents
Electrical Maintenance
for
Engineers and Technicians
Rev 3
Website: www.idc-online.com
E-mail: idc@idc-online.com
IDC Technologies Pty Ltd
PO Box 1093, West Perth, Western Australia 6872
Offices in Australia, New Zealand, Singapore, United Kingdom, Ireland, Malaysia, Poland, United States of America, Canada, South Africa and India
Copyright © IDC Technologies 2010. All rights reserved.
First published 2008
ISBN: 978-1-921007-89-7
All rights to this publication, associated software and workshop are reserved. No part of this publication may be reproduced, stored in a retrieval system or transmitted in any form or by any means electronic, mechanical, photocopying, recording or otherwise without the prior written permission of the publisher. All enquiries should be made to the publisher at the address above.
Disclaimer
Whilst all reasonable care has been taken to ensure that the descriptions, opinions, programs, listings, software and diagrams are accurate and workable, IDC Technologies do not accept any legal responsibility or liability to any person, organization or other entity for any direct loss, consequential loss or damage, however caused, that may be suffered as a result of the use of this publication or the associated workshop and software.
In case of any uncertainty, we recommend that you contact IDC Technologies for clarification or assistance.
Trademarks
All logos and trademarks belong to, and are copyrighted to, their companies respectively.
Acknowledgements
IDC Technologies expresses its sincere thanks to all those engineers and technicians on our training workshops who freely made available their expertise in preparing this manual.
Contents
1 Electrical Preventive Maintenance 3
1.1 Introduction 3
1.2 Planning an EPM 6
1.3 Production economics 9
1.4 Energy conservation 9
1.5 Record keeping 10
2 Planning 13
2.1 Introduction 13
2.2 Survey of electrical installations 15
2.3 Installation modifications 17
2.4 Forms and records 18
2.5 Emergency procedures 18
2.6 Identification of critical equipment 19
2.7 Frequency of maintenance 20
2.8 Frequency of inspection 21
2.9 Test and maintenance requirements 22
2.10 Establishment of a systematic program 24
3 Electrical Drawings and Schematics 29
3.1 Electrical diagrams 29
3.2 Single line diagram 30
3.3 Three line diagrams 33
3.4 Common terms 33
3.5 Protective relays 35
3.6 Abbreviations 36
3.7 Schematic diagrams 37
3.8 Logic diagrams 47
3.9 Ladder diagrams 48
3.10 Plant cabling system drawings 49
3.11 Control cable interconnection diagrams 54
3.12 Panel internal wiring diagrams 55
3.13 Terminal diagrams 55
3.14 Summary 55
4 Principles of Safety Rules and Hazards 59
4.1 Overview 59
4.2 Industrial hazards 60
4.3 Electrical hazards 63
4.4 Protective Earthing 64
4.5 Dangers of static electricity 67
4.6 Electric arcing 69
4.7 Preventive maintenance 72
4.8 Reducing fault level 73
4.9 Reducing arcing time 76
4.10 Arc flash protection program 81
4.11 Electrical equipment in explosive atmosphere 82
4.12 Hazards due to high temperature 84
4.13 Electrical accidents and safety measures 88
4.14 Summary 89
5 Inspection of Electrical Systems for Safety 91
5.1 Objectives of inspection 91
5.2 IEE wiring regulations 92
5.3 Initial verification 93
5.4 Testing 94
5.5 Alterations and additions 95
5.6 Periodic inspection and testing 95
5.7 Follow up measures 95
5.8 Summary 96
6 Substation components, Maintenance and Asset Management of Switchgear 99
6.1 Voltage classification 99
6.2 Switchgear rating and specification 100
6.3 Substation types 102
6.4 Substation components 102
6.5 Overview of maintenance of power distribution systems 104
6.6 Maintenance of electrical switchgear 104
6.7 Insulation deterioration 110
6.8 Switchgear diagnostic techniques 112
6.9 Substation battery condition and monitoring 120
6.10 Circuit breaker measurements 122
6.11 Switchgear maintenance procedures 129
6.12 Problems that may be found during switchgear maintenance 133
6.13 Defect management 134
6.14 Case studies of switchgear defects 136
7 Testing- Introduction 141
7.1 Need for testing 141
7.2 Purpose of testing 142
7.3 Categories of tests 142
7.4 Variations to test voltages and results 143
8 Insulation Testing 145
8.1 Principles of insulation testing 145
8.2 Purpose of insulation testing 148
8.3 Testing the insulation of equipment 149
8.4 Insulation resistance test voltages 150
8.5 Types of testers 150
8.6 Construction of a tester 151
8.7 Connecting a tester 151
8.8 Test procedure 153
8.9 Precautions to be taken when measuring insulation 156
8.10 Polarization index 157
8.11 Step voltage test 158
8.12 Readings and interpretation 159
8.13 Dryness of insulation using absorption ratio 160
8.14 Burn test 161
9 High Potential Tests 163
9.1 Purpose of hi-pot testing 163
9.2 AC and DC hi-pot tests 164
9.3 Test equipment construction and connections 166
9.4 Safety precautions to be taken 166
9.5 Test voltages as per applicable standards 167
9.6 VLF high pot test 167
10 Ducter Testing 169
10.1 Need for the instrument 169
10.2 Description of instrument 169
10.3 Working principle 170
10.4 Milli-ohmmeter Vs micro-ohmmeter 173
10.5 Breaker contact resistance measurement 174
10.6 Transformer resistance measurement 175
10.7 Precautions during measurements 175
11 Tests on Other Major Equipment 177
11.1 Other major equipment 177
11.2 HV/MV switchgear and breakers 177
11.3 MV motors 183
11.4 MV capacitors 183
11.5 Disconnectors 185
12 Field Tests 187
12.1 Need for field tests 187
12.2 General safety procedures 188
12.3 Transformers 190
12.4 Switchgear 193
12.5 High voltage disconnectors 193
12.6 MV cables 194
12.7 MV bus ducts 194
12.8 Instrument transformers 195
12.9 Rotating machinery 195
12.10 Surge arresters 196
12.11 Outdoor bus structures 196
12.12 Engine generators 196
13 Testing of Transformers 201
13.1 General 201
13.2 Routine tests 202
13.3 Guarantees and tolerances 203
13.4 Visual inspection 203
13.5 Winding resistance measurements 203
13.6 Turns ratio measurement 204
13.7 Polarity and vector group check 204
13.8 Impedance voltage and load losses 206
13.9 No load losses and current measurement 206
13.10 Insulation resistance tests 207
13.11 Dielectric tests 207
13.12 RIV corona measurements 208
13.13 Partial discharge measurements 209
13.14 Impulse tests 209
13.15 Tests on OLTC 210
13.16 Type tests 210
13.17 Special tests 210
13.18 Tests on bushings 211
14 Transformers 215
14.1 Installation of transformers 217
14.2 Special aspects of installation of large power transformers 222
14.3 Fire protection measures for large transformer installations 228
14.4 Transformer troubleshooting 229
14.5 Liquid level indicator, pressure and temperature gauges 231
14.6 Transformer inspections 234
15 CT Testing 235
15.1 Major tests on a CT 235
15.2 Test procedures 236
15.3 Safety precautions 243
16 VT Testing 245
16.1 Tests on voltage transformers 245
16.2 Test procedures 246
17 Oil Testing 253
17.1 Transformer oil – dielectric properties and uses 253
17.2 The need for testing transformer oil 254
17.3 Dielectric test 255
17.4 Improvement of oil by filtration 256
17.5 Oil filtration units 258
17.6 Test of acidity 260
17.7 Other tests 261
17.8 Dissolved gas analysis 263
17.9 Precautions to be taken when sampling oil 277
18 Protection of Motors 281
18.1 Introduction 281
18.2 Stalling of motors 286
18.3 Over current / overload 290
18.4 Under-voltage / over-voltage 291
18.5 Under-frequency 291
18.6 Pole slip / out of step 292
18.7 Loss of excitation 292
18.8 Inadvertent energization 292
18.9 Over fluxing 293
18.10 Stall protection / acceleration time 293
18.11 Negative sequence currents 295
18.12 Derating factors 296
18.13 Earth faults – core balance, residual stabilising resistors 297
18.14 Calculation of protective relay settings 299
19 Installation and Fault Finding 305
19.1 General installation and environmental requirements 305
19.2 General safety recommendations 305
19.3 Power supply connections and earthing 307
19.4 Installing contactors in power circuit 310
19.5 Installation of AC converters into metal enclosures 311
20 Motor Failure Analysis 317
20.1 Types of motor failure 317
20.2 Common causes of motor failure 318
20.3 Modern developments 326
21 Testing 329
21.1 Insulation life and resistance 329
21.2 Polarization index 332
21.3 DC hipot 334
21.4 DC ramp test 334
21.5 AC hipot 335
21.6 Capacitance test 335
21.7 Dissipation factor 337
21.8 Partial discharge 339
21.9 Surge test 340
21.10 Mechanical testing 345
21.11 Online testing 346
22 Maintenance and Cleaning 349
22.1 Introduction 349
22.2 Factors effecting motor performance 349
22.3 Motor cleaning methods 356
23 Cables – Failure Modes and Fault Detection 361
23.1 Introduction 361
23.2 Various types of cables 362
23.3 Cable joints 362
23.4 Installation 363
23.5 Special locations 368
23.6 Fire prevention and fire protection for cable installations 369
23.7 Types of failures 373
23.8 Reasons for failures 374
23.9 Fault location 379
23.10 Cable testing 381
23.11 Electrical tests for detection of cable faults 385
23.12 Safety issues in fault location 387
23.13 Analysis of failures 389
23.14 Documentation of work 393
23.15 Documentation of failures 394
23.16 Summary 395
24 Introduction to Power Quality 398
24.1 Introduction 399
24.2 Sags and swells 400
24.3 Surges and transients 402
24.4 Harmonics and distortions 404
24.5 Interruptions 405
24.6 Noise disturbance 406
24.7 Notching 407
24.8 Noise definitions 409
24.9 Earthing conductor 410
24.10 Isolated/insulated connections 411
24.11 Ground/earth loops 411
24.12 Site examination 412
25 Installation Guidelines 415
25.1 Checklist of considerations for power quality 415
25.2 Equipment selection specifications 428
25.3 Building maintenance analysis 430
25.4 Power quality versus reliability 432
25.5 Typical project approach 433
26 Testing & Periodic Inspection and Maintenance of UPS Batteries 437
26.1 Introduction 437
26.2 UPS systems 439
26.3 Periodic inspection and maintenance of ups batteries 455
27 Protective Relays 459
27.1 Introduction 459
27.2 Classification of protective relays 460
27.3 Attracted armature relay 460
27.4 Electromagnetic induction relays 461
27.5 Overcurrent relays 461
27.6 Distance relays 461
27.7 Differential relays 461
27.8 Static relays 462
27.9 Comparators 462
27.10 Microprocessor based relays 463
27.11 Relay maintenance 464
27.12 Automated testing 466
27.13 Safety precautions 466
27.14 Basics on relay handling 467
28 Testing and Maintenance 471
28.1 Faults – types and their effects 471
28.2 Causes of inadequate grounding 473
28.3 Mitigation by multiple ground connection 474
28.4 Grounding system inspection 476
28.5 Testing and monitoring 476
28.6 Requirement for testing 484
28.7 Maintenance of grounding system 488
28.8 Grounding for safety during maintenance 490
29 Supervisory Control and Data Acquisition (SCADA) 493
29.1 Introduction 493
29.2 SCADA components 495
29.3 Maintenance and troubleshooting 499
29.4 The maintenance unit system – A case study 506
30 Safe Operation and Maintenance of Electrical Equipment 511
30.1 Introduction 511
30.2 Key safety factors in operation and maintenance of electrical installations 512
30.3 Isolation during maintenance of electrical installations 515
30.4 Visual checks for safety 517
30.5 Monitoring hot spots to improve safety 517
30.6 Earthing for Safety During Maintenance 522
30.7 Need for periodic inspection and maintenance 523
30.8 Emergency and first-aid training 524
31 Portable Electric Tools and Equipment 527
31.1 Introduction 527
31.2 Portable hand and power tools 528
31.3 Portable electric tools 529
31.4 Ground-type plugs and receptacles 530
31.5 Double insulated portable electric tools 532
31.6 Electrical cords 533
31.7 Safety precautions 536
31.8 Employee training 537
32 Maintenance Reports 543
32.1 Transformer test report 543
32.2 UPS inspection checklist 545
32.3 Batteries inspection checklist 546
32.4 Circuit breaker (oil) test report 547
32.5 Overcurrent relay test report 548
Appendix – Practical Exercises 549
1
Electrical Preventive Maintenance
In this chapter we will learn about Electrical Preventive Maintenance (EPM). We will discuss objectives and benefits of EPM. Planning an effective EPM program, record keeping, personal safety, equipment maintenance, production economics and energy conservation are covered in this chapter.
Learning objectives
- Elements of preventive maintenance
- Benefits of EPM
- Planning an EPM
- Production economics
- Energy conservation
- Record keeping
1.1 Introduction
Preventative maintenance (PM) is a program of routine equipment inspections, maintenance tasks and repairs which are scheduled to ensure that degradation of equipment is minimized. A well planned and designed preventative maintenance program keeps equipment/facilities in satisfactory operational state by providing for systematic inspection, detection, and correction of incipient failures either prior to their occurrence or prior to their development into major failure.
Predictive maintenance is the technique of regularly monitoring selected parameters of equipment operation to detect and correct a potential problem before it causes a failure. This is done by trending measured parameters which allows a comparison of current parameters to historical data. From this approach ensures that the right maintenance activities are performed at the right time.
The main objectives of PM are to:
- enhance capital equipment productive life
- reduce critical equipment breakdowns
- allow better planning and scheduling of needed maintenance work
- minimize production losses due to equipment failures, and
- promote health and safety of maintenance personnel
If maintenance is carried out reactively, in response to interruptions, breakdowns and other unfortunate events, then this kind of approach can be severe, especially at operations such as processing plants, assembly lines and power plants, where the failure of a relatively minor component can disrupt the entire facility. The total cost of downtime and emergency around-the-clock repairs can be overwhelming. Where as a preventive maintenance program ensures continuity of operation and reduces the danger of unplanned outages. Planned shutdowns during periods of least usage, helps in detecting troubles in the early stages and corrective action taken before extensive damage is done.
Table 1.1 shows results of the survey conducted by the IEEE Industrial Commercial Power Systems Committee.
Deterioration of electrical equipment is inevitable whereas the equipment failure is not inevitable. The deterioration process can cause malfunction or an electrical failure. An effective EPM program identifies and recognizes these factors and provides measures for coping with them.
Other potential causes of equipment failure can be detected and corrected through EPM, such as load changes, voltage conditions, improperly set protective relays and changes in circuits.
Effect of EPM frequency of inspection on overall costs
| Number of failures versus maintenance quality for all equipment classes combined | |||
| Number of failures | |||
| Maintenance Quality | All causes | Inadequate Maintenance | Percent of Failures due to inadequate maintenance |
| Excellent | 311 | 36 | 11.6% |
| Fair | 853 | 154 | 18.1% |
| Poor | 67 | 22 | 32.8% |
| Total | 1231 | 212 | 17.2% |
1.1.1 Elements of preventive maintenance
The following are the seven elements of preventive maintenance (seen in Figure 1.1):
- Inspection: Periodically inspecting materials/items to determine their serviceability by comparing their physical, electrical, mechanical, etc., characteristics (as applicable) to expected standards.
- Servicing: Cleaning, lubricating, charging, preservation, etc., of items/ materials periodically to prevent the occurrence of incipient failures.
- Calibration: Periodically determining the value of characteristics of an item by comparison to a standard; it consists of the comparison of two instruments, one of which is certified standard with known accuracy, to detect and adjust any discrepancy in the accuracy of the material/parameter being compared to the established standard value.
- Testing: Periodically testing or checking out to determine serviceability and detect electrical/mechanical-related degradation
- Alignment: Making changes to an item’s specified variable elements for the purpose of achieving optimum performance.
- Adjustment: Periodically adjusting specified variable elements of material for the purpose of achieving the optimum system performance.
- Installation: Periodic replacement of limited-life items or the items experiencing time cycle or wear degradation, to maintain the specified system tolerance.
Elements of preventive maintenance
1.1.2 Benefits of EPM
AS per NFPA 70B (National Fire Protection Association) standard, benefits of an effective EPM program fall into two general categories:
- Direct, measurable economic benefits – derived from reduced cost of repairs and reduced equipment downtime.
- Less measurable but very real benefits – result from improved safety.
Direct, measurable economic benefits can be documented by equipment repair cost and equipment downtime records after an EPM program has been implemented.
- A well-administered EPM program reduces accidents, saves lives, and minimizes costly breakdowns and unplanned shutdowns of production equipment.
- Improved employee morale — reduces injuries and property loss. Improved employee moral, comes with employee awareness of a conscious management effort to promote safety by reducing the likelihood of electrical injuries or fatalities, electrical explosions, and fires.
- Reduced personnel injuries, better workmanship and increased productivity, reduced absenteeism, reduced interruption of production, and improved insurance considerations.
- Equipment lasts longer and performs better
- Investment in EPM is small compared with the cost of equipment repair and the production losses associated with an unexpected equipment shutdown.
- With proper planning, maintenance costs can be held to a practical minimum, while production is maintained at a practical maximum.
- An effective EPM program satisfies an important part of management’s responsibility for keeping costs down and production up.
Maintenance costs can be placed in either of two basic categories: preventive maintenance or breakdown repairs. The money spent for preventive maintenance will be reflected as less money required for breakdown repairs. An effective EPM program holds the sum of these two expenditures to a minimum. Figure 1.2 is a typical curve illustrating this principle. According to this curve, as the interval of time between EPM inspections increases, the cost of the EPM diminishes and the cost of breakdown repairs and replacement of failed equipment increases. The lowest total annual expense is realized by maintaining an inspection frequency that keeps the sum of repair/replacement and EPM costs at a minimum (Refer NFPA 70B Recommended Practice for Electrical Equipment Maintenance).

Effect of EPM inspection frequency on overall costs
1.2 Planning an EPM
The purpose of an EPM program is to reduce hazard to life and property that can result from the failure of electrical systems and equipment. A preventive maintenance program can only be effective if it is both well planned and regularly carried out. Planning involves understanding the electrical system, identifying and prioritizing equipment maintenance requirements and then establishing a maintenance schedule.
AS per NFPA 70B standard, the following basic factors should be considered while planning an EPM program:
- Personal safety
- Equipment maintenance
- Production economics
1.2.1 Personal safety
Personal safety should be given prime consideration in system design and in establishing maintenance practices. Safety rules should be instituted and practiced to prevent injury to personnel who are performing tasks and others who might be exposed to the hazard.
Maintenance should be performed only by qualified personnel who are trained in safe maintenance practices and the special considerations necessary to maintain electrical equipment. Employees who face a risk of electrical hazard should be trained to understand the specific hazards associated with electrical energy. The qualified personnel are expected to know the proper personal protection equipment (PPE) to avoid or mitigate electrical shock or burn exposure. The qualified person should determine if the hazard exposure is limited and restricted.
All employees should be trained in safety-related work practices and required procedures as necessary to provide protection from electrical hazards associated with their respective jobs or task assignments. The training should include information on the type of tools to be utilized. Instruction should be given in selecting the proper tool for the job and the limitations of the tool.
Electrically safe work condition should be established before performing maintenance of electrical circuits or equipment. According to 29 CFR 1910.333, “Occupational Safety and Health Act” (OSHA), circuits or equipment should be disconnected using proper de-energization means, also should be locked and tagged.
Article 130 of NFPA 70E, Standard for Electrical Safety in the Workplace, requires that electrical conductors and circuit parts that have not been de-energized or that have been disconnected [but not under lockout/ tagout, tested, and grounded (where appropriate)] not be considered to be in an electrically safe work condition and that safe work practices appropriate for the circuit voltage and energy level be used. All insulating tools and PPE should be tested periodically.
Switchboards, panelboards, industrial control panels, and motor control centers that are likely to require examination, adjustment, servicing, or maintenance while energized should be field marked to warn qualified persons of potential electric arc flash hazards. The marking should be located so as to be clearly visible to qualified persons before examination, adjustment, servicing, or maintenance of the equipment.
In spite of all precautions, de-energized circuits can be inadvertently reenergized. When this occurs, adequate grounding is the only protection for personnel working on those circuits. For this reason, it is especially important that adequate grounding procedures should be established (Refer NFPA 70B Recommended Practice for Electrical Equipment Maintenance).
The following safety precautions should be observed:
- Personnel should wear personal protective equipment (PPE) such as goggles, gloves, aprons, and respirators when working with solvents.
- Care should be exercised in the selection of cleaning agents for any particular task, following all applicable environmental regulations.
- Adequate ventilation should be provided where cleaning agents are used, to avoid fire, explosion, and health hazards.
- A metal nozzle used for spraying flammable cleaning agents should be bonded to the supply drum and to the equipment being sprayed.
- Screens, ropes, guards, and signs should be provided to prohibit access to persons other than those necessary to perform the task.
- A procedure should be established to leave the test site in a safe condition when unattended.
- Employees should be trained to identify and understand the relationship between electrical hazards and possible injury.
1.2.2 Equipment maintenance
Many maintenance tasks require equipment to be shut down and de-energized for effective results. Other maintenance tasks might specifically require or permit equipment to be energized and in service while the tasks are performed. Examples include taking transformer oil samples and observing and recording operating temperatures, load conditions, corona, noise, or lamp output.
Coordinating maintenance with planned production outages and providing system flexibility such as by duplication of equipment and processes are two recommended means to avoid major disruptions of operations. An example of flexibility is a selective radial distribution system incorporating double-ended low-voltage substations. This system permits maintenance and testing to be performed on equipment such as the primary feeders, transformers, and main and tie circuit breakers during periods of light loads. Duplication of equipment enables maintenance to be performed economically without costly premium time and ensures continuous production in the event of an accidental breakdown.
Good quality equipment, appropriate for the task should be properly installed and maintained. Selection of quality equipment that is adequate for the present and projected load growth is a prime factor in reducing maintenance cost.
Scheduling maintenance
Effective maintenance program requires a positive mechanism for scheduling and recording the work that has been accomplished. Maintenance outages, particularly in plants that operate 24 hours a day, 7 days a week, are difficult to schedule. For example, low-voltage power circuit breakers should be inspected on an annual basis and tested under simulated overload and fault conditions every 3 to 5 years.
Many plants schedule shutdowns of 1 to 3 weeks duration to perform needed periodic maintenance on vital production apparatus that cannot be taken out of service at any other time. A total plant shutdown resolves the problem of scheduling partial outages around limited production operations. Even so, some difficulty might be encountered in providing power requirements for maintenance operations and still performing the needed maintenance on the electrical system. The distribution system should allow for maintenance work without load interruption, or with only minimal disturbances for critical loads. Table I.1 in NFPA 70B Recommended Practice for Electrical Equipment Maintenance Annex I gives an initial guideline for maintenance intervals for equipment.
Equipment safety
The protective device should be capable of immediately sensing an abnormality and causing it to be isolated with the least destruction and minimum disturbance to the system. The degree of sensitivity and speed of response is vital to the effectiveness of the protection. Applying the settings and periodic testing of the protective devices, relays, series and static trip elements, checking the proper type and ampere rating of the fuses used in the system is part of maintenance.
Rework, remanufacturing, or retrofitting process can be conducted by the original manufacturer or by another party with sufficient facilities, technical knowledge, and manufacturing skills. Safety certifications should be sought for repaired or rebuilt equipment.
Equipment cleaning
The cleaning method used should be determined by the type of contamination to be removed and whether the apparatus is to be returned to use immediately. Drying is necessary after using a solvent or water. Insulation should be tested to determine whether it has been properly reconditioned. Enclosure and substation room filters should be cleaned at regular intervals and replaced if they are damaged or clogged. Loose hardware and debris should be removed from the enclosures (new or unusual wear or loss of parts occurring after the cleaning can be detected during subsequent maintenance).
Methods of cleaning
Dirt should be cleaned with clean, dry, lint-free cloth or soft brush if the apparatus is small. Waste rags should not be used as the lint will stick to the insulation and collects more dirt. Care should be used to avoid damage to delicate parts.
If the dirt cannot be removed by wiping or vacuuming, compressed-air blowing can be used. Care should be taken while cleaning with compressed air as contaminants as compressed air can cause contaminants to become airborne which can foul the mechanical operation of nearby equipment. Therefore, other equipment should be guarded from the cross contamination. Air should be dry and directed in a manner to avoid further blockage of ventilation ducts and recesses in insulations.
Accumulated dirt, oil, or grease might require a solvent to remove it. A rag barely moistened (not wet) with a non-flammable solvent can be used for wiping. Solvents used for cleaning of electrical equipment should be selected carefully to ensure compatibility with materials being cleaned. Equipment might require cleaning by nonconductive sandblasting. Devices containing radioactive materials can require special precautions.
1.3 Production economics
Maintenance costs are usually due to manhours, materials and indirect costs. Preventive maintenance should be done when production is least effected. Assessing the costs of equipment downtime is an important step in the determination of costs of preventive maintenance.
A system in general is a complex configuration of different units, which may imply that downtime of one unit, does not necessarily halt the full system. It is important to identify which unit is most vital to production, and analyze the effect of repair or replacement of the unit on the production.
The failure of one component often is an opportunity to preventively maintain other components. Especially if the failure causes the breakdown of the production system it is favorable to perform preventive maintenance on other components. In such cases, only a little or no production is lost above that resulting from the original failure.
Maintenance scheduling in line with the production can reduce the good maintenance plan, one that is integrated with the production plan, can result in considerable cost savings. This integration with production is crucial because production and maintenance have a direct relationship. Any breakdown in machine operation results in disruption of production and leads to additional costs due to downtime, loss of production, decrease in productivity and quality, and inefficient use of personnel, equipment and facilities.
Selection of quality equipment that is adequate for the present and projected load growth is a can reduce the maintenance cost. Too often, installation cost without sufficient regard for efficient and economic maintenance influences system design. Within a few years, the added cost of performing maintenance plus production loss from forced outages due to lack of maintenance will more than offset the savings in initial cost.
1.4 Energy conservation
Equipment that is well maintained operates more efficiently and utilizes less energy. Energy management incorporates engineering, design, applications, operation and maintenance of electrical power system to provide for the minimum overall use of the electrical energy. Optimized use of electrical energy involves factors such as comfort, healthful working conditions, the practical aspects of productivity, aesthetic acceptability of the space, and public relations.
Any process requires a certain minimum consumption of energy. Energy additions beyond this minimum consumption require an evaluation of the incremental cost of more efficient or techniques versus the resulting energy savings or costs. Energy conservation can be obtained by proper maintenance and operation as follows:
- Shutting off unused equipment, eliminating steam, compressed air and heat leaks, proper lubrication of equipment, proper cleaning and replacement of filters in equipment
- Equipment and process modifications should be taken into considerations during designing and planning, such as using more durable or more efficient components, more efficient design concepts or replacement of an existing process with an energy efficient process.
- Better utilization of equipment can be achieved by properly examining the production processes, schedules, and operating practices.
- Energy survey and energy balances identify energy wasting situations and differentiate between identify energy corrected by maintenance and operation actions from those that require capital expenditures.
- Power quality improvement – Energy savings can be achieved by improving the quality of the power supply to the utilization equipment.
- The I2R losses in electrical conductors can be reduced by selecting an increased wire size in cabling and by using a heavier cross section in busbars.
- Energy savings can be achieved by specifying and purchasing efficient transformers and operating the transformer efficiently.
- Provide zoning capability to shut down unused areas.
1.5 Record keeping
Records should be maintained by the management; analysis of the records should guide the breakdown repair and evaluate the results. They should contain accurate and vital information. Excessive record keeping will disrupt the EPM program. Usually records are classified into four categories:
- Maintenance work records
- Maintenance cost
- Inventory
- Maintenance files
Maintenance work records contain documentation of all the repairs and maintenance performed during the equipment service life to date. Cost records contain chronological records of profiles, labor, material costs by item. Figures should be kept to show the total cost of each breakdown. Inventory records contain information of equipment number, size and type, cost, date of manufacture or acquire, manufacturer, location of the equipment, etc. Other files include drawings, operating manuals, service manuals etc.
Record keeping is a practice and useful to determine operating performance trends, troubleshooting breakdowns, replacement or modification decisions, investigating faults, performing reliability and maintainability studies.
2
Planning
In this chapter we will learn how to plan an effective EPM. The various steps involved in planning like survey of the installation, installation modifications, documentation required for inspection and maintenance, procedures for maintenance and inspection are covered in detail.
Learning objectives
- Survey of electrical installations
- Installation modifications
- Forms and records
- Emergency procedures
- Identification of critical Equipment
- Frequency of maintenance
- Frequency of inspection
- Test and maintenance requirements
- Establishment of systematic program
2.1 Introduction
The purpose of planning an EPM program is to reduce hazard to life and property that can result from the failure or malfunction of electrical systems and equipment. This chapter explains the various steps involved in planning like survey of the installation, documenting the installation modifications, data and diagrams needed to maintain the installation, procedures for maintenance and inspection.
The following four basic steps should be considered in the planning and development of an EPM program.
- Compile a listing of all equipment and systems.
- Determine which equipment and systems are most critical and most important.
- Develop a system for keeping up with what needs to be done.
- Train people for the work that needs to be done or contract the special services that are needed.
The caliber of personnel responsible for its implementation, decide the success of an EPM program. The primary responsibility for EPM program implementation and its success lies with a single individual.
This individual responsible for the EPM program should be given the authority to do the job and should have the cooperation of management, production, and other departments whose operations might affect the EPM program.
Ideally, the person designated to head the EPM program should have the following qualifications:
- Technical competence. The person should, by education, training, and experience, be well-rounded in all aspects of electrical maintenance.
- Administrative and supervisory skills. The person should be skilled in the planning and development of long-range objectives to achieve specific results and should be able to command respect and solicit the cooperation of all persons involved in the program.
The maintenance supervisor should have open lines of communication with design supervision. Frequently, an unsafe installation or one that requires excessive maintenance can be traced to improper design or construction methods or misapplication of hardware.
The work center of each maintenance work group should be conveniently located. This work center should contain the following:
- Copies of all the inspection and testing procedures for that zone
- Copies of previous reports
- Single-line diagrams
- Schematic diagrams
- Records
- Vendors’ catalogs
- Facility stores’ catalogs
- Supplies of report forms
There should be adequate storage facilities for tools and test equipment that are common to the group.
In a continuously operating facility, running inspections (inspections made with equipment operating) play a vital role in the continuity of service. The development of running inspection procedures changes with the type of operation. Running inspection procedures should be as thorough as practicable within the limits of safety and the skill of the craftsman. These procedures should be reviewed regularly in order to keep them current. Each failure of electrical equipment, be it an electrical or a mechanical failure, should be reviewed against the running inspection procedure to determine if some other inspection technique would have indicated the impending failure. If so, the procedure should be modified to reflect the findings.
Supervisors have a good scope for best motivational opportunities through handling the results of running inspections. When the electrical maintenance supervisor initiates corrective action, the craftsperson should be so informed. The craftsperson who found the condition will then feel that his or her job was worthwhile and will be motivated to try even harder. However, if nothing is done, individual motivation might be affected adversely.
Trends in failure rates are hard to change and take a long time to reverse. For this reason, the inspection should continue and resulting work orders should be written, even though the work force might have been reduced. Using the backlog of work orders as an indicator, the electrical maintenance supervisor can predict trends before they develop. With the accumulation of a sizable backlog of work orders, an increase in electrical failures and production downtime can be expected.
2.2 Survey of electrical installations
2.2.1 Data collection
Organizing a survey should start with a look at the total package. Should check if the available manpower permits the survey of an entire system, process, or building, or should it be divided into segments?
Next, each segment must be assigned a priority. Segments to be done in sequential should be identified before the actual work commences.
All documentation must be assembled. This might need a search of desks, cabinets, and such, and might also require that manufacturers be contacted, to replace lost documents. All of the documents should be brought to a central location and marked immediately with some form of effective identification.
2.2.2 Diagrams and data
The availability of up-to-date, accurate, and complete diagrams is the foundation of a successful EPM program. No EPM program can operate without them, and their importance cannot be overemphasized. The diagrams discussed here are some of those in common use.
Single-line diagrams should include the electrical circuitry down to, and including, the major items of utilization equipment. They should show all electrical equipment in the power system and give all pertinent ratings. In making this type of diagram, basic information like voltage, frequency, phase, and normal operating position must be included. Important information that might be less obvious such as transformer impedance, available short-circuit current, and equipment continuous and interrupting ratings must also be covered. Other items include current and potential transformers and their ratios, surge capacitors, and protective relays. If one diagram cannot cover all the equipment involved, additional diagrams, appropriately noted on the main diagram, can be drawn.
Short-circuit and coordination studies are important. Many managers have the misconception that these engineering studies are part of the initial facility design, after which the subject can be forgotten. However, a number of factors can affect the available short-circuit current in an electrical system. Among these factors are changes in the supply capacity of the utility company, changes in size or percent impedance of transformers, changes in conductor size, addition of motors, and changes in system operating conditions:
- As part of periodic maintenance testing of protective equipment, such as relays and series or shunt-trip devices, equipment settings should be evaluated. Along with the proper sizing of fuses, this evaluation is part of the coordination study.
- In a small facility, one receiving electrical energy at utilization voltage or from a single step-down transformer, the short circuit study is simple. The available incoming short-circuit current can be obtained from the utility company sales engineer.
- In a larger system, it might be desirable to develop a computerized short-circuit study to improve accuracy and reduce engineering time. Should resources not be available within the plant organization, the short-circuit study can be performed on a contract basis. The short-circuit data are used to determine the required momentary and interrupting ratings of circuit breakers, fuses, and other equipment.
- Fuses are rated on the basis of their current-carrying and interrupting capacities. These ratings should be determined and recorded. Other protective devices are usually adjustable as to pickup point and time-current characteristics. The settings of such protective devices should be determined, verified by electrical tests, and recorded for future reference.
- Personnel performing the tests should be trained and qualified in proper test procedures. Various organizations and manufacturers of power and test equipment periodically schedule seminars in which participants are taught the principles of maintenance and testing of electrical protective devices.
Circuit-routing diagrams, cable maps, or raceway layouts should show the physical location of conductor runs. In addition to voltage, such diagrams should also indicate the type of raceway, number and size of conductors, and type of insulation.
- Where control conductors or conductors of different systems are contained within the same raceway, the coding appropriate to each conductor should be noted.
- Vertical and horizontal runs with the location of taps, headers, and pull boxes should be shown.
- Access points should be noted where raceways pass through tunnels or shafts with limited access.
Layout diagrams, plot plans, equipment location plans, or facility maps should show the physical layout (and in some cases, the elevations) of all equipment in place.
- Switching equipment, transformers, control panels, mains, and feeders should be identified.
- Voltage and current ratings should be shown for each piece of equipment.
Schematic diagrams should be arranged for simplicity and ease of understanding circuits without regard for the actual physical location of any components. The schematic should always be drawn with switches and contacts shown in a de-energized position.
Wiring diagrams, like schematics, should show all components in the circuit but arranged in their actual physical location. Electromechanical components and strictly mechanical components interacting with electrical components should be shown. Of particular value is the designation of terminals and terminal strips with their appropriate numbers, letters, or colors. Wiring diagrams should identify all equipment parts and devices by standard methods, symbols, and markings.
An effective EPM program should have manufacturers’ service manuals and instructions. These manuals should include recommended practices and procedures for the following:
- Installation
- Disassembly/assembly (interconnections)
- Wiring diagrams, schematics, bills of materials
- Operation (set-up and adjustment)
- Maintenance (including parts list and recommended spares)
- Software program (if applicable)
- Troubleshooting
2.2.3 System diagrams
System diagrams should be provided to complete the data being assembled. The importance of the system determines the extent of information shown. The information can be shown on the most appropriate type of diagram but should include the same basic information, source and type of power, conductor and raceway information, and switching and protective devices with their physical locations. It is vital to show where the system might interface with another system, such as with emergency power; hydraulic, pneumatic, or mechanical systems; security and fire-alarm systems; and monitoring and control systems. Some of the more common of these are described below.
Ventilation
Ventilation systems normally comprise the heating, cooling, and air-filtering systems. Exceptions include furnace, dryer, oven, casting, and similar areas where process heat is excessive and air conditioning is not practical. Numerous fans are used to exhaust the heated and possibly foul air. In some industries, such as chemical plants and those using large amounts of flammable solvents, large volumes of air are needed to remove hazardous vapors. Basic information, including motor and fan sizes, motor or pneumatically operated dampers, and so on, should be shown. Additionally, many safety features can be involved to ensure that fans start before the process — airflow switches to shut down an operation on loss of ventilation and other interlocks of similar nature. Each of these should be identified with respect to type, function, physical location, and operating limits.
Heating and air conditioning
Heating and air-conditioning systems are usually manufactured and installed as a unit, furnished with diagrams and operating and maintenance manuals. This information should be updated as the system is changed or modified. Because these systems are often critical to the facility operation, additional equipment might have been incorporated: for example, electronic, and similar processes and corrosive and flammable vapor control for chemical and related industries. Invariably, these systems interface with other electrical or nonelectrical systems: pneumatic or electromechanical operation of dampers, valves, and so on; electric operation for normal and abnormal temperature control; and manual control stations for emergency smoke removal are just a few. There might be others, but all should be shown and complete information given for each.
Control and monitoring
Control and monitoring system diagrams should be provided to describe how these complicated systems function. They usually are in the form of a schematic diagram and can refer to specific wiring diagrams. Maximum benefit can be obtained only when every switching device is shown, its function is indicated, and it is identified for ease in finding a replacement. These devices often involve interfaces with other systems, whether electromechanical (heating or cooling medium) pumps and valves, electro-pneumatic temperature and damper controls, or safety and emergency operations. A sequence-of-operation chart and a list of safety precautions should be included to promote the safety of personnel and equipment. Understanding these complex circuits is best accomplished by breaking down the circuits into their natural functions, such as heating, cooling, process, or humidity controls. The knowledge of how each function relates to another enables the craftsperson to have a better concept of the entire system and thus perform assignments more efficiently.
Lighting system diagrams
Lighting system diagrams (normal and emergency) can terminate at the branch circuit panel board, listing the number of fixtures, type and lamp size for each area, and design lighting level. The diagram should show watchman lights and probably an automatic transfer switch to the emergency power system.
2.3 Installation modifications
The documentation of the changes that result from engineering decisions, planned revisions, and so on, should be the responsibility of the engineering group that initiates the revisions.
Periodically, changes occur as a result of an EPM program. The EPM program might also uncover undocumented practices or installations.
A responsibility of the EPM program is to highlight these changes, note them in an appropriate manner, and formally submit the revisions to the organization responsible for the maintenance of the documentation.
2.4 Forms and records
2.4.1 Forms
For a testing and maintenance program to provide optimum benefits, all testing data and maintenance actions should be recorded on test circuit diagrams and forms that are complete and comprehensive. Recording both test data and maintenance information on the same form is often found useful. A storage and filing system should be set up for these forms to enable efficient and rapid retrieval of information regarding previous testing and maintenance on a piece of equipment.
A variety of forms can go along with the inspection, testing, and repair (IT&R) procedure; these forms should be detailed and direct, yet simple and durable enough to be used in the field. Field notes should be legibly transcribed. One copy of reports should go in the working file of the piece of equipment and one in the master file maintained by first line supervision. These forms should be used by the electrical maintenance personnel; they are not for general distribution. If reports to production or engineering are needed, they should be separate, and inspection reports should not be used.
2.4.2 Records
Important records must be maintained by the management to evaluate results. Analysis of the records should guide the spending level for EPM and Breakdown repairs.
Records of cost
Figures should be kept to show the total cost of each breakdown. This should be the actual cost plus an estimated cost of the business interruption. This figure is a powerful indicator for the guidance of expenditures for EPM.
Records kept by first-line supervisor of EPM
A variety of approaches exist to perform this phase of the program, but the following approach is a typical one that fulfils the minimum requirements:
- Inspection Schedule. The first-line supervisor should maintain, in some easy-to-use form, a schedule of inspections so that he or she can plan manpower requirements.
- Work Order Log. An active log should be kept of unfinished work orders. A greater susceptibility to imminent breakdown is indicated by a large number of outstanding work orders resulting from the inspection function.
- Unusual Event Log. As the name implies, this log lists unusual events that affect the electrical system in any way. This record is derived from reports of operating and other personnel and is a good tool for finding likely problems after the supervisor has learned to interpret and evaluate the reports. Near misses can be recorded and credit given for averting trouble.
2.5 Emergency procedures
Emergency procedures should list, step by step, the action to be taken in case of emergency or for the safe shutdown or start-up of equipment or systems. To make optimum use of these procedures, they are bound for quick reference and posted in the area of the equipment or systems. Some possible items to consider for inclusion in the emergency procedures are interlock types and locations, interconnections with other systems, and tagging procedures of the equipment or systems. Accurate single-line diagrams posted in strategic places are particularly helpful in emergency situations. The production of such diagrams in anticipation of an emergency is essential to a complete EPM program. Diagrams are a particularly important training tool in developing a state of preparedness. Complete and up-to-date diagrams provide a quick review of the emergency plan. During an actual emergency, when time is at a premium, they provide a simple, quick reference guide.
In the emergency situations, properly trained electrical maintenance personnel can make an important contribution. However, most such situations will also involve other crafts and disciplines, such as operating personnel, pipe fitters, and mechanics. An overall emergency procedure for each anticipated emergency situation should be developed by the qualified personnel of each discipline involved working as a team. The procedure should include detailed steps to be followed, sequence of steps, and assignment of responsibility. Each of these emergency procedures must be run periodically as a drill to ensure that all involved personnel are familiar with the tasks they are to perform as and when the emergency arises.
2.6 Identification of critical equipment
Equipment (electric or otherwise) should be considered critical if its failure to operate normally and under complete control will cause a serious threat to people, property, or the product. Electric power, like process steam, water, and so forth, might be essential to the operation of a machine, but unless loss of one or more of these supplies causes the machine to become hazardous to people, property, or production, that machine might not be critical. The combined knowledge and experience of several people might be needed to make this determination. In a small plant, the plant engineer or master mechanic working with the operating superintendent should be able to make this determination.
A large operation should use a team comprising the following qualified people:
- The electrical foreman or superintendent
- Production personnel thoroughly familiar with the operation capabilities of the equipment and the effect its loss will have on final production
- The senior maintenance person who is generally familiar with the maintenance and repair history of the equipment or process
- A technical person knowledgeable in the theoretical fundamentals of the process and its hazards (in a chemical plant, a chemist; in a mine, a geologist; etc.)
- A safety engineer or the person responsible for the overall security of the plant and its personnel against fire and accidents of all kinds
The team should go over the entire plant or each of its operating segments in detail, considering each unit of equipment as related to the entire operation and the effect of its loss on safety and production.
There are entire systems that might be critical by their very nature. Depending on the size and complexity of the operation, a plant can contain any or all of the following examples: emergency power, emergency lighting, fire-alarm systems, fire pumps, and certain communications systems. There should be no problem in establishing whether a system is critical and in having the proper amount of emphasis placed on its maintenance.
More difficult to identify are the parts of a system that are critical because of the function of the utilization equipment and its associated hardware. Some examples are as follows:
- The agitator drive motor for a kettle-type reactor can be extremely critical in that, if it fails to run for some period of time, when the charge materials are added to the reactor, the catalyst stratifies. If the motor is then started, a rapid reaction, rather than a slow, controlled reaction, could result that might run away, over pressurize, and destroy the reactor.
- The cooling water source of an exothermic reactor might have associated with it some electrical equipment such as a drive motor, solenoid valves, controls, or the like. Failure of the cooling water might allow the exothermic reaction to go beyond the stable point and over pressurize and destroy the vessel.
- A process furnace recirculation fan drive motor or fan might fail, nullifying the effects of temperature-sensing points and thus allowing hot spots to develop, with serious side reactions.
- The failure of gas analysis equipment and interlocks in a drying oven or annealing furnace might allow the atmosphere in the drying oven or furnace to become flammable, with the possibility of an explosion.
- The failure of any of the safety combustion controls on a large firebox, such as a boiler or an incinerator, can cause a serious explosion.
- Two paralleled pump motors might be needed to provide the total requirements of a continuous process. Failure of either motor can cause a complete shutdown, rather than simply reduce production.
There are parts of the system that are critical because they reduce the widespread effect of a fault in electrical equipment. The determination of these parts should be primarily the responsibility of the electrical person on the team. Among the things that fall into this category are the following:
- Source overcurrent protective devices, such as circuit breakers or fuses, including the relays, control circuits, and coordination of trip characteristics of the devices
- Automatic bus transfer switches or other transfer switches that would supply critical loads with power from the emergency power source if the primary source failed; includes instrument power supplies as well as load power supplies
Parts of the control system are critical because they monitor the process and automatically shut down equipment or take other action to prevent catastrophe. These items are the interlocks, cutout devices, or shutdown devices installed throughout the plant or operation. Each interlock or shutdown device should be considered carefully by the entire team to establish whether it is a critical shutdown or a “convenience” shutdown. The maintenance group should thoroughly understand which shutdowns are critical and which are convenience. Critical shutdown devices are normally characterized by a sensing device separate from the normal control device. They probably have separate, final, or end devices that cause action to take place. Once the critical shutdown systems have been determined, they should be distinctly identified on drawings, on records, and on the hardware itself. Some examples of critical shutdown devices are overspeed trips; high or low temperature, pressure, flow, or level trips; low-lube-oil pressure trips; pressure-relief valves; overcurrent trips; and low-voltage trips.
There are parts of the system that are critical because they alert operating personnel to dangerous or out-of-control conditions. These are normally referred to as alarms. Like shutdown devices, alarms fall into at least three categories:
- Those that signify a true pending catastrophe,
- Those that indicate out-of-control conditions, and
- Those that indicate the end of an operation or similar condition.
The entire team should consider each alarm in the system with the same thoroughness with which they have considered the shutdown circuits. A truly critical alarm should be characterized by its separate sensing device, a separate readout device, and, preferably, separate circuitry and power source. The maintenance department should thoroughly understand the critical level of each alarm. The critical alarms and their significance should be distinctly marked on drawings, in records, and on the operating unit. For an alarm to be critical does not necessarily mean that it is complex or related to complex action. A simple valve position indicator can be one of the most critical alarms in an operating unit.
2.7 Frequency of maintenance
Frequency of maintenance cannot be fixed as the recommended frequency depends on environmental and operating conditions of an application.
2.7.1 Routine maintenance tests
Routine maintenance tests are tests that are performed at regular intervals over the service life of equipment. These tests normally are performed concurrently with preventive maintenance on the equipment.
2.7.2 Special maintenance tests
Special maintenance tests are tests performed on equipment that is thought or known to be defective or equipment that has been subjected to conditions that possibly could adversely affect its condition or operating characteristics. Examples of special maintenance tests are cable fault “locating tests or tests performed on a circuit breaker that has interrupted a high level of fault current.
2.7.3 Frequency of tests
Most routine testing can best be performed concurrently with routine preventive maintenance, because a single outage will serve to allow both procedures. For that reason, the frequency of testing generally coincides with the frequency of maintenance. The optimum cycle depends on the use to which the equipment is put and the operating and environmental conditions of the equipment. In general, this cycle can range from 6 months to 3 years, depending on conditions and equipment use. The difficulty of obtaining an outage should never be a factor in determining the frequency of testing and maintenance. Equipment for which an outage is difficult to obtain is usually the equipment that is most vital in the operation of the electrical system. Consequently, a failure of this equipment would most likely create the most problems relative to the continued successful operation of the system. In addition to routine testing, tests should be performed any time equipment has been subjected to conditions that possibly could have caused it to be unable to continue to perform its design function properly.
2.8 Frequency of inspection
Those pieces of equipment found to be critical should require the most frequent inspections and tests. Depending on the degree of reliability required, other items can be inspected and tested much less frequently.
Manufacturers’ service manuals should have a recommended frequency of inspection. The frequency given is based on standard or usual operating conditions and environments. It would be impossible for a manufacturer to list all combinations of environmental and operating conditions. However, a manufacturer’s service manual is a good basis from which to begin considering the frequency for inspection and testing.
An annual inspection of the entire switchgear assembly, including withdrawable elements during the first 3 years of service, is usually suggested as a minimum when no other criteria can be identified.
There are several points to consider in establishing the initial frequency of inspections and tests. Electrical equipment located in a separate air-conditioned control room or inspection interval might be extended 30 percent. However, if the equipment is located near another unit or operating plant that discharges dust or corrosive vapors, this time might be reduced by as much as 50 percent.
Continuously operating units with steady loads or with less than the rated full load tend to operate much longer and more reliably than intermittently operated or standby units. For this reason, the interval between inspections might be extended 10 to 20 percent for continuously operating equipment and possibly reduced by 20 to 40 percent for standby or infrequently operated equipment.
Once the initial frequency for inspection and tests has been established, this frequency should be adhered to for at least four maintenance cycles unless undue failures occur. For equipment that has unexpected failures, the interval between inspections should be reduced by 50 percent as soon as the trouble occurs. On the other hand, after four cycles of inspections have been completed, a pattern should have developed. If equipment consistently goes through more than two inspections without requiring service, the inspection period can be extended by 50 percent. Loss of production due to an emergency shutdown is almost always more expensive than loss of production due to a planned shutdown. Accordingly, the interval between inspections should be planned to avoid the diminishing returns of either too long or too short an interval.
Adjustment in the interval between inspections should continue until the optimum interval is reached. This adjustment time can be minimized and the optimum interval approximated more closely initially by providing the person responsible for establishing the first interval with as much pertinent history and technology as possible.
Inspection frequency can be increased or decreased depending on observations and experience. It is good practice to follow specific manufacturers’ recommendations regarding inspection and maintenance until sufficient knowledge is accumulated that permits modifying these practices based on experience. It is recommended that frequent inspections be made initially; the interval can then be gradually extended as conditions warrant.
The frequency of inspection for similar equipment operating under differing conditions can differ widely. Typical examples are as follows:
- In a continuously operating plant having a good load factor and located in a favorable environment, the high voltage oil circuit breakers might need an inspection only every two years. On the other hand, an electrolytic process plant using similar oil circuit breakers for controlling furnaces might find it necessary to inspect and service them as frequently as every 7 to 10 days.
- An emergency generator to provide power for noncritical loads can be tested on a monthly basis. Yet the same generator in another plant having processes sensitive to explosion on loss of power might need to be tested during each shift.
2.9 Test and maintenance requirements
2.9.1 IT&R procedure
The inspection, testing and repair (IT&R) procedure folder for a piece of equipment should list the following items:
- All the special tools, materials, and equipment necessary to do the job
- The estimated or actual average time to do the job
- Appropriate references to technical manuals
- Previous work done on the equipment
- Points for special attention indicated by previous IT&R
- If major work was predicted at the last IT&R, a copy of the purchase order and receiving reports for the parts to do the work and references to unusual incidents reported by production that might be associated with the equipment
Special precautions relative to operation, such as the following, should be part of the IT&R document:
- What other equipment is affected and in what way?
- Who has to be informed that the IT&R is going to be done?
- (3) How long will the equipment be out of service if all goes well? How long if major problems are uncovered?
2.9.2 Test and maintenance equipment
All maintenance work requires the use of proper tools and equipment to properly perform the task to be done. In addition to their ordinary tools, crafts persons (such as carpenters, pipe fitters, and machinists) use special tools or equipment based on the nature of the work to be performed. The electrician is no exception, but for EPM, additional equipment not found in the toolbox should be readily available. The size of the plant, the nature of its operations, and the extent of its maintenance, repair, and test facilities are all factors that determine the use frequency of the equipment. Economics seldom justify purchasing an infrequently used, expensive tool when it can be rented. However, a corporation having a number of plants in the area might well justify common ownership of the same device for joint use, making it quickly available at any time to any plant. Typical examples might be high-current or dc high-potential test equipment or a ground-fault locator.
Because a certain amount of mechanical maintenance is often a part of the EPM program being conducted on associated equipment, the electrical craftsperson should have ready access to such items as the following:
- Assorted lubrication tools and equipment
- Various types and sizes of wrenches
- Non-metallic hammers and blocks to protect against injury to machined surfaces
- Wheel pullers
- Feeler gauges to function as inside- and outside-diameter measuring gauges
- Instruments for measuring torque, tension, compression, vibration, and speed
- Standard and special mirrors with light sources for visual inspection
- Industrial-type portable blowers and vacuums having insulated nozzles for removal of dust and foreign matter
- Nontoxic, non-flammable cleaning solvents
- Clean, lint-free wiping cloths
The use of well-maintained safety equipment is essential and should be mandatory for work on or near live electrical equipment. Prior to performing maintenance on or near live electrical equipment, NFPA 70E, Standard for Electrical Safety in the Workplace, should be used to identify the degree of personal protective equipment (PPE) required. Some of the more important equipment that should be provided includes the following:
- Heavy leather gloves
- Insulating gloves, mats, blankets, baskets, boots, jackets, and coats
- Insulated hand tools such as screwdrivers and pliers
- Non-metallic hard hats with clear insulating face shields for protection against arcs
- Poles with hooks and hot sticks to safely open isolating switches
A statiscope is recommended to indicate the presence of high voltage on certain types of equipment.
Portable electric lighting should be provided, particularly in emergencies involving the power supply. Portable electric lighting used for maintenance areas that are normally wet or where personnel will be working within grounded metal structures such as drums, tanks, and vessels should be operated at an appropriate low voltage from an isolating transformer or other isolated source. This voltage level is a function of the ambient condition in which the portable lighting is used. The aim is to limit the exposure of personnel to hazardous current levels by limiting the voltage. Ample supply of battery lanterns and extra batteries should be available. Suitable extension cords should be provided.
Portable meters and instruments are necessary for testing and troubleshooting, especially on circuits of 600 volts or less. These include general-purpose volt meters, volt-ohmmeters, and clamp-on-type ammeters with multi-scale ranges. In addition to conventional instruments, recording meters are useful for measuring magnitudes and fluctuations of current, voltage, power factor, watts, and volt-amperes versus time values. These instruments are a definite aid in defining specific electrical problems and determining if equipment malfunction is due to abnormal electrical conditions. Other valuable test equipment includes devices to measure the insulation resistance of motors and similar equipment in the mega ohm range and similar instruments in the low range for determining ground resistance, lightning protection systems, and grounding systems. Continuity testers are particularly valuable for checking control circuits and for circuit identification.
Special instruments can be used to test the impedance of the grounding circuit conductor or the grounding path of energized low-voltage distribution systems and equipment. These instruments can be used to test the equipment grounding circuit path of electrical equipment.
Insulation-resistance-measuring equipment should be used to indicate insulation values at the time equipment is put into service. Later measurements might indicate any deterioration trend of the insulation values of the equipment. High-potential ac and dc testers are used effectively to indicate dielectric strength and insulation resistance of the insulation, respectively. It should be recognized that the possibility of breakdown under test due to concealed weakness is always present. High-potential testing should be performed with caution and only by qualified operators.
Portable ground-fault locators can be used to test ungrounded power systems. Such devices will indicate ground location while the power system is energized. They thus provide a valuable aid for safe operation by indicating where to take corrective steps before an insulation breakdown occurs on another phase.
Receptacle circuit testers are devices that, by a pattern of lights, indicate some types of incorrect wiring of 15- and 20-ampere, 125-volt grounding-type receptacles.
Although these test devices can provide useful and easily acquired information, some have limitations, and the test results should be used with caution. For example, a high resistance ground can give a correct wiring display, as can some multiple wiring errors. An incorrect display can be considered a valid indication that there is an incorrect situation, but a correct wiring display should not be accepted without further investigation.
2.10 Establishment of a systematic program
The purpose of any inspection and testing program is to establish the condition of equipment to determine what work should be done and to verify that it will continue to function until the next done in conjunction with routine maintenance. In this way, many minor items that require no special tools, training, or equipment can be corrected as they are found. The inspection and testing program is probably the most important function of a maintenance department in that it establishes what should be done to keep the system in service to perform the function for which it is required.
2.10.1 Atmosphere or environment
The atmosphere or environment in which electrical equipment is located has a definite effect on its operating capabilities and the degree of maintenance required. An ideal environment is one in which the air is:
- clean or filtered to remove dust, harmful vapour, excess moisture, and so on;
- maintained in the temperature range of 15 °C to 29 °C (60 °F to 85 °F); and
- in the range of 40% to 70% humidity.
Under such conditions, the need for maintenance will be minimized. Where these conditions are not maintained, the performance of electrical equipment will be adversely affected. Good housekeeping contributes to a good environment and reduced maintenance.
Dust can foul cooling passages and thus reduce the capabilities of motors, transformers, switchgear, and so on, by raising their operating temperatures above rated limits, decreasing operating efficiencies, and increasing fire hazard. Similarly, chemicals and vapors can coat and reduce the heat transfer capabilities of heating and cooling equipment. Chemicals, dusts, and vapors can be highly flammable, explosive, or conductive, increasing the hazard of fire, explosion, ground faults, and short circuits. Chemicals and corrosive vapors can cause high contact resistance that will decrease contact life and increase contact power losses with possible fire hazard or false overload conditions due to excess heat. Large temperature changes combined with high humidity can cause condensation problems, malfunction of operating and safety devices, and lubrication problems. High ambient temperatures in areas where thermally sensitive protective equipment is located can cause such protective equipment to operate below its intended operating point. Ideally, both the electrical apparatus and its protective equipment should be located within the same ambient temperature. Where the ambient temperature difference between equipment and its protective device is extreme, compensation in the protective equipment should be made.
Electrical equipment installed in hazardous (classified) locations as described in NFPA70, National Electrical Code, requires special maintenance considerations.
2.10.2 Conditions
Equipment is designed and rated to perform satisfactorily when subjected to specific operating and load conditions. A motor designed for safe continuous operation at rated load might not be satisfactory for frequent intermittent operation, which can produce excessive winding temperatures or mechanical trouble. The resistance grid or transformer of a reduced-voltage starter will overheat if left in the starting position. So-called “jogging” or “inching” service imposes severe demands on equipment such as motors, starters, and controls. Each type of duty influences the type of equipment used and the extent of maintenance required. The five most common types of duty as defined in NFPA 70, National Electrical Code are:
- Continuous duty
- Intermittent duty
- Periodic duty
- Short-time duty
- Varying duty
Some devices used in establishing a proper maintenance period are running-time meters (to measure total “on” or “use” time); counters to measure number of starts, stops, or load-on, load-off, and rest periods; and recording ammeters to graphically record load and no-load conditions. These devices can be applied to any system or equipment and will help classify the duty. They will help establish a proper frequency of preventive maintenance.
Safety and limit controls are devices whose sole function is to ensure that values remain within the safe design level of the system. Because these devices function only during an abnormal situation in which an undesirable or unsafe condition is reached, each device should be periodically and carefully inspected, checked, and tested to be certain that it is in reliable operating condition.
Wherever practical, a history of each electrical system should be developed for all equipment or parts of a system vital to a plant’s operation, production, or process. The record should include all pertinent information for proper operation and maintenance. This information is useful in developing repair cost trends, items replaced, design changes or modifications, significant trouble or failure patterns, and replacement parts or devices that should be stocked. System and equipment information should include the following:
- Types of electrical equipment, such as motors, starters, contactors, heaters, relays
- Types of mechanical equipment, such as valves, controls, and so on, and driven equipment, such as pumps, compressors, fans, and whether they are direct, geared, or belt driven
- Nameplate data
- Equipment use
- Installation date
- Available replacement parts
- Maintenance test and inspection dates: type and frequency of lubrication; electrical inspections, test, and repair; mechanical inspections, test, and repair; replacement parts list with manufacturer’s identification; electrical and mechanical drawings for assembly, repair, and operation.
3
Electrical Drawing and Schematics
This chapter explains the purpose and applications of various types of electrical diagrams with suitable examples for reading and interpretation of these diagrams.
Learning objectives
- To familiarize the reader with the purpose and application of one line and three line diagrams.
- To familiarize the reader with the purpose and application of logic and ladder diagrams.
- To familiarize the reader with the purpose and application of cabling and wiring diagrams.
3.1 Electrical diagrams
Engineers and technical personnel associated with an engineering organization use drawings to convey graphically the ideas and plan necessary for execution and completion of a project involving construction or assembly of components or systems. Drawings work as a tool for problem solving at various stages of working in an organization. The drawings are at the centre of activities taking place in an engineering organization whether a manufacturing organization or a turnkey contracting organization. Every effective troubleshooter must be able to read these drawings in order to quickly find failures in electrical controls. Technical drawings are used to convey a large amount of exact, detailed information in an abbreviated language. They consist of lines, symbols, dimensions, and notations to accurately convey an engineer’s designs to electricians/technicians who install the electrical system on a job. Some of the types of electrical drawings used for any project can be categorized as block diagrams, layout drawings, single line diagrams, wiring diagrams etc. All drawings should be prepared in line with the international standards mentioned above or any company specific standards.
3.2 What is a single line diagram?
A single line diagram (SLD), also sometimes called a one-line diagram, is a drawing that shows by single lines and symbols a simplified layout of a three-phase electrical system. It is a schematic drawing of an electrical power system that uses a concise, standard notation accepted by all power engineers. Single line or one-line diagrams get their name from the fact that only one phase of a three-phase system is shown and only one line is used to represent any number of current carrying conductors. Standard symbols are used to represent components of power systems, such as transformers, circuit breakers, generators, fuses and switches.
3.2.1 Information provided in a Single Line Diagram
A single line diagram must incorporate the following information as a minimum:
General
- Marking of phase-lines on incoming circuit/bus-bars/feeders
- Cubicle No./Circuit No. marking
- Legend/Legend drawing reference
- Board designations
- Device designations
Incoming Circuit/Sectionalising Circuits
- Incoming cable size/source details marked
- If through bus-duct, symbol and ratings marked
- Type of switching device and nominal rating
- CT/PT ratio, burden and accuracy class
- Instruments
- Relays (represented using ANSI/IEC convention)
- Earthing of incoming/outgoing feeders
- Surge arrestors for incoming feeders
Transformers
- Rating, connection, vector group, voltage ratio and percentage impedance
- Transformer alarm and protections
- Tap changer provision and range
- Neutral earthing
- CT/PT ratio, VA, accuracy class
- Relaying details
Bus-Bars
- Nominal supply voltage/frequency with tolerances
- Nominal current/short time current ratings
- No. Of phases + neutral
- System specification (BIL, earthing type etc.)
- Bus PT (ratio, burden, accuracy class)
- Instruments and ranges
- Relaying
- Earthing provision for bus-bars
- Surge suppressor for buses
- Interconnecting bus-duct
Feeders
- No. of feeders including spares and description
- Ratings of switching elements and protective elements
- CT/PT, ratio, class of accuracy, VA
- Protections Relay type and setting range
- Instruments and ranges
- Cable sizes
- Earthing provision
3.2.2 Typical examples
A typical example for single line diagrams are given below:
Figure 3.1 shows the power distribution system in a plant with 13.8 kV incomers. Voltage and current transformers are provided with relays for protection and metering. Voltage is stepped down to 480 Volts through 1000 kVA transformers through ACB of 1200 Amps. Output from the transformers is fed to the medium voltage switchgear with outgoing feeders for large motors and auxiliary transformers/ other distribution boards. Power from the MV switchboard is further step down transformers for lighting and control supply. The MV switchboard also has a bus-coupler of 1200 Amp for coupling of the two incomers.

Single line diagram
3.3 Three-line diagrams
The 3-line diagram shows the different components of the circuit as simplified standard symbols, and the power and signal connections between the devices. Arrangement of the component interconnections on the diagram does not correspond to their physical locations in the finished device. Figure 3.2 shows a simple 3-line diagram for a motor DOL starter.
Example of 3-line diagram
3.4 Common terms associated with electrical diagrams
Some of the common terms associated with the single line diagram are listed in Table
Common terms associated with Single line Diagrams
| Term | Explanation |
| Electrical Bus | The conductor(s) usually made of copper or aluminium, which carries the current and serves as a common connection for two or more circuits. |
| Fault | See “œShort Circuit.” |
| Fault Current | The surge of amperage created during an electrical failing. |
| Fixed Low Voltage Circuit Breaker | A circuit breaker rated for less than 1000V and bolted into a fixed position with bus or cable mechanically bolted to breaker terminations. |
| Fully Rated | This is a type of system coordination in which all circuit breakers are rated to operate independently |
| Ground Fault | Current leakage from an ungrounded conductor to the grounding path in an electrical system. |
| Interrupting Rating | The maximum short circuit current that an overcurrent protective device can safely interrupt. |
| Load centre | A wall mounted device that delivers electricity from a supply source to loads in light commercial or residential applications. |
| Network Distribution System | Interconnected circuits connect the customer to two or more power sources. Most reliable for continuity of service. |
| Overcurrent | A current higher than the current a conductor or electrical component can safely handle. |
| Overload | A temperature build-up caused by excessive loads on a circuit causing damage to the conductor’s insulation. |
| Panel board | A wall mounted device that delivers electricity from a supply source to loads in light commercial, commercial and industrial applications. |
| Selectively Coordinated | A type of system coordination in which all circuit breakers are fully rated at the point of application |
| Series Rated | A type of system coordination in which the main upstream circuit protection device must have an interrupting rating equal to or greater than the available fault current of the system. |
| Short Circuit | An electrical fault that is created when two exposed conductors touch or when conductor insulation fails. |
| Single-Phase | A continuous single alternating current cycle. |
| Specification | The detailed descriptions of electrical equipment to be provided for an application. |
| Standards | Guidelines and regulations for the manufacturing of electrical equipment. |
| Step-Down Transformer | Decreases the output voltage that is being supplied. |
| Step-Up Transformer | Increases the output voltage that is being supplied. |
| Three-Phase | A continuous series of three overlapping AC cycles offset by 120 degrees. |
| UL Listed | Listed by Underwriters Laboratory, an independent laboratory that tests equipment to determine whether it meets certain safety standards when properly used. |
3.5 Protective relays
Protective relays are commonly used in single line diagrams for denoting protective devices used for generators, motors, transformers etc. Protective relays are denoted through numbers designated by IEEE/ANSI. A device could also be a combination of two relays e.g. 50/51 denotes a combination of instantaneous over current and time over current. Letters can be added to clarify application (87 T for transformer differential, 59G for ground over voltage). The list of relay numbers as per ANSI is provided below:
2 – Time Delay Starting or Closing Relay
3 – Checking or Interlocking Relay
21 – Distance Relay
24 – Over-Excitation Relay
27 – Undervoltage Relay
30 – Annunciator Relay
32 – Directional Power Relay
37 – Undercurrent or Underpower Relay
44 – Unit Sequence Starting Relay
46 – Reverse-phase or Phase-Balance Relay
47 – Phase-Sequence Voltage Relay
48 – Incomplete-Sequence Relay
49 – Machine or Transformer Thermal Relay
50 – Instantaneous Overcurrent
51 – AC Time Overcurrent Relay
53 – Exciter or DC Generator Relay
55 – Power Factor Relay
56 – Field Application Relay
58 – Power Rectifier Misfire Relay
59 – Overvoltage Relay
60 – Voltage or Current Balance Relay
62 – Time-Delay Stopping or Opening Relay
64 – Ground Detector Relay
67 – AC Directional Overcurrent Relay
68 – Blocking Relay
74 – Alarm Relay
76 – DC Overcurrent Relay
79 – AC-Reclosing Relay
81 – Frequency Relay
82 – DC-Reclosing Relay
83 – Automatic Selective Control or Transfer Relay
85 – Carrier or Pilot-Wire Receiver Relay
86 – Lockout Relay
87 – Differential Protective Relay
91 – Voltage Directional Relay
92 – Voltage and Power Directional Relay
96 – Autoloading Relay
3.6 Abbreviations
Abbreviations are frequently used in electrical diagrams. Table 3.3 identifies a few commonly used abbreviations.
Abbreviations used in electrical single line diagrams
| Abbreviation | Definition |
| CT | Current transformer |
| PT | Potential transformer |
| V | Volts |
| kV | Kilo volts |
| W or kW | Power meter |
| kWH | Energy meter |
| A | Ampere meter |
| TP | Three pole |
| FP | Four pole |
| DP | Douple pole |
| VCB | Vacuum circuit breaker |
| Abbreviation | Definition |
| ACB | Air circuit breaker |
| OLR | Over load relay |
| OLTC | On load tap changer |
| RTCC | Remote tap changer cubicle |
3.7 Schematic Diagrams
The purpose of electric circuits is to direct and control current flow, at the correct time, to the various components in any system. A broken wire or open switch or wiring error can stop the current from flowing, thereby preventing the system, or part of the system from functioning. A schematic diagram shows an electrical circuit in detail. By clearly depicting individual current paths, it also indicates how the electrical circuit operates. Most schematic diagrams are current flow diagrams. They are arranged from top to bottom, so that we can clearly see how the current flows through the circuit. It shows the different components of the circuit as simplified standard symbols, and the power and control connections between the devices. Unlike the single line or the block diagram, the schematic diagram shows the actual connection details.
Schematic diagrams are usually spread over a number of sheets and the different sheets provide the following details:
- Title sheet
- Three line diagram
- Power distribution circuits
- Control circuits
- Terminal diagrams
An example of schematic diagram for the motor control centre for a press machine is provided in Figure 3.3. The sheet-wise details are as below:
Sheets 1 and 2: Motor power circuit
Sheet 3: Power circuit diagrams for service plugs and cabinet lamps
Sheet 4: Power circuit for transformer and bridge rectifier for getting 24 V DC from 380 volts AC and
Sheet 5: Alarm circuits for field pressure switches (low and high pressure switch contacts).
Sheet 6: Emergency circuits for press machine stopping
Sheet 7: interlock circuits for emergency stop from external panel, overload relays, tool safety position sensor contacts.
Sheets 8, 9, 10: Fault indication and interlock circuits


Schematic diagram for press machine motor control panel
3.8 Logic Diagrams
Logic diagrams are easy to read graphic representations of the operation of system equipment controls using basic digital logic symbols. These symbols functionally relate manual and process input actions to the process control and operator display output actions. The logic diagram in itself does not provide the details of the hardware to be used or the details of the control signal levels but it works as a basis for other drawings such as electrical schematics or solid-state logic systems.
Before the advent of solid-state logic circuits, logical control systems were designed and built exclusively around electromechanical relays. Relays are far from obsolete in modern design, but have been replaced in many of their former roles as logic-level control devices, relegated most often to those applications demanding high current and/or high voltage switching. Solid state logic circuits are in common use now and these are based on voltage levels. These are designed to input and output only two types of signals: ‘high’ (1) and ‘low’ (0), as represented by a variable voltage: full power supply voltage for a ‘high’ state and zero voltage for a ‘low’ state.
Figure 3.4 shows the control logic for a solenoid valve which can be operated automatically in ‘Auto’ mode or manually through a hand switch with ‘OPEN’, ‘CLOSE’ and ‘AUTO’ positions. A limit switch in the field sends a signal that the valve is fully open. Only when this signal is activated, the valve remains open in the ‘AUTO’ mode. Otherwise it remains open as long as the hand switch is manually kept at the “œOPEN’ position.

Logic diagram for solenoid valve circuit
3.9 Ladder Diagrams
A ladder diagram reflects a conventional wiring diagram (Figure 3.5). A wiring diagram shows the physical arrangement of the various components (switches, relays, motors, etc.) and their interconnections. The ladder diagrams are more schematic and show each branch of the control circuit on a separate horizontal row (the rungs of the ladder). They emphasize the function of each branch and the resulting sequence of operations. The base of the diagram shows two vertical “rails” one connected to a voltage source and the other to ground, and a series of horizontal “rungs” between them.

Framework of a ladder diagram
Ladder logic is widely used to program PLCs, where sequential control of a process or manufacturing operation is required. Ladder logic is useful for simple but critical control systems, or for reworking old hardwired relay circuits. As programmable logic controllers became more sophisticated it has also been used in very complex automation systems.
3.10 Plant Cabling Systems Drawing
Cabling drawings are a part of the detailed design and engineering activity of a project. These drawings are usually prepared on the basis of the single line diagram, the load schedule, equipment schedule and piping/plant layout drawings.
3.10.1 Cable/conduit/tray schedules
The intent of the conduit, cable and tray schedule is to provide all pertinent information to assist in installing, connecting, identifying, and maintaining control and power cables. Each cable and conduit should be identified with an individual designation. The cable and conduit are tagged with a designation at each end and at intermediate points as necessary to facilitate identification. The designation is also shown on equipment wiring diagrams, tray loading diagrams, on conduit plans and details, on cabinet layouts, and on junction and pull box layouts.
An example of cable schedule is provided in Figure 3.6.

Example of a cable schedule

Example of a cable tray schedule
3.10.2 Cable layouts
Cable layouts are prepared on the basis of the plant layout, electrical layout/ equipment layout, power distribution system layout and the load schedule. This is a diagram which shows the layout of the plant cabling system.
Cable layouts comprise of the following:
- Cable tray layouts: These provide details of the cable tray routing, support systems, cross sectional details etc(example is shown in Figure 3.7).
- Conduit and wiring layouts: These are provided mostly for lighting and utility circuits.
- Cable layout for underground cables: These provide details of duct banks, cable trenches, concrete troughs, etc.
- Pull box/junction box layout. (Pull box is an enclosure for joining conductors which also provides by its size, arrangement, and location the necessary facilities for pulling the conductors into place. This term as used here includes structures also known as ‘manhole’, ‘hand hold’, and ‘switch board pull section’.)
- Details for duct banks (A duct bank protects electrical lines that are beneath the ground from accidental breakage. They consist of electrical cables within round ducts encased in reinforced concrete in paved/unpaved areas, crossings). Details of cable trenches (Please refer to Figure 3.11 for sectional detail of a cable trench).
- Cable identifications and markings.
- Details of cable mounting on rack, cable fastening systems, conduit support systems.
- Details of cable termination and mounting diagrams (if required or can be provided separately).
Figure 3.8 is an example of a plan drawing showing layout of cable from the Motor Control Centre to the Pump Area. The tag numbers of the cables both power and control which are passing through the cable trench are mentioned in the drawing. For example P001 is the power cable and C 001 is the control cable connected to the motor 3580-NPP-001/M1 and so on.
Figure 3.9 is an example of Wiring Diagram for conduits (indoor illumination and utility power supply). The drawing provides the details of the circuit number for the conduits and their connection scheme with the lighting fixtures, power sockets etc. The legend in the drawing shows details for the fixtures and utilities.

Example of a cable layout

Wiring layout

Wiring layout
3.11 Control cable interconnection diagrams
Electrical equipment may require controls from various sources and systems. In such cases control wiring for the equipment requires interconnections between the different systems which may have varied locations. These interconnections could be made through a panel or a junction box. Interconnection diagrams and listings show details of all control interconnections in the plant including TJBs (terminal junction boxes), MCCs and Control Panels. These diagrams differ from wiring diagrams in the way the information is organized (according to multi-conductor cables or TJBs and terminal strips). For example, in an interconnection diagram, all connections on the either side of a multi-conductor cable are shown together or alternatively all connections to terminal strips in a TJB are shown together.
3.12 Panel internal wiring
Panel internal wiring diagrams are prepared once the single line diagram, the logic diagram and the control schematic have been finalized. Panel internal wiring diagrams provide the following details:
- Wiring details for the power circuits
- Wiring details for the control circuits
- Coil and contacts cross-referencing details
- Terminal block details
3.13 Terminal diagrams
These are used for providing details of terminal strips for junction boxes, control panels, etc. Terminal diagrams provide details of the terminal number and the corresponding ferrule number of the outgoing cable to be terminated at the particular terminal.
3.14 Summary
Electrical drawings and documentation are extremely important for the troubleshooting and maintenance of any electrical system. The basic key diagram for any electrical installation is the single line diagram. Cabling and wiring drawings are prepared as part of the detailed design and engineering activity of a project. These drawings are usually prepared on the basis of the single line diagram, the load schedule and equipment schedule. The different types of cabling drawings are the cable schedule/layout, conduit/tray schedule/layout, control cable interconnection diagram and the panel internal wiring diagrams. The electrical drawings are important at all stages of project execution right from the tendering stage to the plant operation and maintenance stage.
4
Principles of Safety Rules and Hazards
Electrical safety is an important issue in any industry and requires adequate attention while planning, designing, installing operating and maintaining electrical equipment and installations in an industrial facility. A number of serious accidents, including fatalities, occur every year in industrial establishments due to accidents involving electricity. Electric shock is the major hazard posed by any electrical equipment to those working on electrical systems. In this, we will take a detailed look at various hazards present in any general industrial environment and in particular, electrical hazards. We shall also learn about electric shocks and shocks due to direct and indirect contact.
Learning objectives
- Hazards of a general nature in industrial installations
- Electrical hazards, direct and indirect contacts
- Protective earthing and earth faults
- Dangers of static electricity and its control
- Requirements for safe working on electrical installations
- Technical , preventive and organizational measures in the work place and certification of competency
- Electric arc and arc flash protection
Note:
In this text, the term ‘earth’ has generally been used to represent the reference point of power supply system, in accordance with the practice followed in UK literature and standards. ‘Earthing’ refers to connections of exposed metallic parts to this reference point. Depending on the context, ‘earth’ may also mean soil mass and ‘earthing’ may stand for the connection of the reference point to the soil mass. The terms ‘ground’ and ‘grounding’ common in the North American practice have been avoided, but where encountered, they should be understood to have the same meaning as ‘earth’ and ‘earthing’ respectively.
4.1 Overview
It is often remarked that electricity is a good slave but a bad master. Improper use of electricity or careless handling of electrical equipment leads to a number of avoidable accidents every year, resulting in huge loss of productive man-hours and monetary compensation liability to the employer. Even more serious are the instances of fatalities due to electrocution or as a result of grievous injuries. In this text, we will take a detailed look at the electrical hazards in substations and other premises handling electricity. We will learn a little about the theory behind electrical safety as well as examining the preventive measures that need to be adopted to ensure safety while working on electrical installations.
Electrical safety is a well-legislated subject and the various Acts and Regulations enacted in most countries emphasis the responsibility of both employers and employees in ensuring safe working conditions. We will briefly trace the history of regulations on the subject of workplace safety in general, and electrical safety, in particular.
Safety is not simply a matter of taking precautions in the workplace. It has to, as a matter of course, begin at the stage of equipment design. Safety should be built into the design of electrical equipment and it is the responsibility of every manufacturer of electrical equipment to remove every possible hazard that can arise from its normal use. Another important aspect involved with safety in the workplace is the correct selection of equipment. Incorrect selection and application of even the most well designed piece of electrical machinery, can give rise to hazardous conditions. Similarly, a lot of care is required in the operation and maintenance of any electrical equipment in order to avoid accidents. Appropriate knowledge of equipment and systems is essential for each and every person who operates or maintains the equipment. This knowledge is initially acquired through structured training and thereafter by hands-on experience. The training should be comprehensive and should deal not only with the technical details of the equipment, but also with the possible hazards present in the specific working environment. This training should also teach the working personnel about the measures required in order to prevent accidents, and the skills needed to deal with accidents when they occur.
Another important factor involves the close monitoring of all electrical equipment/installations to ensure their continued safe operation. A thorough inspection during initial erection and commissioning (as well as periodic inspections and maintenance thereafter) is absolutely essential to ensure safety. Any defects brought to light during such inspections must be attended to promptly.
We will devote our attention to the use of electrical equipment in environments where hazardous materials are likely to be present. We will also discuss in detail the safety of substations, and the precautions necessary while handling DC storage battery installations. Batteries need particular attention since they contain toxic materials such as lead, as well as corrosive chemicals such as acid or alkali. These chemicals are particularly dangerous because of their electrical voltage and the risk of explosion due to the presence of the explosive mixture of hydrogen and air. Finally, we will review the organizational aspects of safety. Electrical safety is not merely a technical issue. Accidents can only be prevented if appropriate safety procedures are evolved and enforced. A mechanism should be put in place to ensure that all working personnel are aware of the hazards and are trained to carry out their duties in a safe manner.
But firstly, we will discuss in general the hazards present in any industry and more particularly, the hazards present in electrical installations.
4.2 Industrial hazards
In any industrial facility several types of hazards exist. The hazards may be due to any of the following:
- Electrical equipment
- Mechanical equipment
- Fire or flames
- Hazardous/toxic materials
- Hot liquids/gases
- Cold liquids
- Potentially explosive gas vapors and dusts
- Corrosive liquids
4.2.1 Hazards due to electrical equipment
The main hazard from electrical equipment is, naturally, the danger from electric shock. Electric shock or electrocution can cause many problems in a human body. It can cause the human heart to stop, thereby resulting in death. Even if an electric shock is not fatal, it can cause other problems such as internal organ damage due to excessive heating of body tissues, burns at the point of contact of the skin with live conductors, loss of consciousness, or loss of balance resulting in a fall while working at a height.
Apart from electric shocks caused by contact with parts that are (or become) live, another major danger for those who work on electrical equipment, is the risk of burns due to arc faults. Such faults are often caused by the affected workers themselves. When working on live equipment, or in the vicinity of live equipment, workers can inadvertently cause a short circuit fault. In fact, arc faults in equipment and their potential dangers, are subjects of extensive study and have given rise to standards such as IEEE 1584 (Guide for Performing Arc-Flash Hazard Calculations). We will discuss in detail the basic safety issues of electrical equipment in subsequent chapters.
4.2.2 Hazards due to mechanical equipment
Hazards from mechanical equipment are quite numerous and depend largely on the type of industrial process involved and the machinery in use. The following is a representative list of hazards that one may come across in an industrial environment.
- Injuries from moving parts of static machinery
- Injuries from moving vehicles
- Injuries from falling objects (including head injuries)
- Injuries from flying objects following an explosion
- Injuries to eye from moving particles
- Injuries to eye from prolonged exposure to bright light
- Loss of hearing due to prolonged exposure to noise
Unlike electrical hazards, most of the dangers listed above arising from mechanical equipment, are quite apparent to those who work near them except, of course, when they happen unexpectedly. For example, machinery with a moving component, for example a belt drive, is a visible potential hazard. However, by providing suitable barriers or guards, one may avoid the hazards that could be caused by them. The real danger is when such a drive starts unexpectedly while maintenance work is being carried out on it. This is usually a result of a procedural lapse during maintenance. Thus, we have two possible approaches for avoiding dangers from mechanical equipment. The first is by implementing safety through proper equipment design. The second is by adopting safe working practices in operations and during maintenance. In fact, these approaches work for any of the hazardous conditions that we will be discussing.
4.2.3 Hazards due to toxic materials
The dangers due to handling of toxic materials can occur as a result of any of the following:
- External contact on skin and eyes
- Ingestion
- Inhalation
One of the examples of this type of contamination is lead dust, where exposure can occur while working on lead-acid battery plates. In this instance, the exposure can happen in any of the ways listed above, and appropriate precautions are necessary to avoid all these methods of contact. The seriousness of the injury depends on the nature of the hazardous material and the concentration of the material/amount to which a person is exposed.
4.2.4 Fire hazard
Fire is one of the most common hazards in any industrial environment and is usually a result of some other accident. An electrical short circuit is the culprit in most cases. The excessive heat produced in conductors, and sometimes the arc flash accompanying the short circuit, ignites nearby flammable materials and can result in a fire. Once a fire is initiated, it can however become self-sustaining.
The best way to avoid fire hazard is by prevention. However, preventive measures alone cannot totally eliminate fires. Therefore, in addition to preventive measures, it is imperative to install alarm systems to warn of incipient fires. It is essential also to initiate fire fighting measures appropriate to the materials involved. These measures should include, where possible, automatic extinguishing systems to limit the damaging effects of a fire. Transformer fires are a case in point. In spite of the presence of a large volume of combustible coolant and other insulating materials, transformer fires, to a great extent, can be avoided. This can be achieved by designing the transformer fires with the necessary capacity to withstand the expected loading. Another design factor which will reduce the risk of fire in this area, is the inclusion of protective devices to trip the transformer in the event of over currents or excessive winding temperature. However, as a matter of abundant caution, large transformers are also provided with fire detection and fire fighting systems, which get activated automatically when a fire is detected.
Fire inspection and certification of industrial or other premises where a number of people work (or gather), is a mandatory requirement in most countries of the world.
4.2.5 Hazards from hot surfaces, liquids or gases
A common cause of industrial accidents is burn injuries from contact with hot surfaces, liquids or gases. Enclosures of electrical equipment can often attain high temperatures when they are in operation. Therefore, contact with them can cause burn injuries. Such enclosures are normally placed out of reach, or otherwise protected, from accidental contact. Similarly, conducting parts can attain very high temperatures, and working on them immediately after they are de-energized can result in burns.
Similar precautions are necessary in the case of other hot substances. This includes handling of molten metals and hot gases, including steam. Molten metals should be prevented from coming into accidental contact with water, as the resulting sudden evaporation can result in explosions and the splashing of liquid metal.
4.2.6 Hazards from cold liquids
Cold liquids such as liquid nitrogen can also cause burns if they come into contact with skin. Some cold liquids such as liquid oxygen are explosive and due care is essential when handling them.
4.2.7 Hazards from corrosive liquids
Acids and alkalis are highly corrosive and can cause injuries if they come into contact with skin. In electrical installations, battery electrolyte, which is an acid such as sulphuric acid, or alkaline such as sodium hydroxide, pose such hazards. The hazards in this case are:
- Burns/irritation due to contact with skin
- Loss of sight or serious injury of eyes
- Danger of ingestion causing internal injuries in food path
- Danger of inhalation (fumes) causing similar injury to lung tissue
4.2.8 Hazards from explosive gases
Explosion is a result of accidental ignition of explosive mixtures formed by combustible gases or fumes with oxygen in air. The source of ignition is often electrical. The effects of explosions are manifold and can include:
- Burns by fire accompanying explosion
- Injuries from flying objects following an explosion
- Damage to limbs/internal injuries by the pressure wave generated by an explosion
Prevention of hazards due to explosions is primarily through the following approach:
- Prevent formation of explosive mixtures
- Prevent ignition of explosive mixtures if formed
- Limit the effect of explosion if ignition does take place.
4.3 Electrical hazards
Hazards from electrical equipment could include any of the following:
- Electric shock and associated effects
- Internal organ damage due to passage of electricity through body
- Burns on skin at point of contact
- Injuries by electric shock combined with fall
- Temperature hazards due to high temperature during operation
- Arc flash causing external burns and injuries by explosive expansion of air due to the arc.
Electric shock is a result of the following conditions.
- Exposure to live parts (Direct contact)
- Exposure to parts that accidentally become live (Indirect contact)
- Potential difference between different points in the earth under certain conditions
The last named is similar to indirect contact except that it does not involve contact with any electrical equipment (either a live part or enclosure). Electric shock causes current flow through the body, resulting in muscular contraction. If the current flows through heart muscles, it can cause the heart to stop through a condition called fibrillation.
4.3.1 Exposure to live parts (Direct contact)
Direct contact is the condition when a human body comes into contact with a part that is normally live. In this case the current flow through the body will be the governed by the voltage at the point of contact across the body earth and resistance of the human body. Part of the earth loop impedance may also be included in the current path, but this will not affect the current flow significantly since the value is usually negligible in comparison to the body resistance.
The voltage to which a human body is subjected is the main factor influencing the current flow through the body in the case of a direct shock condition. Direct contact hazard can be minimized by:
- Using appropriate insulation so that live parts are not normally exposed to direct contact.
- Where the system design necessitates in having live parts exposed, such exposed live parts are placed out of reach or protected by suitable barriers so as to make direct contact difficult.
- Use of safe system voltage insufficient to cause dangerous values of body current even if a person comes into contact with live parts. Usually such systems do not have any intentional earth connection to make them safe against both direct and indirect contact. Such systems are called separated extra low voltage systems (SELV) and are adopted only under special circumstances. Most practical systems in electrical substations do NOT fall under this category.
It should be noted that live parts are normally protected by suitable insulation so that direct contact is not possible. Instances of live parts remaining exposed in systems deploying voltages higher than extra low voltage limit are kept to a minimum and occur only where it is absolutely necessary. Direct contact in such cases is prevented by providing suitable barriers to prevent accidental contact and by providing adequate clearance between exposed live parts and work areas so that a person working in the area is not within an ‘arms reach’ of exposed conductors. Where possible, residual current devices sensitive enough to detect accidental contact (by detecting the leakage current that such a contact causes) can be deployed as supplementary protection. Usually such devices can be put in final circuits feeding low power equipment where possibility of direct human contact is high (e.g. utility socket outlets, or low capacity domestic circuits) and the normal leakage current through insulation is negligible. It must be stressed that the residual current devices do not make a system safe by themselves against direct contact but offer supplementary protection only.
4.3.2 Indirect contact hazard by touch and step potential
Indirect contact is the condition when a potential is applied on a human body in situations other than ‘direct’ contact. This usually happens in two ways.
The first case is when a human body is in contact with an external (or under certain cases extraneous) conductive part of an electrical installation and there is a fault in the system involving a live conductor and the external conductive part. For example, a person standing on the earth with his hand touching the earthed metallic enclosure of electrical equipment just at the moment when a fault occurs between the live conductor of the equipment and the enclosure, will be exposed to an electric shock. The second instance is the case of a potential difference between two points on the earth arising out of an earth fault in a system which is applied across the two feet with the distance being about 1 Meter. This condition usually happens in high voltage electrical switchyards when a live conductor snaps and falls to the ground. This creates appreciable potential differences, which arise when the high voltage gets dissipated into the soil
4.4 Protective Earthing
Electrical equipment earthing is primarily concerned with connecting conductive metallic enclosures of the equipment (which are not normally live) to the earthing system of the substation or other consumer facility through conductors known as earthing conductors. For the earthing to be effective, the fault current (in the event of a failure of insulation of live parts within the equipment) should flow through the equipment enclosure to the earth return path without the enclosure voltage exceeding the value of safe touch potential. This is also applicable to other parts that are normally dead (refer to Figure 4.1).

Voltage pattern during earth fault
4.4.1 Sensing of earth faults
Earth fault protection in LV branch circuits is usually achieved using over current protective devices such as fuses or circuit breakers and no special protective relaying is used. However, main circuit feeders and the incoming circuit-breaker from the supply transformer are provided with specific protection for earth faults. Sensing of earth faults is done using one of the following approaches:
- In case the power supply source (such as the transformer) is a part of the system, a CT and relay can be provided in the earth connection of the neutral of the transformer (Figure 3.2a).
- Sensing by a single current transformer enclosing all phase and neutral conductors (called a core balance or zero sequence CT). Such a transformer detects the earth fault currents and can operate a sensitive relay (Figure 3.2b). Residual current circuit breakers use a similar scheme.
- Sensing by individual current transformers in phase and neutral conductors and providing a relay in summation circuit (Figure 3.2c).
Adding sensitive earth fault relays will enable the protection system to sense even low value of earth fault currents and trip the circuit faster. Inclusion of the neutral in Figure 4.2 cases b and c is for canceling any unbalance currents that may flow in the neutral from being sensed as earth faults.

Equipotential bonding for safety against indirect contact
Bonding is the practice of connecting all accessible metalwork – whether associated with the electrical installation (known as exposed-metalwork) or not (extraneous-metalwork) – to the system earth. In a building, there are typically a number of services other than electrical supply, which employ exposed metallic parts in their design. These include water piping, gas piping, HVAC ducting and so on. A building may also contain steel structures in its construction. We have seen earlier in this chapter that when an earth fault takes place in an installation, the external conducting surfaces of the installation and the earth mass in the vicinity may attain higher potential with reference to the source earth. Therefore it is possible that a dangerous potential may develop between the conducting parts of non-electrical systems including building structures and the external conducting parts of electrical installations as well as the surrounding earth. It is therefore necessary that all such parts are bonded to the electrical service earth point of the building to ensure safety of occupants. This is called equipotential bonding.
There are two aspects to equipotential bonding; the main bonding where services enter the building, and supplementary bonding within rooms, particularly kitchens and bathrooms. Main bonding should interconnect the incoming gas, water and electricity service where these are metallic, but can be omitted where the services are run in plastic, as is frequently the case nowadays. Internally, bonding should link any items, which are likely to either be at earth potential or which may become live in the event of a fault. These items are large enough to make contact with a significant part of the body or large enough to be gripped. Small parts, other than those likely to be gripped, are ignored because the instinctive reaction to a shock is muscular contraction, which will break the circuit. Refer to Figure 4.3.

Main and supplementary equipotential bonding
In each electrical installation, main equipotential bonding conductors (earthing wires) are required to connect to the main earthing terminal for the installation of the following:
- Metal water service pipes
- Metal gas installation pipes
- Other metal service pipes and ducting
- Metal central heating and air conditioning systems
- Exposed metal structural parts of the building
- Lightning protection systems
It is important to note that the reference above is always to metal pipes. If the pipes are made of plastic, they need not be main bonded.
4.5 Dangers of static electricity buildup
The following are the dangers posed by static electricity:
- Ignition causing fire or explosion
- Damage to sensitive electronic components
- Electric shock to humans followed by accidents such as a fall
- Damage to mechanical components such as bearings due to sparking through the oil films on bearing surfaces
It is necessary to study the static buildup potential of any workplace and institute protective measures to control such buildup.
4.5.1 Control of static electricity
Earthing and bonding
Charge buildup takes place when two surfaces, which are in contact and across which electrons migrate, get suddenly separated. Connecting such surfaces together with a conducting medium prevents charge accumulation by providing a leakage path. This is called bonding, and can be achieved by using a bare or insulated conductor of adequate mechanical strength. Where electric current flows are due to charge leakage of very low magnitudes, the size of the conductor is immaterial and so is the resistance of this conductor.
For moving objects, an earth brush of metal, brass or carbon can be used to provide the required leakage path. This method is commonly used for shafts of rotating machines to prevent bearing surface damages (refer to Figure 4.4). For objects which are in contact with earth already, no separate earthing or bonding is necessary.

Example of the use of earthing brush
Earthing cannot, however, provide a solution in all cases, especially where a bulky non-conducting material is involved. In this case, the part of the substance which is a distance away from the earthed portion, can retain sufficient charge, since movement of charge will not be fast enough in an insulating material. This charge can result in a spark.
Control by humidity
Many insulating materials such as fabric, paper, etc., can absorb small quantities of water when the atmospheric humidity is sufficiently high. Even in the case of materials that do not absorb water, a thin layer of moisture gets deposited on the surface due to humidity (for example, plate glass). If the environment has a humidity reading of over 50%, moist insulating materials can leak charges as fast as they are produced. This prevents high charge buildup, thereby avoiding sparks.
Conversely, most of the materials become dry when the humidity becomes lower than 30% since they tend to lose moisture to the atmosphere. This results in increased charge accumulation, which can cause sparking. Keeping humidity levels at 60% to 70% can solve static problems in many cases such as industries handling paper and fibers where charge buildup causes unwanted adhesion. In some cases, localized humidification using steam ejectors can be useful, particularly where the large space involved makes increase of humidity in the entire space a difficult proposition.
However, this method is unsuitable where:
- The processed material can be adversely affected due to high humidity
- If the area involved is air-conditioned or humidity controlled for process reasons or human comfort
- In cases where humidity increase does not cause appreciable drop in resistivity
In all such cases, other methods of static control may have to be resorted to.
Ionization
Ionization consists of forced separation of electrons from air molecules by application of electric stress or other forms of energy. The air thus ionized becomes conductive and can drain charges from charged bodies with which it is in contact. The positive ions and electrons are also attracted by the negative and positive charges respectively, thus resulting in charge neutralization.
Ionization can be produced by high voltage electricity, by ultra violet light, or by open flames. Various devices using a step up transformer operating on mains supply and producing high electric fields are commercially available. Due care is needed however to address safety issues arising from the use of high voltage. Such devices find application in paper and fabric processing plants. They are, however, unsuitable for use in situations where the environment contains inflammable gas mixtures.
A simpler device is the static comb, which does not use electricity at all. It consists of a metallic bar with a row of sharp points projecting from it and bonded to earth. When this device is placed near the charged surface, the electric stress due to accumulation of charge near the sharp points causes ionization and helps to drain the charge from the surface. This method is commonly used in belt driven equipment near the point of separation of the belt and pulley (refer to Figure 3.5).

An example of the use of static comb
Another method of ionization is by using a row of small open flames. This method, however, requires caution where combustible materials are handled.
In addition to these hazards of electricity, the accumulation of static electrical charge while processing/conveying materials that are not good electrical conductors (examples: paper, wood chips and grains) also poses hazards of electric shock, ignition and explosion.
4.6 Electric arcing
An electric arc takes place when current flows through the air or through the insulation between two conductors at different potentials. The path of the current becomes conducive due to the ionization of the gas. Since arcs are associated with faults, the fault current level and the heating effect, is usually very high. Injury from arcs is usually a direct result of burning from the arc.
4.6.1 Electrical hazard: arc flash
Many of the short circuit faults happen as a result of insulation failure or the electrical breakdown of air between two exposed live parts. In this case, an arc is always struck between these exposed parts. ARC FLASH is the SUDDEN release of large amounts of heat and light energy at the point of a fault. Exposure to an arc flash frequently results in a variety of serious injuries and in some cases, death. Workers have been injured even when ten feet or more away from the arc center. Equipment can be destroyed causing extensive downtime and requiring expensive replacement and repair. Nearby flammable materials may be ignited resulting in secondary fires that can destroy entire facilities.
4.6.2 How electric arcs are developed
The following can cause electric arcs:
- Discharge due to impurities: Dust and impurities on insulating surfaces may provide a path for the current, allowing it to flashover and create arc discharge across the surface. This can produce greater arcs. Fumes and vapor of chemicals may produce break down voltages of air and cause arc flash.
- Corrosion: Corrosion of equipment parts can provide impurities on insulating surfaces. Corrosion also weakens the contact between conductor terminals, and increases contact resistances through oxidation or other corrosives.
- Contamination: Heat is generated on contacts, and spark can be produced. This can lead to arcing faults with nearby exposed conductors of different phases or ground.
- Condensation: Condensation of vapor and water dripping can cause tracking on the surfaces of insulating materials. This may create a flashover to ground and potential escalation to phase-to-phase arcing.
- Spark discharge: Accidental touching: Accidental contact with live exposed parts can produce arc faults.
- Dropping tools: Accidental dropping of tools may produce momentary short circuit, create sparks and initiate arcs.
- Over voltage across narrow gaps: When air gap between conductors of different phases is very narrow, arc may strike across during over voltage.
- Failure of insulating materials.
- Improperly designed or utilized equipments.
- Improper work procedure.
- External causes such as entry of rodents in energized compartments which bridge live parts of different phases and initiate an arc.
4.6.3 Effect and consequences of ARC flash
Arcs created by a fault do not remain stationary. The interaction between an arc and the electromagnetic field caused by the fault current flow will cause the arc to move away from the source point with the arc behaving very much like a conductor placed in a magnetic field. The arc also causes sudden heating of the air in its immediate vicinity causing a violent expansion much like an explosion. This can result in the dislocation of loose components around the fault point and their being thrown like projectiles outwards from the arc. Following are some important effects of arc flash:
- Electric arcs produce some of the highest temperatures known to occur on earth up to 35000°F. This is four times greater than of the temperature of the sun’s surface.
- The intense heat from arc causes a sudden expansion of air. This results in a blast with a very strong air pressure.
- All known materials are vaporized at this temperature. When materials vaporize they expand in volume. The air blast can spread molten metal to great distances with force.
- For a low voltage system, a 3 to 4 inch arc can become stabilized and can persist for an extended period of time.
- Energy released is a function of system voltage, fault current magnitude and fault duration.
- Arcs in enclosures, such as Motor Control Centers or switchgears, magnify the blast and energy is transmitted towards the worker as the blast is forced to the open side of the enclosure.
Figure 4.6 is a model of an arc fault and the physical consequences that can occur.
Electrical Arc Model
4.6.4 Arc flash protection program
An arc flash protection program is implemented as part of the electrical safety program, which in turn, is part of the overall safety program of the company. The main objective of the program is to prevent or minimize injuries to workers from arc flash. Since arc flash hazard mitigation is a fairly new concept in the industry, it is expected that considerable efforts and allocation of resources will be required to effectively launch the program.
The arc flash hazard program consists of following steps:
- Hazard assessment: A qualified person performs calculations based on power system parameters to determine the flash protection boundary, the incident energy a worker may be subject to, and the hazard /risk category. An important step in assessment is the collection of technical data and other necessary data.
- Documentation: It is necessary to document the results of arc flash hazard assessment in reports and drawings, and also to provide signs and labels on equipment and at hazardous areas. Documentation is also a party of the planning process; documentation is used before working on live equipment and after; and documentation is required if work changes are made to the equipment or system.
- Personal protective equipment (PPE) plan: Based upon the hazard assessment the appropriate PPE must be selected and provided to the workers. Workers must wear the PPE properly, provide care and maintenance of the PPE, inspect it before every use and dispose of it after its life expires.
- Development of procedures to minimize hazard: The potential hazards can be minimized by developing safer working methods, providing shields, proper work planning etc; the exposure to arc flash can also be reduced by improving system design, using current limiting devices and solid state relays, and adjusting relay and trip devices to safer settings.
- Training for workers: Workers who are exposed to arc flash hazard should be well trained to understand what the hazards are, how they are initiated, and how to read the documents and warning labels. They should be trained in how to properly wear PPE, and how the hazard can be reduced with safer working procedures. Different tasks will require different work practices.
- Continuous improvement: Much research and development is necessary in the arc flash hazard program. New standards and PPE and industry practices are needed in this area. Workers’ experiences can be considered while developing the program.
- Safety audit: Safety audits should be regularly performed to evaluate various aspects of the safety program.
- Corporate wide plan: Corporate wide plan should be implemented to ensure consistency in safety practices. Communication channels should be established and responsibility should be distributed between various plants and divisions, thereby ensuring a unified approach.
4.6.5 Methods to reduce arc flash hazards
Workers exposed to an arc flash event may suffer from injuries including burns, cardiac arrest, amputation, memory loss, hearing loss, fracture, cataract, and blast trauma. Barrier protection when applied to switchgear can reduce the risk and impact of electrical burns and pressure waves. Enclosures containing primary elements are compartmentalized and grounded for maximum isolation. All live parts (where possible) are fully insulated, reducing the possibility of an arcing fault to occur. All primary elements such as breakers, PTs, CPTs, etc. have a disconnect means involving isolating shutters. Other methods used to reduce arc flash hazards are discussed below:
Limiting arc exposure
Exposure to arc flash can be eliminated in three ways:
- Avoiding arc flash accidents.
- Reducing the level of arc energy released.
- The proper use of personal protective equipment (PPE).
The following procedures used correctly can reduce arc flash accidents:
- Use of proper tools
- Good preventive maintenance
- Planning and coordination of work
- Skill development and practical experience
- Mental and physical condition of the worker, such that the dropping of tools,
- accidental touching, etc is avoided
Avoiding arc flash accidents
Understanding arc flash and its causes and taking steps to minimize them can avoid accidents.
4.7 Preventive maintenance
Preventive maintenance practices exist in most companies that can boast a high reliability of supply or process continuity. Preventive maintenance also provides for a safer workplace. Procedures needed to be included that address arc flash hazards, such as the enhancement of maintenance procedures when carrying out inspections, and preventive or breakdown maintenance. This reduces the overall cost of implementing the arc flash program. Following are some recommended maintenance practices:
- Rodents and birds entering panels and switchgear are not uncommon. This can lead to a short circuit and eventually to an arc flash. Closing all open area equipment with wire nets or sealant so that rodents and birds cannot enter can prevent this risk.
- Use corrosion resistant terminals. Corrosion can lead to snapping of small wires, which in turn can create spark and fumes when the tip of the wire hits the metal enclosure or another phase conductor. Check the corroded terminals and parts regularly if the electrical equipment is at a chemical plant or near marine atmosphere. Electrical contact grease is typically used in joins and terminations. This will reduce corrosion. Check the loose connections and overhead terminals. Impurities at the terminal connectors or dust can create additional contact resistance, resulting in a heating of the terminals. A sign of such a case is discoloring of the nearby insulation.
- Heating of cable insulation can damage insulation – another cause of flash over. Infrared thermography can provide valuable data on poor connections and overheated electrical conductors or terminations.
- Insulate exposed metal parts if possible. If heat dissipation is not really needed from the exposed metal part, and insulating it with some insulating tape, sleeve or cover is not a problem, then it is better to do so; this is preferable to leaving them exposed. Insulation prevents arcing. For example, if a worker drops an insulated spanner, which then touches bare bus bars of two phases, a short circuit will occur. However this will not happen if the spanner or bus bar is insulated.
- Make sure relays and circuit breakers operate properly. Failure could lead to a prolonged exposure to arc flash, which could result in death. Routine inspection and testing of relays are carried out in companies with good maintenance practices. The frequency of the relay tests may be couple of years up to five years, depending upon the manufactures suggestions and the policies of the company. Pitting of contacts takes place when fuses are operated. Replace contacts of the fuses holder or the fuse holder itself when excessive pitting is observed.
- When fuses melt, make sure that the fault has cleared before installing new fuses. Closing on to a fault can produce a spark which could lead to an arc flash. Wire harnesses for control and instrumentation should be kept in proper condition. It is common for these wires to become bundled and messy over time. Occurrence of arc flash is possible while opening covers of such switchgear/MCC.
- Check for excessive moisture or water/ice on insulating surface of equipment. This may cause flashover, especially on high voltage equipment.
4.7.1 Working on live equipment
- It is always preferable to work on de-energized equipment, regardless of the hazard risk category (HRC). When work on live equipment is unavoidable, then justification and written authorization is required. Incorporate this precautionary measure into the work procedure
- Use insulated tools. Dropping of tools can cause momentary fault, spark and arcs. Insulated tools can help to reduce this accident
- Torque control: When using spanners, wrenches or screwdrivers to fasten or loosen a connection, use the appropriate torque. When excessive force is required, it is not uncommon to loose control. Slipping of screws or nuts and bolts may cause accidental touching. Corroded or heated fasteners can be difficult to loosen. Work off line if loosening is difficult
- Do not use paint, cleaning chemicals, spray, etc., on live exposed metal parts. The fumes or spray may be conductive and it may reduce the insulating property of air and allow an arc to strike through. Spraying directly on live conductor can provide a conducting path that will result in electric shock
4.7.2 Reducing incident energy on worker
The incident energy exposure can be reduced by system design or operating procedures. Below are several ways to reduce the energy on an existing system:
- Reduce the fault level.
- Reduce the exposure time.
- Remote operation.
- Remote racking.
4.8 Reducing the fault level
Fault level can be reduced in following ways:
4.8.1 System configuration
- Reducing fault level depends on the existing system configuration. Double ended load centers with normally closed tie (as shown in Figure 4.8) are prime examples where fault levels can be reduced by either opening the tie or incoming breaker
- The fault current will be reduced by approximately 50% and the incident fault energy will also be reduced, although not in same proportion
- If the bus has two sources, or a source and a normally closed tie as shown in Figure.4.8, the opening of one of the sources (or tie), will reduce the fault level while maintenance is being done on the equipment
- For both the situations, the loading and relay setting should be checked to make sure that the opening of a breaker does not overload the other source

Double end load center configuration

Dual Source
4.8.2 Current limiting fuses/breaks
- Current Limiting fuses/breaks introduce additional resistance within the fuse element while the fuse is melting. This limits the fault current
- The fault current limiting region of the fuse is cleared quickly, usually within half a cycle. Since the incident arc energy is proportional to arcing time, current-limiting fuses and breakers limit the arcs energy
- Obtain verifiable engineering data on the current-limiting ability of the overcurrent protective devices. Be sure to specify the most current-limiting devices available where possible; the greater the degree of current-limitation the less will be the arc fault energy released (when the fault current is in the current limiting range of the overcurrent protective device). For instance, for fuses, it is suggested to use UL Class RK1 or Class J rather than RK5 since RK1 and Class J fuses are more current limiting than RK5
- Size current-limiting and branch circuit over current protective devices as low as possible. Typically the lower the ampere rating, the greater degree of current-limitation
- Limit the ampere rating size of main and feeders where possible. Split large feeders into two feeders. For instance, rather than a 1200-ampere motor control center, have two 600-ampere motor control centers
- Size current-limiting branch circuit overcurrent protective devices as low as possible. For instance, for a 100hp, 460 volt, three phase motor, the NEC® maximum for dual-element, Class RK1 fuses would be 225 amperes. However, it is possible to use a 175-ampere dual-element, Class RK1 fuse for this application. Under fault conditions the 175-ampere fuse will let through less energy than the 225-ampere fuse
- Motor starter protection: use starter/overcurrent protective device combinations that have been tested and witnessed for Type 2 protection. For all practical purposes, the regular UL 508 and Type 1 starter/overcurrent protective device combinations permit extensive damage to the starter. As long as a fire is not started outside the enclosure, and the enclosure does not become energized and as long as the door does not blow open, a UL 508 and Type 1 starter is sufficient. If a worker has the door open and a fault is initiated on a UL 508 or Type 1 starter, the hazard is much greater to the electrical worker. Type 2 protection for starters typically is provided by current limiting overcurrent protective devices such as Class J or Class RK1 fuses and the starter sustains “no damage” under short-circuit conditions
- If current-limiting protective devices are utilized, then utilizing low impedance circuit components such as low impedance transformers can reduce arc-fault hazards even more. It has been shown that all other variables are constant: if the 3-phase available bolted short-circuit current is higher, the 3-phase arc fault current is higher. With the low impedance circuit approach, an arcing fault current will tend to be of a higher magnitude increasing the probability that the overcurrent protective device will react quickly. This increases the probability a current-limiting overcurrent protective devices will be in their current-limiting range; this results in the current let through being reduced and the fault time reduced – hence, lower incident energy. Lower impedance circuit components also enhance the distribution system voltage regulation
- If non-current-limiting overcurrent protective devices are used, then utilize high impedance circuit components to at least try to limit the arc-fault current potentially available. This approach may result in voltage regulation issues, but with non-current limiting protective devices, the incident energy of a fault can attain significantly high levels
- Do not use circuit breakers with short-time delays. It has been well documented that arc-fault incident energy is directly proportional to the time the fault is permitted to persist. Permitting an arcing fault to intentionally flow for 6, 12, or 30 cycles, dramatically increases the hazards to electrical workers. If selective coordination of overcurrent protective is the objective, then use current-limiting fuses which can be selectively coordinated simply by adhering to minimum ampere rating ratios between the main and feeder fuses, or feeder and branch circuit fuses
4.8.3 Current limiting reactors
- Current-limiting reactors introduce additional impedance in the system and are used to limit the fault current. This not only reduces damages caused by faults but also allows the use of circuit breakers with smaller duty
- Limiting the fault current can also increase the fault clearing time if the fault current happens to lie in the inverse time delay characteristics of the protective relays. Therefore, protective device coordination analysis is also required when selecting current limiting reactors
4.9 Reducing arcing time
Arcing time can be reduced in several ways. Some changes in the system of settings may be required for this purpose. Some characteristics underlined in this chapter are as follows:
- Reduce safety margin for relay and breaker operation with improved solid- state trip devices.
- Use bus differential protection to combine selectivity with instantaneous operation
- Use temporary instantaneous trip setting during work
- Retrofit time overcurrent relays with delayed instantaneous trip device if needed
- Use Optical sensor to trip breaker in the event of arc flash
- Use smaller fuse size if possible; smaller current-limiting fuses may clear faster. Fuses will generally be much faster than breakers at high fault currents; even with ignoring the current-limiting effect, this can greatly reduce arc energy
- Use Protective device coordination study to balance improving reliability with reducing arc flash hazard
4.9.1 Reducing breaker response time safety margin
- Incident energy increases with time and fault current. Reducing either or both lowers the incident energy due to arcing fault
- Faster acting relays and trip devices can reduce the arcing time to some degree. In this regard, a protective relay review may be performed in order to see if they can be lowered in time and pick up
- Breakers time are now commonly 5 cycles rather than 8 cycles of older breakers. Microprocessor relays are used, for which the over travel has essentially been eliminated
- The repeatability of the microprocessor relay is better that of electromechanical relay. Therefore the safety margin can be reduced
- The end result is that the relay coordination margin can be 0.2 to 0.25 seconds instead of 0.4 seconds. This will reduce arc energy exposure by 25% -35%.
4.9.2 Bus differential protection
- A major improvement in clearing time would result if an instantaneous relay could be used instead of time-delay relay
- Feeders on both low and high voltage systems are likely to have instantaneous settings and therefore would limit arc exposure time. However, a fault on main bus is often cleared by time delay relays for selectivity reasons
- In high voltage systems, using bus-differential relays reduces the arc exposure time to a minimum. The arc energy exposure can easily be 5 to 30 times less than that of the delayed clearing time
4.9.3 Temporary instantaneous settings
- Replacement of low-voltage trip devices from many industries have instantaneous units that can be turned on and off. This has many advantages for the incoming breakers
- In many cases for co-ordination purposes, the instantaneous is not set and fault-clearing times are delayed for selectivity
- A main breaker clearing time with load center tie and feeder breakers could easily have a short time setting of 0.4 seconds
- If the instantaneous trip could easily be enabled while work is being performed, lower fault currents could be tripped and cleared in less than 0.04 seconds. The incident energy exposure is reduced to 10% of its previous value
- During maintenance, full selectivity of device may decrease, but reduction in arc flash exposure makes this worthwhile. The temporary instantaneous setting should be disabled and the original protective setting should be restored for normal operations after the work is completed
- Separate instantaneous trip devices with increased protection can also be added to the shunt trip or transfer trip for added protection during work procedure
Retrofit instantaneous trip devices
If bus differential relaying is not possible, then main relay can be retrofitted with an instantaneous device and safety control switch. As shown in Figure 4.9, a selector switch can be used to place the instantaneous device in service when maintenance is being done.
- Normally the instantaneous protection would not be functional due to open contact of the selector switch. However, when work is being done on energized equipment, the safety switch would be turned ‘ON’ thereby limiting the arc exposure time to the worker should an arcing fault accident occur
- The delayed fault clearing could be in range of 0.4 to 2.0 seconds on the main breaker instead of 0.1 second
- The delayed trip time greatly increases the arc exposure time and the amount of radiation a worker would receive if the arc blast pressure were not enough to propel the worker away from the fault
- The time selective protection system would be eliminated for the duration of the work in the interest of safety. The selector switch should be lockable in the maintenance position
- Ideally, positive feedback from the trip unit would be used for an indicating light associated with the switch, to confirm the setting change was in effect
- Many medium voltage multifunction relays have provisions for different protective settings for various operating modes. For example, one group of setting is used for normal operation; a second group of settings is used for the emergency mode
- Another group setting could be for maintenance where tripping and current pick-up settings are reduced and set as instantaneous. Again, these temporary settings could result in the loss of selectivity, but with a gain in human protection

Selector switch
Reducing the arcing current
Certain protective devices are current-limiting in design. By limiting the current available for a fault, there is a corresponding reduction in the incident energy for clearing times that are short in duration (1-3 cycles). Fault duties at these devices must be in the current limiting range for them to be effective (typically at least 10-15 times the device rating).
4.9.4 Increasing the working distance
- Since the incident energy is proportional to the square of the distance (in the open air), increasing the working distance will significantly reduce the incident energy
- Working distance can be increased by using remote racking devices, remote operating devices, and extension tools (i.e. hotsticks). Figure 4.10 demonstrates the impact of using a remote device to increase the working distance from 18 inches (Class 3, 12.62 cal/cm2) to 72 inches (Class 1, 3.28 cal /cm2)
Effect of working distance on incident energy
4.9.5 Reducing the clearing time
- Lowering device settings is the cheapest solution to lowering the incident energy, but is limited by the range of available settings that will still achieve selective operation
- In medium voltage relaying, this can be achieved by changing the curve shape or lowering the time dial settings
- Low voltage protection changes are more limited due the device characteristics. Figure 4.11 shows one example of changing the settings to improve the incident energy. The incident energy was reduced from a Class 4 (38.7 cal/cm2) to Class 3 (19.8 cal/cm2)
- Zone selective interlocking (ZSI) and bus differential protection are two methods to detect bus faults and quickly clear the fault to minimize damage
- The zone selective interlocking (typically low voltage breaker only) uses a communications signal between zones of protection. For a through fault, the downstream protection sends a blocking signal to the upper level breaker, allowing normal time selective operation
- For an in zone fault, no blocking signal is sent and the time delay (usually for short time and ground fault protection only) is reduced to the minimum setting for the trip unit (typically 100 ms plus the breaker response). ZSI is not generally available as a field modification, and therefore cannot be used for installed systems
- Bus differential protection is faster than ZSI (2 cycles or less plus breaker response) and can be retrofit to existing systems. It is expensive to install due to the number of current transformers that need to be installed
- Using the example in Figure 4.12 and assuming a clearing time of 150ms for ZSI and 100ms for bus differential protection, the incident energy is reduced from 38.7cal/cm2 to 9.3cal/cm2 and 5.6cal /cm2 respectively

Effect of main failure on incident energy

Effect of Reduced Main Breaker Settings on Incident Energy
4.9.6 Fuse size and speed
- Fuse size can be reviewed to determine if smaller fuses can be used. Smaller fuses reduce exposure time. This can be significant when arcing current or 85% of arcing current is not in the current limiting range of the current
- The smaller fuses would operate quicker and reduce arc energy exposure when a main breaker fail or fault occurs between the main breaker and the transformer
- The speed of the fuses is selected to coordinate with other protective devices and the over-current capacity of the equipment being protected
- A disadvantage of lowering the fuse size is the possibility of fuses not being able to discern a temporary fault from a persistent fault
- A temporary fault, such as those found in overhead distribution lines, exists for a few cycles
- Some fuses are selected so that they will allow temporary faults, but interrupt persistent faults. If the fuse size is lowered with the intent of reducing the arc flash hazard, then the fuse may melt upon temporary faults, thereby reducing the reliability of supply
- Operating fuses can cause sparks and may lead to arc flash accidents. Fuses should not be temporarily lowered just for the purposes of live wires
4.9.7 Temporary relay settings
- It is necessary to keep in mind that changing protective settings on electrical equipment could place workman in danger
- While protective devices are at a low voltage, a spontaneous fault could occur in the switchgear. Most relay resetting is done with a keypad and not with screwdrivers, resulting in the chance of a fault at this time being extremely low
- Review protective devices to see if they can be lowered in time and pick up. Due to reliability reasons, using temporary settings is not the preferred practice
- Tampering with settings of protective devices is prohibited. However qualified persons, for instance the engineers, can temporarily provide alternate settings during the work period: in this way, the incident energy can be reduced by lowering trip time
4.9.8 Protective device coordination study
- A protective device coordination study is carried out to improve system reliability
- This study can be done on a regular basis, perhaps every few years or whenever there are changes in the systems
- Such studies also included as one of the goals: the reduction of incident energy from arc flash. The engineer performing the study should simultaneously evaluate the arc flash hazard, and seek to minimize the hazard by keeping arcing current as low as possible
4.10 Arc flash protection program
An arc flash protection program is implemented as part of the electrical safety program, which in turn, is part of the overall safety program of the company. The main objective of the program is to prevent or minimize injuries to workers from arc flash. Since arc flash hazard mitigation is a fairly new concept in the industry, it is expected that considerable efforts and allocation of resources will be required to effectively launch the program. The arc flash hazard reduction program consists of the following steps:
- Hazard assessment: A qualified person performs calculations based on the power system parameters to determine the flash protection boundary; the incident energy a worker may be subject to; and the hazard /risk category. An important step in this assessment is the collection of technical data and other necessary data.
- Documentation: It is necessary to document the results of arc flash hazard assessment in reports and drawings, and also to provide signs and labels on equipment and at hazardous areas. Documentation is also a part of the planning process before and after working on live equipment; if work changes are made to the equipment or system, documentation is also required.
- Personal protective equipment (PPE) plan: Based upon the hazard assessment the appropriate PPE must be selected and provided to the workers. Workers must wear the PPE properly as well as caring for and maintaining the quality of the PPE. They must inspect it before every use and dispose of it after its life expires.
- Development of procedures to minimize hazard: Potential hazards can be minimized by developing safer working methods, providing shields and proper work planning etc. The exposure to arc flash can also be reduced by improving system design, using current limiting devices and solid state relays, and by adjusting relay and trip devices to safer settings.
- Training for workers: Workers who are exposed to arc flash hazard should be well trained to understand what the hazard is, how it is initiated, how to read the document and warning labels, how to properly wear PPE, and how the hazard can be reduced with safer working procedures. Different tasks will require different work practices.
- Continuous improvement: Much research and development is necessary in the arc flash hazard program. New standards, PPEs and industry practices are needed for future improvements to be made. Workers’ experiences must be considered while developing the program.
- Safety audit: Safety audits should be regularly performed to evaluate various aspects of the safety program.
4.11 Electrical equipment in potentially explosive atmospheres
There are eight standardized protection principles for the safe use of electrical apparatus in potentially explosive atmospheres, in addition to some non-standardized methods. This standardized principle is commonly considered as a type of protection and for each of the principles, harmonized European standards or Euro-norms have been issued.
Hazardous areas, where potentially explosive atmospheres exist are encountered in a wide variety of industries. Thankfully, the science of how to operate safely within such areas is now well understood. However, knowing how best to comply with the requirements of this operation is something that still causes widespread confusion. Particular care has to be taken with electrical apparatus because of its potential for creating sparks and hotspots that could ignite a gas, vapour, mist or dust-laden atmosphere. Such environments are encountered in everyday life, with petrol station forecourts being an obvious example; Industry sectors that are prone to hazardous areas are mining, chemical processing, petrochemicals, and oil and gas. In addition, pharmaceutical production facilities often have areas where solvents are used; likewise, chemical plants often have hazardous areas. Flour mills, bakeries, sugar processors, timber processors, coal handling plant, paper mills and processors of metals such as aluminum and magnesium, for example, can all have areas where dust-laden atmospheres are potentially explosive. It is apparent therefore that the full spectrum of production and process plants which contain hazardous areas is extremely broad.
There are three zones for gases and vapours as shown in Table 4.1:
Different zones and their area
| Zone 0 | Explosive atmosphere highly likely to be present for long period of time or continuously. |
| Zone 1 | Explosive atmosphere possible but unlikely for longer period of time. |
| Zone 2 | Explosive atmosphere unlikely to be present except for short periods of time – typically as a result of a process fault condition. |
When on considers the size of a refinery or chemical factory and the amount of liquids and gases that circulate, as well as the various processes that occur, it is clear that there exists a certain amount of risk of leaks and other hazards. In some cases the gas, vapour or dust is present all the time or for long periods. Refineries and chemical complexes should therefore be divided into areas of risk, areas called zones, which are categorized by the various releases of gas, vapors or dust.
Safe area
A domestic domain such as a house would be classed as safe area where the only risk of a release of explosive or flammable gas would be the propellant in an aerosol spray. The only explosive or flammable liquid would be paint and brush cleaner. These are classed as very low risk.
Zone 2 area
This is a step up from the safe area. In this case it has been decided that in this zone the gas, vapour or dust would only be present under abnormal conditions (most often leaks). Unwanted substances should only be present under 10 hours/year or 0–0.1% of the time.
Zone 1 area
These areas are where special or classified electrical equipment must be used. It is expected that the gas, vapour or dust will be present or expected for long periods of time under normal running. This is defined as 10–1000 hours/year or 0.1–10% of the time. In this case there must be no sparks at all that can ignite these mediums.
Zone 0 area
This is the worst scenario as gas or vapor is present all of the time (over 1000 hours/year or >10% of the time). Although this is the worst case it is very rare that a zone 0 area will be in the open. Usually this would be the vapour space above the liquid in the top of a tank or drum.
General principles of design
With very few exceptions, the ignition of a flammable atmosphere results in a potentially destructive explosion, caused by the heat generated in a thermochemical chain reaction. In this respect, the LEL of gas/air mixture is analogous to the critical mass of a nuclear device. Hence electrical apparatus for use in potentially explosive atmospheres must be designed so that it is not capable of initiating an explosion.
If we only consider normally sparking and heated components, design will be very easy.
But we have to consider abnormal conditions such as mechanical overloads and electrical faults, which often lead to dangerous conditions. The design requirement is therefore either to prevent these faults from occurring, or to ensure in some way that they cannot cause ignition.
Circuits where safe fault levels cannot be exceeded are termed as intrinsically safe circuits. Flameproof enclosures for power equipment and intrinsic safety for light current apparatus are still the two most important and widely used concepts for electrical installations in explosion/hazardous areas.
Flameproof enclosures: The principle of flameproof protection is to place electrical equipment in an enclosure, which does not need to be sealed, but which will not ignite a surrounding explosive gas if same explosive mixture is ignited within the enclosure. A flameproof enclosure is therefore, in effect, a type of pressure vessel in which all openings and running clearances have been shown by test as reliable flame traps.
The following rules are considered while designing a flameproof enclosure:
- All face joints such as flanges to be machined and to have a land of at least 1 inch from outside to inside of the enclosure
- Flange faces may form a tight metal to metal joint; or they may be held apart to form a tight metal to metal joint; or they may be held apart to form a vented joint with maximum permissible gap of 0.02 inches
- Joining with rubber, asbestos or any other such material liable to deterioration is not permissible
- Length of bearings for shafts and spindles to be not less than 1 inch, with a maximum radial clearance of not more than 0.01 inch
- Direct entry of cables into the main flameproof enclosure is not permissible
- Nuts and bolts heads securing covers to be shrouded
- The above rules are modified but form the basis for the flameproof design.
Application and Limitation of flameproof protection
This type of protection is useful for all apparatus including switches, contactors, commutators and slip-ring motors, and incandescent lamps.
This equipment is very robust.
Limitations:
- These apparatus are not suitable for areas above atmospheric pressure
- Low temperature applications
- Cost is very high
Protection by intrinsic safety
Research has shown that the lowest current, which can cause an explosion, falls very rapidly with increase in supply voltage. If the voltage and current at the spark lie below the curve as shown in Figure 4.13, the circuit is said to be intrinsically safe.

Graph of open circuit voltage and maximum pre-sparking current
Application of intrinsic IS system
This protection is applicable to low power and low voltage equipment. It is widely used in the protection of the electronic process control and telemetering system, where all parts of the circuit are within the hazardous area.
4.12 Hazards due to high temperature
Excessive temperatures can cause burns, start a fire, or degrade insulation within the equipment. The standards generally provide temperature limits for various internal and external parts. Installation or mounting methods are considered when evaluating the product: for example, under the counter, installed in a cabinet, etc.
Hazards due to high temperature include:
- Burns due to high surface temperature
- Fire in nearby combustible materials
- Fire originating from electrical equipment
- Arcing due to breakdown of insulation
- Mechanical failures and injury to personnel, due to arc faults
We have discussed at length arc fault prevention through proper design of insulation and enclosure in the previous sections. Arc hazard from live electrical equipment and the precautions required against this hazard were also discussed in an earlier chapter. In this section, we will confine the discussions to the temperature produced by the normal/abnormal operation of electrical equipment and electrical equipment related fires.
Adverse thermal effects are a result of high temperatures occurring during equipment operation:
- in exposed metallic enclosures
- in conducting parts
Current flowing in a conducting part produces watt losses due to the resistance of the material causing the heating of the conductors. This heat is dissipated in the form of thermal radiation and convection when the conductors are kept bare and exposed to the cooling medium. In the case of insulated conductors, the heat is first conducted through the insulation to its outer layers and then dissipated by convection and radiation. (Strange, but true; one of the requirements of an electrical insulator is that it should conduct heat adequately).
In a conductor carrying a steady load current, the temperature initially starts rising but reaches a steady state value when the heat generated and the heat dissipated are in equilibrium. The temperature, which a conductor can attain, is limited by the maximum permissible value which the insulating components in contact with it can withstand. Thus the conductor temperature of a wire with PVC insulation should not exceed the limiting temperature value applicable to PVC material (say 70 deg C). Exceeding this temperature will cause accelerated ageing and thermal failure of the insulation as discussed earlier. When abnormal conditions are encountered, the conductor temperature can go up to a much higher value compared to the temperature during normal operation. Such an increase must also be factored into the design of insulation in any electrical equipment. Abnormal conditions stated here include:
- Excessive current during overloads
- Excessive current during faults (short circuit)
- Cooling system failures
When there is a metallic enclosure around the live conductors, they too participate in the heat dissipation process and in doing so, their temperature rises beyond ambient value. Exposed and accessible parts of any electrical equipment must not attain temperatures beyond specified limits. If the part is to be held by hand for operation, the limit is the lowest. For parts which need not be held or touched during normal operation, higher limits are permissible. Though these parts are not normally handled, such requirement may occur occasionally. In addition, they can ignite any nearby flammable materials. Suitable limits must therefore be adopted. Table 4.2 below shows the typical limits for accessible parts (source: IEE wiring regulations):
Temperature limits of accessible parts of electrical equipment
| Accessible part | Surface material | Max. Temperature Deg. C |
| A hand held means of operation | Metallic | 55 |
| Non metallic | 65 | |
| A part intended to be touched but not hand held | Metallic | 70 |
| Non metallic | 80 | |
| A part which need not be touched for normal operation | Metallic | 80 |
| Non metallic | 90 |
Similarly, lightning flashes striking a facility can have dangerous consequences unless they are safely dissipated to the ground. We will discuss these aspects in subsequent chapters.
In some instances an electric shock may not, by itself, cause injury. However, a resulting fall from a height could. Those who are working at heights on electrical equipment (e.g. changing lamps in a high bay factory premises or on road lighting poles) must take precautions to avoid a fall as a consequence of electric shock.
Burn injuries result from an arc flash, which happens when there is a short circuit between exposed live parts. The extent of arcing and the seriousness of injury depend on the following factors:
- Fault energy as given by the fault level of the system (VA)
- Time of fault clearance
For example, the arc energy in an MV system short circuit fault is usually much higher compared to an LV mains circuit fault, which in turn has a much higher energy compared to a branch circuit fault in the same system. The longer an arc fault is allowed to persist, the higher the damage. Faults which are cleared much faster are therefore much less dangerous from the viewpoint of injury the resulting arc can inflict. High-energy faults will also cause melting of components such as copper/aluminium conductors or the steel parts of an enclosure. Copper is particularly dangerous because it can result in deposition of toxic copper salts on the skin. Direct electrical contact with a live part at the point of contact (without overt arcing) can also cause burns on the skin. Internal burn injuries and organ damage can be the result of the passage of electricity through the body (example: lightning current through a human body). Sometimes, the sudden expansion of air due to an arc fault within an enclosed space may dislodge mechanical parts (e.g. terminal covers) with a great force. Documented cases of such accidents causing injury or even death are on record. It is common practice in the design of equipment such as HV switchgear, to provide vents or flaps which open in the event of explosive arc faults, thereby avoiding damage to the enclosure. They also help to direct the arc products way from an operator who may be stationed nearby.
Another hazard arises due to the high temperature on the surface of electrical equipment enclosures and current carrying parts. As stated earlier, external surfaces of electrical equipment often attain elevated temperature: for example, the enclosure of bus ducts which can often attain surface temperatures of over 60 °C. Exposed conducting parts such as overhead line conductors can attain even higher temperatures. For example, the bus bars in switchgear often run at temperatures in excess of 100 °C. Electrical joints/mating surfaces can have temperatures exceeding the conductor temperature. This is because of increased localized resistance. Apart from causing less serious burn injuries (compared to arc flash), high surface temperature can cause ignition if flammable vapors are present in the environment.
Electrical faults can also cause fire danger as discussed in an earlier section. Special care is required when the electrical equipment itself contains flammable materials. Examples of this type of equipment include oil circuit breakers and mineral oil cooled transformers. In some cases, a fire can result because of combustible materials stored in the vicinity of electrical equipment.
Electrical equipment installed in explosive environment needs special attention. Frequently, components of electrical equipment produce arcing or sparking in the course of normal operation. Contactors, carbon brushes, push buttons, control switches are examples of such equipment. Some equipment may generate arcs during abnormal conditions such as a short circuit occurring within a motor terminal chamber. While in a normal environment such instances would be quite harmless, they may cause an explosion if hazardous substances are present in the surrounding atmosphere. Equipment intended to operate in such an environment should be designed to prevent an explosion being caused in the external environment. The nature and characteristics of the hazardous materials present in the environment play an important role in these cases. We will discuss in detail the safety measures to be taken in a hazardous environment in a subsequent chapter.
Table 4.3 identifies the safety hazards posed by electrical equipments commonly used in electrical generation and distribution systems and substations.
Electrical equipment hazards
| Type of equipment | Hazards |
| Generation equipment | Electric shock, arc flash, mechanical hazards |
| Transformers | Electric shock, arc flash, fire hazard |
| Overhead Transmission/Distribution Lines | Electric Shock, Arc Flash, Fall From Heights |
| Cables | Electric shock, arc flash, fire hazard |
| Bus ducts | Electric shock, arc flash, thermal hazard |
| Distribution equipment | Electric shock, arc flash, thermal hazard, fire hazard |
| Motive equipment | Electric shock, arc flash, thermal hazard, mechanical hazards |
| Heating equipment | Electric shock, arc flash, thermal hazard |
| Lighting equipment | Electric shock, arc flash, thermal hazard, fall from heights |
| Uninterrupted power supplies with battery | Electric shock, arc flash, hazards from corrosive liquids and explosive gases |
4.13 Electrical accidents and safety measures
We will discuss briefly in the section the reasons why electrical accidents happen and how we can avoid them. These points will be elaborated on in more detail in subsequent chapters. Electrical accidents happen mostly as a result of the following:
- Failure to isolate live parts/inadequate or insecure isolation of live parts (60%)
- Poor maintenance and faulty equipment (30%)
- Insufficient information about the system being worked on
- Carelessness and lack of safety procedures
4.13.1 Isolation measures and work on/near live equipment
Isolating normally live equipment before starting any work on it, can improve safety substantially in any system. We must however bear in mind that there are certain kinds of equipment where live work is possible. Furthermore, there are certain kinds of activities where work in the vicinity of exposed live parts is unavoidable. However, such work must be carried out according to well laid safety procedures.
4.13.2 Eliminate faults to improve safety
The other major cause of accidents is faulty equipment (which can include both poorly designed or improperly operating equipment). Unless safety is built into the design of the equipment, accidents and injury will result. Similarly, improperly maintained equipment can also lead to failures which may result in accidents.
4.13.3 Improved knowledge level
Insufficient knowledge of operating personnel, as well as a lack of familiarity with equipment and systems, can also result in unsafe situations. Absence of proper operational safety procedures as well as violations of existing procedures can result in accidents.
4.13.4 Safety measures
The following are the general safety measures, which need to be adopted to reduce the possibility of accidents in electrical equipment.
Technical measures
- Safe design/installation of plant and equipment as per applicable codes and regulations
- Posting clear warning signs at points of hazard
- Use of equipment/sensors to warn incipient problems with automated hazard containment measures
Accident prevention measures
- Safe operating and maintenance practices established through documented procedures and instructions
- Proper periodic inspection and prompt repairs
- Use of personal safety equipment mandated in safety procedures
- Avoiding live or hot work except as mandated in the relevant codes of practice and carried out using the stipulated procedures and precautionary measures
Organizational measures
- Creating an organizational safety structure to handle safety issues, lapses and accidents
- Documenting the procedures required to operate and maintain different electrical installations in a work place; reviewing them vis-à-vis the various applicable regulations; updating them to keep these procedures in step with regulatory changes
- Appropriate knowledge on the part of workers by proper structured training
- Establishing the requirements for levels of competence for operating electrical equipment; carrying out or supervising the issue of work-permits to work on equipment and for normalization of system after completion of work; carrying out or supervising maintenance work on equipment on which a permit-to-work has been issued
- Creating and enforcing a system for certification of personnel in accordance with the competence levels demanded by their duties
- Create and encourage safety awareness among the workforce
We will discuss these measures in detail in the ensuing chapters.
4.14 Summary
Improper use of electricity or careless handling of electrical equipment, leads to a number of otherwise avoidable accidents. Electrical safety is a well-legislated subject and the various acts and regulations enacted in each industrialized country emphasize the responsibility of both the employer and the employee to ensure safe working conditions. However, it must also be understood that safety is not simply a matter of taking precautions in the workplace: safety must start at the stage of equipment design.
In any industrial facility, several types of hazards exist. The hazards may be due to electrical faults, mechanical faults, as well as several other causes. Electrical hazards result, in the main, from electric shock, a fall as a result of an electric shock, burns due to arc flash and injuries by explosive expansion of air due to the arc. Other safety hazards include high temperature on the surface of electrical equipment/enclosures, exposed conductors and electrical faults resulting in fire within electrical equipment or nearby combustible materials. Special attention must be given to electrical equipment installed in an explosive environment. Equipment intended to operate in such an environment should be designed to prevent an explosion being caused in the external environment.
The reason for over 60% of accidents is the result of a failure to isolate live parts, as well as inadequate or insecure isolation of live parts. The proper isolation of normally live equipment from the mains supply before commencement of work can improve safety substantially. Poor maintenance and faulty equipment, insufficient information about the system being worked on, and a lack of safety procedures are the other major reasons for electrical accidents.
The possibility of accidents can be reduced substantially by the implementation of various steps. These steps include the initial design and installation of equipment in accordance with the appropriate safety features and relevant regulations. Adoption of proper documented procedures, as well as making available adequate training to working personnel and creating safety awareness among the workforce, are examples of further steps that could be taken. In the next chapter, we will discuss the basic theory of electrical safety and shock hazards.
5
Inspection of Electrical Systems for Safety
We have discussed in earlier chapter about electrical hazards in installations. In this chapter, we will discuss the need for periodic inspection of electrical installations to ensure their continued safe operation. Various stipulations of IEE Wiring Regulations form the basis of the chapter.
Learning objectives
- Objectives of inspection
- Stipulations of IEE Regulations
- Inspection of new installations
- Checklists of items/aspects to be inspected
- Periodic inspection
- Documentation of inspection
- Planned and condition-based preventive maintenance
5.1 Objectives of inspection
The quality of an electrical installation and ensuring safety of personnel who operate and maintain the installation are important issues. Carrying out the design and construction of an installation as per various applicable standards, regulations and codes of practice is crucial in ensuring the quality, safety and integrity of the installation, since standards and codes put must emphasis on matters pertaining to safety. An installation must be inspected for conformity with the applicable regulations and for safety on completion of erection and thereafter periodically.
IEE Wiring regulations stipulate various requirements to achieve these objectives. Planning, design and erection of an electrical system need extreme care in order to ensure that the installations are safe for the personnel who use, operate and maintain them. Proper planning using the methods of systematic assessment given in Chapter 3 of the Regulations will ensure that the installations function as intended and are not unduly affected by the presence of external influences. Proper design of the system and selection of equipment, which form part of the installation, ensure that the system is safe and remains safe over its entire intended life. Proper erection ensures that the equipment operates and meets the functional requirements as intended. Inspection verifies the compliance with regulations and safety requirements.
The objectives of inspection are as follows:
- To ensure that a new installation is safe to energize, operate and maintain
- To ensure that the installation remains safe during its operation without deterioration
- To ensure that additions/modifications to an existing installation do not impair its safety
Chapter 7 of the Regulations deals with the inspection of installations, prior to commissioning (called initial verification) and on an ongoing basis (periodic inspection). Initial verification ensures that there are no defects or non-compliance issues in the completed installation and it is fit to be put in service. Periodic inspection ensures that it is fit to continue in service.
Note:
IEE Wiring Regulations do not deal with high voltage equipment. However, the general principles discussed here are equally applicable for HV installations and can be extended to such installations with specific additions to suit the equipment involved.
5.2 IEE wiring regulations
In general, during inspection it should be ensured that electrical equipment is designed, manufactured and erected as per the applicable standards using good workmanship and proper materials. The characteristics of the equipment should not be impaired in the process of erection. It should also be ensured that the design temperatures are not exceeded. Measures for identification of equipment and wiring should be as per the requirements stipulated in the wiring Regulations. Joints should be of good electrical and mechanical quality.
On completion of any new electrical installation, as well as additions or modifications to an existing installation, appropriate inspection and testing should be carried out to verify that the requirements of the Regulations have been met. Similarly, periodic inspection and testing should be carried out in an operating installation to ensure that the installation quality has not deteriorated in service, due to the service conditions or other external influences. Appropriate reporting and certification should be performed by the authority carrying out the inspection/testing.
These aspects are covered in Part 7 of the Regulations in the following sections:
- CH. 71: Initial verification
- CH. 72: Alterations and additions
- CH. 73: Periodic Inspection and testing
- CH. 74: Certification and reporting
The basic objective of inspection is therefore to verify that all relevant requirements of the Regulations have been met and to make sure that the installation is safe to energize, operate and maintain. The steps involved in inspection are:
- Collection of the documents pertaining to the installation
- Assessment of general characteristics using drawings and specifications
- Disconnection of supply to the part of the installation being verified
- Inspection
- Testing
- Issue of Electrical Installation Certificate by inspecting authority with necessary documentation including inspection schedules and test schedules
5.3 Initial verification
Every installation should be inspected and tested on completion and prior to putting in service, in order to confirm that all relevant requirements of the Regulations have been met. Due precautions should be taken during inspection and testing to avoid danger to persons and property. The result of assessment of the general characteristics (as per Part 3 of the Regulations) together with the drawings and documents pertaining to the installation should be made available to the person carrying out the inspection and testing.
Inspection should precede testing and should be performed after disconnecting the supply to that part of the installation which is under inspection. The inspection should verify that all equipment forming part of the installation conforms to the appropriate standards based on markings and certification/documentation by the installer or manufacturer. The inspection should also check that the equipment is correctly selected and erected as per the Regulations and is not visibly defective or damaged. The following are the aspects that should be checked during inspection. Some of the points will require checking during erection itself (as the parts may not be accessible for external inspection once the installation is completed):
- Connection and identification of conductors
- Routing of cables in safe zones and protective measures against mechanical damage
- Connection of single pole devices used for switching or protection in the phase conductors only (a single pole switch should not be put on the neutral conductor)
- Correct connection of accessories and equipment
- Presence of fire-barriers, fire-seals and protection against thermal effects
- Protection against electric shock (to be performed in detail and all measures for protection against direct and indirect contact to be verified to ensure conformity with the Regulations)
- Preventive measures against mutual detrimental influences
- Correct location and installation of devices for isolation and switching
- Provision of under voltage protective devices
- Choice and setting of protective and monitoring devices (indirect contact/over-current)
- Protective measures against external influences
- Adequacy of access to equipment
- Presence of danger notices
- Presence of diagrams and instructions
- Erection methods
As may be noticed, the points covered by verification indicate the emphasis of the Regulations on safety against electric shock and the prevention of various other unsafe conditions as discussed in earlier chapters.
Any other aspects not specifically listed but which are appropriate to the installation may be added to this list. It would be advisable that any shortcomings observed during the above inspection are rectified before proceeding with the testing.
5.4 Testing
The following tests should be carried out and the results compared with the appropriate criteria. (The results of initial testing often form a reference for subsequent testing, particularly where no definite norms are available for acceptable values of the tests). The tests should be carried out in the order mentioned in the Regulations (713-02 to 713-09) and any non-compliance or fault revealed during a test must be rectified. The test (including any previous test whose results might have been affected by the fault) should be repeated. The installation can be energized only after successful completion of all the tests.
- Continuity of protective conductors and equipotential bonding conductors using a device whose source has a open circuit voltage between 5V and 25V and a short circuit current capability of at least 200 mA
- Continuity of all final circuit/ring final circuit conductors including the protective conductor
- Insulation resistance between live conductors and between each live conductor and Earth must be measured. In circuits having electronic devices, the insulation resistance should be measured between phase/neural conductors connected together and earth to avoid damage to sensitive electronic devices
- Voltage withstand test for site-applied insulation for protection against direct contact. (No breakdown or flashover should occur when the specified voltage is applied for the specified duration)
- Verification of degree of protection of enclosures provided for supplementary insulation and voltage withstand test for the enclosures
- Insulation resistance test for electrically separated circuits
- Verification of degree of protection for barriers provided as protection against direct contact IP XX B being the minimum acceptable degree of protection
- Measurement of insulation resistance of non-conductive locations for protection against indirect contact. (Measurement to be performed at no less than three points for each non-conductive surface between the surface and the main protective conductor of the installation)
- Polarity check to ensure that all fuses and protective devices are connected to the phase conductor and correct connection of conductors to the switches and socket outlets
- Measurement of earth resistance of earth electrodes where provided
- Measurement of earth-fault loop impedance
- Measurement/calculation of short circuit and earth fault current at the origin of the installation and at other relevant points of the installation
- Functional tests including:
- Simulation of residual current devices
- Tests on switchgear and control-gear assemblies to verify that they arecorrectly mounted, adjusted and installed in accordance with the requirements of the Regulations.
On completion of inspection and testing, the person conducting the inspection and testing shall give an Electrical Installation Certificate together with a schedule of inspections and a schedule of test results to the person ordering the inspection.
5.5 Alterations and additions
Verification on the lines indicated in the previous paragraphs (for initial verification and testing) will be done whenever any addition or alteration to an existing installation is carried out. This is to ensure that the work completed fulfills the requirements of the Regulations as applicable and does not impair the safety of an existing installation.
On completion of the verification, an Electrical Installation Certificate will be issued as in the case of the Initial verification.
5.6 Periodic inspection and testing
The objective of periodic inspection and testing is to determine whether an installation is in a satisfactory condition for continued service. Periodic inspection should comprise of careful scrutiny of the installation without dismantling or with partial dismantling as per scope decided by a competent person based on the availability of records and the condition of the installation. Inspection will generally be along the lines followed for the initial verification. The following aspects need to be especially examined:
- Safety of persons/livestock against electrical hazards
- Protection against damage that can arise from a defect in the installation
- Confirmation that the installation has no damage or defects which could hinder safety
- Identification of any defects/non-compliance with Regulations in the installation which may give rise to danger
No fixed periodicity is recommended in the Regulations. In the case of an installation which is under effective supervision in normal use, periodic inspection may not be necessary. Instead, a scheme of continuous monitoring and maintenance by skilled persons with appropriate documentation would be adequate. In other cases, a suitable periodicity can be determined based on the type of installation, its use and operation, as well as the type and frequency of maintenance.
The person carrying out the work should give a Periodic Inspection report together with the schedule of inspection and the schedule of tests to the person ordering inspection. The record of defects/damage/non-compliance with regulations etc. should be included in this report. The person carrying out the inspection will record the recommendation regarding the next appropriate date of inspection.
5.7 Follow up measures
The defects revealed by periodic inspection reports should be attended without delay to avoid unsafe situations. Apart from defect resolution, the following actions are also required:
A planned schedule of preventive maintenance should be drawn up based on the manufacturer’s recommendation/code of practices and implemented rigorously. This will avoid too many defects from showing up during the inspection.
Measures for condition-based preventive maintenance may be adopted to attend to incipient problems, resolving the defects in early stages. Examples: Monitoring of oil parameters (online dissolved gas monitoring) in large transformers, hot-spot detection in indoor switchgear using infrared detectors, incipient arc fault detection through photo electric sensors etc.
While planned preventive maintenance is completed according to a fixed schedule using a recommended list of maintenance works, condition-based maintenance is pro-active and relies on an early warning of problems. While this practice is well established in specific segments of mechanical machinery (such as vibration signature analysis in high speed machines), the applications in the electrical field are gradually becoming popular. The main benefit is need-based maintenance and preventing major unforeseen failures, both of which have major cost implications.
5.8 Summary
Carrying out the design and construction of an installation as per various applicable standards, regulations and codes of practice is crucial in ensuring the quality, safety and integrity of the installation. Standards and codes put much emphasis on matters concerning safety. IEE Wiring Regulations stipulate various requirements to achieve these objectives. Chapter 7 of the Regulations deals with inspection of installations prior to commissioning (called initial verification) and on an ongoing basis (periodic inspection). Initial verification ensures that there are no defects or non-compliance issues in the completed installation and it is suitable to be put into service. Periodic inspection ensures that it is fit to continue in service. Appropriate reporting and certification should be undertaken by the authority carrying out the inspection/testing. The defects revealed by periodic inspection reports should be attended to without delay to avoid unsafe situations. A planned schedule of preventive maintenance should be drawn up and implemented rigorously. Measures for condition-based preventive maintenance may also be adopted to attend to incipient problems, thereby resolving the defects in the early stages.
6
Substation Components, Maintenance and Asset Management of Switchgear
A proper plan to manage electrical distribution system assets is essential to improve operational performance and also to maximize revenues and profits. In this chapter we will discuss the basic principles of planning of electrical systems and substation components. We shall also learn about asset management in the context of electrical switchgear, which is one of the most critical assets in any distribution system.
Learning objectives
- Planning of electrical systems
- Substation types and components
- Maintenance of approaches
- Insulation deterioration
- Switchgear diagnostic techniques
- Substation battery condition and monitoring
- Switchgear maintenance procedures
- Problems that may be found during switchgear maintenance
- Defect management
- Case studies of switchgear defects
6.1 Voltage classification and multiple voltage levels in power distribution
A number of standard voltages are used in different parts of the world both at utilization level as well as the transmission and distribution levels. For the purpose of convenience these voltages are grouped using the following classification (Ref: IEEE 141:1993).
Low voltage (LV): Systems of nominal voltage up to 1000V
Common usage: 380V, 416V, 480V
Medium voltage (MV): Systems of nominal voltage 1000V and above and less than 100000V
Common usage: 4160V, 6900V, 12000V, 13800V, 34600V, 69000V
High voltage (HV): Systems of nominal voltage 100000V and above and up to 230000V
Common usage: 116kV, 138kV, 230 kV
A majority of the plant loads are normally supplied at LV. This includes motors of up to 200 kW rating, lighting systems and so on. Unless loads of higher rating is involved, distribution at the utilization voltage is always a possibility. As such, power is usually received from MV distribution system.
Power can either directly distributed at the receiving voltage within the plant and be stepped down at different locations to the utilization levels or it can be stepped down at the incoming point and then distributed at a lower voltage to different consumers.
In large facilities, there may be a need for motors of higher ratings and these may require supply at MV. In other words, there is more than one level of utilization voltage in such plants; an LV system for the lower rated loads and an MV system for larger loads.
This may not be acceptable in some cases, because the drives at the MV utilization level may interfere with the other loads connected to the system; especially if direct-online starting of the motors is involved. Therefore there may be need to have a separate voltage level for the main distribution different from the MV utilization voltage. Taking a typical case, the following voltage levels may be used.
| LV utilization voltage | : | 416V |
| MV utilization voltage | : | 3300V |
| Main distribution voltage | : | 11000V |
| Incoming supply voltage | : | 33000V |
The incoming voltage naturally will have to be what the power supply agency can provide in the area in question.
6.2 Switchgear rating and specification
Power distribution system needs to be planned with care. In any modern industry, the power system is an essential facility that keeps the industrial process functioning. It should be planned considering the need for trouble free service under various conditions the normal and not-so-normal.
6.2.1 Selection of basic system parameters
The basic step in the design is to plan the basic system parameters of the power distribution system. The parameters to be selected are:
- Environmental or ambient specification
- Voltage level/s to be adopted in the distribution system and system frequency
- Acceptable variations in power system parameters
- Fault interrupting/withstanding capacity
6.2.2 Planning of electrical system configuration
Once the basic system parameters have been finalized, the next task is to plan the overall distribution system configuration. This is a very important step and requires the planner to consider all the aspects and arrive at an optimal configuration. The configuration once finalized is extremely difficult if not impossible to modify at a later date. At the end of this step we will have finalized the following details:
- Overall configuration
- No. of incoming feeders
- Incoming and distribution voltage level
- Ratings of major equipment
- Redundancy planning
- Type of distribution (Radial, Ring etc.)
- Type of redundancy including standby generation
- Integration of emergency/standby generation with the distribution system
- System Earthing and protective earthing (Local statutory requirements must be considered as the basis)
- Equipment for voltage/pf/harmonic control
6.2.3 Equipment ratings/sizing
Deciding the ratings of distribution equipment is the next stage in system planning. The common ratings required to be finalized at this stage are:
- Rated voltage, current and frequency
- Variations of voltage and frequency
- Fault withstand current and time
- Fault breaking capacity
- Clearance and creepage
- IP ratings of enclosures
6.2.4 Selection of appropriate equipment
While equipment sizing is the first step in finalizing the required distribution equipment, there are other factors which play an important role too:
- Cost factor
- Market reputation of the vendors who can supply such equipment
- Experience of other users (internal/external)
- Conformity to standards (national/international)
- Standardisation and variety reduction
- Maintenance requirements
- Status of technology
- Local statutory requirements being met
6.2.6 Maintainability and expandability
Planning must be done with due regard to maintainability of the equipment in service. Space for maintenance and other requirements must be integrated into the facility while the planning process is going on. Also, equipment such as switchboards may undergo additions or changes during this process. The initial assumptions must be constantly reviewed and necessary changes must be made in the layout to ensure space adequacy. Some of the aspects to be taken care of are as follows:
- Adequate space for all equipment as planned
- Access for maintenance
- Clearances for safety and maintainability
- Removal of parts
- Special tackles used at site
- Buildings to be designed considering expandability
While the requirement of space, maintenance access and clearances are usually obvious, the other points may need careful attention. These may only be known after finalizing the exact equipment as they vary from vendor to vendor. Early discussions after order placement will be required to freeze requirements arising from equipment-specific aspects.
As stated in the previous module, any distribution system equipment must be expandable to accommodate changes or additions to the plant process without major changes to the distribution system. Apart from expandability of equipment, other requirements such as space for such additions must also be planned without which equipment expandability alone will not be of much use. Important aspects to be considered as a part of expandability of distribution equipment are:
- Building design loads as a result of additions to switchgear
- Lighting and HVAC system to cater to expansion of distribution equipment.
As stated earlier, the ratings of principal equipment should be selected adequately to accommodate near-term growth of the system.
6.3 Substation types
An electrical substation is a subsidiary station of generation, transmission and distribution system where AC voltages are transformed from one level to the other and convert AC to DC and vice versa. It is an assemblage of equipment that switches, protects and controls transmission, distribution. Substations can be classified as following:
- Transmission substations
- Step-up transmission substations
- Step-down transmission substations
- Distribution substations
- Underground distribution substations
6.4 Substation components
Components of a substation are as follows:
- Circuit breaker: A circuit breaker is a device used to complete, maintain, and interrupt currents flowing in a circuit under normal or fault conditions.
- Air circuit breaker: Compressed air is used to quench the arc.
- Vacuum circuit breaker: It utilizes a vacuum to extinguish arcing when the circuit breaker is opened and acts as dielectric to insulate the contacts after the arc is interrupted.
- SF6 circuit breaker: These are filled with compressed sulphur-hexafluoride gas which acts to open and close the switch contacts. The gas also interrupts the current flow when the contacts are open.
- Oil filled circuit breaker: It is oil filled to provide cooling and to prevent arcing when the switch is activated.
- Capacitor banks: These are used to control the level of the voltage supplied to the customer by reducing or eliminating the voltage drop in the system caused by inductive reactive loads.
- Switchgear: Switchgear can be either for outdoor use or indoor use. Outdoor metal-clad switchgear is a weatherproof housing for circuit breakers, protective relays, meters, current transformers, potential transformers, bus conductors, and other equipment. Indoor switchgear must be protected from the environment and contains the same types of equipment as the outdoor type.
- Relays: A relay is a low-powered device used to activate a high-powered device They are used to trigger circuit breakers and other switches in substations and transmission and distribution systems.
- Lightning arresters: These are the protective devices for limiting surge voltages due to lightning strikes or equipment faults or other events, to prevent damage to equipment and disruption of service. Also called surge arresters. Lightning arresters (see Figure 8.16) are installed on many different pieces of equipment such as power poles and towers, power transformers, circuit breakers, bus structures, and steel superstructures in substations.
- Instrument transformers : Current transformers: These are used to supply information for measuring power flows and the electrical inputs for the operation of protective relays associated with the transmission and distribution circuits or for power transformers. These current transformers have the primary winding connected in series with the conductor carrying the current to be measured or controlled. The secondary winding is thus insulated from the high voltage and can then be connected to low-voltage metering circuits. Below figures shows different current transformer types.
- Current transformers are also used for street lighting circuits. Street lighting requires a constant current to prevent flickering lights and a current transformer is used to provide that constant current. In this case the current transformer utilizes a moving secondary coil to vary the output so that a constant current is obtained.
- Potential transformers: These are required to provide accurate voltages for meters used for billing industrial customers or utility companies.Microwave transmission tower and transformers: Electric power for microwave transmission comes from special transformers that reduce incoming transmission voltage to that required for the microwave system.
- Power transformers: Power transformers raise or lower the voltage as needed to serve the transmission or distribution circuits.
- Grounding transformer: It is intended primarily to provide a neutral point for grounding purposes. It may be provided with a delta winding in which resistors or reactors are connected.
- Batteries: These are used in the substation control house as a backup to power the control systems in case of a power blackout.
- Control panels: Control panels contain meters, control switches and recorders located in the control building, also called a doghouse. These are used to control the substation equipment, to send power from one circuit to another or to open or to shut down circuits when needed.
- Disconnect switches: Disconnect switches are used to isolate equipment or to redirect current in a substation. Below figures shows different disconnect switches that are used.
- Distribution bus: It is a steel structure array of switches used to route power out of a substation. See figure 8.26 for a typical distribution bus
- Control wires and wire conduit: Control wires are installed connecting the control house control panels to all the equipment in the substation. A typical substation control house contains several thousand feet of conduit and miles of control wires.
- Meters: Various types of meters are found in substation control houses. They all are measuring devices and can be an indicating meter or a recording meter. An indicating meter shows on a dial the quantity being measured. A recording meter makes a permanent record of the quantity being measured, usually by tracing a line on a chart or graph. Newer recording meters store the information electronically.
- Rectifier: It is a device that converts alternating current to direct current (AC to DC).
- Shunt reactors: These are used in an extra high-voltage substation to neutralize inductive reactance in long EHV transmission lines. The photo shows an installation of both an older version and a newer version of the reactor.
- Synchronous condenser: A synchronous condenser is a synchronous machine running without mechanical load. It is used to supply or absorb reactive power to or from a power system. It is also called a synchronous compensator.
- Gas insulated substations: An electric power substation in which all live equipment such as high voltage conductors, circuit breaker interrupters, switches, current transformers, voltage transformers and busbars are housed in metal enclosed modules filled with SF6 gas. GIS uses a superior dielectric gas, SF6, at moderate pressure for phase-to-phase and phase-to-ground insulation.. The dielectric strength of SF6 gas is higher than air, the clearances required are smaller. Hence, the overall size of the equipment and entire substation is reduced to about 10 % of conventional air-insulated substations. Figure 8.30 shows a high voltage GIS.GIS contain the same components as in the conventional outdoor substations. All the live parts are enclosed in metal housings filled with SF6 gas. Various modules of GIS are factory assembled and are filled with SF6 gas and then they a taken to site for final assembly. Such substations are compact and can be installed conveniently on any floor of a multi-storied building or in an underground substation. They are also preferred in heavily polluted areas where dust, chemical fumes and salt layers can cause frequent flashovers in conventional outdoor air-insulated substations.Experience has shown that the internal parts of GIS are so well protected inside the metal enclosure that they do not age and as a result of proper material selection and lubricants, there is negligible wear of the switch contacts. Only the circuit breaker arcing contacts and the teflon nozzle of the interrupter experience wear proportional to the number of operations and the level of the load or fault currents being interrupted. Good contact and nozzle materials combined with the short interrupting time of modern circuit breakers provide, typically, for thousands of load current interruption operations and tens of full-rated fault current interruptions before there is any need for inspection or replacement. Except for circuit breakers in special use such as at a pumped storage plant, most circuit breakers will not be operated enough to ever require internal inspection. So, most GIS will not need to be opened for maintenance. The external operating mechanisms and gas monitor systems should be visually inspected, with the frequency of inspection determined by experience.
6.5 Overview of maintenance of power distribution systems
Any power distribution system has several critical assets such as switchgear, transformers, cabling and so on. These assets need to be properly managed in order to maximize revenue and profit. This would include timely maintenance, life extension programs and finally planned/phased replacements. The objective of maintenance is to ensure optimum performance and avoiding failures in service to the extent feasible. Sudden failure in service may result in lengthy loss of service leading to revenue loss and loss of customer confidence besides high repair costs. At the same time, maintenance itself has associated costs. Unnecessary maintenance will increase the operating cost and thus lower profits. Sometimes, it may also add to the probability of failures by human errors committed during maintenance. Thus, excessive maintenance is as much a problem as lack of maintenance. A properly planned and implemented asset management system will limit the maintenance to the optimum degree which is appropriate to the level of operations and ensure least total cost of ownership. We will concentrate in this module on maintenance of switchgear which is a crucial asset for continuity of power supply to illustrate the above principles.
6.6 Maintenance of electrical switchgear
Before the introduction of SF6 and Vacuum switchgear, oil circuit breakers and other types of oil switchgear predominated at Medium Voltage and Air Blast at High Voltage. Oil switchgear is characterised by a high maintenance requirement, due to fast rates of contact wear, deterioration of the arc control devices and rapid contamination of oil by Carbon. Research on 11 kV oil circuit breakers undertaken approximately 30 years ago identified the deterioration mechanisms illustrated in Figure 6.1.

Mechanisms of oil circuit breaker deterioration at different current levels
At that time, switchgear maintenance regimes were mainly based upon elapsed time, typically between 6 and 10 years for general overhaul, whilst the oil circuit breakers themselves were maintained according to an allowed number of actual current interruptions, typically between 6 and 16, depending upon type. A special purpose device, sometimes incorporated in one of the protection relays, counted the number of interruptions.
The burden of continuous maintenance was costly and involved a number of operational engineers whose sole task was to take switchgear out of service and then restore it, together with their associated maintenance teams. These costs represented an additional and continuing expense over the lifetime of the switchgear, adding to the ‘whole life cost’ also called as Total Cost of Ownership (TCO). When SF6 and Vacuum switchgear first appeared, it was significantly more expensive in first cost than oil switchgear of equivalent rating, but the greatly reduced maintenance expenditure made it cost effective, that is the TCO was reduced.
Along with the change in arc interruption technology came significant changes to insulation materials. In bushings, polymers and elastomers began to supersede porcelain and in cable terminations, polymeric cable and heat shrinkable rubber began to supersede paper insulation and bitumen compound. Voltage transformers changed from oil filled to solid encapsulation, as did current transformers. Although somewhat outside the scope of this seminar, it is worth noting that electro-mechanical relays began to be superseded by microprocessor types, again with a significant reduction in maintenance requirement.
These technology changes prompted a review of maintenance policy, in particular introduction of the concepts of Asset Management, Condition Based Maintenance (CBM) and Reliability Centred Maintenance (RCM), which are now discussed.
6.6.1 Asset management
In a utility, the major operating cost is that of servicing the debt created by purchasing and installing the distribution system. This cost may be regarded as fixed, or at least beyond the immediate control of the company, being largely dependent on prevailing money interest rates. However, maintaining the asset and the rate of replacement of the various components are determined by the policies adopted and can be regarded as controllable costs. Thus in recent years, maintenance and replacement have been the focus of attention and great efforts have been made to drive down these costs.
In asset management, the ‘Asset’ to be ‘Managed’ is considered to be the whole of the electricity distribution system, both active and passive components, that is, the sum total of all the historic investments that have been made, that are still in service. Some of these investments will be within the assigned lifetime over which the investment is depreciated financially (typically 40 years) whilst other assets will have been in operation for a longer period, but are still serviceable. Extending the life of these assets is critical to overall costs and therefore, in a privately owned utility, to profitability. This is because replacement before the end of an asset’s financially depreciated life is an absolute loss, whereas if life can be extended beyond the depreciated life the asset’s cost is only its continuing inspection and maintenance.
The ‘sinking fund’ formula below allows the annual cost of an asset to be calculated over a nominal service lifetime, leaving no debt at the end of the period.

The sum of money calculated by the above formula is sufficient to pay the interest on the debt and pay back the capital at the end of the period. The actual period of service lifetime varies according to the type of asset but for switchgear, transformers and cables it is usually 40 years, somewhat less for overhead lines. For example, calculate the annual cost of a circuit breaker costing $20,000 over 40 years at 6% interest rate.

For oil circuit breakers, the annual cost of initial purchase and installation has to be increased by annual sums covering after fault maintenance (typically every 3 years) and full maintenance (typically every 10 years). Although the equivalent rated Vacuum or SF6 circuit breaker could cost $26,000, its reduced maintenance nevertheless reduces the whole life cost. These factors are shown in Figure 6.2.
The annual cost of an asset is very dependent upon the service lifetime obtained. For example, the $20,000 oil circuit breaker identified in Figure 23.2 costs $1330 each year over a 40-year service life, but $1743 each year over a 20-year service life. Because of the rapid growth of load and major economic development that took place between thirty and forty years ago, many utilities and companies have switchgear assets already well into their assigned lives. This factor sets the stage for policies aimed at extending asset lifetime.
Comparative circuit breaker lifetime costs
The management of these assets involves inspection, maintenance, repair and ultimately replacement, together with the installation of additional or improved specification assets to meet the needs of the system and to continuously improve network performance. The accurate formulation of these programmes of work is fundamental to the long-term management of the distribution system.
The following statements are taken from the stated Asset Management objectives of a major utility:
- To ensure that the distribution system is inspected and maintained in a condition that safeguards members of the public and company personnel, contributes to environmental improvement and provides an economic and reliable electricity supply.
- To produce an increased business benefit and a greater return on investment in the asset base, through higher levels of utilisation and a reduction of whole life costs.
Note from the second statement that a reduction in ‘whole life cost’ through more effective (that is, less but more targeted) inspection and maintenance is not the sole objective, it is also intended to increase the system ‘level of utilisation’, that is, the overall system loading. This is to be achieved by a more detailed knowledge of the condition of the system, on the understanding that a system in good condition is better able to withstand increased loading with fewer failures, compared to a system in poor condition.
6.6.2 Asset registers
A prior condition of effective Asset Management is to know what the asset is and its condition; in practice this means drawing up an Asset Register. To be fully effective, the register needs to be in computer format and should contain as much information as possible about the individual system components. Having an asset register in a computer allows for automatic production of inspection and maintenance schedules, sophisticated ‘what if’ modelling and the identification of trends in different types and classes of switchgear. The collected data for switchgear could include the items shown in Table 6.1.
The collection of all necessary data to compile a comprehensive asset register is a very large task indeed that may require several years to complete, unless a specialist contractor is brought in to undertake, or at least assist in the work. Furthermore, some of the required information may be obtainable only during outage. Circuit outage should be regarded as a resource, comparable to manpower. An outage has a cost, not only financial, but also the cost of risk to the system. This is because, where supplies are duplicated, one feeder will be inoperative during the outage and the system then relies on a single feed. Therefore outage should be used as little as possible and generally not just to collect asset data. Where data is only available through an outage, maximum use of each outage should be made both to obtain condition data and to complete all the outstanding maintenance required on the section of system taken out of service. Condition data is considered later in this chapter.
Data elements in a typical Asset Register
| Manufacturer | Type | Voltage rating |
| Current rating | Short circuit rating | Type of operating mechanism |
| Method of arc interruption | Auxiliary supply voltage | Telecontrol whether fitted |
| Circuit name | VT details | CT ratios |
| Protection details | Date of installation | Date of last inspection |
| Date of last maintenance | Historic defects | Condition measurements taken at last maintenance |
If maintenance is to be scheduled and targeted by switchgear condition rather than time, it is vital that information that can only be obtained during plant maintenance is accurately measured and securely stored for future reference. In particular, it is important that plant type-specific defects are checked for, put right if found and recorded as complete. It is this kind of information that identifies trends in plant condition and allows maintenance resources to be targeted to where they will be most effective.
In practice, Asset Registers are built up over time, starting with the most critical items of plant at the strategic, generally higher voltage, locations in the network, gradually extending to less critical plant. This policy gives the greatest and quickest benefit for the least cost.
6.6.3 Condition Based Maintenance (CBM)
The prime objective of Condition Based Maintenance (CBM) is to move towards a maintenance philosophy that directly relates ‘work done’ to ‘condition’. This represents a change in direction away from time-based maintenance where work was done at pre-determined intervals regardless of need. Overall, the total amount of maintenance can be considerably reduced compared with a time-based maintenance policy and as well as the obvious reduction in cost, it also produces the benefit of reduced risk to system security that is inherent with invasive maintenance.
The key to effective timing of preventive maintenance for each asset type is to understand the progressive nature of asset condition deterioration with time and/or use. Maximum value comes from understanding the relationship, with respect to time, between potential failure and functional failure (the P-F interval). Figure 6.3 provides a simplified model illustrating this concept. Ideally the ageing or performance characteristics should be determined such that preventative maintenance can be scheduled just before a condition indicator enters the area in which a particular asset condition indicator reaches the criteria defined as failure.
Where a condition is allowed to progress beyond the point of unacceptable risk of failure, it is likely that failure will occur and maintenance can then be regarded as remedial. This is likely to be more expensive. CBM aims to carry out maintenance no sooner but certainly no later than the time needed to prevent a failure and:
It is an absolute requirement of good maintenance that the plant asset should be in better condition after the maintenance than it was before.
Relationship of asset condition to time
Clearly, for condition based maintenance to be effective, the condition of the asset must be known; if it is not known, time based maintenance must still prevail. Knowledge of condition implies the use of diagnostic tools, of which there are two types, invasive and non-invasive. Invasive inspection describes the collection of condition data, which involves one or more of the following:
- Circuit outage to allow safe access to components for either visual inspection or the use of diagnostic equipment.
- The dismantling of an item of plant to allow access for visual or measured data to be obtained followed by the re-assembly of the plant into its original form. (This normally refers to collecting data during maintenance or repair).
- The disruptive dismantling of an item of plant or equipment to obtain visual or measured data followed by the replacement of that item because it cannot be re-assembled in its original form.
Non-invasive inspection falls into two categories:
- Diagnostic instruments or remote monitoring that allow measurement of condition directly from a safe distance, without disturbing the plant, for example partial discharge monitoring techniques.
- Measurable indicators which have a direct relationship with the asset condition, for example analysis of insulating oil or analysis of insulating gas.
Non invasive technique (a) can be difficult, because development work is still in progress and a considerable amount of data needs to be collected, analyzed and compared to actual failures of equipment, before absolute, safe limits can be established for many of the condition indicators gathered in this manner. In practice, trend data between inspections, or between inspection and first installation, are the only guides. However, over a longer period of time, it is expected that appropriate limits can eventually be set.
If asset condition can be established with confidence, maintenance requirements can then be assessed and the priorities ranked by a process that takes account of both the condition of an asset and its relative importance in the distribution system. This process is known as establishing a Condition Importance Rating with the highest priority being given to plant scoring highest (that is, ranking condition alongside the consequences of failure).
6.6.4 Reliability centered maintenance (RCM)
This technology originated in 1974 and was first utilized in the aviation industry, although it has since been extended to other industries, including the electric power industry. It differs from other techniques by focusing on the function of the equipment, rather than the equipment itself.
RCM can be described as a process used to determine the maintenance requirements of any physical equipment, based upon the operational requirements, standards of performance and in particular, failure modes and the consequences of failure. This process essentially repeats the ‘form and function’ analysis carried out by the equipment manufacturer at the design stage, which is referred to as the Failure Modes Effects Analysis (FMEA) or sometimes the Failure Modes Effects Critical Analysis (FMECA).
The only difference between the manufacturer’s FMEA worksheet and the user’s RCM worksheet is that the former summarises the manufacturer’s expectations of how the equipment may fail in the future and the latter is based upon historical knowledge of how the equipment actually fails. The RCM worksheet specifies the known failure modes and also analyses the maintenance actions required to prevent failures.
Risk can be defined as the product of the probability of an event occurring and the consequences of that event. Using a matrix diagram, risk can be quantified and ranked, as shown in Tables 6.2 and 6.3:
Risk Matrix
| RISK MATRIX Risk = Probability of occurrence of an event x consequences of that event |
|||||
| Consequence | Probability | ||||
| Ranking | 1. Frequent | 2. Probable | 3. Occasional | 4. Remote | 6. Improbable |
| 1 Catastrophic | A | A | A | B | B |
| 2. Critical | A | A | B | B | C |
| 3. Moderate | A | B | B | C | C |
| 4. Negligible | A | B | C | C | C |
Risk Level and description
| Level of Risk | Description of Risk |
| A | High |
| B | Moderate |
| C | Low |
An RCM analysis is implemented as a seven-step process as follows:
- The objectives of maintenance with respect to any asset are defined by the functions of the asset and its associated desired performance standards.
- Inability of an asset to meet a desired standard of performance is known as functional failure. This can only be identified after the functions and performance standards of the asset have been defined.
- After identifying the functional failures, the failure modes are identified which are reasonably likely to cause loss of each function.
- Failure effects describe what will happen if any of the failure modes did occur.
- In what way does each failure matter? This refers to a quantitative measure of failure consequences, namely the criticality of failure. RCM not only recognizes the importance of the failure consequences but also classifies these into four groups: hidden failure, safety and environmental, operational and non-operational.
- The process of analyzing functions, functional failures, failure modes and criticality (FMEA/FMECA) yields opportunities for improving performance and safety.
RCM recognises three major categories of preventive tasks as follows:
- Scheduled on-condition tasks – which employ condition-based or predictive maintenance
- Scheduled restoration
- Scheduled discard tasks
6.7 Insulation deterioration
In circuit breakers, deterioration of insulation can usually be attributed to one or more of the following causes:
- Excessive temperature, which particularly affects polymeric and elastomeric insulation. Excessive temperature can also cause cracking due to thermal expansion of conductors placing excess stress on insulators, for example bushings.
- Moisture, which promotes surface discharge and consequent surface erosion in most kinds of insulator.
- Ageing.
- Accumulation of airborne dirt, again causing surface discharge and erosion.
- Excessive vibration or shock loading, which can cause cracking.
- Deterioration from causes (a), (c) and (e) is irreversible, that from cause (d) can be rectified, to some extent, by cleaning and resurfacing also cause (b), again to some extent, by drying out and resurfacing.
The condition of insulation can be assessed using the sophisticated technologies described later in this seminar. However, where the insulation is directly accessible (usually during outage) a relatively simple test can be applied which, with skilled application, training and experience can yield useful information on particular components or assemblies. In this test, a steady DC voltage is applied to the insulation. The current which flows (and which will be very small) is made up of three components:
- A capacitance charging current that starts from a high value and quickly declines to zero.
- A dielectric absorption current, which starts at a particular value and falls rapidly.
- An irreversible leakage current, which starts from zero and rises to a steady value.
These currents combine and are shown graphically in Figure 10.4, note that the scales are logarithmic.
The graph shows that the total current starts at a high value, decreases with time and stabilises at a low value. The low initial value of insulation resistance is partly caused by the high initial capacitance charging current, which falls to a negligible value, usually within about 16 seconds, as the insulation becomes charged. The low initial insulation resistance is also partly caused by the initial dielectric absorption current, which also decreases with time but more gradually, typically taking from 10 minutes to several hours to decay to a negligible value. However for test purposes, this current can be disregarded after 10 minutes. The leakage current does not decrease with time and it is this current which determines the insulation quality. The situation is:
- At the start, capacitance current predominates.
- At or about 1 minute, absorption current predominates.
- At 10 minutes, the reading is mainly leakage current.
DC insulation test – graph and equivalent circuit
A curve plotted between total insulation current (logarithmic scale) and time (linear scale) is known as the dielectric absorption curve. The test is based upon a comparison of the absorption characteristics of good insulation versus that of insulation that has absorbed moisture or is otherwise contaminated.
In the graph of Figure 6.5, the slope of the curve indicates the condition of the insulation. Good insulation will show a continuous increase in resistance, as shown in curve A. Contaminated, moist or cracked insulation will show a relatively flat curve, B. A value known as the polarization index is obtained by dividing the 10 minute reading by 1 minute reading. Values as high as 10 are obtained for good insulation. Note that this test is good for most insulation (for example cast resin VTs) but does not work well for bushings.

Dielectric absorption curve
6.8 Switchgear diagnostic techniques
The inspection checklist for switchgear and switch rooms described earlier in the seminar falls well short of providing reliable data on which to found a condition based maintenance regime. Manual inspection can trigger appropriate maintenance if a failure characteristic can be observed and a predictable pattern recognized, but this is difficult with deterioration processes taking place inside a closed metal box. Much more detailed information is required and this should be based upon the special diagnostic techniques described in the section. These techniques do not provide for absolute maintain now/maintain later decisions to be made, rather they provide continuing data, from which trends of deterioration can be identified.
6.8.1 Partial discharge
Partial discharge within and on the surface of insulating materials is one of the most reliable indicators of equipment condition and possible failure. It has been the focus of considerable research effort and is therefore well understood.
Consider Figure 6.6, showing a layer of solid insulation between two flat plate electrodes. The insulation is imperfect because it contains an air filled void. As the applied voltage rises, the voltage distribution is non-uniform, due to the different dielectric constants and the air filled void will tend to be more electrically stressed than the remainder of the solid insulation.
Imperfect insulation under voltage stress
At some point in the AC voltage cycle, the stress across the air filled void is sufficiently great that ionisation occurs instantaneously. This causes a high frequency electrical signal that is small but detectable; it may also be detectable by sound. As the voltage falls during the second quarter cycle, ionisation ceases, followed by a further ionisation and cessation during the third and fourth quarter cycles. In the positive going half cycle, the pulse is negative and during the negative half cycle the pulse is positive, as shown in Figure 6.7.
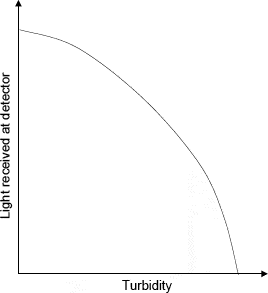
Partial discharges occurring during voltage cycle
The voltage at which ionisation commences is called the ‘inception voltage’ and the voltage at which ionisation ceases is called the ‘extinction voltage’. In practice, partial discharge is a good measure of the quality of the insulation, which ideally should be partial discharge free at the equipment’s operating voltage. However, this is seldom the case.
Because PD is voltage dependent, it will tend to increase as voltage stress increases and ever-smaller voids begin to ionise, not only within the body of the insulation but also at the interfaces between the insulation surface and the electrodes. A more typical pattern of partial discharges is shown in Figure 6.8.

Signal from multiple partial discharge sites
In the situations shown in Figure 6.8 the inception voltage is the voltage at which the first partial discharge can be detected. The total number of PD pulses and the total PD charge (in Coulombs) can also provide useful indicators.

Partial discharge from contaminated bushing with equivalent circuit
Partial discharge is not confined to the interior of solid insulation. Figure 6.9 shows an insulated bushing, which is internally satisfactory, but contaminated on the surface with a semi-conducting layer of dust and metallic particles. Gaps in this contamination act in exactly the same manner as the void in Figure 10.6. That is, they ionise and de-ionise in a random pattern as arcing, sparking and surface erosion re-distributes the contaminating material. Careful and expert analysis of the recorded waveforms can detect the following forms of PD:
- Inside solid insulation
- Between a conductor and solid insulation
- Between insulating material and ground
- Surface tracking
- Arcing and sparking (for example a conductor under floating potential)
Power distribution measurement can be undertaken online or off-line. When measured on line, either coupling capacitors or radio frequency antennas may be used, but accurate measurement is more difficult, because the small signals tend to be masked by general electrical noise in the supply and the metal casing of the equipment.
For off line measurement, a partial discharge free voltage source is required, preferably with the equipment and the test specimen inside an earthed metal enclosure so that the electromagnetic conditions are perfect for accurate measurement. This is seldom available outside a laboratory.
Another factor to consider is whether the equipment being monitored for PD is on or off load. When on load, the temperature will rise and any imperfections at the interfaces will tend to become more pronounced. To allow for this possibility, monitoring should preferably continue over a period of time (this can only be on line measurement). Extended PD monitoring on line can provide further useful data, over a medium to long timescale. This is called ‘time trending’ and includes:
Short term PD monitoring (1 – 2 hours). This duration of testing simply allows a more accurate measurement by removing short-term variations.
Semi-permanent monitoring (1 – 3 days). This length of monitoring allows measurement of variations of PD with load, that is, component temperature and mechanical stress. This method is useful for older installations with high levels of PD activity.
Continuous monitoring – This measures the long-term trends in PD activity and may be combined with an alarm facility. Due to cost, continuous monitoring can only be justified for critical, high value installations with high cost of failure.
In an inspection and maintenance context, it is economic and useful to carry out PD monitoring at intervals, perhaps yearly, so that a baseline level is established and long-term trends monitored.
Although it is difficult to give exact guidance on what is and what is not an acceptable level of PD, sharp rises in activity over short periods of time or a strongly rising trend should encourage a more detailed investigation. A PD analysis expert may categorise PD levels into the following categories:
- Low
- Moderate
- Elevated
- Critical
In general, air insulated switchgear will be more susceptible to PD than switchgear where the insulation surfaces are within a gas filled (SF6) enclosure. The following locations in switchgear are known to be common sources of PD:
- Internal faults in VTs
- Busbar support insulators
- Cable terminations
- Through bushings
- Internal faults in CTs
- Points where a conductor at medium or high voltage is close to earthed metal
- Surface contamination including moisture
- Conductor under floating potential
- Arcing contacts of circuit breaker
- Arcing at isolating contacts
- Loose connections including loose earthing connections
Where a company or utility has a population of switchgear of the same or very similar type, valuable information can be obtained by comparing the levels of PD occurring at the various installations and between different switch panels in the same installation. In some parts of the world, ‘user clubs’ have been established where this information can be exchanged. This is the type of information that the PD expert analyst draws upon and should have access to.
If PD in a particular installation is greater than the PD in the remainder of installations in that group, this may be taken as a warning of impending failure. At worst, if PD activity has risen to a very high value, it may be a signal that an end-of-life decision needs to be taken.
6.8.2 Partial discharge – transient earth voltage (TEV) monitoring
Developed over the last 16 years, TEV monitoring locates partial discharge activity by measuring the transient voltages occurring in the switchgear metal enclosure. It has the great advantage that it can be carried out whilst the switchgear is in service and it is also capable of locating the site of a partial discharge. Figure 6.10 shows the test method in diagrammatic form.
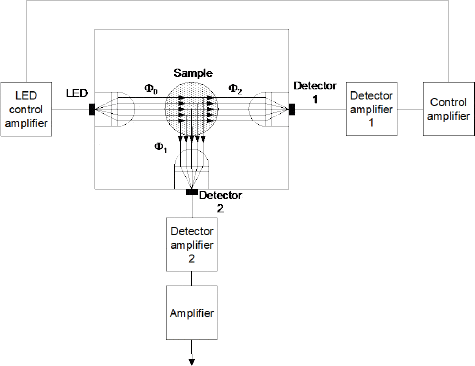
Locating partial discharge sites by TEV
When a partial discharge occurs, in the example phase to earth, a small quantity of electric charge is transferred by capacitance to the earth metal cladding. The quantity of charge is extremely small, normally a few pico-coulombs and the transfer occurs very quickly, just a few nanoseconds. As the charge is transferred, electromagnetic waves propagate away from the discharge site in all directions as transient voltages. Due to skin effect, these transient voltages occurring on the inside of the enclosure cannot be detected on the outside. However, at an opening in the cladding, such as a gasketted joint, the electromagnetic wave can propagate into free space. The wave front impinges on the outside of the enclosure creating a voltage wave that may be detected, although the equipment must be very sensitive and very fast. By using two capacitive probes, the location of the discharge site may be estimated by comparing the time of arrival of the two waves.
Although TEV monitoring requires expert interpretation, TEV can locate partial discharge sites in live equipment, providing that the electrical noise is not excessive. TEV survey is usually carried out in two stages; in the first stage one probe is used to find PD sites and in the second stage both probes are used to locate them more precisely. The equipment has a 2 ns capability, equivalent to a distance of 600 mm, so in practice a PD site can be reliably attributed to a particular switch panel in a multi panel switchboard or even an individual cable box.
6.8.3 Partial discharge testing by acoustic methods
Monitoring of Partial Discharge by electrical methods has the limitations that coupling capacitors may not be available, or difficult to connect. In these circumstances, monitoring may be carried out by an acoustic method. Portable test equipment is available and has the advantages that:
Measuring can be carried out at any time, it is not necessary to take the switchgear off line.
Even where the electrical (radio frequency) signal from a Partial Discharge is suppressed by the metal enclosure, some sound signal may escape.
Figure 6.11 shows an acoustic discharge probe made by Detectaids Ltd. This unit can be fitted with different sensors suitable for detecting both airborne sound and sound conducted through structures. It is sensitive to sounds up to 40 kHz, that is, well above the human range of hearing and it can also amplify sound from a non-audible to an audible level.
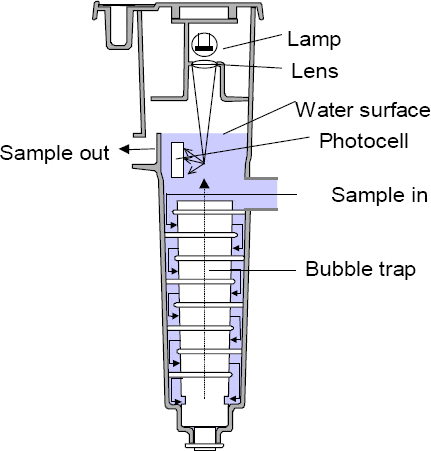
Hand held acoustic probe by Detectaids Ltd.
Acoustic measurement has much the same advantages and disadvantages as electrical methods. It does not provide an absolute satisfactory/unsatisfactory indication, but it can alert users to developing problems and monitor trends over longer periods of time. Because the instrument and its sensor can be moved, it can provide some information on the location of a problem.
Monitoring needs to be done in a consistent manner and good records taken, so operative training is required. However, the device is cheap enough to be issued to substation inspectors.
6.8.4 Tan delta testing
Historically, Tan Delta testing is much older than Partial Discharge testing and dates back at least 60 years. Despite its age, it can still be useful in certain circumstances. Consider the cracked bushing of Figure 6.12, together with the equivalent circuit to the right. The crack, though difficult to see by eye, is nevertheless contaminated with dust and moisture and forms a high resistance path in parallel with the bushing capacitance.

Cracked bushing and equivalent circuit
In the bushing of Figure 6.12, current flows through both the capacitance and the resistance, forming the vector diagram shown in Figure 6.13. The current through the resistor is in phase with the applied voltage, but out of phase with the capacitance current by 90°.
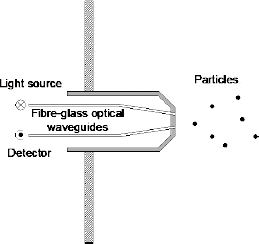
Vector diagram – Tan delta
In practice the resistive current tends to be much smaller than the capacitive current and Tan Delta (the ‘Loss Angle’) is small. This is one of the reasons that the ‘Schering’ bridge measurement method is used.
All insulating materials have a loss angle and the better the insulation quality, the smaller the loss angle. The loss angle at a low applied voltage is called the ‘material loss’. As the voltage applied to the specimen is increased, any voids in the insulation tend to ionise and discharge (that is, partial discharge). The PD current is an additional loss, called the gaseous loss and adds arithmetically to the material loss, resulting in increased Tan Delta with increasing voltage. The increase is not linear, but tends to increase sharply above a PD inception voltage (Figure 6.14).
TAN Delta change with voltage increase
The main limitations of Tan Delta testing are that it is strictly an off line test and that it can only be applied to single component. Tan Delta testing of an entire switch unit could not identify any single component causing a problem. Nevertheless, the graph of Tan Delta with voltage is a useful indicator of insulation quality/deterioration and finds major application in cable testing.
Thermal imaging
This technology is also several decades old and originally used solely by the military; it was too expensive for general use. However over the last 30 years it has steadily declined in cost and increased in performance. Infra red radiation, also known as thermal energy, is electromagnetic energy emitted by all objects whose temperature is greater than absolute zero. The lower the temperature, the longer the infra red wavelength, but it is always longer in wavelength than visible light. The human eye cannot see it, but special electronic sensors can detect it. Also, thermal energy does not bounce off objects like visible light does, it only comes directly from the objects emitting it. In general, dark, dull surfaces emit infra red radiation better than shiny, light colored surfaces and glass does not transmit infra red energy at all; that is, it is not transparent to infra red in the same way that it is transparent to visible light.
In the early years, infra red sensors had to be cooled to extremely low temperatures to be effective; it was the necessary refrigerating equipment that made the technology so expensive. A further disadvantage was that the early cameras were incapable of registering a steady image, the view had to be continuously moved for an image to be obtained. Later, improved sensors were introduced that did not need cooling and also provided a steady image. Mostly these uncooled systems were based upon the ‘PyroElectric Vidicon’, (PEV) a sensor similar to a television camera tube. Unfortunately, PEVs were easily ‘overloaded’ by hot objects, causing a white area on screen where the image should have been. This effect was called ‘blooming’.
Modern cameras use a solid state technology first introduced about 20 years ago, in which the heat detecting elements are grouped on a printed circuit board. ‘Blooming’ has been eliminated. This development has allowed camera size and weight to decrease to a level that is easily hand held. Cost has fallen to between $10,000 for the cheapest models up to $30,000 for a high specification unit.
Because the infra red energy cannot be seen by the human eye, the viewing screen of the camera has to translate the various temperatures it sees into either ‘false colors’ (in the more expensive models) or into a ‘grey scale’ (in the cheaper models). Figure 6.15 illustrates.
Infra Red Camera and image captured (on the right)
A point worth noting is that cameras are made to a performance standard that includes ‘Minimum Resolvable Temperature Difference’ (MRTD), the measure of how small a temperature difference it can detect. For example, a thermal imaging camera with an MRTD of 20° would be half as sensitive as a camera with an MRTD of 10°. In addition, the number of ‘picture elements’ in the sensor and on the viewing screen determines the smallest detail that can be seen. Thermal imaging cameras do not directly indicate an absolute value of temperature, though they sometimes have the facility of downloading the image, plus a temperature scale to a computer (Figure 6.16).
Thermal grey scale image of air break disconnector with temperature scale
Viewing screens indicate objects hotter than those in the background very well and this is entirely suitable for locating hot spots in exposed conductors. Also, it is a monitoring technique that is non-invasive and therefore can be used at any time, either as a routine monitoring tool, or to investigate suspected problems, or both.
The main application in electrical networks is in the detection of hot spots in overhead lines and in exposed busbar systems in substations. Thermal imaging finds only a limited application for metal enclosed switchgear indoors, although it can detect hot cable boxes and would detect a switchgear enclosure that was significantly hotter than its neighbour (refer to Figure 6.17).

Thermal image of Overhead busbar conductors
Typical camera specifications
- Angular resolution – 1.3 millirad (0.14 degrees)
- Thermal sensitivity – 0.08 °C
- Viewer – 640 x 480 pixels, full colour
- Sensor array – 320 x 240 pixels
- Accuracy +/- 2 °C, +/- 2 %
- Temperature range – 40 °C to + 248 °C or 0 °C to + 600 °C
6.9 Substation battery condition and monitoring
Substation batteries are so critically important to safe switchgear and system operation that a section on them has been included in this seminar, with particular focus on battery failure alarms. The purpose of the battery alarm is to detect a battery charge condition that is so low that circuit breaker tripping is not achieved. This can be due to battery failure (sulphation, cell short circuit) or more probably, charger failure.
However, an alarm that is a simple voltage measurement device is generally not sufficient. This is because, in substations, short-term heavy current loads are imposed on batteries for example by switchgear closing solenoids. These loads can temporarily depress the battery voltage well below the open circuit voltage, but they only reduce the amount of charge in the battery by a marginal amount. For example, a closing solenoid operation of 300 A for 3 seconds results in 900 Ampere second or 0.26 Ampere hour discharge. This is small in relation to the total battery capacity, which may be several hundred ampere hours. Nevertheless, these heavy loads cause a significant fall in battery voltage, resulting from the battery internal resistance.
A further aspect of the problem is that, as well as voltage drop due to battery internal resistance during the period of the solenoid operation, there is also polarisation within the cells, a condition that persists for tens of seconds after disconnection of the heavy load. The duration of polarisation depends on three factors:
- The magnitude of the load.
- The duration of the load.
- The ability of the subsequent charge current to dissipate the polarization of the cells.
Because of these factors, to prevent spurious charger fail relay operations it is necessary to introduce a time delay between detection of the low battery voltage condition and the initiation of the charge fail alarm. The earliest type of charge-fail device incorporating a time delay was the thermal relay. This provided very good service for several years (some still exist) but was superseded by an electrical version, fitted with independent adjustments for voltage setting and time delay. More recently and as a result of the introduction of supervisory control, the 30 second time delay has proven inadequate, because the use of supervisory control for closing circuit breakers results in longer duration of solenoid operating currents. Under remote control, the operator cannot hear the circuit breaker close as is the case when operating locally. Under these conditions a longer time delay is required, as long as 120 s. This requires the use of electronic circuitry for the delay device, in lieu of the resistance/ capacitance discharge circuit which was used for the 30 s delay. The values of resistance and for capacitance applicable to a 120 s delay are impracticably high.
The voltage setting of the charge fail portion of the alarm should comply with the tables at the end of this section. If the lower settings are used, there is a serious risk that the device will remain passive until the battery has become near to complete discharge and possibly permanently damaged in the case of lead/acid batteries. There is also the obvious risk of complete failure of switchgear to operate with either lead/acid or nickel/cadmium types. Table 6.4 gives the characteristics of typical batteries used for substation applications.
Battery characteristics
| Nickel/Cadmium batteries | Voltage per cell |
| Open circuit voltage | 1.26 to 1.28 V |
| Float charge voltage | 1.40 V |
| Charger fault relay setting LOW | 1.32 V |
| Charger fault relay setting HIGH | 1.60 V |
| Lead/Acid Batteries (HP Plante) | |
| Open circuit voltage | 2.08 V |
| Float charge voltage | 2.2 to 2.26 V |
| Charger fault relay setting LOW | 2.16 V |
| Charger fault relay setting HIGH | 2.40 V |
Overcharging
Experience with constant voltage chargers has shown that apart from loss of charge (or undercharging) make of charger. In one type of charger a possible cause is the blowing of the sensing-circuit fuse which unbalances the differential amplifier with the resultant triggering of the main series transistor and consequent saturation of the transductor. In another type the likely cause is failure of the main control transistor.
Whatever the cause, a prolonged state of overcharge will cause gassing of the battery and gradual loss of electrolyte resulting ultimately in damage to the plates of cells. To avoid persistent overcharging, the alarm should respond to over voltage as well as under voltage. Hence in the most modern designs of alarm, separate controls are provided for both high and low settings. A third control allows the time delay to be set.
Earth fault alarms
It is entirely possible for substation batteries to suffer earth faults and monitoring devices are available to detect this condition. One type of earth fault detecting device comprises a centre-tapped potentiometer connected between the end terminals of the battery, together with a relay connected between the centre-tap of the potentiometer and earth. This is shown in Figure 6.18. The suggested design requirements for a battery earth fault detector are:

Schematic of battery earth fault detecting device
- The resistance values must be such as to limit the earth fault current for a solid earth fault on either pole of the battery (or equipment connected to it) to a value not in excess of 60 mA.
- The sensitivity should be such as to detect an earth fault on either pole of a value of 10,000 Ω or less, for a 100 V battery (and proportionately greater or less for other battery voltages).
- The continuous drain on the battery from the potentiometer shall not exceed 26 mA at the normal float voltage and should preferably be less.
- To provide a test facility, the battery charger front panel should be equipped with a double throw-and-off switch, which is biased off, but that can connect a 10,000 Ω resistance between either pole of the battery and earth. This is to facilitate routine testing. The test facility will not pass sufficient current to cause tripping of circuit breakers. This value refers to 100 V batteries and will need to be proportionately scaled up or down for other voltages.
6.10 Circuit breaker measurements
Although this is an ‘invasive’ measurement technology requiring an outage to perform it is nevertheless very useful, allowing both OK/not OK decisions and long term trend monitoring. It can be used during maintenance to measure not only the circuit breaker contact resistance (the main concern) but also all the other main current carrying contacts (busbar joints, isolating contacts, etc.). The measured value of any contact carrying load current should be in the low λΩ range, for example at 1000 A, a 6 contact resistance will dissipate:
1,000 x 1,000 x 6/1,000,000 = 6 W
At 400 A, a 30λΩ contact resistance will dissipate:
400 x 400 x 30/1,000,000 = 4.8W
Contact resistance values greater than these will generate more heat and may, at worst, lead to thermal runaway. Oil circuit breakers can tolerate a higher contact resistance than contacts in gas or vacuum, due to better cooling. With more sophisticated equipment, for example a ‘Kelman Profiler’, it is possible to measure contact ‘wipe’ as well as contact resistance.
The simplest method of measuring contact resistance is by a portable bridge device known as a ‘Ducter’. However more sophisticated devices are available, allowing contact resistance to be measured under simulated load conditions. Figure 10.19 (a) shows an instrument of this type. This test set is a heavy current device intended to measure contact resistance at the normal load current (test sets up to 600 A are available). Figure 6.19 (b) shows how the set is connected and used.

Ducter for contact resistance measurement and connection scheme
With the output of the test set OFF, connect the heavy current leads, ensuring that all connections to be measured are included in the circuit. Connect the voltage sensing leads either side of the connection as shown and switch the test set ON. Increase the current to the required level then switch the test set OFF. The contact resistance reading and the measuring current will be held and shown on the display.
Contact resistance measurement technology is particularly appropriate to SF6 and Vacuum circuit breakers, where direct access to contacts is not possible. It is also applicable to the three position ON – ISOLATED – EARTH disconnectors associated with many SF6 circuit breaker designs (see Table 6.5).
Suggested limits for contact resistance for circuit breakers
| Rated Voltage kV | Rated Current A | Contact resistance limit λΩ | |
| In vacuum or gas | In oil | ||
| 6 – 16 | 600 | 100 | |
| 1200 | 60 | ||
| 2000 | 60 | ||
| 7.2 – 16 | 600 | 600 | 300 |
| 1200 | 160 | ||
| 2000 | 76 | ||
| 4000 | 40 | ||
| 23-24 | All | 600 | |
| 46 | All | 700 | |
| 69 | 600 | 600 | |
| 1200 | 600 | ||
| 2000 | 100 | ||
| 116-230 | All | 800 | |
Trip coil monitoring
The trip mechanism is second in importance only to the circuit breaker itself. It must open the circuit called upon to operate, perhaps decades. Statistics show that trip mechanisms and trip coils are responsible for a high proportion of circuit breaker faults and investigation shows the following factors as primary causes:
- Improper lubrication or lubrication that has dried out and gone solid, freezing the mechanism
- Shorted turns in the trip coil, mainly due to deteriorated winding insulation
- Faulty secondary wiring and secondary wiring contacts
- Seized bearings
- Defective latch mechanisms
- Corrosion especially rust
- Incorrect adjustment of trip latch mechanism
It follows that maintenance of the trip mechanism is vitally important and effort should be directed toward monitoring its performance. The best method of test is to measure the time interval(s) between the instant when current begins to circulate in the trip coil and the circuit breaker main contact(s) open. Alternatively and more simply, the length of time between inception of trip coil current and its interruption by the opening of the secondary contacts can be measured, as this closely approximates to the total circuit breaker opening time. Trip coil testing is an off line test undertaken during maintenance and should, of course, be undertaken before any maintenance of the mechanism is undertaken or the circuit breaker CLOSED or OPENED.
Ideally the circuit breaker should be tested on first installation so that later measurements can be compared to the original performance. IEC 66 requires that the trip coil should operate correctly at 60% of the normal battery voltage, this is to allow for the situation where several circuit breakers trip simultaneously and current demand on the battery is high, depressing the battery voltage. Hence testing should take place not only at normal battery volts, but also at lower voltages. Traditionally tapping the main battery carried out this reduced voltage testing, but newer testers have facilities to continuously vary the trip coil voltage, typically between 6 and 96% of the nominal value.
A further matter of concern is the length of time that the trip coil is energised during a circuit breaker operation. In the design of circuit breaker trip mechanisms, secondary contacts are arranged to disconnect the supply to the trip coil after the mechanism has been triggered, to prevent burn out. The time limit for an energised trip coil is 0.6 s and there are devices on the market that will automatically disconnect the supply after this period of time. The secondary contacts that interrupt the trip coil current undertake a severe duty, because the induction of the coil stores significant energy and a good deal of arcing can take place on these contacts. They should therefore be given careful attention during maintenance.
As a further refinement of protection, it is possible to fit devices that will detect a continuously energised trip circuit and, via an inter-trip link, cause another circuit breaker, the ‘backup’ circuit breaker to operate after a pre-determined time. Schemes of this type are justified where the consequences of a circuit breaker to operate are severe. For example, if a generator circuit breaker fails to operate after the generator prime mover has shut down, the generator will continue to operate as an induction motor, drawing its supply from the network. Even if the generator circuit breaker is fitted with reverse power protection, it will still not be immune to the consequences of trip mechanism failure.
Testing can be further extended to monitor and record the actual current flow through the trip coil, the movement of the circuit breaker operating lever and the opening of the contacts. The coil is of course an inductive device and the operating current will take time to rise to a level where the mechanism is released.

Trip coil current and main contact opening
Figure 6.20 shows a typical trip coil graph of time against trip coil current and contact opening. Further useful measurements on the trip coil are:
- The voltage at which the circuit breaker will just trip. This measurement indicates the level of static friction (‘stiction’) and establishes the margin of safety over the normal tripping voltage. It should not be more than 66% of the nominal operating voltage.
- The D.C. resistance of the trip coil. Any reduction in this value over time indicates shorted turns.
Taken together, these measurements of trip coil parameters are called the ‘trip coil fingerprint’. They should be measured and recorded on commissioning of the circuit breaker and at every subsequent maintenance. A typical tester is shown in Figure 6.21.

Trip coil tester (Typical)
Typical instrument specifications
- User settable 6 to 96% of coil input voltage
- Setting accuracy 2%
- 80 A capability
- Reversible polarity
- Overload protection
- Trip coil burnout protection (0.6 s limit)
Contact motion analysis
If the cost of the necessary test equipment can be justified, it is possible to make time-travel or motion analyzer records. Motion analyzers are portable devices that monitor the operation of the complete circuit breaker by coupling the sensors of the motion analyzer to the circuit breaker operating lever or rod. These include high-voltage and extra- high-voltage dead tank and SF6 breakers and low-voltage air and vacuum circuit breakers.
Motion analyzers can provide graphic records of close or open initiation signals, contact closing or opening time with respect to initiation signals, contact movement and velocity, and contact bounce or rebound. The records obtained not only indicated when mechanical difficulties are present but also help isolate the cause of the difficulties. Like other measurements, it is preferable to obtain a motion analyser record on a breaker when it is first installed. This will provide a master record which can be filed and used for comparison with future maintenance checks. Tripping and closing voltages should be recorded on the master record so subsequent tests can be performed under comparable conditions.
Time-travel records are taken on the pole nearest the operating mechanism to avoid the inconsistencies due to linkage vibration and slack in the remote phases
Programma Electric TM1600/MA16 Motion Analyser
- This breaker analyzer system measures a circuit breaker’s timing cycle. The timing channels record closings and openings of main contacts, resistor contacts and voltage contacts.
- Since the timing channels are not interconnected, series-connected breaker chambers without having to disconnect them.
- A built-in program unit permits easy selection of different sequences of breaker control pulses. The delay time between pulses is set on a thumb wheel. The program unit can be used to control coil currents up to 26 A (see Figure 6.22).

UTM1600 motion analyser by programma electric
- The time values obtained refer to the exact instant at which voltage was applied to the coil, and a built-in printer provides you with a hardcopy printout immediately after measurement.
- The TMI 600 can be equipped with up to 24 time-measuring channels as required by the user. When more than 24 channels are needed, one or several Slave Units can be connected together to provide an unlimited number of measurement channels. Modular design also makes it easy to combine the system with the MA61 Motion Analyzer.
- The MA61 Motion Analyzer is an excellent supplement to the TM1 600. It combines the easy readability of an oscillograph with the extra accuracy ensured by computerized measurement and computer-processed readings. Menu-driven button selection via the built-in display makes operation simple and easy.
- The MA61 can be equipped with up to 6 analog channels, and it can be easily adapted to the different measurement requirements for high-voltage circuit breaker testing. It can measure and calculate contact paths and the speeds at which breaker contacts operate as well as the current in operating coils. It can also measure dynamic resistance (DRM), voltage, pressure and a number of other entities.
- After measurement, the MA61 performs the necessary calculations and prints results in both diagram and table form on a connected printer (letter-size A4 paper) or via the TM1600’s high-speed built-in printer. Moreover, parts of curves can be easily enlarged for closer study.
- The MA61 incorporates a battery-backed memory that can store up to ten measurements for subsequent processing.
- The TM 1600 also supports communication with personal computers and the CABA Win Breaker Analysis Software. The analyzer can be used for testing breakers taken out of service or for on-line testing. Fully equipped, it weighs only12 kg (2.6 lbs).
SF6 gas monitoring
The effectiveness of SF6 as an insulator and in extinguishing arcs is dependent on its purity. In service this purity may degrade due to contamination by:
- Oxygen
- Moisture
- Acidity (mainly as Hydrogen Fluoride)
To prevent contamination, a ‘molecular sieve’ is usually incorporated in each enclosure; this contains chemicals to filter out contaminants but they have a limited life. Monitoring of SF6 circuit breakers should include taking and analyzing gas samples for these contaminants; the switchgear manufacturer should be able to advise on acceptable limits.
In general user replacement of SF6 in a circuit breaker or enclosure is not practicable, either the unit should be returned to the maker (particularly if the circuit breaker is a cassette) or the manufacturer, or a specialist contractor, should be asked to replace the gas on site. SF6 is a powerful greenhouse gas and should never be allowed to escape into the atmosphere. Where an SF6 circuit breaker has faulted and arc products are exposed, great care will need to be taken. The white powder like deposits contain toxic Fluoride and they are irritant to the skin, so a specialist contractor should be employed. Typical features of analytical instruments are given below.
Oxygen
Teledyne’s 3010TAC and 3010PAC BASEEFA / CENELEC approved, intrinsically safe trace and percent oxygen analyzers are versatile, microprocessor based instruments used for detecting oxygen from 0 – 10 ppm to 100% in a variety of gases. Simple menu choices, membrane command switches, and dual displays make set-up and operation clear and quick. Three user-configurable ranges are offered with an excellent linearity precluding the need to recalibrate when changing ranges. A bi-directional RS-232 serial interface is incorporated to relay information to a host computer for remote monitoring of zero and span calibration. Applications include: Power, Air separation, Furnace, Chemical processes (see Figure 6.23).

Teledyne 3010TAC oxygen in gas analyser
Moisture
Model SDDLG has a range 0 – 80 °C dew point, to room air. The self-extending head allows up to 20 litres a minute flow for clearing the air supply pipe work without wetting the test chamber. Note the absence of knobs, calibrating, cooling, and servicing required by other methods. The automatic dry down measuring head accelerates the remarkably quick response from the sensor. An additional Shaw sensor can be connected to the rear of the hygrometer if desired, so that the external and internal switch can monitor two positions. Accuracy is guaranteed to better than one part in a million of moisture in very dry air or gas, and as the reading is specific to water vapour, so calibration is accurate for different gases. Flow rate has no effect on the accurate measurement.
The heart of the meter is a Shaw molecular sieve moisture sensor with a gold internal filter and gold plated exterior, a jewel of a sensor in fact with a rapid 1 s response time from dry to wet. (99%) So simple to use, blocking the outlet with a finger for a moment, raises the measurement head, and directs air or gas to the sensor (see Figure 6.24).

Shaw SDDLG moisture in gas analyser
Acidity tester (Anachem HF-1000 acidity in SF6 analyser)
The HF-1000 enables the determination of trace levels of HF in SF6, therefore enabling the prevention of the damaging effects of this aggressive contaminant (see Figure 6.25).

Anachem HF-1000 acidity in gas analyser
6.11 Switchgear maintenance procedures
The following procedure is specific to oil switchgear but it is included as an example of a written maintenance procedure. Most procedures are combinations of:
Generic requirements – those applicable to that class of switchgear (for example Ring Main Unit, Load Break, Fault Make Switch, Air Break CB, Oil Break CB, Small Oil Volume CB, SF6, CB, Vacuum CB)
Type specific requirements – those applicable to a particular make and type of switchgear. This should include instructions to check and if necessary rectify historic defects known to apply to that class of switchgear.
Example of a generic maintenance instruction
Lighting
Portable lighting will be required to supplement the permanent substation lighting, so that the interiors of chambers can be properly examined and safe access can be gained. All power tools and portable lights must be 110 V operated and supplied from centre tapped 66 – 0 – 66 V transformers.
Safe exit from substation
Check that the emergency exists are clear and that door panic bars, if fitted, operate correctly.
Tools and equipment
Insulated tools and guards shall be provided as necessary, together with any other special equipment for operation of the switchgear (for example circuit breaker slow closing handles).
Safe working – power closing
Before work commences it is important that all power-closing devices have been rendered inoperative. This should be confirmed on the safety document. The work involved may require the restoration of the power closing supply at some stage, if so, the arrangements for this should be made clear to the fitters carrying out the work.
Environmental protection
When working on outdoor switchgear, a temporary shelter shall be erected if rain is falling or appears likely to fall.
Protection from live LV equipment
If any part of the LV distribution board is live, it is to be covered over with an Approved insulation sheet that shall be fitted before work commences and removed only when all work is complete.
Cleaning materials
Only approved cleaning materials shall be used. Under no circumstances shall steel wool be used as it will cause contamination.
Unit identification
Before maintenance work commences check that substation nameplates are in position and that all switchgear is clearly labelled with the circuit names. If the switchgear is labelled at the front and at the back, check that the labels agree. All labels must be securely fixed and legible. Any temporary labels should be replaced with permanent labels.
Cleanliness
Only lint free wipes may be used in oil filled chambers, not cloth or paper wipers that can leave fibres to contaminate the oil. All loose dust should be swept away before opening any normally closed access. After a delay to allow dust to settle the equipment should be wiped down, any rust removed and the area cleaned and spot primed. Wipe down exposed insulating surfaces with a clean, dry, dust free wiper and cover them over until maintenance is complete. When oil tanks are removed these should be covered over to prevent ingress of dust or other foreign matter. Grease and other lubricants should be applied sparingly and any spillage wiped off.
Use an Approved plastic sponge to wipe down in oil filled chambers, followed by rinsing with clean oil. After use, the sponge should be well rinsed in clean oil and stored in a clean, closed container. A polythene food container with a snap-on lid is recommended. Tanks should be refilled from a pipe reaching to the bottom of the tank to avoid entraining air. Pipes should be flushed with clean oil and the outside wiped with a clean oil soaked sponge before using them for refilling. Test bushings that enter oil must be cleaned immediately before use by wiping with a clean oil soaked sponge or by polishing with clean chamois leather. After use, paper wipers may be used to dry off excess oil. Oil sampling thieves should be treated in a similar manner. Where a tank must be entered, a plastic mat well sponged down before use should be used to stand on. Ladders and all other items that enter the tank should be well cleaned before entry to the tank. In these situations it is usually possible finally to swill down with clean oil to a drain in the tank.
Cleaning down oil filled switchgear
The preferred procedure for cleaning down oil filled switchgear is as follows:
Spray all components with clean oil, working from top to bottom. Remove all oil from the chamber using a wet/dry vacuum cleaner ensuring that the suction tube reaches the bottom of the tank. Repeat the above procedure until residual oil is clean. Take care to adjust the spray so that a mist is not created in the work area.
Avoiding the ingress of moisture
At all stages of inspection or maintenance, precautions must be taken to avoid the ingress of moisture or wind borne debris by using suitable temporary shelters over outdoor equipment. Tools, wipers, oil, etc. must be kept dry.
Any sign of moisture in equipment being maintained or inspected must be reported, to allow remedial work to be initiated. Particular attention shall be given to gaskets, tank breathers and the seals on those parts of the mechanism that pass through the sides of oil filled chambers.
Solvents
Care must be taken with the selection and use of cleaning solvents and penetrating oils with respect to fire risk and possible damage to insulation, indicator windows, moulded components, seals, gaskets, etc. Their use should be avoided wherever possible and any excess removed immediately.
Maintenance items specific to distribution switchgear
Position indicators and oil level indicator windows
Before maintenance or operation, check the semaphore windows for signs of cracking, crazing, discoloration or any signs of ingress of moisture. If damage is considered the result of vandalism or interference, ensure that this is reported for a re-assessment of the substation’s security classification. Take appropriate actions to prevent recurrence before leaving site.
Arc gaps
If arcing horns are fitted make sure that gaps are correct and that the fastenings are secure.
Earth bonding continuity
Ensure that earthing connections are tight and electrically clean, and that all contact screws are tight and full contact is maintained. Take care to tighten all bolts and nuts, together with any locking devices that may have been disturbed during maintenance. All exposed metal work should be effectively earthed.
Shutters and locking devices
Make sure that shutters and all locking devices function correctly and that where they need to prevent an action, they do so. Mechanisms should be free from corrosion and freely operating with all items such as nuts, locking devices, being secure.
Unless otherwise stated in the manufacturer’s handbook, servicing should be limited to occasional light lubrication applied to bearings, shafts and pivots. Thin machine oil should be used on actuating levers and rollers.
Interlocks
Purpose
Interlocks are incorporated to ensure safe operation of the switchgear.
Knowledge of interlocking requirements
In order to maintain interlocks correctly, an understanding of their purpose is required and a person should be designated who has the relevant knowledge and experience. The manufacturer’s handbook and any relevant plant diagrams should be available for reference.
Maintenance of interlock systems
This should include implementation of the following recommendations, depending on the types of interlock installed.
- Mechanical aspects. Moving parts should be cleaned and adequately lubricated, so that they are free to move as intended. Check for wear or excessive free play and, if found, correct it or refer it to the manufacturer. All fasteners should be secure.
- Electrical aspects. Inspect control wiring for signs of damage and check terminations for tightness. If in doubt concerning the condition of the insulation, carry out an insulation resistance test.
Ventilation
Ventilated equipment should be examined to make sure that the airflow is not restricted in any way and, in the case of forced ventilation, that any airflow interlock operates correctly. Filters, if any, should be cleaned or renewed as necessary.
Functional test
Where the relevant busbar and/or feeder circuits can be made dead, all interlocks should be functionally tested before equipment is restored to service. These checks should be carried out in both the positive and negative modes to ensure that the interlock system not only permits fulfilment of the intended operational sequence, but also prevents, when necessary, unintended and unsafe action. When an interlock is found to be defective and remedial action cannot be implemented immediately, steps need to be taken to ensure safety by other adequate means.
Equipment heating and lighting
The operation of heaters, lights, emergency lighting installations and changeover equipment for alternative low voltage (LV) supplies, where fitted, should be verified. WARNING: These circuits often remain live when the equipment is otherwise isolated.
Lifting devices
The maintenance of lifting devices should be carried out at regular intervals. In some types of equipment these form an integral part of the item and should be dealt with during the maintenance of the equipment. Some lifting devices are portable; these should be separately maintained in accordance with the manufacturer’s recommendations, and should be examined and tested In accordance with statutory requirements.
Equipment tools, spares and test instruments
Tools, spares and test instruments stored local to and associated with a particular equipment should be regularly checked against an inventory.
Tripping and closing supplies
It is particularly important that tripping and closing supplies be maintained in good order. Compressed air plant and battery installations should be regularly maintained, including associated indicators and alarms, in line with the manufacturer’s instructions.
Cable boxes, compound filled busbar chambers, band joints and endcaps
Proceed as follows:
- Check for signs of compound leaking, displaced gaskets or other damage.
- Remove the filling orifice cover or in the case of band joints, the top plate.
- Check the compound level.
- Check the compound surface for signs of unevenness, dullness or tackiness. Dullness or tackiness indicates leakage of switchgear oil into the compound.
- Check for ingress of moisture, signs of rust, corrosion or flaking paint.
- Carry out any remedial work necessary.
Test Access Covers
Test access covers are likely to be opened more frequently than any other sealed cover on switchgear. Particular attention should be paid to the fastening and compression of the gasket. During maintenance the test bushings should be inserted and all associated interlocks checked. The surface of the test bushing should be inspected and any damage repaired. Restore weather protection to all disturbed surfaces; nuts, threads etc. either by repainting or by use of grease coating.
Insulation, bushings, barriers and tank linings
Porcelain
Visually examine all porcelain components carefully for cracks, deterioration of the cement or any other defects. Do not ‘feel’ for cracks, because edges can be dangerously sharp. ‘Ring’ the porcelain component by tapping it with a pencil, the sound should be sharp not dull. This may not be effective in all situations, depending upon the mounting or enclosure.
SRBP
Visually examine all SRBP (Synthetic Resin Bonded Paper) and cast resin bushings. If the bushing is in air, wipe clean and examine for cracks, tracking, blistering, de-lamination or discoloration. In oil, wipe clean with an Approved wiper soaked in clean oil and continue as above.
Permali
Visually examine compressed densified laminated wood (Permali) drive links. Inspect them carefully for any sign of moisture absorption, swelling distortion, or de-lamination. Also check for treeing or tracking. This type of insulation is moisture absorbent if the varnish layer is broken; therefore it should be out of oil for the shortest possible period of time.
Epoxy resin & DMC
Wipe clean and visually examine Epoxy Resin and DMC (Dough Moulding Compound) components for any signs of cracking, treeing or tracking, especially those at the bottom of tanks where water can collect and promote tracking.
Insulating oil – the insulating oil filling should be changed at each maintenance.
Fuses and Fuseholders
Check fuses for distortion, discoloration or damage. Check fuse mounts for discoloration and the security of any retaining clips. Ensure that the spring clips remain resilient.
Fastenings
During the course of maintenance, check all fastenings for security, this includes lock nuts, lock washers, circlips, taper pins, split pins etc. Renew these items as necessary.
Weather protection
Whenever weather protection is disturbed, for example by the removal of filling orifice covers, access covers to switchgear compartments or cable boxes, it is essential that a weather protective coating is restored at all outdoor locations and preferably at indoor situations as well. This means the renewal of paint films or re-coating with a corrosion inhibitor, for example grease.
Test on completion of maintenance
On completion, voltage test the switchgear, 6 kV DC phase to phase and phase to earth, with the unit in the OPEN and CLOSED positions. In the OPEN position, also test between poles.
Note on polychlorinated biphenyls (PCBs)
Mineral oil used for insulation and arc extinguishing may be contaminated by PCB. Although this problem mainly concerns transformer oil, circuit breaker oil may also be contaminated. PCB is both toxic and very persistent in the environment, therefore extreme care should be taken when handling oil that may be contaminated, because PCB may be absorbed through the skin. Test kits are available for determining the amount of PCB in oil and where the level of contamination exceeds 60 parts per million, the material is classed as toxic and specialist advice should be sought.
6.12 Problems that may be found during switchgear maintenance
The following difficulties should be looked for during internal breaker inspections:
- Inspect for keys, bolts (especially fibre), nuts, cotter pins, roll pins, etc. that have come loose.
- Inspect for wood operating rods, supports, or guides to come loose from clamps or mountings.
- Look for broken welds.
- On oil circuit breakers, look for contact burning. Where found, contacts will need to be reshaped or replaced.
- Look at densified wood (Permali) operating arms particularly those in oil, where they can absorb moisture and start to track across the surface.
- On oil switchgear, look for carbon or sludge to form and accumulate in interrupter or on bushings.
- On oil switchgear, look for burning or erosion on arc control devices, interrupter parts and barriers.
- Look at bushings and gaskets that they are in good condition. In most cases, gaskets should be replaced.
6.13 Defect management
Type-specific switchgear defects are normally identified in the course of routine maintenance, but they may be found from actual switchgear failures or, at worst, accidents to operators. In addition, the manufacturer may notify defects or, where information exchange arrangements exist, they may be notified by other utilities or companies. The action to be taken varies according to the nature of the defect and the assessed risk, which will be a value judgment.
The first step will normally be to identify other locations on the network having the same type and class of switchgear, in particular to identify critical locations. This allows the extent of the problem to be assessed. Where a central control room exists, it may be appropriate to mark up the main system diagram with those substations containing the affected switchgear.
If the defect is potentially dangerous to operators, an immediate operational ban should be imposed and a programme of remedial works drawn up, for early implementation. An intermediate category covers those defects that may affect the ability of the switchgear to carry out its job of interrupting fault current. Here the situation is less critical but remedial work should begin as soon as resources permit. The final category of defect is one that is not dangerous and will not affect the function of the switchgear, but may affect the life of the equipment. Remedial work for this category of defect is another value judgement; either draw up a programme for non-priority attention or defer the work until next planned maintenance. An action diagram describing this process is shown in Figure 6.26.

Action diagram for type-specific switchgear defect
Computer based asset registers provide facilities for defects to be associated with particular equipment, often as a letter or number code. This allows the operational situation for any particular defect to be assessed over time, in terms of:
- Numbers of switchgear with the defect still outstanding.
- Numbers of switchgear with the defect checked and if found, corrected.
Over the service lifetime of any particular type of switchgear, a number of defects may be identified and corrected. It is therefore important that records are kept so that the defect status of individual switches is always known.
6.14 Case studies of switchgear defects
Example 1: Oil filled Ring Main Unit-Loss of ‘spirol’ roll pin
Summary – This defect concerns the possible loss of ‘Spirol’ roll pins from the main and earth switch operating shafts, on both the left and right hand circuit switches. Spirol roll pins (Figure 6.27) are used to lock two drive components together and transfer the operating torque between them. Loss of a pin implies loss of drive between the operating mechanism and the switch contacts. To prevent this possibility, modification DM fitted a worm drive clip directly over each pin. Therefore, four worm drive clips should be visible on inspection.

‘SPIROL’ Pin
The illustration on the left hand side of Figure 6.28 shows the location of the Spirol pin on the main shaft of the right hand circuit switch, looking directly down into the ring main unit (below the fuse tray). The shaft is round at the location of the pin, where it enters a boss, but becomes square further along. The equivalent pin on the earth switch drive shaft is located close by. The equivalent pair of pins on the left hand circuit switch are located on the opposite side of the unit in a mirror image configuration, bosses on the left, shafts on the right.

Original arrangement (Left) and modification (Right)
The illustration on the right hand side of Figure 6.28 shows the worm drive clip fitted over the Spirol pin. Four of these clips should be visible and each one should be checked that it is in its correct position (no Spirol pin should be visible). Worm drive clips are unlikely to fall off, but they could move along the shaft.
Example 2: Oil filled Ring Main Unit-Clearance stop bolt quadrant
Summary – This defect concerns failure of the circuit switch mechanism to latch when moved from the OFF to the ON position and was identified during remedial work for defect code AQ. Drawing A26746 reproduced in Figure 6.29. overleaf shows that part of the mechanism affected by this defect and its proper settings. Unless 1 mm clearance exists between the stop bolt and the stop quadrant, intermittent latching may occur, resulting in slow operation from ON to OFF. The following information is reproduced from composite defect document CH:
To check that mechanism is latched in the ON or EARTH Position
Refer to Figure 6.29. Operate the switch to ON. With a spanner on the square main drive shaft attempt to move the switch to OFF. The movement should be stopped by the mechanism latch and in this position check the clearance between the ON stop screw and the stop lever, dimension Y on Figure 6.29. This should be a minimum of 1mm. If the movement is not stopped and the switch moves to the OFF position, the mechanism has not latched. Adjust the ON stop screw until the switch latches and the clearance Y is correct (1mm minimum). Check that with the switch closed the moving contact engagement on the fixed contact is 50% as shown on Figure 6.29, both with the stop lever tight against the stop and against the latch.
Repeat above with switch in the EARTH position. Dimension W may be much greater than 1mm because of the requirements of setting the oil switch stop position under defect code AR.
Note that Figure 6.29 shows only the right hand circuit switch, the left hand switch is a mirror image.
Documentation for switchgear maintenance should contain both generic maintenance information, relating to the type of switchgear for example, Vacuum cb, Air Break cb, together with type-specific information covering the known potential defects. This latter information is best accompanied by detailed illustration, so that the maintenance staffs know precisely what to look for.
The questions that maintenance staff must answer are:
- Does the known defect still exist?
- Did the defect exist, but was put right at the last maintenance or last remedial work?
- Has the defect occurred (possibly again) since the equipment was last taken out of service for the last maintenance/inspection?

Modification details
7
Testing – Introduction
7.1 Need for testing
The continuity of power distribution depends on the reliability of the electrical equipment in a system. While the reliability of many equipment have increased manifold during the last century, it is not recommended to connect any finished equipment to a system directly from the manufacturing place, unless its performance is proven. Earlier manufacturers had to think of many ways to prove the worthiness and reliability of their equipment. Nevertheless due to various reasons, manufacturers duplicating proven equipment also gained entry into the market. This had led to claims and counterclaims by the sellers, with consumers and end users being confused.
However the concepts have changed and bringing equipment under a common umbrella to prove their performance have slowly become the practice in every country. Each country had established committees and organizations to ensure the uniformity and performance of electrical equipment in an orderly way. This has led to the release of electrical standards in each country (for all electrical equipment). The major content of most of these cover the minimum tests that are to be conducted on any equipment in an environment that may be more severe than normal operating conditions; in terms of voltage and current levels.
With the sharing of knowledge among intellectuals from different regions and with globalization leading to the use of electrical equipment from different parts of the world, a common way to establish the capability of equipment has been accepted. This has lead to mandatory testing of electrical equipment before being put into use. The tests and the methods to be followed are covered in all electrical standards.
It can be concluded that testing on electrical equipment is needed
- To prove the performance of an equipment before being put into service
- To ensure that the equipment is assessed on a common basis with respect to their technical capabilities
- The end user is confident about the capability and performance of the equipment where it is to be used
- An assurance is established to show that the equipment will not cause any damage to property and personnel, when the equipment is put into service.
7.2 Purpose of testing
Most electrical equipments are produced by assembling various components made of different materials. The internal construction of the final equipment like transformers, circuit breakers, etc are not visible from the outside and it is not possible to visually check the performance of each and every part under a particular operating condition. Hence it is necessary to find ways to check the performance of the equipment in its full form without dismantling it. Accordingly ways and means have been drawn out to check the performance of the complete equipment in its final form which has become the basis of all electrical equipment standards. The testing helps in identifying the defects that may be inherent in particular equipment. Hence it enables the user to take a decision whether to use or not to use the equipment under known circumstances.
The purpose of electrical testing on major equipment is basically to ensure that the equipment will function as desired, when it is installed and energized within its specified voltage and load conditions. This is basically like an insurance premium to be spent before the equipment is accepted in a particular installation. The other purpose is to develop a set of base line test results of the equipment that can be compared in future to identify deterioration and therefore for taking corrective actions.
7.3 Categories of tests
Depending on the area/nature of the tests, they may be categorized as
- Factory tests
- Field/pre-commissioning tests
The factory tests are the major tests that are to be conducted by the manufacturer before declaring that the equipment suits a particular application.
These are categorized as:
- Type tests/design tests: These are normally done on identical equipment. These tests can be destructive in some cases in a sense that the type tested equipment may not be usable again. Hence it is not expected that the equipment under use is type tested but its design should have been proven by conducting tests on similarly designed equipment. All type tests are not destructive. Some times when multiple quantities of similar equipment are ordered, it is acceptable that one unit alone passes these tests.
- Routine tests: These are the necessary basic tests that are to be conducted by a manufacturer even if a customer does not specifically indicate this requirement. Any equipment which had failed in any of the routine tests is generally NOT to be used for the desired application. However under exceptional cases some routine tests may be repeated after making minor alterations to internal construction. It may be noted that all electrical equipment in service, should pass the routine tests.
- Acceptance tests: Some of the tests are to be conducted in case the operating conditions demand the same. These tests may not be applicable for all operating conditions and are mostly guided by the application of the particular equipment.
- Sample tests: When tens and hundreds of identical equipment are ordered, it is not necessary to conduct the same set of tests on each and every unit. Standards define the quantities to be considered for sample testing and the items are randomly tested to prove their capacity. The quantities to be selected are defined by a table or by some formula and samples are chosen accordingly.
- Special tests/other tests: These are defined by standards for some specific equipment at some specific ratings/capacities. These are invariably defined for tests like partial discharge tests, impulse withstand voltage tests, etc which are normally applicable for operating voltages above specified ranges like 132 kV or 220 kV.
- Field tests: As the name implies these are tests that are conducted on equipment in the field of service before being put into service. Invariably most of the pre-commissioning tests are almost same as routine tests (like megger tests, insulation tests, etc).
- Maintenance tests: These are tests conducted at regular intervals as part of maintenance checks to maintain performance. Typical tests are conducted on items like relays, etc which control the HV equipment and on oil which is the insulating medium in transformers.
7.4 Variations to test voltages and results
It is not practically possible to test the electrical equipment in ambient conditions at which they are expected to be in service. The major conditions that can affect performance and its acceptance by the end user are
- Altitude above sea levels
- Maximum and minimum ambient temperatures
- Tolerances on test results
Hence it is customary to define the performance requirements at pre-defined altitude and temperature and also to correct the test results to some basic temperature conditions; so that the equipment performance can be evaluated in a true sense.
7.4.1 Altitudes above sea level
The major requirement for any electrical equipment is that it shall be able to withstand some minimum voltage across its terminals and also across each terminal to earth, since the equipment is expected to carry its rated voltage throughout its life. Hence almost all HV and MV equipment shall be tested to prove its capacity to withstand voltage conditions. These are generally called Dielectric tests. Most electrical equipment has its terminals separated by air. This means that air is the insulating medium, though internally their parts may be filled with some other insulating medium like oil. It is well known that the breakdown voltages across two terminals separated by air vary with the ambient temperature due to the presence of moisture at higher altitude conditions. Hence it is usual to define test voltages at some minimum altitude conditions. The standards normally consider an altitude of 1000 meters above sea level, to define the test voltages to be withstood by equipment. Correction factors shall be applied for altitudes above this value, which means the equipment, shall be able to withstand higher operating voltages at higher altitudes.
7.4.2 Temperature conditions
Similarly the operating temperature can vary the factors like impedance, temperature rise, etc. The variation of temperatures could be critical to assess the losses of major electrical equipment (like power transformers, motors, generators, etc). It is usual to correct the results to a common temperature, which is 75ºC for electrical equipment. Hence the testing engineer shall ensure that the test results are properly corrected to take care of the altitude and temperature conditions.
The operating temperatures can affect the ratings of some main equipment like transformers and generators because their current ratings are dependent on the windings that carry the currents. Hence it is necessary to define the ratings based on the expected operating temperatures.
7.4.3 Tolerances
The other major condition on which test results are dependant is the applicable tolerance level. It is necessary that there cannot be any tolerance on the test voltages after applying the above correction factors. This means that any equipment failing at 99.9 kV with its defined test voltage of 100 kV can not be considered to have passed this test. At the same time the losses and impedance values which are normally measured during tests, cannot meet the guaranteed figures exactly. Hence it is usual to define tolerances on test result values for such guaranteed figures and the equipment is accepted to meet the testing requirements if the results fall within the defined tolerance value.
The following sections also include the conditions and tolerances that are normally applicable for various HV/MV equipment test values and their respective results.
8
Insulation Testing
8.1 Principles of insulation testing
The fundamental Ohm’s law is
E = I — R,
Where I is the current and R is the resistance of the equipment to which voltage is applied. The equipment function will suffer if it is not getting the required current. At the same time, the total equipment will fail if it takes more than its allowable current or voltage. In the above equation, imagine two resistances in parallel (R1 and R2, with R2 >>>R1), then it is obvious that the maximum current will flow through R1 with almost negligible current flowing through R2.
In the above clause insulation material is generally referred to be a non-conducting material, which is not 100% true. It cannot be denied that all the materials in the world are built with some integral resistance, with their values being almost zero for conducting materials and almost infinite for non-conducting materials. The insulation is basically made of some materials that offer almost infinite resistance to ground. The most common insulating material is Poly Vinyl Chloride (PVC) that covers a cable and has its external surface in contact with ground. Even if the outer surface is touched by humans, the voltage is not diverted to ground. When the insulation covers a conductor like in a cable, it basically ensures that the equipment voltage is not diverted to the ground but gets routed only through the conductor enclosed by the insulation. Hence the fundamental requirement for an insulation material is that it shall have a resistance equal to many times the conductor resistance, so that maximum current flows through it.
In a similar way air, SF6, etc that separate the terminals also have a higher resistance provided this medium separates the terminals at least for some minimum distance for a particular voltage. When the distance across the terminals is reduced, it effectively means that the molecules across the terminals are getting reduced. The resistance of the separating medium in comparison starts reducing which allows a current to flow through it. As the distance is further reduced, it may ultimately lead to a large current across the terminals in the form of an arc; referred to as short-circuit.
The insulation can be considered simply as a capacitor in parallel with a resistor as shown in Figure 8.1 below, with the phase to earth voltage applied to the insulation material.

Currents through the insulation
A marginal current through the insulation material is unavoidable but its value may be in the order of micro amperes due to the high resistance it offers. The current flow that results will comprise of two components: the capacitive current (Ic) and the resistive current (Ir).
The normal currents that flow during the application of a high voltage comprise of many currents as detailed below:
8.1.1 Capacitive current (Ic)
The capacitive current charges the capacitance in the system. It normally stops after flowing for a few seconds (at most) after the DC voltage is applied. The short burst of capacitive current flow may put a rather substantial stress on any test equipment that is applied to very large insulation systems such as cables or large rotating machines.
8.1.2 Dielectric absorption current (Ida)
The applied insulation voltage puts a stress on the molecules of the insulation. The positive sides of the molecules are attracted to the negative conductor and the negative sides of the molecules are attracted to the positive conductor. The result is an energy that is supplied to realign the molecules much like force will realign a network of rubber bands. Like Ic, Ida usually dies off fairly quickly as the molecules realign to their maximum extent.
Alignment of polarized molecules – (a) before charging (b) After charging
8.1.3 Resistive (leakage) current (Ir)
This is the electron current flow that actually passes through the insulation. In good insulation the resistive current flow will be relatively small and constant. In bad insulation the leakage current may be fairly large and it may actually increase with time.
The insulating material that is used for a particular voltage may be able to offer a maximum resistance value at that voltage, so that it does not offer a path to ground under healthy operating conditions. However in case the resistance reduces or becomes zero, the voltage will try to drive the full current to earth, which is limited only by the system impedance. Hence in the above case, the value of Ir should be very low depending on the voltage that is likely to be applied across the insulation during its life. It is also possible that the insulation will offer this high resistance only up to certain voltage levels, depending upon its properties and thickness, beyond which it is likely to fail.
Typical currents during IR test are mentioned in Figure 8.3. Ir is basically measured, which stabilizes after some time.

Currents Ic, Ida and Ir during IR measurement
The basic principle of insulation testing lies with Ohm’s law and the quality of insulation is ensured by checking the following:
- Applying a high voltage (normally in the region of 500 volts to 5000 volts) to verify its integrity up to this voltage level. The resistance value from the terminal to the ground or between terminals can be directly read in units of Ohm, by measuring the current flowing. The lower this current the higher is the insulation resistance offered by the separating medium.
- The IR measuring instrument is used to measure the resistive leakage current Ir and it is necessary that the required DC voltage shall be applied at least for one minute to allow sufficient time for Ic and Ida to die out.
- It is obvious that the equipment that is designed for a particular voltage will fail at a higher voltage. The voltage of 5 kV may not be acceptable for equipment with a rated voltage of 3.3 kV. At the same time, it is enough if this voltage is applied for a period of time that is adequate to complete the measurements. Most of the insulation tests are conducted from one minute to about 5 minutes.
- In case of some insulations like oil, etc the voltage is slowly increased over a fixed gap and to check at what voltage the insulation is likely to breakdown and this is normally indicated in breakdown voltage rather than in ohms.
The insulation resistance test is very simple and non destructive because of the short duration of application.
A typical connection is is shown in Figure 8.4.
Simple connections for cable IR test
8.2 Purpose of insulation testing
It is very important that the resistance offered by the insulation, maintains a high value for achieving the purpose for which the electrical equipment is intended. This includes air or SF6 or oil or PVC, etc that separates the terminals or the conductor from one phase to another or one phase to ground. This will ensure high efficiency in power distribution at optimum cost while simultaneously offering safety to humans. It is generally observed that the insulation resistance value is very high at the time of manufacture or commissioning. But it becomes very low to such an extent that it leads to equipment failure.
The quality of insulation is linked to some basic parameters that are obtained during insulation testing. Hence the first purpose for insulation testing, (i.e. measurements done during insulation testing) is to assess how well the insulation is and whether it can withstand the continuous voltage stress during normal operation (without ‘puncture’ or ‘breakdown’).
The majority of tests performed on electrical equipment are related to the verification of the quality of the insulation, which is basically the measurement of insulation resistance. The low value of resistance means some thing is seriously wrong.
The insulation of the equipment, that had given high resistance values before being put into service, is constantly stressed over its life by a constant application of a very high voltage. In addition, there are other environmental factors like dirt, moisture, oil, corrosion, vibration, electrical spikes and surges, mechanical stresses from pulling and tugging, and many other factors that add up to deteriorate the ‘good’ insulation. This can be catastrophic, but may happen slowly and steadily even if the voltage values are within acceptable limits.
Established practice is to conduct insulation testing at various stages as noted below:
- Before an electrical equipment is approved for dispatch from a manufacturing place
- Before the same equipment is put into service
- At periodic intervals during the life of the equipment, which is generally once in a year
- When the equipment is to be put back into service after a maintenance shutdown or a repair or a prolonged shutdown.
- In all the above cases, the purpose of insulation testing is
- To verify that the assembled equipment meets the minimum quality standards required for putting into service, without breaking down.
- To ensure that it had not undergone any transit damage and will successfully resist the high voltage that is to be applied to it when it is in service.
- Environmental factors have not affected the quality of insulation and in case it is affected, make necessary corrections to bring up the value to an acceptable level.
- To monitor the quality of insulation over its life time that indirectly provides information on the possible remaining life of the insulation/equipment based on the life of similar equipment. This can be in years or in decades or it may even completely break down during the next startup if no corrections are taken.
8.3 Testing the insulation of equipment
All electrical equipment shall be able to prove their insulation characteristics before the standard rated voltage is applied. Hence all the equipment shall be subjected to insulation test, and the most common HV/MV electrical items are
- Transformers (not across phases but terminals to ground)
- Motors (not across phases but terminals to ground)
- Switchgear and circuit breakers
- Switches and switch boards
- Disconnect switches
- Insulators and bushings
- Cables
It is to be noted that the insulation test is not conducted across the terminals of the transformers and motors (unless they are physically disconnected). This is because the insulation testing will give a negligible resistance value due to a very low resistance of the windings. Similarly, some components have a very low resistance but are connected across the equipment terminals or bus bars. Application of 500V or 2000V across such low resistance will result in heavy currents through these components giving wrong results and may also lead to failure of these components. For this reason these components used between any bus bars/terminals to another bus bar/terminal or to the neutral shall be kept out of the circuit while the main bus bars are insulation tested.
Some such components are
- Fuses
- Indication lamps
Insulation tests are generally expected to be across the phase terminals or between a phase terminal-to-ground, because the insulation offered to the ground is very important from the safety point of view. As noted above even if insulation tests are avoided between phases for motors and transformers, the insulation to ground tests are very important from safety point of view. Hence the persons responsible for testing must ensure that the insulation tests to ground are conducted for all equipment. But insulation tests across phases are done only for equipment whose terminals are not internally interconnected but always maintained at a minimum distance.
8.4 Insulation resistance test voltages
The readings obtained during an insulation resistance (IR) test should give reasonable values and it is necessary that the resistance values increase with any increase in service voltages. A higher resistance may prevent flow of substantial current through the testing instrument if the voltage is not sufficient. IR test instruments are available that can produce 500 V, 1000 V, 2500 V, 5000 V and 10,000 V across their output terminals. Most common test voltages that are applied to measure the IR values are as below depending upon the system voltage (line-to-line voltage)
IR test voltages
| System voltage | Test voltage |
| Up to 1000 V | 500 volts |
| > 1000V up to 3300 volts | 500–1000 volts |
| >3300 V up to 6600 V | 2500–5000 V |
| > 6600 volts | 5000 volts |
The 10 kV test voltage is generally adopted for motor windings above 12 kV. In the above table the two values indicate the applicability of both test voltages. Though it may be possible to verify the IR value with low test voltage like 500 V for a system of 3300 volts, it is recommended to follow the above test voltages to get consistent results with comparatively lesser errors.
IEEE 43 recommends the following test voltages for rotating machineries. The rated voltage means the line-to-line voltage for the three-phase machines and line-to-ground voltage for single phase machines and rated DC voltage of DC motors/field windings.
IR test voltages for rotating machines
| Winding rated voltage | IR test voltage |
| <1000 | 500 |
| 1000–2500 | 500–1000 |
| 2501–5000 | 1000–2500 |
| 5001–12000 | 2500–5500 |
| >12000 | 5000–10000 |
8.5 Types of testers
Megger® is the most common alternate name referred for IR tests. Megger is a patented brand name of the insulation resistance tester manufacturers. The tester is basically able to produce a voltage without any external means so that its output voltage is applied to the terminals under test. The most common types are
- Hand operated
- Motor operated
- Battery operated
When the testers were introduced in the market in early 20th century, they were hand operated because of the technology prevailing in those days.
Subsequently the motor operated types entered into the market and with the advent of electronics technology, battery operated ones are gaining entry.
All these types are still most commonly used in most of the installations during manufacture and also in the field.
Due to the advancement in measuring technology, present day testers are available with analog display and digital display to show the results and accordingly they are named as analog type and digital type. We also have meters that can be used for two or more different voltages like 2.5–5 kV with output terminals marked as applicable. These are called multi range type and care should be taken to connect the correct terminal depending upon the rated voltage of the equipment under test.
8.6 Construction of a tester
The insulation resistance tester is a portable instrument that can be carried to the point of measurement and connected to the equipment being tested. Most of the types do not need external power but some operate with auxiliary single phase 110/220 V AC supply. The instrument gives direct measurement of IR values in ohms, mega-ohms, giga-ohms, etc based on the model used. It is essentially a high resistance ohm meter having built-in DC generator, generating the appropriate voltage to be applied. The DC generator is hand cranked type in case of a manual type, like a bi-cycle dynamo. A hand rotation at a good speed produces the necessary voltage.
Where a battery or AC source is used, electronic circuits produce the necessary DC voltage which can be stably maintained (unlike hand-operated ones).
8.7 Connecting a tester
In older types connecting the positive and negative terminals to the test points is critical because connecting a positive to a ground always gives low resistance values, irrespective of insulation quality. In case of three-phase (A,B,C) neutral (N) winding equipment, connections are done for the following cases separately and readings are taken separately.
- A-N, B-N, C-N, with other two phases connected to ground while measuring between one phase-to-neutral
- A-B-C-G and N-G without grounding the unconnected terminal
- A-B, B-C, C-A with the unconnected terminals grounded
In case of rotating machineries IEEE recommends that each phase is isolated and tested separately by connecting the test instrument between the reference phase and ground. This helps in identifying the condition of each winding independently. Also while conducting the tests, all external components like cables, surge arresters and surge capacitors are preferably disconnected to get better readings. Some times in the field, it is normal to conduct the IR test at motor terminals along with connecting cables. A common ground shall be used to prevent stray losses in the round circuit, which may affect the results.
Some instruments are provided with an additional terminal called the guard terminal. It should not be confused with ground and it basically shorts some external current paths that may be getting into the instruments hence giving wrong results. For example in the case of bushings, dirt and moisture produce leakage currents across the positive and negative terminals and in such cases the guard is connected to a bare wire wrapped around the bushing. Nevertheless any visible dirt and moisture is removed before applying the tester (to avoid getting low value results). Figures 8.5 and 8.6 show typically how insulation testers are connected.

Typical transformer test connection for IR

Typical Cable full test connection for IR
Cable length does not have an influence on the time for IR measurement.
8.8 Test procedure
The steps involved during testing insulation resistance are as follows:
IR Test Procedure
| Step | Procedure | Remarks |
| 1 | Apply the applicable DC Voltage based on the nominal voltage rating of equipment under test | Usually applied with a meg-ohm-meter or high potential test set |
| 2 | Wait one minute. This will allow the capacitance current and dielectric absorption current ( Ic and Ida ) to decay | If using a high voltage test set monitor current closely for indications of insulation failure |
| 3 | At the end of one (1) minute read the meter current (Ir) or the insulation resistance in meg Ohms directly depending on the meter used. | Compare to previous values of identical equipment or refer to industry standards such as International Electrical Testing Association (NETA) |
Figure 8.8 shows the terminal voltage of the insulation tester vs insulation resistance of the item under measurement. Since the insulation tester has a limit for the current it can deliver, the terminal voltage of the insulation tester drops with lower values of insulation resistance as shown in the figure. In the example shown, the instrument can deliver a maximum of 1mA current.
| Date | Insulation Resistance (M.Ohms) | Temperature (ºF) | Temperature corrected Insulation Resistance (M.Ohms) |
| 1st Jan 2000 | 14300 | 68 | 14290 |
| 1st Jul 2000 | 8700 | 81 | 14341 |
| 1st Jan 2001 | 14500 | 68 | 14490 |
| 1st Jul 2001 | 8900 | 81 | 14671 |
| 1st Jan 2002 | 14200 | 69 | 14748 |
| 1st Jul 2002 | 8900 | 80 | 14117 |
| 1st Jan 2003 | 13600 | 68 | 13591 |
| 1st Jul 2003 | 8900 | 78 | 13071 |
| 1st Jan 2004 | 13500 | 66 | 12491 |
| 1st Jul 2004 | 7500 | 80 | 11896 |
| 1st Jan 2005 | 11300 | 68 | 11292 |
| 1st Jul 2005 | 6500 | 80 | 10310 |
| 1st Jan 2006 | 8000 | 67 | 7693 |

Insulation resistance vs Terminal voltage characteristics of Insulation Tester
Temperature has got a significant effect on insulation resistance values. Resistance value gets lowered with increase in temperature. Each insulation material has a different rate of change of resistance with temperature. Temperature correction factor tables have been developed for the various types of electrical apparatus and can be acquired from the manufacturer. On the other hand correction factor tables can be developed by measuring and plotting the insulation resistance values of the same equipment at different temperatures. The graph is plotted with temperature in the logarithmic scale and the temperature on a linear scale. The graph is a straight line and can be extrapolated to any temperature for obtaining correction factors.
The following table shows the significance of the effect of temperature on insulation resistance values and the importance for applying the correction factors.
As can be observed, that without temperature correction factors applied, the insulation values do not give meaningful trend pattern.
The following table shows the correction factor table using multiplier factors as per the information provided by NETA (International Electrical Testing Association Inc., USA). This is shown in Table 8.4.
NETA Temperature Correction factors for IR tests
| Temperature | Multiplier | ||
| ºC | ºF | Apparatus Containing Immersed Oil Insulations | Apparatus Containing Solid Insulations |
| 0 | 32 | 0.25 | 0.40 |
| 5 | 41 | 0.36 | 0.45 |
| 10 | 50 | 0.50 | 0.50 |
| 15 | 59 | 0.75 | 0.75 |
| 20 | 68 | 1.00 | 1.00 |
| 25 | 77 | 1.40 | 1.30 |
| 30 | 86 | 1.98 | 1.60 |
| 35 | 95 | 2.80 | 2.05 |
| 40 | 104 | 3.95 | 2.50 |
| 45 | 113 | 5.60 | 3.25 |
| 50 | 122 | 7.85 | 4.00 |
| 55 | 131 | 11.20 | 5.20 |
| 60 | 140 | 15.85 | 6.40 |
| 65 | 149 | 22.40 | 8.70 |
| 70 | 158 | 31.75 | 10.00 |
| 75 | 167 | 44.70 | 13.00 |
| 80 | 176 | 63.50 | 16.00 |
A general thumb rule is that for every 10 deg C increase in ambient temperature the IR value halves and hence these correction factors shall be applied to get the realistic values for comparison of previous readings.
The following are the minimum recommended values for good insulation as per NETA standards.
NETA recommended IR test values
| Maximum Rating of Equipment in Volts | Minimum Test Voltage DC | Recommended Minimum Insulation Resistance in MegOhms |
| 250 | 500 | 25 |
| 600 | 1000 | 100 |
| 5000 | 2500 | 1000 |
| 8000 | 2500 | 2000 |
| 15000 | 2500 | 5000 |
| 25000 | 5000 | 20000 |
| 35000 | 15000 | 100000 |
| 46000 | 15000 | 100000 |
| 69000 | 15000 | 100000 |
The recommended minimum IR values after 1 minute at 40ºC are as below based on the experience with different machines.
IR values for various voltages
| Minimum IR | Applicability |
| kV + 1 (Refer Note) | Machines built around 1975 and before |
| 100 | Most machines of today |
| 5 | For machines rated below 1 kV |
In the first row, kV refers to the rated line to line voltage of the machine. IEEE indicates that both IR value and PI value shall be met for machines rated 10,000 kVA and above whereas for machines below 10,000 kVA, either PI value or IR value shall meet the minimum values as per the tables. All the values are referred at 40 deg C ambient temperature.
8.9 Precautions to be taken when measuring insulation
- It is obvious that the instrument generates a high voltage which if applied to a human may cause electrocution. Though the source has limited power, it can still cause considerable damage. This is to be avoided by grounding the positive terminal to a local ground to discharge the voltage completely immediately. Use of hand gloves is recommended to avoid accidental contacts.
- Sudden application or removal of the voltage causes an abnormal dV/dt amount of stress. Whenever possible the test voltages should be gradually applied and removed to limit the stress on the insulation.
- If a large over-voltage (on the order of 2 or more times normal) is applied to some insulation systems, the small air voids in the insulation will become charged. If the insulation is then suddenly re-connected to the power system, it may fail due to the addition of the system voltage to the still charged voids. Even if the insulation does not immediately fail, it will be stressed and may lose life. To avoid this problem insulation should always be drained of DC test voltage for 1 to 5 times the length of time that the test voltage was applied before it is re-energized.
- Low quality test leads may cause undesirable leakages, which can result in wrong readings. Hence caution should be taken to avoid the leads getting into contact with each other or to ground/water during measurements.
- Effects of ambient temperature will affect the readings very much. Insulation resistance values drop considerably with increase in temperature for a specific apparatus. If possible the correction factors should be obtained from the manufacturers. As a rule of thumb every 10ºC increase halves the reading or alternatively, every 10ºC drop doubles the readings. For example 10 Mega-ohm at 20ºC may actually be 2.5 Mega-Ohm at 40ºC. These shall be ascertained at the time of taking measurements.
- Humidity and moisture also affect readings. If readings are taken above the dew point temperature, the values may not vary considerably. In electrical apparatus, we are concerned about the exposed surfaces which may lead to condensation affecting the test results.
- Good practice calls for making measurements when insulation is clean and dry whenever possible.
- Ensure proper connection of guard wires if available.
Guard wires in IR test
- Motors and transformers will take longer than average conductors and hence the voltage is applied for sufficient time to get a fairly stable reading.
- Equipment should be discharged (shunted or shorted out) for at least as long as the test voltage was applied in order to be absolutely safe for the person conducting the test.
- An Insulation Tester should never be used in an explosive atmosphere.
- For safety make sure all switches are blocked out and cable ends marked properly.
- It takes longer for absorption current to reach a static point as compared to the time taken by a charging current. Similarly it takes longer to bleed off. Hence on large or long cables it is important to short out the cable or ground the tested end after test to eliminate the possibility of shock to the person conducting the test.
- With modern insulating materials there is little difference in the reading obtained irrespective of which way the terminals are connected to the insulation being tested. However in older insulations, a little understood phenomenon called electro endosmosis causes a low reading to be obtained when the positive terminal is connected to the grounded side of the insulation under test. When underground cable insulation is being tested, the positive terminal of the instrument is connected to the neutral or ground of the cable and the negative terminal to the core of the cable.
8.10 Polarization index
When a motor winding insulation resistance is measured from phase-to-ground, it can be seen that the value of IR slowly increases after application of voltage for one minute. The result is basically the healthiness of the insulation. Polarization index is the ratio between IR value after 10 minutes to IR value recorded at the end of one minute. The following are the steps involved for the PI measurements.
Polarization Index test Procedure
| Step | Procedure | Remarks |
| 1 | Apply the DC Voltage based on the nominal voltage of the system | Usually applied with a meg-ohm-meter, |
| 2 | Wait one minute for the Ic and Ida to decay. Read and record the insulation resistance (R1 ) at the end of one minute. | If using a high voltage test set monitor current closely for indications of insulation failure |
| 3 | Continue voltage application for nine (9) additional minutes (10 minutes total) and record the insulation resistance again. (R10 ) | If using a high voltage test set monitor current closely to detect insulation failure |
| 4 | Calculate the polarization index (P.I.) | P.I. = R10 /R1 |
PI value varies with the class of insulation and is applicable for all classes of insulation as per IEC 60085-01 irrespective of the application. The following are the minimum values that are recommended based on the insulation class.
PI values and insulation classes
| Thermal class | PI value (minimum) |
| A | 1.5 |
| B | 2.0 |
| F | 2.0 |
| H | 2.0 |
PI tests are not applicable to oil insulated transformers, since the presence of oil affects the PI values. PI concept is based on the relatively rigid structures of solid insulation materials, where absorption energy is required to reconfigure the electronic structure of comparatively fixed molecules against the applied voltage field. In the case of liquid insulation materials, the flow of current causes convection currents in the oil, resulting in an unstable structure that does not support the concept on which PI testing is based. PI tests are however applicable to dry type transformers since the windings in a dry type transformer are solid and similar to that of the winding in a motor.
8.11 Step voltage test
Since a good insulation is mostly resistive and remains constant, any increase in the applied voltage will have a proportionate increase in the current flowing to provide the same resistance value for a wide range of voltages. Any deviation means some defects in the insulation exist. Normally the resistance values are observed to be almost the same at 500 and 1000 volts instilling confidence that the insulation is good. However there could be some cracks and cavities that may become prominent in ionization effects as the voltage level increases, making increased currents and lower IR values. The step voltage test is a useful tool for tests that are carried at 2.5 kV and above. Though step voltage can be an under-voltage test or an over-voltage test, it is preferred to consider under-voltage step tests (below the rated equipment voltage) to minimize catastrophic failures.
A recognized step voltage test is to increase the voltage in five equal steps at one minute intervals and record the IR value at the end of one minute before going to the next voltage level. Any considerable reduction in the IR values at any point indicates the possibility of poor insulation characteristics. The following could be the possible results and the inferences accordingly may vary.
Inferences on step voltage test
| Observation | Remarks |
| No appreciable differences | Reliable insulation |
| Appreciable differences beyond 25% | Insulation requires thorough inspection and reconditioning. Possibilities of moisture presence |
| Failure (Less than the minimum value per standards) at 2.5kV | Most likely to fail if put into service, even if the rating is more than 2.5kV |
The step voltage test is one of the most reliable tests whose results do not differ much because of ambient temperature corrections and hence do not require any corrections.
8.12 Readings and interpretation
With hand operated low voltage type testers often a reading close to infinity is seen in the meter scale and invariably the results are obtained as infinite. But as we have noted earlier, a very high value may be possible but not infinity. Still if the equipment is for low voltage application it can be concluded safely that the IR value is in the order of mega ohms and hence acceptable, without a need to decide the exact value. However it means that the value is beyond the instrument’s capability and generally does not give a chance to check the values that may be obtained later. For critical equipment, it would be preferable to use an instrument with higher ranges (in Giga ohms) so that a reasonable figure can be recorded for future reference.
The measurements taken for one machine shall not be generalized for all the machines. Relative comparisons of the same equipment will give more accurate feedback on the insulation quality. In case the IR values of machine 1 are lower than machine 2 but machine 2 values vary considerably, and reduce within a short period compared to almost a constant value for machine 1, it could mean that machine 2 needs much closer inspection and correction. Hence periodic insulation resistance measurements give a much better picture on insulation quality rather than a single measurement. Table 8.10 gives the possibilities depending upon the variations in the IR values recorded for equipment.
Inferences on IR test values
| Results | Inference |
| Average to higher values but well maintained | No need for worry |
| Similar to above but more towards low values | May need a check and correction |
| Low but well maintained | Though not a concern the possibility could be due to the material characteristics |
| Unacceptably low | Needs drying and repeating the measurement before putting the equipment into service. |
| Sudden drop from a previous higher values | May need more tests to check the tendency and if the value reaches safe figures and is maintained, no major concern. But if the value shows downward trend, this could mean problem. |
The readings of PI also give a good indication of insulation quality. Though the standards define some minimum values, often new equipment gives values far exceeding the minimum values. Inferences can be derived depending on the PI values as shown in Table 8.11.
Inferences of PI test values
| PI Value | Insulation condition |
| < 1.0 | Very poor. |
| 1 to 2 | Questionable and may need a review before acceptance |
| 2 to 4 | Passed |
| 4 to 5 | Good |
| >5 | May be due to brittle or cracked insulation needing inspection |
Similarly an increase of more than 20% after any maintenance done compared to previous readings may also indicate trouble and would require inspection and correction.
8.13 Dryness of insulation using absorption ratio
Normally the dielectric absorption current in the insulation and its discharge takes a much longer time than the capacitive current. It is because of the dipoles randomizing their alignment within the insulation. This is equivalent to a current flowing with the discharge circuit still connected or a voltage appearing across if left open circuited. Rapidly removing the effects of leakage and capacitive currents allow a measurement relating to the moisture content in the insulation.
This test is mainly used to check the moisture absorption in the insulation. This test monitors the condition of the insulation during the discharge of the dielectric by measuring the dielectric discharge current and was developed mainly for application to large rotating machines by EDF in France. The following steps and observations are involved.
- The equipment under test is charged by applying DC voltage for a sufficient time of 10 to 30 minutes to be ‘stable’ allowing full absorption to take place.
- The applied voltage is then removed and the insulation is discharged through an internal resistance of the measuring instrument. After 1 minute any balance current still flowing is measured. At this time the charge voltage has collapsed and the current measured basically constitutes the capacitive discharge and the re-absorption current, combining to give the total ‘dielectric discharge’.
- The one minute gap is much greater than the primary time constant of the capacitive discharge, which means the resultant current is dependent on the overall capacitance, the final test voltage and the degree of polarization of the dielectric due to its moisture content.
- The Dielectric Discharge factor or absorption ratio is calculated using the formula

The dielectric discharge ratio or absorption ratio can identify absorbed moisture in the insulation as this basically decides the absorption behavior of the dielectric which is masked by its capacitive effects if we try to measure it on the charging cycle. The factor is temperature dependent.
The above test also helps to show if an internal layer is damaged. The time constant of this damaged individual layer will mismatch the other good layers, generally giving rise to a higher value of capacitive current than for a good insulation. The following inferences may be derived from the ratio.
Inferences of absorption ratio test
| Ratio Value | Insulation condition |
| < 2 | Good |
| 2 to 4 | Questionable |
| 4 to 7 | Poor |
| > 7 | Bad |
8.14 Burn test
In a normal, insulation tester the specified high voltage is applied to measure the insulation value. In the event of a problem in the insulation, the applied voltage is tripped by the automatic Hi-Pot tester when a preset leakage current level is reached. However in a ‘Burn test’, the applied voltage is deliberately maintained to cause burning at the problem location for facilitating easy identification of the location. Burn testing is generally performed using a ‘Flash tester’. The ‘Flash tester’ provides a continuously variable A.C test voltage up to max. 4kV, having a frequency same as the supply voltage. Three modes of testing can be selected namely ‘Breakdown’, ‘Trip Level’ and ‘Burn’.
In The ‘Breakdown’ Mode, The Instrument Responds Only To The High Frequency Signals Produced By The Flashing Arc Of Breakdown And Trips The Test Voltage Only When This Occurs. In The ‘Trip Level’ Mode, The Output Voltage Is Tripped When The Preset Threshold Level Of Leakage Current Is Exceeded Or If A Breakdown Occurs. In The ‘Burn’ Mode, The Output Is Maintained Irrespective Of The Leakage Current Or Breakdown, But The Output Voltage Level Is Reduced To Limit The Level Of Current Flow. The Burning At the Fault Site Enables the Detection of the Fault
9
High Potential Tests
9.1 Purpose of hi-pot testing
Four basic approaches are used for testing insulation with AC.
9.1.1 AC high potential testing (also called an over-potential test)
The high potential test (Hi-pot test) is basically an over voltage test on an equipment with the test voltage being considerably higher than the equipment nominal design voltage. Since the applied voltage is higher than the nominal voltage it is termed as a ‘high potential’ test. The test is also known as ‘voltage withstand’ test or ‘voltage proof’ test.
This is also a test to check the capacity of the insulation. As reviewed in the earlier chapters, the purpose of this testing is to verify the healthiness of the equipment by checking its ability to withstand a voltage stress higher than for what it is designed. The test values are defined in International Standards, which are slightly more than two times the AC rated rms voltage of the equipment being tested.
The equipment that fails this test is invariably rejected and hence this test is also referred to as a Go-No-Go test, meaning whether you do go or do not go for using the equipment in the service for which it is intended for. Example – where stator coils tested in the motor plant before assembly where if the insulation fails, the coils are not taken up to build the motor.
9.1.2 Power factor testing
This test measures the ratio of resistive current to the total current (called power factor) or ratio of resistive current to the capacitive current (called dissipation factor). Since a good insulation has a low resistance the ratio should be low for good insulation. It requires a sophisticated instrument to measure different types of current and hence generally this is done for special cases like transformers, etc.
9.1.3 AC hertz test
This test is basically conducted at very low frequencies. Since the capacitors have very high impedance at low frequency, the resultant current at low frequency is predominantly resistive indicating the soundness of insulation. The low frequency set generates 0.1 Hz, which also makes it very small compared to a 60 Hz test.
9.1.4 Resonant test
This test set has the ability to adjust its inductive reactance to cancel the effect of the capacitive reactance to enable measuring only the resistive current. However the set cost is quite prohibitive and hence normally used for equipment rated 230 kV and above.
The last three tests are relatively specialized compared to the first one which is straight forward. These tests require special training for the test personnel and some times the results require complex interpretations. Hence the hi-pot test still dominates the scene in electrical tests on the insulation.
9.2 AC and DC hi-pot tests
The high voltage in a hi-pot test can be either AC or DC. Since most of the systems are AC rated and AC generation is simpler, it is still the logical choice today. AC testing normally tries to drive a current through the insulation which is typically a resistance in parallel with a capacitance as shown in Figure 51.1. For a good insulation,
Ica >>> Ir equal to almost 100 times the Ir
Ica leads Ir by almost 90 degree due to the capacitive predominance.
In case of marginally good insulation the value of Ica may still be large but not large enough and may be around 50 times the resistive current, with the resultant power factor angle getting reduced to around 0.75 to 0.80. In AC hi-pot tests, it is generally difficult to distinguish between a good and a marginally good insulation.
When a DC voltage is applied, the capacitive current dies down after a small time if the insulation is good and hence the readings at the end of one minute are not generally related to the capacitance current unless it happens to be bad insulation.
AC testing has two significant problems
- A large percentage of the current flowing through the insulation during application of a voltage (whether good or marginal insulation) is capacitive. The resultant AC current in good insulation is almost very close to the same amount of AC current flow that flows in a marginal insulation. Hence it is not always possible to evaluate the quality of insulation by simply measuring the magnitude of the current flow alone. Nevertheless, if the insulation is really very bad, the current drawn by the insulation will be reasonably high to clearly indicate its poor quality.
- The high amount of current flow drawn by the insulation with AC voltage requires a comparatively large test instrument to supply the same. This causes the AC test sets to be generally heavier and more difficult to transport than equivalent voltage DC test sets.
- In spite of these limitations many manufacturers specify that AC be used to test their equipment, and AC testing has a large following. To overcome the above issues, DC voltages have been accepted for most insulation tests, whose test values for a particular system is slightly lower than the test voltage normally recommended for AC tests.
The principal concern while testing the insulation with DC is the possibility of damaging otherwise good insulation. Some studies have indicated that DC testing at very high voltages may cause insulation damage for one of the following two reasons:
- Sudden application or removal of the DC step voltage from zero potential causes an abnormal dV/dt amount of stress on the insulation under test. Hence it is recommended that whenever possible the test voltages should be gradually increased, applied for the specific duration and again slowly removed.
- When a large over-voltage (on the order of 2 or more times normal rated voltage) is applied to some insulation systems, the small air voids in the insulation will get charged and will remain for quite some time. If the insulation is then suddenly re-connected to the same system, it may fail due to the addition of the system voltage to the still charged voids, exceeding the normally recommended voltage. Even if the insulation does not immediately fail, it will be stressed and may have its life curtailed.
To avoid this problem insulation should always be drained of DC test voltage for 1 to 5 times the length of the duration for which the test voltage was applied before it is re-energized.
However this test is considered destructive compared to the IR test referred in the earlier chapter. The test voltages are typically as per Table 9.2. Though a higher voltage is applied at the factory, subsequent tests consider reduced voltages as given below. Though AC voltages are applied at the factory, it is normal to consider DC voltage in subsequent tests to avoid insulation getting affected.
AC and DC hi-pot test practice
| Factory AC test voltage | 2 × Name plate voltage + 1000 V |
| DC proof test voltage before commissioning | 0.8 × factory AC test × 1.6 |
| DC proof test voltage during maintenance tests | 0.6 × factory AC test × 1.6 |
| Example for 2400 V motor | |
| Factory AC test voltage | 2 × 2400 + 1000 V = 5800 V AC |
| DC proof test voltage before commissioning | 0.8 × 5800 × 1.6 = 7424 V DC |
| DC proof test voltage during maintenance tests | 0.6 × 5800 × 1.6 = 5568 V DC |
DC Test is generally preferred after the Go-No-Go AC test at the factory due to the following specific advantages.
- Lower cost
- Lighter weight
- Smaller size
- Non- destructive
- Qualitative information
9.3 Test equipment construction and connections
The test instrument is similar to the IR test with a DC voltage being generated internally. The instrument is normally provided with ammeters and timers to enable direct readings during the tests, with the timer cutting off the voltage after the set time.

Typical hi-pot test instrument
Typical instrument is shown above.
9.4 Safety precautions to be taken
- The voltages being handled can become high for high voltage equipment in tens and hundreds compared to the IR test equipment which is generally limited to 5 kV. Hence extra precautions are necessary while taking up the test.
- Generally the tests are conducted on bus bar ends, etc with the switchgear or motor kept in open condition to permit connections. The leads shall be properly insulated to avoid any inadvertent contact with any personnel in the near vicinity.
- Though the IR test is conducted with the hand operated instrument, the same is not followed for hi-pot test instruments. The leads are connected to the terminals under test and the personnel should maintain a safe distance from the equipment enclosure.
- It is necessary to caution all personnel about the test and provide warning tapes around the equipment being tested. Some instruments are provided with a beacon lamp and alarm to warn the personnel when the voltage is being applied.
- The test may be repeated for different phases by disconnecting and reconnecting the leads as needed. Hence a suitable earth rod should be kept in hand to ensure discharge of the voltage before attempting disconnection.
- All equipment under test MUST be disconnected and isolated from any other source.
- All small components shall be suitably isolated from the circuit to avoid destructive voltage being applied. It shall be ensured that all switches are blocked out and cable ends are marked properly for safety
9.5 Test voltages as per applicable standards
The following NETA table gives the test voltages recommended for the hi-pot test on different equipment based on their rated maximum voltage, depending on whether AC or DC test is adopted.
NETA Table for high-potential testing
| Type of Switchgear | Rated Maximum Voltage (kV) (rms) | Maximum Test Voltage (kV) | |
| AC | DC | ||
| Low-Voltage Power Circuit Breaker Switchgear |
0.254/0.508/0.635 | 1.6 | 2.3 |
| Metal-Clad Switchgear |
4.76 | 14 | 20 |
| 8.25 | 27 | 37 | |
| 15.0 | 27 | 37 | |
| 27.0 | 45 | Consult Manufacturer | |
| 38.0 | 60 | Consult Manufacturer | |
| Station Type Cubicle Switchgear | 15.5 | 37 | Consult Manufacturer |
| 38.0 | 60 | Consult Manufacturer | |
| 72.5 | 120 | Consult Manufacturer | |
| Metal Enclosed Interrupter Switchgear | 4.76 | 14 | 20 |
| 8.25 | 19 | 27 | |
| 15.0 | 27 | 37 | |
| 15.5 | 37 | 52 | |
| 25.8 | 45 | Consult Manufacturer | |
Recommended maximum are 1 minute for AC Hipot test and 5 minutes for DC Hipot test.
9.6 VLF high pot test
VLF High pot test (very low frequency AC high pot) is a test that is becoming popular for the testing of cables and electrical apparatus like transformers, motors etc. VLF stands for very low frequency sinusoidal AC voltage having generally frequency of the order of 0.1 Hz or lower. VLF is used wherever a high capacitance load needs to be tested with AC voltage, especially in applications of field testing where the large and heavy series resonant AC test systems are not practicable. The reason for using low frequency is that, use of the system frequency (60Hz) necessitates large, high capacity, heavy and expensive equipment. Usage of low frequency enables the test equipment to be of small capacity, lighter weight and less expensive.
Testing at a frequency of 0.1 Hz reduces the power requirement by approximately 600 times when compared with testing at 60Hz. Testing of long runs of shielded power cable is the most common application for VLF testing. The problems associated with DC high voltage testing namely damage to the solid dielectric insulation and inability to detect many types of cable defects are not present in VLF Hi pot testing.
VLF testing is a go/no-go type of AC stress test for verifying the integrity of cables. If the cable is able to hold the applied test voltage, the cable is deemed healthy. VLF finds application in the following three types of cable testing.
- Testing the healthiness of a repaired cable
- Condition monitoring through routine periodic testing of cables
- Burning of cable faults to identify the location of the fault
For testing the equipment, the HV output of the tester is connected to the HV terminal of the equipment and the ground terminal is connected to the ground terminal of the equipment. The test voltage is applied for the required duration and it is checked whether the equipment is able to hold the test voltage till the duration of the test.
Figure 9.2 shows the schematic setup for performing VLF High Pot test for a cable.

VLF High Pot test for Cable
10
Ducter Testing
10.1 Need for the instrument
A ducter is basically a low resistance meter (unlike mega ohm meter) used in insulation resistance tester. Ohm’s Law dictates that for a specified energy source, operating on V AC or V DC, the amount of current drawn will be dependent upon the resistance of the circuit or the component. The satisfactory operation of the circuit or the component depends on the controlled flow of current within the design parameters for the given piece of equipment.
In this age of electronics, increased demands are placed on all aspects of electrical circuitry. In the present demanding industrial electronic environments, the engineer is now required to make measurements which show repeatability within a few micro-ohms or less to prove the reliability of the equipment.
The electrical system comprises of many interconnections and joints that introduce considerable resistance in various electrical circuits. These may be a few micro ohms at each point but their summation may introduce long term damage to existing equipment and will also waste considerable energy as heat. Any restrictions in current flow will prevent a machine from generating its full power and may also allow insufficient current to flow to activate protective devices in the case of a fault. Hence it is necessary at an early stage to test and establish resistance values and then continuously monitor any upward changes to identify unexpected changes in measured values. The trending of this data helps to forecast possible failure conditions. Excessive changes in measured values would need corrective actions to prevent a major failure.
A low resistance measurement is typically a measurement below 1 ohm. At this level it is important to use test equipment that will minimize errors introduced by the test lead resistance and/or contact resistance between the probe and the material being tested. Also, at this level, standing voltages across the item being measured (e.g. thermal emfs at junctions between different metals) may cause errors and need to be identified.
10.2 Description of instrument
The original DUCTER™ low resistance ohmmeter was developed by Ever shed & Vignoles in 1908 and employed the cross coils meter movement that was already used in insulation resistance testers. This initial design evolved into field units in the 1920s that required a leveling procedure at the time of the test due to the sensitivity of the coil. These early models did not travel well and were sensitive to shock and vibration.
To allow a measurement to compensate the errors, a four terminal measurement method had been developed with a reversible test current along with a suitable Kelvin Bridge meter which enables measuring very low resistance values. Subsequent demands required ranges up to kilo ohms, which used a Wheatstone bridge.
The low range on many resistance ohmmeters resolves 0.1 micro-ohms. This level of measurement is required to perform a number of low range resistance tests.
10.3 Working principle
10.3.1 Kelvin bridge
The Kelvin Bridge (also known as the Thomson Bridge) is used for precision measurements below the typical range of the Wheatstone bridge. Sir William Thomson (Lord Kelvin) devised this in 1854. The classic arrangement has six resistors in a rectangle, bisected by a galvanometer (see Figure 10.1), which includes an unknown resistance. A comparatively large current is passed through this unknown resistance and also through a known resistance of a comparatively low value. The galvanometer compares the voltage drops across these two resistances with the double-ratio circuit comprised of the other four resistors.

Kelvin Bridge
The two pairs of ratio resistors (A/B, a/b) are in parallel to each other and connected across with the galvanometer. One pair (a/b) is in series with the unknown (X) and the reference standard (R). The latter is an adjustable low-resistance, usually a manganin bar with a sliding contact.
This arrangement introduces a total resistance of A+X+a and B+R+b in parallel with the galvanometer. A connecting link (Y), sometimes called the yoke, shunts the ratio pair (a/b) that are otherwise in series with the unknown and the standard. This has minimal effect on the accuracy of the measurement so long as the two pairs of parallel ratio resistors are kept exactly equal (A to a, B to b). Lead and contact resistances are included in the value of the ratio pairs, and any effects can be nullified by keeping the resistance of the yoke extremely low. Keeping the yoke resistance low also accommodates the large test currents often used in Kelvin Bridges without causing unwanted heating effects.
When potential is balanced across the two parallel circuits, the unknown is equivalent to the parallel ratio multiplied by the adjusted reference value.
X = A/B × R
For very low measurements, the Kelvin Bridge has the advantage of nullifying extraneous resistances from leads and contacts by employing the system of double-ratio arms. The resistances of the connecting leads are in series with the high-resistance ratio arms and not with the reference or tested resistors.
10.3.2 Wheatstone bridge
A pioneering method for measuring resistance was devised in 1833 by S. H. Christie and made public by Sir Charles Wheatstone. The arrangement is a square pattern having four resistors with a galvanometer connected across one diagonal and a battery across the other (see Figure 56.2). Two of the resistors are of known appropriate values and comprise the ratio arm (A + B). A third has a known value which can be varied in small increments over a wide range, and is thus designated the rheostat arm (R). The fourth is the resistance being measured, the unknown arm (X).
Wheatstone Bridge
The bridge is considered balanced when the rheostat arm has been adjusted so that the current is divided in such a way that there is no voltage drop across the galvanometer and it ceases to deflect (is nulled). The resistance being measured can then be calculated from the knowledge of the values of the ratio resistors and the adjusted value of the rheostat arm. The basic formula is:
X = B/A × R
Where
B and A are the ratio resistors
R is the rheostat resistance used.
The Wheatstone bridge can be constructed to a variety of ranges and is generally used for all but the highest and lowest measurements. It is suited to a range of about 1 to 100,000 ohms.
10.3.3 Four wire instrument
There are basically three ways of measuring resistance of an element viz., 2-wire, 3-wire and 4-wire instruments.
Two wire testing is the simplest method and is used to make a general assessment of a circuit element or a conductor in a circuit. The two-wire lead configuration is the most familiar one, used in multi-meters. It is generally used when the probes contact resistance, series lead resistance or parallel leakage resistances, do not degrade the quality of the measurement beyond an acceptable point.
The disadvantage with this method is that the measured value will include the test lead wire resistance and contact probe resistance values. This resistance may be equal to some tens of mille-ohms to the actual resistance, thereby introducing considerable errors when the resistance value is low. In most instances this may make little difference to the measured value, but when the measurement is below 1.000 ohm the two-wire method can easily introduce an error. This error could be several percentage of the actual resistance value. The lead resistance may be zeroed out, but that leaves the uncertainty of the contact resistances, which can change with each measurement. Contact resistance values may be in the 35 mille-ohm range at each probe and can vary with the temperature of the material under investigation.
The two-wire test method is best used for readings above 10.00 ohms up to about 10.0 megohms.
Three-wire testing is used for very high resistance and is typically used for measurements above 10.0 megohms. This is nothing but the insulation resistance tester where a third test lead is used as a guard, and allows for resistances in parallel with the test circuit to be eliminated from the measurement. This parallel resistance is usually considerably lower than the insulation resistance being measured. In fact it may, in severe cases, effectively short out the insulation resistance such that a meaningful measurement cannot be carried out without the use of a guarding circuit.
Four-wire measurement is the concept used by a Ducter. This is more suitable for accurately measuring resistances starting from mille ohms up to about 10 ohms. Out of the four wires two are called voltage leads and the other two are called current leads. A typical arrangement is as shown in Figure 56.3. The four-wire measurement compensates for usual errors that are introduced by the probe lead wire and the contact resistance values in the final reading, thus ensuring more accurate measurements.
A DC instrument should be used when trying to measure the pure resistance of a circuit or device. An AC instrument is used for applications such as ground bed testing or impedance testing.

Four wire measurement
Current is injected into the item under test via leads C1 and C2. The current that flows will be dependent upon the total resistance of this loop and the power available to push the current through that resistance. Since this current is measured, and the measured value is used in subsequent calculations, the loop resistance, including the contact resistance of the C1 and C2 contacts and the lead resistance of C1 and C2, does not have an effect on the final result.
From Ohm’s Law, if we pass a current through a resistance we will generate a voltage across the resistance. This voltage is detected by the P1 and P2 probes.
The voltmeter to which these probes are connected internally has a high impedance, which prevents current flowing in this potential loop. Since no current flows, the contact resistance of the P1 and P2 contacts produces no voltage and thus has no effect on the potential difference (voltage) detected by the probes. Furthermore, since no current flows through the P leads their resistance has no effect.

Measurement principle
A high current output is one of the qualifying characteristics of a true low resistance ohmmeter. Generic multi-meters do not supply enough current to give a reliable indication of the current-carrying capabilities of joints, welds, bonds and the like under real operating conditions. At the same time, little voltage is required, as measurements are typically being made at the extreme low end of the resistance spectrum. Only the voltage drop across the measured resistance is critical, and it is measured at the mille-volt level.
10.4 Millie-ohmmeter Vs micro-ohmmeter
As the name implies, a mille-ohmmeter is less sensitive than a micro-ohmmeter, with measurement capability in mille-ohms rather than micro-ohms (minimum resolution of 0.01 mille-ohm). This type of instrument is normally used for general circuit and component verification. Millie-ohmmeters also tend to be less expensive than micro-ohmmeters, making them a good choice if measurement sensitivity and resolution are not critical. The maximum test current is typically less than two amperes and as low as 0.2 amperes.
In contrast, the micro-ohmmeter uses 10-amp maximum test current which provides a comfortable and suitable test current through the test sample to make the measurements. The best 10-amp micro-ohmmeters offer measurements from 0.1 micro-ohm to 2000 ohms with a best resolution of 0.1 micro-ohm at the low end of the range and accuracy of ±0.2%, ±0.2 micro-ohms. On some instruments, different measurement modes may be selected which address different types of testing conditions. Measurement modes could include manual, automatic or continuous testing, or a high power test for large windings.
The following is a selected list of key DC resistance measurement applications for 10-amp micro-ohmmeters.
- Switch and contact breaker resistance
- Bulbar and cable joints
- Small transformer and motor winding resistance
- Aircraft frame bonds and static control circuits
- Welded joint integrity
- Intercell strap connections on battery systems
- Resistive components (quality control)
- Rail and pipe bonds
- Metal alloy welds and fuse resistance
- Graphite electrodes and other composites
- Wire and cable resistance
- Transmitter aerial and lightning conductor bonding
There are different ways in which the leads are provided as shown in Figure 10.5.

Different means of measurement
10.5 Breaker contact resistance measurement
According to IEC62271-100, testing the contact resistance of high voltage AC circuit breakers calls for a test current with any convenient value between 50 A and the rated normal current. ANSI C37.09 specifies that the test current should be a minimum of 100 A. Most electrical utilities prefer to test at higher currents, as they believe this is more representative of working conditions. Field portable instruments are available that can supply anywhere from 100 A up to 600 A (subject to the load resistance and supply voltage). The best instruments have measurement resolution to 0.1 micro-ohm and offer variable test current to address a wider range of applications.
By testing at 10 Amp and then at a higher current, the operator can get a better understanding of the maintenance requirements for the circuit breaker. In addition to circuit breakers, electrical utilities and testing companies use higher current micro-ohmmeters on other high voltage apparatus, including:
- Cables
- Cable joints
- Welds
- Bus bars
- Switchgear in general
It is some times a practice to initially perform a 10 amp test and then see improved resistance readings with test currents beyond 100 amps as per standards.
However it is necessary to realize that high current meters are intended to be used at high currents. Their accuracy may reduce considerably at low currents, particularly when measuring small resistances.
Mechanical wear and tear on circuit breaker contacts reduces the area of the contact surfaces. This reduction combined with sparking and/or arcing during operations increase the resistance across the working connections. This condition will produce heat that can reduce the effectiveness of the circuit breaker. Periodic measurements will show the rate of increase of the contact resistance value. When these values are compared to the original manufacturer’s specification, a decision can be made to continue or repair. By tracking the trend of the readings, the operator gets an idea of when the circuit breaker should be pulled for service before damage is done.
10.6 Transformer resistance measurement
Some of the transformer ohmmeters include dual meters with independent range controls such that the high voltage/primary (high resistance) and low voltage/secondary (low resistance) windings of a transformer can be measured at the same time.
The transformer ohm meter is a multi current device with measurement resolution to 1 micro-ohm and is used both in factory tests and for field operating verification. Operation of the transformer ohmmeter is sometimes enhanced by connecting the test current through both windings with opposite polarity, thus providing the fastest test time (the mutual inductance between the windings is minimized by this way). This current connection operation is used on wye-to-wye, wye-to-delta and delta-to-delta transformers. The ability to measure primary and secondary windings at the same time also speeds up the testing time.
The power supply is often designed to deliver the energy to saturate the winding and then provide a stable level of test current. The test set should also be able to test the windings and contact resistance on tap-changers with make-before-break contacts and voltage regulators. Tap-changers are the most vulnerable part of the transformer and face more failures and outages than any other component. Frequent testing is required to ensure proper and reliable operation. A transformer ohmmeter is used to:
- Verify factory test readings.
- Help locate the presence of defects in transformers, such as loose connections.
- Check the make-before-break operation of on-load tap-changers.
- Perform ‘heat runs’ to determine the internal temperature changes, via the winding resistance, that occur under rated current conditions.
10.7 Precautions during measurements
The temperature of the device will have a strong influence on the measured values. For example, the resistance measured for a hot motor will be different from a measurement done in cold conditions. As the motor warms up, the resistance readings will go up. The resistance of copper windings responds to changes in temperature based on the basic nature of copper as a material. Different materials will have different temperature coefficients. As a result, the temperature correction equation will vary depending on the material being tested.
As a general safety measure, normal testing should always be performed on de-energized samples. Special training and equipment are required to perform tests on energized circuits. Internal fused input circuits are designed into a few instruments that will protect the instrument if inadvertently connected to an energized test sample. The low input impedance of the current supply internal to general instruments becomes a willing current sink when connected across a live circuit.
Safety is the responsibility of the field test engineer or technician, whoever will be in contact with the sample being tested. The majority of field tests are performed on de-energized circuits. When testing magnetic components, a state of winding saturation may occur.
The operator should connect a short circuit across the winding to neutralize the energy stored in the winding and then make a voltage test to verify the neutral state of the sample.
Battery strap testing represents a special condition, as the batteries must remain connected. The operator is required to use insulated gloves, facemask and a body apron for protection when performing these tests. This is one of the few times when electrical resistance tests are performed in the field on energized systems. Special probes, rated for 600 V operations, are available with the newer instruments to perform these tests.
When planning a test on circuit breakers, the operator must be aware of IEC62271-100 and ANSI C37.09 for test current requirements. When testing large oil circuit breakers, the best instrument is one that ramps up current slowly and steadily, holds it for a period of time to complete measurements and then ramps down in a similar fashion. This method reduces magnetizing, which would otherwise be created by the sudden switching ON and OFF of the test current. This may also result in inaccurate ‘CT’ measurements when the system is returned to normal AC operation.
Care should be taken when making a measurement across a CT as high DC currents may saturate the CT, leading to potential faults. Also, any ripple on the test current may cause circuit breakers to trip. Careful positioning of the current probes should prevent this happening, and the ripple present on the current waveform may be minimized by separating the test leads.
When connections have higher than normal resistance measurements, one should not resort to retightening the bolts, as this will over stress the soft lead connection. Over tightening does not cure the problem. The proper procedure is to disassemble the straps, clean, grease and then reconnect with the bolts tightened to the supplier’s torque level. All the three phase resistances should be balanced within a narrow tolerance of ±10 to 20%.
A common error in the field is to use a low resistance ohmmeter to sample the resistance of a ground bed. This application is incorrect, as the ground bed test method requires an instrument that toggles the test signal at a known frequency and current level.
A low resistance ohmmeter used in this application will provide an erroneous reading as the ground current will have an undue influence on the measurement. A proper ground tester performs in essentially the same way as a low resistance ohmmeter, that is, by injecting a current into the test sample and measuring the voltage drop across it. However, the earth typically carries numerous currents originating from other sources, such as the utility. These will interfere with the DC measurement being performed by a low resistance ohmmeter. The genuine ground tester, however, operates with a definitive alternating square wave of a frequency distinct from utility harmonics. In this manner, it is able to perform a discrete measurement, free of noise influence.
11
Tests on Other Major Equipment
11.1 Other major equipment
This chapter briefly covers the tests normally done on other HV/MV equipment not covered in earlier chapters. These are
- HV/MV switchgear
- Outdoor circuit breakers
- MV motors and generators
- HV disconnectors
- MV Capacitors
11.2 HV/MV switchgear and breakers
MV switchgear are generally designed for indoor use and basically comprise of the following compartments on one vertical section. (A switchgear panel line up may consist of many such vertical sections.)
- Draw out breaker trolley or contactor assembly
- Metering/relay auxiliary compartment
- Cable compartment
- Bus bar chamber
It is necessary to have tests on integrated assembly of all the units. IEC recommends the following tests on switchgear.
11.2.1 Routine tests
- Power frequency voltage withstand tests
- Dielectric tests on auxiliary circuits
- Measurement of resistance in the main circuit
- Mechanical operation tests
- Tests on auxiliary electrical, hydraulic and pneumatic devices
- Verification of correct wiring
- Partial discharge tests
11.2.2 Type tests
The type tests should be carried out on a maximum of four test specimens unless otherwise specified in the relevant IEC standards and/or mutually discussed with the supplier.
- Dielectric tests on main, auxiliary and control circuits
- Radio interference voltage (R.I.V.) test
- Measurement of resistance of the main current path
- Temperature rise tests
- Short-time withstand current and peak withstand current tests
- Making and breaking tests
- Tests to verify the degrees of protection of enclosures
- Tightness tests (where applicable)
- Mechanical tests
- Humidity tests
- Thermal stability tests
- Test under arcing conditions during internal faults
- Ageing tests
Most of the tests are related to their names. Some of the main tests which generally use higher than the rated voltages are as below.
11.2.3 Lightning impulse voltage tests
Switchgear and outdoor circuit breakers should be subjected to lightning impulse voltage tests. While panels are tested for their ability to withstand these voltages in dry conditions, the outdoor equipments are also tested in wet conditions. The tests should be performed with voltages of both polarities using the standard lightning impulse 1.2/50 µseconds according to IEC. The applicable voltages are based on the maximum system voltages for which the switchgear and equipment are designed and are given in the table below.
11.2.4 Power-frequency voltage tests
These are similar to the PF tests on transformers and bushings covered earlier. All switchgear and breakers should be subjected to short-duration power-frequency voltage withstand tests in accordance with IEC guidelines. For each test condition the test voltage should be raised to the appropriate test value and maintained for one minute. The tests should only be performed in dry conditions (for indoor units). Tables 11.1 and 11.2 are not only for assembled switchgear but also for the stand-alone high voltage circuit breakers. For outdoor breakers the wet test is conducted at the prescribed wet PF voltage by maintaining the applicable voltage for 10 seconds.
Rated insulation levels for European design ranges
| Rated voltage kV (r.m.s.) | Rated short-duration power-frequency withstand voltage kV (r.m.s.) | Rated lightning impulse withstand voltage kV (peak) | ||
| Common value | Across the Isolating distance | Common value | Across the isolating distance | |
| (1) | (2) | (3) | (4) | (5) |
| 3,6 | 10 | 11 | 20 | 23 |
| 40 | 46 | |||
| 7,2 | 20 | 23 | 40 | 46 |
| 60 | 70 | |||
| 11 | 28 | 32 | 60 | 70 |
| 15 | 85 | |||
| 17,5 | 38 | 45 | 75 | 85 |
| 95 | 110 | |||
| 24 | 50 | 60 | 95 | 110 |
| 115 | 145 | |||
| 36 | 70 | 80 | 145 | 165 |
| 170 | 195 | |||
| 52 | 95 | 110 | 250 | 290 |
| 72,5 | 140 | 160 | 325 | 375 |
| 100 | 150 | 175 | 380 | 440 |
| 185 | 210 | 450 | 520 | |
| 113 | 185 | 210 | 450 | 520 |
| 230 | 265 | 550 | 630 | |
| 145 | 230 | 265 | 550 | 630 |
| 275 | 315 | 650 | 750 | |
| 170 | 275 | 315 | 650 | 750 |
| 325 | 375 | 750 | 860 | |
| 245 | 360 | 415 | 850 | 950 |
| 395 | 460 | 950 | 1050 | |
| 460 | 530 | 1 050 | 200 | |
Test voltages for North American standard equipment
| Maximum System voltage kV (r.m.s.) | Rated short-duration power-frequency withstand voltage kV (r.m.s) | Rated lightning impulse withstand voltage kV (peak) | ||||
| Common value | Across the isolating contacts | Common value | Across isolating distance | |||
| (1) | (2) | (2a) | (3) | (3a) | (4) | (5) |
| 4.76 | 19 | — | 21 | — | 60 | 70 |
| 8.25 | 26 | 24 | 29 | 27 | 75 | 80 |
| 35 | 30 | 39 | 33 | 95 | 105 | |
| 15 | 35 | 30 | 39 | 33 | 95 | 105 |
| 50 | 45 | 55 | 50 | 110 | 115 | |
| 25.8 | 50 | 45 | 55 | 50 | 115 | 140 |
| 70 | 60 | 77 | 66 | 150 | 165 | |
| 38 | 70 | 60 | 77 | 66 | 150 | 165 |
| 95 | 80 | 105 | 88 | 200 | 220 | |
| 48.3 | 110 | 100 | 132 | 110 | 250 | 275 |
| 72.5 | 160 | 140 | 176 | 154 | 350 | 385 |
11.2.5 Testing for internal faults
Internal faults inside metal-enclosed switchgear can occur in a number of locations. The arc energy resulting from an arc developed in air at atmospheric pressure or in another insulating gas within the enclosure will cause an internal overpressure and local overheating. This will result in mechanical and thermal stressing of the equipment. Moreover, the materials involved may produce hot decomposition products, either gaseous or vaporous, which may be discharged to the outside of the enclosure.
IEC specifies a method of testing switchgear enclosures against the effects of internal faults, as a type test. It involves setting up deliberate faults within the switchgear enclosure and then testing for the effect by use of what are called ‘indicators’; i.e. large metal screens covered with black cotton textile material. This test procedure demands for operator safety and is covered here.
IEC gives allowance for internal overpressure acting on covers, doors, inspection windows, etc. of the switchgear and also takes into consideration the thermal effects of the arc or its roots on the enclosure and of ejected hot gases and glowing particles. But it does not cover the damages to partitions and shutters and hence does not cover all effects that may constitute a risk (such as toxic gases). The test procedure only simulates situations when doors and covers are fully closed and correctly secured.
The choice of functional units, their numbers, their equipment and their position in the test area as well as the place of initiation of the arc are to be decided between the manufacturer and user. The following points should be observed:
- Functional units of representative sizes should be tested.
- Mounting conditions should be as close as possible to those of normal service.
- The test room should at least reflect the actual installation conditions viz., the floor, the ceiling, two walls perpendicular to each other and simulated cable access ways. If the switchgear is installed in combination with a special exhaust channel which normally leads the gas out of the room in actual working conditions then no room mock-up is necessary.
- The functional units should be fully equipped. Mock-ups of internal components are permitted, provided they have the same volume and external material as the original items.
- The test unit should be earthed at the point provided.
- In the case of gas-filled compartments the test should be made with the original gas at the rated filling pressure. As an alternative and with the agreement of the manufacturer, the test may be carried out with air, but equivalent pressure rise should be given due consideration.
- The arc should be initiated in a way that is representative of faults which could occur under service conditions.
The tests on metal-enclosed switchgear should be carried out on three-phase units. The short-circuit current applied during the test corresponds to the rated short-time withstand current. It may be lower, if specially required by the manufacturer. The applied voltage of the test circuit should be equal to the rated voltage of the metal-enclosed switchgear. A lower voltage may be chosen if the following conditions are met:
- The current remains practically sinusoidal
- The arc is not extinguished prematurely.
The short-circuit current for which the metal-enclosed switchgear is specified with respect to arcing should be set within a +5%–0% tolerance. This tolerance applies to the prospective current only if the applied voltage is equal to the rated voltage. The current should remain constant. If the test plant does not permit this, the test should be extended until the integral of the AC component of the current equals the value specified within a tolerance of + 10%–0%. In this case, the current should be equal to the specified value at least during the first three full cycles and should not be less than 50% of the specified value at the end of the test.
The instant of closing should be chosen so that the prospective value of the peak current (with a tolerance of + 5%–0%) flowing in one of the outer phases is 2.5 times the r.m.s. value of the AC component defined above so that a major loop also occurs in the other outer phase. If the voltage is lower than the rated voltage, the peak value of the short-circuit current for the metal-enclosed switchgear under test should not drop below 90% of the prospective peak value.
At a rated frequency of 50 Hz or 60 Hz, the frequency at the beginning of the test should be between 48 Hz and 62 Hz. At other frequencies it should not deviate from the rated value by more than ± 10%.
The duration of the arc is chosen in relation to the probable duration of the arc determined by the protection facilities and does not normally exceed 1 second. For testing metal-enclosed switchgear with pressure relief devices, an arc duration of 0.1 second is generally sufficient to prove its resistance to internal pressure. This does not apply for gas-filled compartments. It is generally not possible to calculate the permissible arc duration for a current which differs from that used in the test. The maximum pressure during the test will generally not decrease with a shorter arcing time and there is no universal rule according to which the permissible arc duration may be increased with a lower test current.
The neutral is only earthed in the case of metal-enclosed switchgear to be operated in a solidly earthed system. Care should be taken in order that the connections do not alter test conditions. Generally, inside the enclosure, the arc may be fed from two directions and the direction should be the one which is likely to result in the highest stress.
The arc should preferably be initiated between the phases by means of a metal wire of about 0.5 mm diameter or, in the case of segregated phase conductors, between one phase and earth.
If the application of such a wire is not practicable (for arc initiation in a component), as an alternative it is permissible to initiate the fault by other methods. In this case, the method chosen should be agreed upon by the manufacturer and the user. In functional units where live pacts are covered by solid insulating material, the arc should be initiated between two adjacent phases or, in the case of segregated phase conductors, between one phase and earth at the following locations:
- At gaps in the insulation of insulation-embedded parts
- By perforation at insulated joints made on-site when prefabricated insulation parts are not used. Solid insulation should not be perforated.
- The in-feed from the supply circuit should be three-phase to allow the fault to become three-phase. The point of initiation should be chosen so that the effects of the resultant arc produce the highest stresses in the functional unit. In case of doubt it may be necessary to make more than one test on each functional unit.
- Pieces of black cotton cloth so arranged that their cut edges do not point toward the test unit, serve as indicators of the performance. Care should be taken to see that they cannot ignite each other. This is achieved by fitting them in a mounting frame of steel sheet. The indicator dimensions should be about 150 mm × 150 mm.
Indicators should be fitted vertically at the operator’s side of the enclosed switchgear and, if applicable, at sides which are readily accessible to personnel. They should be placed, up to a height of 2 m and at a distance of 30 cm + 5% from the enclosed switchgear, facing all points where gas is likely to be emitted (e.g. joints, inspection windows, doors). Care should be taken when positioning the indicators to take into account the possibility of hot gas escaping in slant directions. Indicators should also be arranged horizontally at a height of 2 m above the floor and between 30 cm and 80 cm from the enclosed switchgear. Black cretonne (cotton fabric approximately 150 g/m2) should be used for the indicators.
Indicators should be fitted vertically on all accessible sides of the enclosed switchgear. They should be placed, up to a height of 2 m and at a distance of 10 cm ± 5% from the enclosed switchgear, facing all points where gas is likely to be emitted (e.g. joints, inspection windows, doors). Care should be taken when positioning the indicators. They should also be arranged horizontally at a height of 2 m above the floor and between 10 cm and 80 cm from the enclosed switchgear and control-gear. If the test unit is lower than 2 m, indicators should be placed horizontally on the top covers, facing all points where gas is likely to be emitted and close to the vertical indicators, which in this case, are only required up to the actual height of the equipment. Black cotton-interlining lawn (approximately 40 g/m2) should be used for the indicators.
It is to be observed:
- Whether correctly secured doors, covers, etc., do not open
- Whether parts which may cause a hazard fly off. This includes large parts or those with sharp edges, for example inspection windows, pressure relief flaps, cover plates, etc.
- Whether arcing does not cause holes to develop in the freely accessible external parts of the enclosure as a result of burning or other effects.
- Whether the indicators arranged vertically do not ignite. Indicators ignited as a result of paint or stickers burning are excluded from this assessment.
- Whether the indicators arranged horizontally do not ignite. Should they start to burn during the test, the assessment criterion may be regarded as having been met, if proof is established of the fact that the ignition was caused by glowing particles rather than hot gases. Pictures taken by high-speed cameras should be produced as evidence.
- Whether all the earthing connections are still effective.
The following information should be given in the test report:
- Rating and description of the test unit with a drawing showing the main dimensions, details relevant to the mechanical strength, the arrangement of the pressure relief flaps and the method of fixing the metal-enclosed switchgear to the floor and to the walls.
- Arrangement of the test connections.
- Point and method of initiation of the internal fault.
- Arrangement and material of indicators with respect to the type of accessibility.
- For the prospective or test current:
- RMS value of the AC component during the first three half-cycles
- Highest peak value
- Average value of the AC component over the actual duration of the test
- Test duration
- Assessment of the test results, including a record of the observations.
11.3 MV motors
The following are the major tests conducted on medium voltage motors that are used to drive mechanical equipment like compressors, blowers, pumps, etc. The tests not only determine the losses and the efficiency but also cover procedures involved in calculating the various loss components to arrive at the efficiency figures.
- Insulation resistance test
- HV test on windings to round for 1 minute
- Over speed test
- Measurement of losses
- Measurement of stator winding resistance across every two terminals
- No load test
- Locked rotor test and measurement of copper losses
- Polarization index for each winding
- Measurement of shaft voltages
- Shaft vibration tests
- Bearing housing vibration tests
- Temperature rise test
- Insulation power factor test
- Over load test
- Noise level measurements
Some of the tests like noise level measurements and heat run test are type tests which are conducted on one motor if multiple motors of the same rating are supplied. The stator coils and insulation also go through high voltage tests before assembly of motor coils.
11.4 MV capacitors
The capacitors are mainly in the form of multiple banks and mounted either indoor or outdoor. The major tests to be conducted per IEC are as below.
11.4.1 Routine tests
- Capacitance measurement.
- Measurement of the tangent of the loss angle (tan δ) of the capacitor.
- Voltage test between terminals.
- AC voltage test between terminals and container.
- Test of internal discharge device.
- Sealing test.
- Discharge test on internal fuses.
11.4.2 Type tests
- Thermal stability test.
- Measurement of the tangent of the loss angle (tan δ) of the capacitor at elevated temperature
- AC voltage test between terminals and container
- Lightning impulse voltage test between terminals and container.
- Short-circuit discharge test.
- Test of an external fuse in combination with a capacitor.
- Disconnecting test on internal fuses.
11.4.3 Test procedures
Some of the test procedures are given below
Capacitance measurement
The capacitance should be measured at 0.9 to 1.1 times the rated voltage, using a method that excludes errors due to harmonics. Measurement at another voltage is permitted, provided that appropriate correction factors are agreed upon between the manufacturer and the purchaser. The final capacitance measurement should be carried out after the voltage test.
In order to reveal any change in capacitance, for example due to puncture of an element, or failure of an internal fuse, a preliminary capacitance measurement should be made, before the other electrical routine tests. This preliminary measurement should be performed with a reduced voltage not higher than 0.15 times the nominal voltage.
The capacitance should not differ from the rated capacitance by more than:
- –5 % to +15 % for capacitor units or banks containing one unit per phase.
- –5 % to +10 % for banks up to 3 Mvar total rating.
- 0 % to +10 % for banks from 3 Mvar to 30 Mvar total rating.
- 0 % to +5 % for banks above 30 Mvar total rating.
TAN d of the capacitor
The capacitor losses (tan δ) should be measured at 0.9 to 1.1 times the rated voltage using a method that excludes errors due to harmonics. The accuracy of the measuring method and the correlation with the values measured at rated voltage and frequency should be given.
High voltage test
The AC test should be carried out with a substantially sinusoidal voltage equal to 2.15 times the nominal system voltage. In the United States of America the value is twice the nominal voltage. In case of DC test the test voltage should be 4.3 times.
Lightning impulse test
This is a type test and conducted between terminals and the container. The lightning impulse test is applicable for capacitor units intended for use in banks with insulated neutral and for connection to overhead lines.
Units having all terminals insulated from the container, and with the containers connected to ground, should be subjected to fifteen impulses of positive polarity followed by 15 impulses of negative polarity applied between bushings joined together and the container. After the change of polarity, it is permissible to apply some impulses of lower amplitude before the application of the test impulses.
The capacitor is considered to have passed the test if:
- No puncture has occurred
- Not more than two external flashovers occurred at each polarity
- The wave shape has revealed no irregularities or no significant deviation from recordings at reduced test voltage
- The lightning impulse test should be made with a wave of 1.2/50 ms to 5/50 ms having a crest value corresponding to the insulation test requirement.
11.5 Disconnectors
11.5.1 Type tests
Mandatory type tests
Tests to prove satisfactory operation and mechanical endurance
Optional type tests
- Tests to prove the short-circuit making performance of earthing switches
- Tests to prove satisfactory operation under severe ice conditions
- Tests to prove satisfactory operation at temperature limits
- Tests to verify the proper function of position indicating devices
- Tests to prove the bus-transfer current switching capability of disconnectors
- Tests to prove the induced current-switching capability of earthing switches
- Tests to prove the bus-charging current switching ability of disconnectors used in metal enclosed switchgear.
11.5.2 Routine tests
- Dielectric test on the main circuit
- Dielectric test on auxiliary and control circuits
- Measurement of the resistance of the main circuit
- Tightness test
- Design and visual checks
- Mechanical operating tests
11.5.3 Procedures
Dielectric tests
Dielectric tests on disconnectors or earthing switches when in the OPEN position should be
carried out:
- With the minimum isolating distance for the disconnector or
- Gap for the earthing switch at which the indicating or signaling device can signal the position OPEN or
- The minimum isolating distance compatible with the locking arrangements whichever is the smallest.
The disconnector or earthing switch should be considered to have passed the impulse tests if the following conditions are fulfilled:
- The number of disruptive discharges should not exceed two for each series of 15 impulses.
- No disruptive discharges on non-self-restoring insulation should occur.
This is verified by at least five impulses without disruptive discharge following that impulse out of the series of 15 impulses, which caused the last disruptive discharge. If this impulse is one of the last five out of the series of 15 impulses, additional impulses should be applied. Some times disruptive discharges may occur and evidence cannot be given during testing that the disruptive discharges were on self-restoring insulation. In such cases, after the completion of the dielectric tests the disconnector or earthing switch should be dismantled and inspected. If punctures of non-self-restoring insulation are observed, the disconnector or earthing switch should be considered to have failed the test.
12
Field Tests
12.1 Need for field tests
The units are normally tested at the manufacturer’s works and transported to the site once the test results are satisfactory. Invariably there will be considerable time elapsed between the factory tests and the readiness of the site where the installation will take place. The time elapsed may vary from a month to several months depending on many factors. The installation and provision of necessary connections also takes considerable time, even if the site is waiting for the equipment. The following factors are unavoidable from the time the equipment is ready at manufacturer’s place till it is ready to get charged in the place of use.
Time for packing and arranging for the transportation after completing all the commercial formalities.
Transportation time from the manufacturer’s works to the place of installation depending upon whether the item is imported or locally available. Even in case of locally available equipment distances may make the transportation and delivery time go from a week to few weeks. Possible damages during transportation, either directly on the equipment or indirectly due to unknown reasons. Rough handling and improper packing can also lead to unknown damages. The delay in readiness of the foundation or the building may result in the equipment being kept in unfavorable climatic conditions that can affect internal insulation. Some times environmental conditions at a construction site or an existing nearby plant can also result in some deterioration to internal components and oil used in the equipment.
All the above reasons plus many other possible human errors generally delay the energizing of electrical equipment. Hence it is necessary to ensure that there are no internal damages that can affect its life and performance. For example, the oil dielectric strength might have gone down over a period of time that would require filtration before charging a transformer. If not, an internal flashover or short circuit may make the whole project wait while the transformer is repaired. Similarly in a switchgear panel, some internal links or shorting may lead to problems.
The above reasons are basically related to the delay in energizing due to unavoidable reasons. Once the equipment is energized, it is necessary to ensure periodical maintenance to maintain health. Maintenance may result in replacement of components, some adjustments in the internal mechanism, rewiring, etc. All these need to be checked for correctness before the equipment is put back into service.
Some basic tests are prescribed (especially for HV/MV equipment) that are to be conducted before restoring the service or charging the equipment for the first time. These tests are called pre-commissioning tests/checks, commissioning tests, maintenance tests, etc and since most of these tests are done in the field of service, these are referred to as field tests in this chapter.
Field tests are usually performed by independent contractors, the installation contractor or the manufacturer himself. The individuals who perform the acceptance tests should preferably be certified and/or licensed for the equipment under test. The system should be initially checked for damage, deterioration and component failures using specific component checks, inspections, and tests defined by the equipment manufacturer. Then the interconnection of the system components should be checked in a de-energized and energized state, to verify the proper interconnection and operation of components, ON/OFF control, system interlocks and protective relaying functions. It is recommended that all field tests are witnessed by a person who could be the operator of the plant or in case of shortage of skilled man power, a commissioning engineer who is not associated professionally with the agency/person performing the tests. Once the above tests are complete, the system can be energized, operational tests conducted and measurements recorded. All steps and results of the field tests should be carefully documented for review and for use in future for comparison. Considerable variation in the results of present tests compared to earlier tests is indicative of problems like deterioration of insulation, dirty environmental conditions, etc.
12.2 General safety procedures
The safety procedures given below are from IEEE Standard 510-1983 which stipulates safety practices to be followed by all personnel dealing with high voltage applications and measurements, so that any possible accidents due to the presence of electrical hazards while conducting the tests are avoided.
Safety considerations in electrical testing apply not only to personnel but to the test equipment and apparatus and or the system under test. These recommended practices generally cover the practices needed while testing in laboratories, in the field and of systems incorporating high voltage power supplies, etc. A voltage of approximately 1,000 volts has been assumed as a practical minimum for these types of tests. Individual judgment is necessary to decide if the requirements of these recommended practices are applicable in cases where lower voltages or special risks are involved.
12.2.1 Basic precautions
All ungrounded terminals of the test equipment or apparatus under test should be treated as energized and hence any contact with enclosures and internal parts always avoided.
The test set grounding connections should be solidly connected to the equipment being tested. As a minimum, the current capacity of the ground leads should exceed that necessary to carry the maximum possible ground current. The effect of ground potential rise due to the resistance and reactance of the earth connection should be considered.
Precautions should be taken to prevent accidental contact of live terminals by personnel, either by shielding the live terminals or by providing barriers around the area.
The circuit should include instrumentation for measuring and/or indicating the test voltages.
Appropriate master isolation switch or an observer should be provided to ensure immediate de-energizing of test circuits in case of unforeseen problems occurring. In the case of DC tests, provisions for discharging and grounding charged terminals and supporting the insulation should also be considered.
High-voltage and high-power tests should be performed and supervised by qualified personnel only.
12.2.2 Test area safety practices
Appropriate warning signs like DANGER – HIGH VOLTAGE should be posted on or near the entrance in case of indoor equipment or on the barrier at all possible entry points.
Automatic grounding devices should be provided to apply a visible ground on the high-voltage circuits once they are de-energized after the test. This may not be practically feasible for most HV/MV equipment. In such cases the operator should attach a ground to the high-voltage terminal using a suitably insulated handle. In the case of several capacitors connected in series, it is not always sufficient to ground only the high-voltage terminal. The exposed intermediate terminals should also be grounded. This applies in particular to impulse generators where the capacitors should be short-circuited and grounded before and while working on the generator.
Safe grounding of instrumentation should take precedence over proper signal grounding unless other special precautions have been taken to ensure personnel safety.
12.2.3 Control and measurement circuits
Leads should not be run from a test area unless they are contained in a grounded metallic sheath and terminated in a grounded metallic enclosure and other precautions have been taken to ensure personnel safety. Control wiring, meter connections and cables running to oscilloscopes fall into this category. Meters and other instruments with accessible terminals should normally be placed in a metal compartment with a viewing window.
Temporary measuring circuits should be located completely within the test area and viewed through the fence. Alternatively, the meters may be located outside the fence, provided the meters and leads, external to the area are enclosed in grounded metallic enclosures.
Temporary control circuits should be treated the same as measuring circuits and housed in a grounded box with all controls accessible to the operator at ground potential.
12.2.4 Grounding and shorting
The routing and connections of temporary wiring should be such that they are secure against accidental interruptions that may become hazardous to personnel or equipment.
Devices which rely on a solid or solid/liquid dielectric for insulation should preferably be grounded and short-circuited when not in use.
Any capacitive object which is not in use but may be in the influence of a DC electric field should have its exposed high-voltage terminal grounded. Failure to observe this precaution may result in a voltage induced in the capacitive object by the field.
Capacitive objects having a solid dielectric should be short-circuited after DC proof testing. If not, it may result in a buildup of voltage on the object due to dielectric absorption in the insulation. The short circuit should remain on the object until the dielectric absorption has dissipated or until the object has been reconnected to a circuit. It is good practice for all capacitive devices to remain short-circuited when not in use.
Any open circuited capacitive device should be short-circuited and grounded before being contacted by personnel.
12.2.5 Spacing
All objects at ground potential must be placed away from all exposed high voltage points at a minimum distance of one inch (25.4 mm) for every 7,500 volts, e.g. 50 kV requires a spacing of at least 6.7 inches (171 mm).
A creep age distance of at least one inch (25.4 mm) for every 7,500 volts for insulators placed in contact with high voltage points.
12.2.6 High-power testing
High-power testing involves a special type of high-voltage measurement in that the level of current is very high. Careful consideration should be given to safety precautions for high-power testing for this very reason. The explosive nature of the test specimen also brings about special concern relating to safety in the laboratory.
Protective eye and face equipment should be worn by all personnel conducting or observing a high-power test where there is a reasonable probability that eye or face injury can be prevented by such equipment. Typical eye and face hazards present in high-power test areas include intense light (including ultraviolet), sparks, and molten metal.
Safety glasses containing absorptive lenses should be worn by all personnel observing a high-power test even if electric arcing is not expected. Lenses should be impact-resistant and have shade numbers consistent with the ambient illumination level of the work area but yet capable of providing protection against hazardous radiation due to any inadvertent electric arcing.
Whenever electric arcs are to be directly observed, safety glasses containing filter lenses should be worn by all personnel observing the electric arc test.
12.2.7 General
All high-voltage generating equipment should have a single obvious control to switch the equipment off under emergency conditions.
All high-voltage generating equipment should have an indicator which signals that the high-voltage output is enabled.
All high-voltage generating equipment should have provisions for external connections (interlock) which, when open, cause the high-voltage source to be switched off. These connections may be used for external safety interlocks in barriers or for a foot or hand operated safety switch.
The design of any piece of high-voltage test equipment should include a failure analysis to determine if the failure of any part of the circuit or the specimen, to which it is connected, will create a hazardous situation for the operator. The major failure shall be construed to include the probability of failure of items that would be overstressed in the event of a major failure. The analysis may be limited to the effect of one major failure at a time, provided that the major failure is obvious to the operator.
12.3 Transformers
12.3.1 Visual and mechanical inspection
Inspect for physical damage and record, if any.
Ensure nameplate information meets latest one line diagram and record discrepancies, if any.
Verify proper operation of all auxiliary devices.
Check and ensure tightness of bolted joints as per manufacturer’s recommendations.
Ensure proper level of oil in tank and bushings.
Conduct mechanical tests of auxiliary devices like OLTC, etc.,
12.3.2 Electrical tests
Insulation resistance tests shall be conducted between windings and windings to ground. Recommended test voltages are
| 150 – 600 V Rating | 1000 V megger |
| 501 – 5000 V Rating | 2500 V megger |
| Above 5001 V | 5000 V megger |
Polarization index value (10 minutes IR to 1 minute IR) should be found and must exceed 1.5
Turns ratio test on all tap positions.
Measurement of power factor test values for bigger transformers generally above 10 MVA.
Oil Dielectric test results should comply with the following.
Dielectric breakdown voltage 35 kV minimum below 69 kV, and 30 kV minimum for 69 kV upwards.
Neutralization number 0.025 mg KOH/gm, maximum.
Interfacial tension 35 dynes/cm minimum.
Color 1.0 maximum.
Winding resistance values shall not exceed 1.0% for adjacent windings and comparable overall.
AC high voltage potential test not exceeding 75% of the factory test values.
12.3.3 Acceptance Criteria
Transformer field tests acceptance values
| Site Acceptance tests | Test criteria and Acceptable values |
| Oil Dielectric breakdown voltage test | Normally with disc or spherical electrodes having 2.5 m spacing – 30 k minimum acceptable voltage |
| Insulation Resistance test between windings and windings to earth | The IR values shall be as below. Oil filled: 100 Meg Ohm upto 600 V, 1000 Meg Ohm 5000 V and 5000 Mega Ohm beyond 5000 V. Dry Type: five times the above figures. |
| Ratio check at normal tap and other taps | Values should be within 0.5% of the calculated values, same as the factory tests. |
| Winding Resistance | Cross check for conformance with factory tests. Changes require thorough investigation. |
| Pressure test if transformer is supplied with inert gas. | At least 6 pounds pressure for 12 hours minimum and check for any leaks using soap solution around seals and gaskets. |
| Power factor (DDF) test for above 15 kV windings rated above 10 MVA | Ensure the values are below 0.5% |
| Oil sample test | In an approved laboratory and ensure the test values are within acceptable figures given earlier. |
| Accessories test | Ensure proper operation of all accessories, relays, pressure relief device, gauges, etc. |
12.4 Switchgear
12.4.1 Visual and mechanical inspection
Verify missing parts or damaged parts
Check all components as per approved drawings
Check and ensure tightness of bolted joints as per manufacturer’s recommendations
Inspect and ensure proper anchorage and grounding
Checking of breaker alignment
Proper operation of safety shutter
Mechanical ON/OFF Operation verification
12.4.2 Electrical tests
Contact resistance check by ducter
Insulation resistance of main bus with appropriate tester (1 kV or 2.5 kV or 5 kV)
Insulation resistance test on PT & control power transformers
Insulation resistance test on breakers phase-to-phase, phase-to-ground and across open contacts
Hi-pot test on vacuum bottles to check integrity across open contacts
Calibration of all relays by primary and secondary injection as appropriate
Electrical ON/OFF operation with auxiliary AC/DC supply.
Tripping checks on set values of the protective relays at minimum voltages
Check for continuity and correct operation of all remote wiring
Insulation resistance check of control wiring
12.4.3 Acceptance criteria
Normal value shall be around 500 micro ohms with breakers in closed position and shall generally be provided by manufacturers.
Over potential and DC high-pot test values shall be as per tables given in chapters 2 and 3.
12.5 High voltage disconnectors
12.5.1 Visual and mechanical checks
General inspection and verification of nameplate ratings
Mechanical ON/OFF operation both manual and motor, if provided.
Blade alignment and contact separation verification
Mechanical key interlocks and their functions.
12.5.2 Electrical checks
Insulation resistance test between phase-to-phase and phase-to-ground using a suitable tester, based on the equipment’s rating
DC over potential test pole to pole and pole to ground
Contact resistance across each switch blade with ducter.
12.5.3 Test values
Over potential values shall meet the table values as per equipment ratings. Generally tests are limited to around 75% of he values given in standards to minimize damages.
Contact resistance values shall be limited to around 50 micro ohms and differences of more than 50% with respect to the adjacent contact values shall be investigated and corrected.
12.6 MV cables
12.6.1 Visual and mechanical inspection
Inspect exposed parts for mechanical damages, if any
Ensure that sizes are proper matching the loads
Inspect for proper supports, shield groundings and proper termination and bolted connections
Ensure bending radii are meeting the recommended values.
12.6.2 Electrical tests
The first test is the DC high-pot test for each conductor with appropriate test voltages based on the system voltages and insulation. This shall be done in incremental values to about 8 steps from zero and record the leakage currents at each incremental voltage. The test at required voltage shall be for 10 minutes. Take the readings of leakage currents during the incremental voltage steps (one every minute or 30 seconds) and the same during the last 10 minutes with the test voltage. The voltages shall then be brought to zero slowly and the voltage held up in the tested terminals shall be discharged to ground.
IR test values for MV cables
| Rated Line voltage Volts | Conductor size AWG | 100% insulation level | 133% insulation level |
| 2001–5000 | 8–1000 | 25 | 25 |
| 5001–8000 | 6–1000 | 35 | 35 |
| 8001–15000 | 2–1000 | 55 | 65 |
| 15001–25000 | 1–1000 | 80 | 100 |
| 25001–35000 | 1/0–1000 | 100 | N.A. |
Insulation resistance test phase to phase and phase to ground with appropriate instrument
12.6.3 Acceptance criteria
The variation in leakage currents shall be linear and proportionate to the incremental voltages.
The slope shall be negative.
Maximum leakage current shall preferably be restricted to about
The IR values shall be not less than 250 megohms
12.7 MV bus ducts
12.7.1 Visual and mechanical inspection
Inspect the bus for physical damage, if any and ratings in line with approved drawings and nameplate data
Bus bar material and hardware as per design data
Proper Bracing, Insulator supports, suspension alignment and grounding connection
Tightness of bolts in line with the manufacturer’s recommendations
12.7.2 Electrical tests
Insulation resistance test phase to phase and phase to ground with appropriate instrument
DC Hi-pot test on each phase to phase and phase to ground.
12.7.3 Acceptance criteria
Bus tightening values shall be proper with correct torque wrench
IR values in line with the table below
Over potential tests withstood for appropriate voltages based on system rated voltage
Hi-pot test values for bus ducts
| Rated Voltage | AC Voltage | DC Voltage |
| 5 | 14.3 | 20.2 |
| 15 | 27 | 37.5 |
| 25 | 45 | — |
| 35 | 60 | — |
12.8 Instrument transformers
12.8.1 Visual and mechanical inspection
Inspection and verification on physical damages, if any and compliance with approved drawings
Mechanical clearances and proper operation of disconnecting switches for potential transformers
Proper grounding and CT shorting links.
12.8.2 Electrical tests
Polarity verification as per connections
Transformer ratio in case of voltage transformers
Insulation resistance test on secondary to ground with 500 V instrument
Optional – saturation curve and burden test on secondary side
Transformer ratio
Secondary LV injection tests on VT with primary disconnected
12.8.3 Acceptance criteria
Polarity shall meet the requirements as per connections. If not, correct the connections.
The ratio shall be within tolerance as per approved test reports.
The IR values shall be around 100 mega ohms.
12.9 Rotating machinery
12.9.1 Visual and mechanical inspection
Inspection for physical damage, if any
Nameplate information meeting the requirements and load data
Proper anchoring, mounting and grounding connections
12.9.2 Electrical tests
Dielectric absorption test
Polarization index test
Insulation resistance phase to ground
No load and full load currents measurements
Vibration tests on bearings with portable devices
Over potential test winding to ground based on the system voltage 80% of the factory test value plus 1000 volts.
12.9.3 Acceptance criteria
Polarization index of less than 3 shall be investigated for correction.
Full load current shall not exceed the nameplate value.
No issues in over-potential and IR tests.
Maximum vibration altitudes shall be less than specified values. Generally less than 0.001 inch peak to peak for two pole, 0.002 inch for four pole, 0.0025 inch for six pole and 0.003 for higher pole motors.
12.10 Surge arresters
12.10.1 Visual and mechanical inspection
Inspect for physical damages, chipped or broken porcelain
Nameplate information meeting the system requirements
Grounding connections proper
12.10.2 Electrical tests
Spark over test
RIV test
Power factor test (optional)
Ground continuity test
12.10.3 Acceptance criteria
Spark over voltage must be between 1.5 to 2.0 times the rating.
No RIV below the rated voltage.
Power factor test values not much differing from test certificates.
Ground grid resistance les than 0.5 ohm.
12.11 Outdoor bus structures
12.11.1 Visual and mechanical inspection
Arrangements in line with the plans
Verify supports are intact with no cracks, chipped porcelain, etc
Tightness of bus bar bolts by torques wrench
12.11.2 Electrical tests
IR test on each section phase to phase and phase to ground
Over potential test phase to phase and phase to ground
Bus section joints contact resistance measurements
12.11.3 Acceptance criteria
Bolt torque values as per manufacturer’s recommendation
IR and over potential results are satisfactory
Measured resistance not above 115% of calculates value or the earlier test results. Investigate and correct if it is more.
12.12 Engine generators
12.12.1 Visual and mechanical inspection
Inspect for physical damages, if any.
Nameplate rating meeting the requirements
Proper anchorage, support and grounding.
12.12.2 Electrical tests
Dielectric absorption test winding to ground and polarization index measurement
Engine shutdown protection checks
Resistive load bank test at 100% rated capacity not less than 30 minutes at 25%, 50% and 75% loads in steps and for 3 hours at 100% load. Record all electrical parameters and vibration readings at coupling and bearings.
Over potential test phase to ground.
12.12.3 Acceptance criteria
Polarization index less than 3 requires investigation and correction.
Load test figures shall meet the manufacturer’s figures.
Vibration amplitudes shall be less than the factory test values.
12.12.4 Maintenance tests
International Electrical Testing Association Inc (NETA) recommends the following table to be followed for deciding the periodicity of the above field tests as periodical maintenance tests. The next table has values that decide the periodicity in months. This is only for guidance and the actual user should justify the periods based on the actual load conditions and environmental factors.
12.12.5 Multiplication factors
The table called maintenance matrix table gives the multiplication factor to be applied for the period provided in the next clause based on equipment conditions which may depend on the usage and environmental factors. These have to be decided by the user and the table serves as a mere guide. The periodicity also depends upon the criticality of the equipment for satisfactory running of the total plant. High critical equipment may require three to four times the periodicity needed for a low critical item. Similarly the poor condition of the equipment due to local factors may require roughly three times more maintenance inspection/tests compared to equipment in good condition.
NETA matrix table
| Equipment Reliability Requirement |
EQUIPMENT CONDITION | ||
| POOR | AVERAGE | GOOD | |
| LOW | 1.0 | 2.0 | 2.5 |
| MEDIUM | 0.5 | 1.0 | 1.5 |
| HIGH | 0.25 | 0.50 | 0.75 |
12.12.6 Recommended schedule
The values given in the following table shall be multiplied with the factors given in the above table to arrive at the actual schedule in months for various equipments.
Inspection and testing frequency (in months)
| ITEM DESCRIPTION | Visual | Visual and Mechanical | Visual, Electrical and Mechanical |
| Switchgear Panels | 12 | 12 | 24 |
| Small Dry type transformers | 2 | 12 | 36 |
| Large Dry type transformers | 1 | 12 | 24 |
| Oil filled transformers | 1 | 12 | 24 |
| Oil sampling | — | — | 12 |
| LV/MV/HV Cables | 2 | 12 | 36 |
| MV Bus ducts | 2 | 12 | 24 |
| MV/HV open switches | 1 | 12 | 24 |
| MV Vacuum/ SF6 Breakers | 1 | 12 | 24 |
| HV SF6 Breakers | 1 | 12 | 12 |
| AC/DC Motors | 1 | 12 | 24 |
| AC/DC Generators | 1 | 12 | 24 |
| MV Motor control centers | 2 | 12 | 24 |
| Surge Arresters | 2 | 12 | 24 |
| Capacitors | 1 | 12 | 12 |
| Dry type reactors | 2 | 12 | 24 |
| Outdoor Bus structures | 1 | 12 | 36 |
| Engine Generators | 1 | 2 | 12 |
13
Testing of Transformers
13.1 General
There are a number of regional standards that define the functional and testing requirements for power and distribution transformers. Universally the transformer principle is the same comprising two or three windings (mostly 2) with magnetic core and enclosure tank. For example some of the main standards available for transformers under IEC are as below:
- IEC-60076 Power Transformer
- IEC-60296 Specification for Unused Mineral Insulating Oils for Transformer & Switchgear
- IEC-60137 Insulating Bushing for Alternating Voltage above 1000 V
- IEC-60354 Loading Guide for Oil Immersed Power Transformer
- IEC-60364 Specification for Gas Operated Relays
- IEC-156 Method for the Determination of the Electric Strength of Insulating Oils
Some of the British standards for transformers are as below.
- BS 7806: Dry-type power transformers
- BS 7821-4 parts: Three phase oil-immersed distribution transformers, 50 Hz, from 50 to 2500 kVA with highest voltage for equipment not exceeding 36 kV
- BS 7844-2 parts: Three-phase dry-type distribution transformers 50 Hz, from 100 to 2500 kVA with highest voltage for equipment not exceeding 36 kV.
- In North America following IEEE/ ANSI standards are generally adopted.
- IEEE C57.12.00 – Standard General Requirements for Liquid-Immersed Distribution, Power, and Regulating Transformers
- IEEE C57.12.01 – Standard General Requirements for Dry-Type Distribution and Power Transformers
- ANSI C57.12.22 – Requirements for Pad-Mounted, Compartmental-Type, Self-Cooled, Three-Phase Distribution Transformers with High Voltage Bushings; 2,500 kVA and Smaller: High Voltage, 34,500 GrdY/19,920 Volts and Below; Low Voltage, 480 Volts and Below Requirements.
- ANSI C57.12.26 – Standard for Transformers – Pad-Mounted, Compartmental-Type, Self-Cooled, Three-Phase Distribution Transformers for use with Separable Insulated High Voltage Connectors: High Voltage, 34,500 GrdY/19,920 Volts and Below; 2,500 kVA and Smaller.
- ANSI C57.12.28 – Switchgear and Transformers, Pad-Mounted Equipment – Enclosure Integrity
- ANSI C57.12.50 – Requirements for Ventilated Dry-Type Distribution Transformers, 1–500 kVA Single-Phase and 15–500 kVA Three-Phase, with High Voltage 601–34,500 Volts, Low Voltage 120–600 Volts.
- IEEE C57.12.51 – Requirements for Ventilated Dry-Type Power Transformers, 501 kVA and Larger Three-Phase, with High Voltage 601-34,500 Volts, Low Voltage 208Y/120–4,160 Volts
- IEEE C57.12.90 – Standard Test Code for Liquid-Immersed Distribution Power, and Regulating Transformers and Guide for Short-Circuit Testing of Distribution and Power Transformers (ANSI).
- IEEE C57.12.91 – Test Code for Dry-Type Distribution and Power Transformers
- ASTM D877 – Test Method for Dielectric Breakdown Voltage of Insulating Liquids Using Disk Electrodes.
These standards not just define the standard construction requirements but indicate the acceptance criterion for a transformer before putting it in service. The standards mainly relate to the testing of transformers at the manufacturer’s works or in an approved laboratory. This is done to ensure that they meet the specific needs of an application.
The tests are broadly classified as:
- Routine tests
- Type tests
- Special tests
Further, like any standard electrical equipment, transformers are tested on-site before commissioning, which may be classified as
- Pre-commissioning tests
- Periodical maintenance tests
This chapter briefly covers the requirements laid down by international standards and best practices followed in industry for transformers before accepting for an application (routine and type tests) and before putting into service (Pre-commissioning tests). Maintenance related tests are covered in a separate chapter.
13.2 Routine tests
The quality of transformers depends on successfully verifying the performance of components that go into it.
A manufacturer is expected to ensure that the following checks and tests are conducted before/during assembly.
- Quality checks and tests on all bought-out components/parts like laminations, conductors, protection devices, oil, insulation materials, bushings, etc
- Tests on individual items like tanks, windings, control panels, etc, being built at the works
The above test reports do not normally form a part of completed transformers. But in the interest of quality, it is necessary to ensure that the manufacturer is in possession of all pertinent records.
Once the transformer is fully assembled, the following routine tests are recommended. These tests are to be normally carried out in the presence of the customer at a manufacturer’s works. Hence it is expected that the manufacturer’s factory includes a well-equipped testing division.
- Visual inspection
- Measurement of winding resistance
- Measurement of voltage/turns ratio
- Verification of polarity and vector group
- Measurement of impedance voltage and load losses
- Measurement of no load losses and no load current
- Measurement of insulation resistance
- Power frequency voltage withstand test
- Induced voltage withstand test
- RIV Corona voltage test (above 132 kV)
- Partial discharge measurements (300 kV and above)Lightning impulse test (above 132 kV)
- Switching impulse voltage withstand test (above 132 kV)
- Tests on OLTC
13.3 Guarantees and tolerances
The test results are always subjected to ambient conditions and some of the figures are allowed with tolerances considering the intricacies involved in manufacture, use of different materials, etc. Following results are based on tolerances as applicable.
| No load Losses | 10% |
| Full load losses | 10% |
| Combined losses | 10% |
| Impedance Value | 10% |
| Turns Ratio | Not above 0.5% of voltage ratio |
The temperature rise figures are normally guaranteed at an ambient of 40ºC unless other values are specified by the user. The resistance figures are normally referred at 75ºC.
13.4 Visual inspection
The visual inspection is not only to check the finish of the equipment but also to cover the following issues:
- Verification of dimensions. Critical dimensions like foundation rails, bus-duct termination level, etc, shall be as per approved drawings (for smooth and fast installation)
- Provision of all accessories as per the bill of materials and specifications, including the check on ratings of various auxiliary devices (like sudden pressure relay, etc), which need an external source for operation. To assist in achieving undisputed test results, these accessories shall be assembled at the works during testing
- Incorporation of all necessary particulars in the nameplate with serial number, etc, matching with duty requirements.
13.5 Winding resistance measurements
The purpose of this test is to establish the copper losses which are basically I2R losses in the winding varying with load. Measurement of winding resistance is done across the terminals through balanced bridge (Wheatstone Bridge or Kelvin Bridge) configurations. Sufficient time should be given to ensure that the resistance reaches a steady state value, which happens once the core saturates with a DC voltage. The time taken may be longer if the winding inductance is high. Also it is to be ensured that the windings are not unduly hot when resistance measurements are taken.
It should be noted that three-phase transformers have the terminals connected in Star or Delta and accordingly the measurements will give net parallel resistance values depending on the configuration. For example with A, B, C, N as terminals and connected in Star, the resistance across A-B will give the total resistances of AN and BN. In Delta connections two windings will be in series and parallel to the third winding across which the measurement is taken. The main point is to ensure that the values are uniform and the copper losses are within the guaranteed figures. The readings shall be taken across the two terminals of the transformer to check uniformity. In case there is discrepancy noted, it could be due to some open winding or loose connections, which should be thoroughly checked and rectified.
13.6 Turns ratio measurement
The measurement of turn’s ratio is done by applying nominal voltage across the terminals of the primary winding and measuring the open circuit secondary voltage across its terminals. The expectation is that the turn’s ratio should be the same as the voltage ratio. The ratio is measured between the primary winding to the full secondary end with tap position at 0 and also by changing to the other taps of the primary winding (which are available outside for external connections). The acceptance criterion is that the turn’s ratio should have a tolerance not exceeding 0.5% of the required voltage ratio. Generally 380/415/480 V 3-phase supply which is commonly available is applied to the HV windings of the transformer for this purpose (in case of three-phase transformers, and may be lesser voltage for single-phase ones).
A transformer turns ratio instrument with leads is shown in Figure 13.1.

Transformer ratio checking instrument
13.7 Polarity and vector group check
Polarity and vector group verification is another important test required to ensure that the secondary voltage displacements are as per specifications so that the connected protective devices operate correctly. Figure 13.2 illustrates the testing connections and the method to determine the polarity of a transformer.
The connections basically require interconnecting the phase terminals of primary and secondary windings, applying voltage to one set of winding and measuring the voltage across the various terminals caused by the induction phenomenon. As is evident from the diagrams, if the voltage measured across A1–A2 is less than the voltage measured across A1–a2 then the polarity is said to be subtractive, and if it is greater, then the polarity is additive.

Test connections for determining single-phase transformer winding polarity
Figure 13.3 illustrates the test connections for a three-phase star-star connected transformer with subtractive polarity and the result verifies that the vector group matches with the requirement.
The voltage measured across C2–A2 and C2–B2 must be equal and shall be more than the measurements between C2–c2 and B2–b2. Further the voltage across C2–b2 must be more than C2–c2 and similar result is to be checked between B2–c2 and B2–b2.

Test connections for determining three-phase transformer winding polarity
13.8 Impedance voltage and load losses
The load losses in a transformer basically comprise of I2R losses in the windings and stray losses due to eddy currents in conductors, clamps and the tank. Since stray loss is frequency dependent, the test frequency should be the rated frequency. Normally the guaranteed figures are for an operating temperature of 75ºC. Corrections will be applied to the losses measured at ambient temperature in the works.
The principle is that the impedance voltage is to be applied to the primary to get the full rated current to flow in the short circuited secondary winding. Though the standards do not say that 100% secondary current is to be flown, it is recommended to get not less than 50% of rated secondary current during this test by applying a reduced voltage on the HV winding. Then,

Since the power factor during these measurements could be very low (less than 0.1), watt meters suitable for such low power factors should be considered. Further, the three watt meter method is preferred when compared to two watt meter method (to avoid a large multiplication constant).
13.9 No load losses and current measurement
The no load test not only establishes the no load losses but also indicates the soundness of insulation after HV tests. Hence normally no load losses are taken before and after the HV tests to ensure that the windings did not suffer any damage due to HV tests.
No load test is conducted by feeding the voltage to the LV winding at the rated frequency. The core loss consists of eddy current losses and hysteresis losses. The eddy current value is dependent on the rms value of supply voltage while hysteresis loss depends on the average value of voltage. Two voltmeters are used with a bridge rectifier to indicate the average value and a dynamometer type to indicate rms value. The actual losses P is given by:

Where, Pm is the measured no load loss
P1 being the fraction of hysteresis loss to the total iron loss
(0.5 for grain oriented steel and 0.7 for non-grain oriented steel)
P2 being the fraction of eddy current loss to the total iron loss
(0.5 for grain oriented steel and 0.3 for non-grain oriented steel)

13.10 Insulation resistance tests
These tests are carried out between phases-to-ground, neutral-to-ground, primary-to-secondary with 500 V/ 1000 V/ 2000 V/ 5000 V meggers depending upon the voltage ratings. The insulation resistance values shall be in hundreds of mega ohms to ensure proper insulation. These tests are conducted before and after high voltage tests to ensure integrity of the insulation after HV tests.
Though there is no standard value for these insulation resistance values, based on experience and temperature conditions some standard acceptable values are applied to verify the soundness of the insulation. If the test results give reduced values, it is preferable to take up some improvement methods like drying out, etc, before the transformer is accepted. Table 13.1 gives typical acceptable values.
IR values for transformers
| Rated Voltage kV | Safe IR values in Mega ohms at applicable ambient temperatures | |||
| 30º C | 40º C | 50º C | 60º C | |
| 66 kV and above | 600 | 300 | 150 | 75 |
| 22 / 33 kV | 500 | 250 | 125 | 65 |
| 6.6/11 kV | 400 | 200 | 100 | 50 |
| Below 6.6 kV | 200 | 100 | 50 | 25 |
13.11 Dielectric tests
The following dielectric tests are conducted on the transformers.
- Applied voltage or Dry power frequency withstand voltage
- Induced potential test
Normally, the above dielectric tests should be conducted after the lightning impulse and switching impulse tests, if they are applicable (for EHV windings) or if the customer’s specifications demand these impulse tests. Otherwise they can be conducted as a routine test.
The power frequency voltage is normally applied for one minute, where its magnitude is almost 2 times the standard voltage and depending upon the grounding method, applied to the neutral. The line terminals of the windings under test are connected together and test voltage is applied to these terminals with the other windings and tank connected to the ground. The application of test voltage is for one minute.
The power frequency withstands voltage values applicable are given in Table 13.2 and are based on the system voltage. Standard 1 values refer to effectively (solidly) earthed applications and standard 2 values are for non-effectively earthed systems.
Dry power frequency voltages
| Operating Voltage (KV) | Highest System Voltage (KV) | Power Frequency withstand Voltage KV rms | |
| Std 1 | Std 2 | ||
| 3.3 | 3.6 | 16 | 16 |
| 6.6 | 7.2 | 22 | 22 |
| 11 | 12 | 28 | 28 |
| 15.75 | 17.5 | 38 | 38 |
| 22 | 24 | 40 | 50 |
| 33 | 36 | 70 | 70 |
| 66 | 72.5 | 140 | 140 |
| 110 | 123 | 230 | 185 |
| 132 | 145 | 275 | 230 |
| 220 | 245 | 460 | 395 |
The induced potential voltage test is basically to check the inter turn insulation and the main insulation between the windings and ground. The test voltage is twice the rated voltage of the winding with uniformly insulated windings. For graded insulation windings (generally adopted for 66 kV and above) the test voltage is about 1.5 times the nameplate voltage. For higher voltages it is usual to raise each V terminal in turn by applying single phase voltage to the LV winding. The neutral terminal may be raised to a higher potential to get at least twice the normal voltage per turn of the tested winding. The duration is 60 seconds for up to twice the rated frequency. However in order to avoid core saturation, the test frequency is chosen at higher value of around 150 to 240 Hz with the time of application reduced suitably as below.

The value of K may be 100 or 120 depending on whether it is a 50 Hz or 60 Hz rated transformer (with a minimum duration of 15 seconds).
13.12 RIV corona measurements
For transformers rated above 132 kV, the RIV corona voltage measurements are taken by applying the potential for one-hour. A rating of 1.7 times the normal voltage is applied for 2 minutes and then reduced to 1.5 times and maintained for one hour. Radio Interference Voltages (RIV) is measured 5 minutes after the voltage is reduced to 1.5 times. The readings are taken at 5 minute intervals during this one hour. The RIV readings at any moment in time and at any terminal shall not exceed 100 μV with readings not differing by more that 20 μV. If the values/differences are exceeding these values, the tests should be repeated until the transformer can match these figures.
13.13 Partial discharge measurements
For voltage ratings 220 kV and above, the partial discharge measurements are also taken during this one-hour test. The partial discharge test is basically to check the possible discharges in cavities of the solid insulation and in gas bubbles in the liquid insulation or along the dielectric surfaces. Partial discharge can result due to the following conditions.
- Improper insulation drying/process
- High stress areas caused by sharp edges in the conductors
This test requires special circuits to measure partial discharges while applying a higher voltage for a considerable duration. Typically the transformer phase and neutral is applied 1.3 times the rated phase to neutral voltage value for 5 minutes and raised to 1.5 times the rated phase to neutral voltage value for 5 seconds and again continuing with 1.3 times the voltage for 30 minutes. During this entire sequence the partial discharge should not exceed 300 pC at 1.3 times voltage and should be within 500 pC during the short 5 seconds while applying 1.5 times the voltage. These tests are normally carried out for power plant and EHV transformers rated 220 kV and above. In practice however customers require this test at much lower voltages and the new standards revision currently being debated is expected to reflect that.
13.14 Impulse tests
The lightning impulse voltage magnitudes are shown in Table 13.3 and normally conducted on EHV transformers as routine tests. The duration of the impulse is 1.2/50 μsec. One application of a reduced voltage (50 to 70% of the table values) is done after which two lightning impulses of the applicable values are applied to the terminal of the transformer.
Typical lightning impulse test voltage levels for transformer windings
| Operating Voltage (kV) | Highest System Voltage (kV) | Lightning Impulse Test Voltage kV peak | |
| Std 1 | Std 2 | ||
| 3.3 | 3.6 | 45 | 45 |
| 6.6 | 7.2 | 60 | 60 |
| 11 | 12 | 75 | 75 |
| 15.75 | 17.5 | 95 | 95 |
| 22 | 24 | 125 | 125 |
| 33 | 36 | 170 | 170 |
| 66 | 72.5 | 325 | 325 |
| 110 | 123 | 550 | 450 |
| 132 | 145 | 650 | 550 |
| 220 | 245 | 1050 | 900 |
Note:
Std 1: Non-effectively earthed systems (Resistance/Reactance grounding)
Std 2: Effectively earthed system (Solid grounding)
As a special test, chopped wave tests are often prescribed, aimed to simulate spark gaps and external flashovers across the porcelains. Dependent on the applicable standard, the value of chopped waves is 100 to 110% of the full wave values. The wave shape is similar except that the voltage is collapsed to zero after 2–8 µ seconds. The standard sequence for chopped impulse application is
- One reduced full impulse
- One 100% full impulse
- One reduced chopped impulse
- Two 100% chopped impulses
- Two 100% full impulses
The switching impulse test is similar to the lightning impulse test with one reduced full wave (75%) and two full waves of the rated impulse magnitude.
13.15 Tests on OLTC
The tests on OLTC normally consist of checking the proper operation of motors, the sequence of tap changing, manual controls, etc.
13.16 Type tests
The following are type tests which are optional and carried out on units if the client specifies the same. Normally these are conducted at additional cost.
- Temperature rise test
- Lightning impulse test (for below 132 kV)
- Switching impulse test (for below 132 kV)
- Partial Discharge test (for below 300 kV)
The temperature rise test basically comprises of allowing a full current load to be passed through the windings until the thermometer readings reach steady state values. The source is normally a low voltage, high current one. After the steady state temperature is reached the transformer will start cooling thereby changing the winding resistance value. The change in resistance value is taken to find the thermal constant of the transformer windings and to interpolate the rise in winding temperature.
The normal duration of a temperature rise test may be about 10 hours and increasing to one day for large capacity transformers. Though this is a type test, the temperature rise within the agreed limits will give a clear condition of the transformer under service conditions.
Different cooling modes are normally tested separately. On large or important transformers a test at up to 1.5 times continuous maximum rating is often specified and is then carried out for a period of some 2–10 hours to prove compliance with AS/IEC. This is done subject to a maximum hot-spot temperature of 120–1400ºC and the performance checked by analyzing the oil for dissolved gases (DGA) afterwards.
13.17 Special tests
Special tests are normally carried out only if required for checking performance. The following special tests are carried out if specified in the contract.
- Measurement of zero sequence impedance
- Short circuit test
- Sound level measurements
- Measurement of harmonics at no load
- Measurement of auxiliary power by fans and pumps
13.17.1 Measurement of zero sequence impedance
This test is carried out for star connected transformers with earthed neutral to determine the fault current value during phase-to-earth faults. The type of core (whether 5 limb or 3 limb) also has an effect on the value, since the reluctance paths are different in the two types. A five limb construction may have above 90% to 100% value of positive sequence impedance as zero sequence impedance, while a 3 limb construction value could be 80 to 90% of the positive sequence impedance.
The three terminals of the star winding are connected and a voltage is applied between these terminals to neutral with the Delta winding left floating. Zero sequence impedance value in ohms is equal to three times V/I where V is the single phase voltage applied and I being the resultant current.
13.17.2 Short circuit test
The short circuit test is normally a destructive test and to be carried out on an identically designed transformer. The transformer should pass all the routine tests before being taken up for the short circuit test. The symmetrical short circuit is calculated using the measured impedance value plus the system impedance.
This test requires three shots on each phase at each tap, which means 9 shots are required for three phase transformers with shots at normal tap, minimum tap and maximum tap. The transformer is supposed to have passed the test if,
- No faults result internally during the tests
- Dielectric tests are successfully repeated
- No visual defects on windings, supports and tank structure are seen
- No traces of electric discharges noticed
- Reactance measurements after the tests are within 2% of the actual value after each shot for category 1 and within 1% for category 3 and the category 2 transformer reactance within a variation between 1% and 2%. (Refer 6.5 for categories per IEC)
13.17.3 Other special tests
The noise level is an environmental issue and is necessary where transformer noise may become objectionable. The loss measurements for auxiliary pumps and fans depend upon the cooling method used for the transformers.
13.18 Tests on bushings
Though the transformer bushings are tested at the sub vendor’s works some of the tests may be repeated to check integrity. Normally bushing tests are repeated for EHV bushings that are condenser types.
Bushings are a critical part of the electrical system that transform and switch AC voltages ranging from a few hundred volts to several thousand volts. Bushings not only handle high electrical stress, they could be subjected to mechanical stresses, affiliated with connectors and bus support, as well. Power factor test or Tan δ test is basically carried out to check the deterioration and contamination of bushings. The voltage is applied in steps up to the rated voltage and capacitance and tan delta values are recorded for each voltage (using a Schering Bridge). Increase in capacitance and tan delta values over a period of time indicates the deterioration of the bushing.
The following are the important factors measured to decide the condition of a bushing.
- C1 Capacitance (of bushing) – this is the capacitance between the high-voltage conductor and the voltage tap or test tap.
- C2 (Tap capacitance of a capacitance graded bushing) – this is the capacitance between the voltage tap and mounting flange (ground).
Modern condenser bushings are usually equipped with test taps. Bushings rated 115 kV and above usually have voltage taps. Bushings rated below 115 kV have test taps. The availability of either a voltage tap or a test tap allows for the testing of the main insulation C1. The test tap is normally designed to withstand only about 500 volts while a voltage tap may have a normal rating of 2.5 to 5 kV. Before applying a test voltage to the tap, the maximum safe test voltage must be known and observed. Any excessive voltage may puncture the insulation and render the tap useless. If absolutely no information is available on the tap test voltage, 500 volts is the maximum test voltage recommended.
13.18.1 Main insulation (C1) test connections
- Ground points of the test set and the apparatus of the bushing under test are interconnected by ground wire.
- The HV lead from the test set to be connected to the center conductor of the bushing. If the bushing under test is in a transformer, all the bushings of the same winding shall be jumpered. The bushings of other windings should be grouped and connected to ground. The bare connector on the HV lead should extend away from the bushing under test to avoid contact with the bushing porcelain. The HV lead may be supported by another bushing or an individual wearing rubber gloves suitable for the voltage rating. The LV lead from the test set to be connected to the test tap.
- The tap housing may contain a small amount of oil or compound. Care must be taken when removing the screw cap to catch the oil. The oil is to be replaced after testing is completed.
13.18.2 Test procedure
- Power factor testing is extremely sensitive to weather conditions. Tests should be conducted in favorable conditions whenever possible.
- The main insulation test is normally performed at 10 kV in the UST test mode. If 10 kV exceeds the rating of the bushing, test at or slightly below the voltage rating.
- Actual test voltage, current, Watts, power factor and capacitance as well as ambient temperature, relative humidity, etc shall be recorded. The power factor readings shall be corrected to 20ºC.
13.18.3 Test results and inference
| General guidelines on PF values recorded are as below. Between nameplate pf and up to twice nameplate pf |
Bushing is acceptable |
| > Twice nameplate pf and < 3 times Nameplate pf | Monitor bushing closely |
| Above 3 times nameplate pf | Replace the bushing |
| General guidelines for capacitance data are as below. | |
| Nameplate capacitance ±5% | Bushing acceptable |
| Nameplate capacitance ±5% to ±10% | Monitor bushing closely |
| Nameplate capacitance ±10% or greater | Replace bushing |
Changes in C1 testing are usually contamination issues caused by moisture ingress, oil contamination or breakdown and short-circuited condenser layers.
The C2 tests are similar to the above but the test voltage is to be limited as earlier indicated.
13.18.4 Hot collar test
For bushings not equipped with a test tap or a voltage tap, the only possibility is to conduct the hot collar test. The test provides a measurement of the losses in the section directly beneath the collar and is especially effective in detecting conditions such as voids in compound filled bushings or moisture penetration – since the insulation can be subjected to a higher voltage gradient than can be obtained with normal bushing tests. This method is also useful in detecting faults within condenser layers in condenser-type bushings and in checking the oil level of oil-filled bushings after a pattern of readings for a normal bushing has been established.
13.18.5 Test connections
- Ground points of the test set and the apparatus of the bushing under test should be interconnected by ground wire.
- The collar should be installed just under the top petticoat of the bushing under test and should be drawn tight around the bushing for good contact.
- The HV lead from the test set should be connected to the collar. The high voltage cable should extend away from the bushing at 90º and should not rest against the porcelain.
- The center conductor of the bushing should be grounded.
13.18.6 Test procedure
- The collar should be energized at 10 kV. If 10 kV exceeds the rating of the bushing, slightly below the rating of the bushing should be applied.
- Actual test voltage, current, and Watts are recorded. Power and dissipation factor data is not recorded. Current and Watts should be corrected to a standard test voltage such as 2.5 kV or 10 kV as necessary.
- Ambient temperature and relative humidity at the time of the test should be recorded.
13.18.7 Test results
General guidelines for evaluating the hot collar data are as follows:
- Watts-loss values less than 100 mw – bushing acceptable
- Watts-loss values of 100 mw or more – bushing unacceptable (contamination)
- Current values within 10% of similar bushings – bushing acceptable
- Current values less than 10% of similar bushings – bushing unacceptable (low level of liquid or compound)
If Watt-loss values are in the unacceptable range, cleaning may be necessary on the exposed insulation surface of the bushing. Effects of surface leakage can be substantially minimized by cleaning and drying the porcelain surface and applying a very thin coat of Dow Corning #4 insulating grease (or equal) to the entire porcelain surface.
13.18.8 Other tests on bushings
The RIV test is done basically to determine the corona discharges in bushings at the rated operating voltage (which lowers its performance and life). Oil type bushings are normally tested for moisture content similar to other transformers.
The other tests include power frequency voltage withstand test, switching impulse tests, partial discharge test, etc., to test the integrity of the bushings.
14
Transformers
In this section, we will learn about testing and maintenance of power and distribution transformers, which form one of the key assets in any power distribution system. We will discuss about the their installation, operation and troubleshooting requirements and testing procedures.
Learning objectives
- Installation features
- Transformer protection
- Fire safety
- Troubleshooting
- Oil testing of transformers
- Other mandatory tests
14.1 Installation of transformers
Transformers may be located indoor or outdoor. The choice is dependent on the size, space requirements, etc. Locating indoor is more common in commercial establishments, though it does not mean industries do not have indoor transformers. Indoor transformers are recommended in commercial establishments like multi-storey buildings, shopping malls, hotels, etc considering space constraints and number of common users/ outside visitors in such establishments. However in an industrial atmosphere the substations can be properly laid out to prevent access by unauthorized personnel. Cost considerations also play a role in choosing outdoor transformer installations in most of the industrial units as this avoids the cost of the building or enclosure required for an indoor location.
In locating a transformer indoors, decisions on the following are essential:
- Oil draining facilities
- Containment during oil drain
- Requirement of forced ventilation
- Approach
- Removal facilities, when required.
It is quite uncommon to have high capacity transformers mounted indoors mainly because of the space limitation, fire hazard conditions, maintainability, etc. Also the transformers with HV bushings of the order of 66 kV and above are mounted outdoor because of the simplicity in bringing the conductors by overhead lines. The insulated cable connections at these voltages are uneconomical, non-feasible and also pose a lot of limitations in routing large sized cables. Hence it can be presumed that a transformer is normally mounted outdoor if it is having EHV bushings, unless special requirements demand otherwise.
14.1.1 Ventilation
Once it is decided to have transformers indoors, whether oil filled or dry type, then adequate ventilation and physical isolation is required. Physical isolation is mainly for oil-filled ones but ventilation is a main requirement for all types of indoor transformers.
The main issue with ventilation is insufficient or non-availability of free air to cool the transformer. Hence, transformer windings reach their maximum permissible temperatures with loads as low as 50%. It is recommended that the transformer room is provided with open doors/ shutters and ventilation fans to enforce forced cooling, if the layout does not allow natural free flow of air across the transformer body.
The room in which transformers are placed must have ventilation arrangements to ensure that heated air escapes readily and can be replaced by cool air. Inlet openings should be near the flow and distributed to be most effective. The outlet opening(s) should be as high above the apparatus as the construction of the building will permit. The number and size of outlets required will depend on their distance above the transformer and on the efficiency and load cycle of the apparatus. In general, about 60 square feet of outlet opening or openings should be provided for each 1000 kVA of transformer capacity. Air inlets should be provided with the same total area as the outlets.
A typical transformer mounted indoors with such arrangements is given in Figure 14.1. It is to be noted that forced ventilation shall allow cross-flow of air from one end to other end of the transformer.

Typical indoor transformer installation with forced ventilation
14.1.2 Approach and maintainability
Another issue with indoor mounting of transformers is the approach required during installation as well as during regular maintenance, once put into service. During installation normally the space availability may not be a concern but the growth subsequent to transformer installation in a plant may pose problems. Once installed, the access requirements may be for regular inspections or filtering and also for changing oil in extreme cases. Hence proper planning is required during initial project phases to avoid complications at a later date due to the above issues.
The transformer installation position should be such that the breather, oil level indicator, rating and diagram plate, dial thermometers, etc., can be safely examined with the transformer energized. It should also be possible to have access to the operating mechanisms of the on-load tap changer/off circuit tap switch, marshalling box, etc. The sampling valve, drain valve, etc. also should be at convenient locations.
14.1.3 Transformer dielectric liquid
In selecting the dielectric type for indoor transformers, the following must be adhered to:
- The dielectric must be non-toxic, biodegradable and must not present a hazard to the environment
- The dielectric must have a fire point above 300°C to be classified as a fire resistant fluid
- The dielectric must not contribute to or increase the spread of an external fire nor must the products of combustion be toxic
- Normal operation, electrical discharges or severe arcing within the transformer must not generate fumes or other products that are toxic or corrosive
This does not mean that liquid-filled transformers cannot be used within buildings. They would meet all of the above criteria and in addition are cheaper and smaller than cast-resin or other dry type units. However there must be a provision for total spillage of the dielectric with suitable sumps and/or bund catchments areas, such that in the event that spillage occurs the building drains would not be flooded with the dielectric liquids. If the transformers are installed on higher levels, then suitable precautions must be taken to prevent leakages to lower floors.
On the other hand the building must be made totally weatherproof and care taken to ensure that there should be no deluges due to pipe leaks on dry type of transformers, after installation. Needless to say, every installation should have proper ventilation.
It is necessary to take samples of the insulating liquid from the top and bottom of the tank and test its dielectric strength. The dielectric strength should be 30 kV or higher. If it is lower, the transformer should not be placed in service until the dielectric strength has been restored by filtration, which will be covered in the next chapter.
In the case of pressurized and sealed transformers, it is common that a pressure vacuum gauge if supplied along with transformer could read negative due to lower temperature at the site of installation, compared to the ambient temperature at which it is sealed. This is not an indication of an abnormality, but in fact an indication that the tank is properly sealed.
14.1.4 Multi-transformer installations
The major points to be considered while installing multiple transformers are:
- Clearances to the other transformers
- Access and entry to each transformer and their components
- Fencing requirements
- Fire wall requirements
- Oil Bunds
Self-cooled transformers should always be separated from one another and from adjacent walls, partitions, etc., in order to permit free circulation of air around the tanks. This separation should not be less than 750 mm and may be restricted to around 1 meter. The access to the components of each transformer shall be ensured without disturbing the other transformers. The fencing could be common when multiple transformers are installed but minimum of two gates shall be provided.
Transformers are usually separated by 2 hour fire rated walls to avoid spread of fire and these walls normally project about 600mm above the top point of the transformer being separated.
14.1.5 Unit-transformers integrated with switchgear
Oil filled transformers are normally mounted indoors in separate rooms where no other equipments are usually provided except for neutral grounding apparatus, etc. But dry type transformers are generally mounted indoors along with their primary and secondary switchgears without any partition walls because the dry type transformers are installed in steel enclosures with louvers for air circulation. Since oil is not there, the chances of spillage and associated issued do not exist.
In the case of oil filled transformers, due to their separation, the switchgears are also installed in a separate room away from the transformer. The interconnections are done by laying cables and bus ducts between transformers and the associated switchgear. This necessitates proper ear marking of space and routing for such connections. However in case of dry type transformers the interconnections can be done by extending the buses similar to a switchgear lineup. The result is a compact integrated substation with all controls and equipment located at a single place.
Dry-type transformer enclosures are larger than fluid-filled because they require air circulation to effectively insulate and cool the transformer. With air-cooled transformer designs, electrical and thermal clearances are critical. Air cooling/insulation also reduce or eliminate the flexibility to incorporate other electrical equipment into the transformer enclosure. As a result, additional air insulated switchgear must be added external to the dry-type transformer. Figure 14.2 shows the typical transformers integrated with switchgear and this type of installation is also called unit substation.

Typical unit substation arrangement
14.1.6 Dry/cast-resin designs
These transformers comprise of magnetic core and windings like any other type of transformers with the only exception being the elimination of oil for cooling/dielectric purposes. The main reason for this type is the desire of industries to reduce the maintenance and monitoring devices required in oil-filled transformers. Accordingly these transformers may also be called maintenance-free transformers.
Since the cooling medium is absent, there is a limit to transformer capacities where dry type transformers can be economically and safely used. For example all electronic gadgets and household appliances use dry type transformers mainly because of the smaller size and also the need to be maintenance free (by the common man). Typical examples are televisions, radios, tape recorders, computers, etc.
In the case of industries that use comparatively larger capacities, FRP is the most common insulation separating the windings. FRP is the short form for Fire Retardant Paper. The insulation materials are paper, pressboards, etc., and insulation up to class H is in common use. The insulation in the transformer may be epoxy encapsulated, vacuum pressure impregnated or cast resin type. There are no major differences in these types for the end user in terms of performance and guarantees, but normally the size and cost decides the type of dry transformer used. The major advantage of dry type transformers is that they can be accommodated at any location like basements, switchgear rooms, etc, provided the minimum clearances and ventilation for cooling purposes are taken care of. A typical dry type transformer internal view will be as per Figure 14.3

Internal Cross section of a dry type transformer
Cast resin transformers are used in areas where use of oil filled transformers are not preferred due to fire risks. Typical installations are for hospitals, shopping complexes, commercial complexes etc. having multi-storied buildings with considerable power requirements.
It is well known that air is not a good cooling medium. Normally air-cooled transformers without oil are thermally less efficient compared to oil filled transformers of same capacities. Extending the same logic, encapsulation of full windings by cast resin creates yet another barrier between surrounding air and the windings. Hence the cast resin transformers are still poorer in their cooling characteristics. The added disadvantage is that cast resin transformers have comparatively lower short time over load capacities compared to the oil filled ones.
The cores and frames of a cast resin transformer are identical in construction features compared to oil filled transformer core and frame. Normally foil windings are used for low voltage side in cast resin transformers and hence they are not resin encapsulated. The cast resin transformers normally use cast resin for the high voltage windings only, mainly where the secondary is less than 480V as most of the cast resin transformers do have. It is also a practice to just have cast resin coating for the secondary foil windings instead of complete encapsulation for getting uniform characteristics.
When the resin is used in the high voltage side, there are more chances for having voids in the filling and also possibilities for resin cracking. The resin has a more coefficient of thermal expansion compared to copper conductors and almost the same thermal coefficient for aluminum conductors. Hence aluminum is a preferred conductor for cast resin transformer windings.
The encapsulation process is normally carried out in full vacuum in steel moulds. To ensure that the filler materials are completely mixed, part filler is mixed with resin and the remainder fully mixed with hardener before both are mixed together in the moulds. It is necessary that the resin should penetrate fully between the winding conductors if the windings are made of wire wound conductors. In order to minimize the resin cracking, it is necessary to control the temperature of the curing process by cooling in between. Most of the resin curing processes adopts microprocessor controlled curing process to ensure reliable encapsulation. The whole transformer is normally mounted in a ventilated enclosure unless special enclosures are required as in the case of oil and gas installations.

Internal view of Epoxy encapsulated (cast resin) dry type transformer
Oil filled transformers are normally provided with off circuit tap switch with +5% to –5% variation of turns ratio. However the cast resin transformers are provided with link terminals and the desired taps are chosen by using bolted links instead of a switch which means the transformer needs to be in de-energized condition to do any change to these connections.
Since cast resin transformers are mostly used to feed a 415V switchboard, it is also a practice to have the transformer as a part of the MCC lineup and interconnected with bus. This can save some cost associated with space and cable/ bus duct requirements of an oil filled transformer mounted away from the switchboard.
14.2 Special aspects of installation of large power transformers
It is quite common to come across transformers mounted outdoors in old plants as well as in modern plants. The main reasons are basically the large size of transformers and their cooling requirements, which are difficult to get accommodated in an indoor installation. Hence it is quite an accepted practice to have the large transformers mounted outdoors with adequate clearances and following necessary precautions to avoid damages to surroundings which could be directly exposed to the transformers, unlike an indoor installation which separates the surroundings by suitable walls. The following are some of the major points to be considered while installing transformer outdoors:
- Clearances to the other equipment near the transformer
- Clearance to ground in case of open type bushings
- The exposure to rain and possible entry of water if not properly sealed
- Fencing requirements
- Fire wall requirements
- Oil Bund and Oil disposal plans (oil soak pits)
14.2.1 Foundation and access
Sometimes the transformer foundation may have to be raised sufficiently to get adequate sectional clearances to the ground particularly for open type bushings and the overhead lines that are brought to the terminals for termination. Transformers at 11 kV/ 13.8 kV may be smaller in size, but in case open bushings are provided, the height of foundation may be half or more than half the transformer height. Proper facilities shall be made to inspect and access parts of transformers during regular checks or during problems. The tank top surfaces are normally sloped downwards to avoid collection of water at the top though it does not completely eliminate water collection. It is also common practice to have large size transformers located away from the center of the active plant area. This is due to overhead conductors associated with EHV connections, which cannot be taken inside the plant area. Hence proper fencing and access restrictions shall be necessary in these installations.
For outdoor installations, a level concrete plinth of correct size to accommodate the transformer in such a way that no person may step on the plinth should be provided for transformers. Further the access requirements are the same as per indoor transformers and should be adopted. i.e. the breather, oil level indicator, rating and diagram plate, dial thermometers, etc., are to be accessible for safe examination with the transformer energized. It should also be possible to have safe access to the operating mechanisms of the on-load tap changer/off circuit tap switch, marshalling box etc. The sampling valve, drain valve etc should also be at convenient locations.
It is generally approved to have a clearance of around 1000 mm all around transformers to allow access from any side and also to ensure proper cooling. These clearances are generally found acceptable for large transformers also.
Large power transformers usually have their neutral connected to ground through a resistance, reactance, etc. In such cases it is usual to mount them close to the respective transformer and the layout planning shall include proper access and provisions for such neutral grounding apparatus.
14.2.2 Noise considerations
One of the main issues with large transformers is the noise generated by the transformers. Transformer noise is caused by a phenomenon called magnetostriction. When a piece of magnetic sheet steel is magnetized it undergoes extension and goes back to its original condition once the magnetic force is removed. All transformers operate on AC systems which mean that the magnetic circuit also undergoes the cyclic changes in line with the supply magnitude changes as per applicable frequency. The extension and contraction of these sheets is not uniform throughout the length of the sheet due to the irregular concentration of impurities and hence the expansion/contraction varies along the length of the sheet. The extensions and contractions happening are not visible to the human eye but are sufficient enough to cause vibrations of the molecules forming the sheet steel. These vibrations are transferred in the form of noise, which we hear from the transformer. The noise factor increases with the size of the transformer. The level of this noise depends on the magnetic flux produced by the system voltage, which cannot be reduced beyond the minimum required values. The noise level is also due to the varying properties of steel over the length of the sheet, which is also unavoidable.
It is noted that the internal vibrations basically produce the noise and hence a transformer installation shall consider limiting these vibrations as well as limiting the transfer of these vibrations to the surroundings as much as possible. Especially for large power transformers, the installation practice plays an important role in limiting the transfer of vibration levels to the foundations as otherwise it could cause problems.
The main practice to be followed for isolating such vibrations is to isolate the core and coils of the transformer from the ground so that the vibrations are not transferred through the foundation. In air-cooled dry types this means to isolate the core and coil of the transformers from its support on the ground. For an oil-filled transformer it is achieved by isolating the core and coil from its tank base, and isolating the transformer tank base from the supporting ground.
The following guidelines could be helpful in containing these vibrations and the resultant sound:
- Use vibrating materials, which are guaranteed to eliminate transformer noise frequencies (at 100 Hz and above). The best practice is to use anti-vibration pads.
- Any solid connection from the vibrating transformer to a solid structure will transmit vibration. Hence ensure that all connections to solid terminations are not rigid but flexible. This includes incoming cables, bus bars, standoff insulators, etc.
- The shipping bolts shall be removed at the time of installation so that they do not short circuit anti-vibration pads.
14.2.3 Oil collection pits
The volume of oil used in transformers increase with the capacity of the transformers almost in direct proportion. Such large volume of oil exerts constant pressure on the tanks. It is possible some leakages could take place over a period of time. Sometimes the oil may have to be completely drained out or removed for replacement. The fault conditions leading to tank blasts would result in large volume of oil getting out of the transformers. It would be necessary that the layout shall have provisions to completely drain out the oil, which is normally done by providing oil collection pits having adequate capacity. Further the oil cannot be allowed to leak inside the room or other factory areas.
It is very necessary to ensure that the oil drained out under emergency conditions are taken in bunds and are not disposed to storm water drains or surrounding equipment foundations. This is also an environmental issue with many Governments introducing legislations for providing bunds around the transformer and safe oil disposals without polluting the surroundings.
Oil-filled large transformers are common in power plants with capacities going up to 500 MVA and using tons and tons of oil. It is common to have the foundation itself acting as a sump for the transformer oil with any oil coming out directly goes below the transformer.
In power plants, provisions are made to contain any oil leakage or spillage resulting from a ruptured tank or a broken drain valve. The volume of the containment should be sufficient to retain all of the oil in the transformer to prevent spillage into waterways or contamination of soil around the transformer foundations. Special provisions (oil-water separators, oil traps, etc.) must be made to allow for separation of oil spillage versus normal water runoff from storms, etc. IEEE 979 and 980 provide guidance on design considerations for oil containment systems.
The pits so provided would also collect water during rains and hence the collection pit will have oil and water normally when disposal is being taken up. Note that water displaces oil and any old oil spillage would be washed up from the sump. Therefore, it is imperative that this large quantity of excess oil and water be carted away as quickly as possible to deluge water treatment centers before allowing the water to enter into storm water drains. Provision should be made to separate oil from water and for containment before this separation.
14.2.4 Firewalls
It is generally preferable to keep the large power transformers separated from the main plant, mainly in industrial areas. Separation involves locating the transformer well away from all other equipment, but this may not be convenient, as there may be space constraints. The other possibility is to segregate the transformer from other areas. Segregation basically calls for firewalls to be built around transformers such that fires, if any, would be contained within these walls. This firewall or barrier must be suitably reinforced to be capable of withstanding any explosion from the transformer. The main reason for such separation and segregation requirements is because in the event of transformer oil igniting (for whatever reason), the damage caused shall be restricted to the transformer alone and its immediate ancillary equipment, and shall not interfere with any other unit assemblies in its vicinity.
It is also a recommended practice and sometimes statutory to have firewalls between transformers, when the installation includes multiple transformers adjoining each other. This is to ensure that an oil explosion in one transformer is not carried over to the other transformers. Though it is not mandatory in some countries, it is an accepted practice to have 2 hour fire rated walls between transformers which are mounted side by side. These walls are called blast wall/ fire-wall and the main purpose of the wall is to basically prevent oil splash over to the adjacent transformer in case of severe faults leading to transformer blasts and fires. Normally installations having multiple transformers have standby transformers and in such cases it is very important to ensure that these walls are provided to minimize breakdowns in power supply. Figure 14.4 shows transformers placed on foundations separated by fire-walls.

Large Power Transformers separated by fire-walls
14.2.5 Transportation and installation
Normally the transformers are dispatched with oil filled in the transformer tanks but with removable items like radiators transported separately. Hence the balance of oil to be occupied in the radiators is transported separately. Sometimes, for big transformers, the oil is transported separately with the transformer tank filled with nitrogen gas to avoid entry of moisture during transportation. Where transformers are sent along with radiators mounted to the body, the isolation valves connecting the radiator to the tank are shutoff to avoid any leakages. These valves shall be opened once transformers are received at site. The silica-gel breather is sent separately and the same shall be fitted on the transformer as soon as possible to prevent moisture absorption. All components and transformer conditions shall be verified on arrival at site and any leakage issues shall be sorted out immediately. Any delay on these could pose problems during commissioning.
Lifting of a transformer is to be done carefully and the use of cranes is recommended considering the weight and importance of the equipment. The recommended lifting arrangement is as per Figure 14.5.

Lifting of Transformer
Hydraulic jacks shall be employed at the jacking points provided in the transformer, when required for transferring from the truck and when fastening or turning transport rollers. During such times care must be taken to lift not more than 2 inches at every point so that no torsional strains are imposed on the transformer body.
Earthing of transformer body is a must and it shall be ensured that proper earthing connections are provided at the transformer yard.
Transformers received at site and not installed immediately are likely to absorb moisture. Hence it is desirable to erect and commission the transformer with minimum delay. However this may not always be the case. A transformer should not be stored or operated in the presence of corrosive vapors or gases, such as chlorine. Should it become necessary to store accessories for a long period of time, they should be stored in a clean, dry place or the manufacturer should be contacted for explicit instructions on the storage of individual pieces.
14.2.6 Placement of surge arresters
Overhead high-voltage power distribution lines are prone to direct lightning strikes as well as induced voltages from strikes on the protecting shield wires. While much of this lightning energy is dissipated by high voltage surge protection devices installed at the ends of a power line, a substantial part will travel further along the distribution system. This is because of the steep wave front which imparts to it the characteristics of a high frequency voltage, It thus passes through the inter winding capacitance between the HV and LV windings of power transformers into the power systems of individual buildings. Refer to Figure 14.6.

Lightning effects Transferred through transformers
Most transformer installations are subject to surge voltages originating from lightning disturbances, switching operations, or circuit faults. Some of these transient conditions may create abnormally high voltages from turn to turn, winding to winding, and from winding to ground. The lightning arrestor is designed and positioned so as to intercept and reduce the surge voltage before it reaches the electrical system. Lightning arresters are similar to big voltage bushings in both appearance and construction.
They use a porcelain exterior shell to provide insulation and mechanical strength, and they use a dielectric filler material (oil, epoxy, or other materials) to increase the dielectric strength. Lightning arrestors, however, are called on to insulate normal operating voltages, and to conduct high level surges to ground. In its simplest form, a lightning arrester is nothing more than a controlled gap across which normal operating voltages cannot jump. When the voltages exceeds a predetermined level, it will be directed to ground, away from the various components (including the transformer) of the circuit. There are many variations to this construction. Some arrestors use a series of capacitances to achieve a controlled resistance value, while other types use a dielectric element to act as a valve material that will throttle the surge current and divert it to ground.
Considering the cost of the transformers, it is necessary to avoid flashovers near the transformer bushings due to lightning discharges, switching voltages, etc as this could affect their availability. Surge diverters are positioned at the entrance of overhead conductors connecting the exposed bushings with one number per phase to ground located close by and mounted suitably. In case of transformers which are used for frequent switching operations like arc/ furnace applications, use of surge diverters need to be carefully selected considering the operations and likely impulses. This is because the failure of surge diverters could also affect transformers if not properly coordinated with the dielectric with stand voltage requirements.
Surge diverters are sometimes placed on the transformer tank itself when the transformer design provides for the same. Many vendors will integrate this feature in their design if the same is included in the specification. The other option is to mount the surge arrestors on separate structures between the transformer and the incoming line gantry. It should be ensured that this structure does not interfere with the removal of the transformer for major repair work. The location of the structure must be as close to the transformer as feasible.
14.3 Fire protection measures for large transformer installations
Fire protection systems are those that are provided to extinguish fires caught by insulation and oil that can spread and damage the full transformer as well as the surroundings. There are many methods of avoiding or at the very least minimizing the risk of such hazards. Conventionally, it has been a general practice in many substations that employ oil filled transformers and switchgear, to provide surfaces of chipping and a drainage sump to transport away any oil spillage that could potentially fuel a fire. This method however is not foolproof. It has been found that over a period of time, these chipping collect dust and grime and this grime would provide the wick for sustained combustion. Alternatively, one could explore the possibility of providing a firewater sprinkler system around the transformer, which could be automatically triggered in the event of a fire.
The other system that can be employed for fire protection is the inert gas extinguishing system using a gas such as Nitrogen. The comprises of main storage cylinders and interconnecting pipe lines that can inject nitrogen gas once fire or internal explosion is detected, thus cutting-off oxygen supply. Figure 14.7 shows the operation of a scheme using nitrogen gas as the extinguishing medium.

Principle of fire extinguishing system using Nitrogen gas
The bulk sprinkler systems are employed only in large power transformer installations because of the cost and space requirements associated with such systems. For example, if the outage of a transformer can have serious financial impact (example: generator transformers), the investment definitely will make sense. In a distribution system, with redundant circuits, a fire-protection system may be difficult to justify. These systems have to be deployed when local statutory and insurance company requirements specify their use for safety and improved life of transformer installations.
The passive method of containing fires (often a mandatory requirement in installation standards) by providing adequately sized fire barriers was already discussed in an earlier section in this chapter. These barriers mainly avoid the spread of a fire from a transformer to other equipment in the vicinity.
14.4 Transformer troubleshooting
For any equipment to provide satisfactory and uninterrupted service, it is necessary that proper operating procedures are followed and recommended maintenance practices are adopted. A transformer is no exception to this rule. It is well known that transformers are the main link providing power to any type of plant and its breakdown cannot be tolerated in any installation. Transformers do not have any moving parts and hence the problems associated with rotating and moving equipment are almost eliminated, except for the accessories like OLTC and cooling fans/pumps.
It is observed that a failure of a transformer may be due to any of the following reasons:
- Continuous over loading of transformer beyond its rated capacity.
- Improper tap positions causing excessive core loss and consequently excessive heating.
- Outgoing cable faults are not cleared in specific time and transformers continue feeding them.
- Improper termination of fuses or provision of over capacity fuses which do not operate under through faults.
- Cable connections to the HT and LT bushings loosen causing arcs at contact points.
- Improper/loose earthing connection.
- Unbalanced load conditions.
- Improper maintenance/checking of oil level in conservator/transformer and not topping up oil to the required level.
- No periodical checking of the condition of silica-gel and not changing/reactivating it, if it has turned pink.
- Not checking oil level at the bottom of the breather/forming oil seal and not making up the oil level when required.
- Not periodically checking the condition of gasket joints and tightening/replacing gaskets if needed.
- Deterioration of oil characteristics and presence of moisture affecting the life of the insulation.
The above problems are mostly due to load conditions or deterioration of components over a period of time or due to poor maintenance. Accordingly the transformer problems and consequent failures can be classified into one of the following classifications:
- Overload
- Incorrect installation or use
- Faulty design or construction
- Neglect
- Wear and tear and other deterioration
- Accidents
A rigorous system of inspection and preventive maintenance will ensure long life, trouble-free service and low maintenance cost for the transformers. Maintenance consists of regular inspection, testing and reconditioning where necessary. Records should be kept of the transformer, giving details of all inspections and tests made, and of unusual occurrences if any. The principal objective of transformer maintenance is to maintain its internal insulation in good condition. Moisture, dirt and excessive heat are the main causes of insulation deterioration and avoidance of these will in general keep the insulation in good condition.
14.4.1 Use of analytical methods for early detection of internal problems
Electrical faults internal to a transformer can result in the following actions within the transformer windings and other parts:
- Over heating
- Arcing
- Sparking
Such problems within transformers usually give rise to:
- formation of gases which can either dissolve in the cooling oil or may collect in the gas protection (Buchholz relay of the transformer) and
- electrical discharges within the insulation material (called as partial discharge)
Overheating: Even though the insulation will not char or ignite, temperatures like 140°C will begin to decompose the cellulose and produce carbon dioxide and carbon monoxide. When hot spot temperatures (which can be as high as 400°C) occur, portions of the cellulose are actually destroyed by pyrolysis and much larger amounts of carbon monoxide are formed.
Arcing: Arcing is a prolonged high energy discharge and produces a bright flame. It also produces a characteristic gas (acetylene), which makes it the easiest fault to identify. Acetylene will occur in a transformer’s oil only if there is an arc.
Corona and sparking: With voltages greater than 10 kV, sharp edges or bends in the conductors will cause high stress areas, and allow for localized low energy discharges. Corona typically produces large amounts of free hydrogen, and is often difficult to differentiate from water contamination and the resulting rusting and oxidation. When the energy levels are high enough to create a minor spark, quantities of methane, ethane and ethylene will be produced. Sparks are usually defined as discharges with duration below one microsecond.
The thermal faults inside a transformer are classified as:
- Local over heating 150-300°C
- Local over heating 300- 1000°C
- Local over heating >1000°C
- Overheating of cellulose
Gases are formed in the oil when the insulation system is exposed to thermal, electrical, and mechanical stresses. These stresses lead to the following gas producing events.
When insulating materials deteriorate, when sludge and acid is produced, or when arcing or overheating occurs, various gases are formed. Some of these gases migrate to the air space at the top of the tank, but a significant amount is trapped, or “entrained” in the oil. By boiling off these gases and analyzing their relative concentrations with a gas chromatograph, certain conclusions can be drawn about the condition of the transformer. Detection of certain gases in an oil filled transformer is frequently the first indication of a malfunction as noted below:
- Tank leaks, oil contamination, sludging and residual contaminants.
- Higher levels of hydrogen (H2), oxygen (O2), and nitrogen (N2) can indicate the presence of water, rust, leaky bushings, or poor seals.
- High levels of CO and CO2 can show whether the transformer is experiencing minor overload conditions, or whether it is overheating.
- Concentrations of hydrocarbon gases, such as Acetylene, ethylene, methane and ethane indicate the integrity of the transformer’s internal functions.
The nature of transformer operation is normally indicated by an analysis on the following gases present in the oil:
- Normal H2, O2, N2, CO, CO2, CH4
- Abnormal H2, CH4, C2H2, C2H4, C2H6
- Deterioration CO, CO2, CH4
The analysis of the percentage of combustible gases present in the nitrogen cap of sealed, pressurized oil-filled transformers can provide information as to the likelihood of incipient faults in the transformer. Fault-gas analysis can be performed on mineral-oil-immersed transformers of all sizes. When arcing or excessive heating occurs below the top surface of the oil, some oil decomposes. Some of the products of the decomposition are combustible gases that rise to the top of the oil and mix with the nitrogen above the oil.
14.4.2 Partial discharge (PD)
IEC 60270 defines partial discharge as an electric discharge that partially bridges and bypasses the insulation between conductors. Such discharges may, or may not, occur adjacent to the conductor. Partial discharges occurring in any test object under given conditions may be characterized by different measurable quantities such as charge, repetition rate, etc. PDs are mainly caused by a local field enhancement, due to imperfections in the insulation, as for instance gas-filled inclusions as voids and cracks. With continued exposure to PD the insulation may fail. An early warning can be given if dangerous PD events are detected.
One method of detecting PD in large transforms is an off-line electrical test. This test requires special circuits to measure the partial discharges while applying a higher voltage for a considerable duration. Typically the transformer phase and neutral is applied 1.3 times the rated phase to neutral voltage value for 5 minutes and raised to 1.5 times the rated phase to neutral voltage value for 5 seconds and again continuing with 1.3 times the voltage for 30 minutes. During this entire sequence the partial discharge shall not exceed 300 pC at 1.3 times voltage and shall be within 500pC during the short 5 seconds while applying 1.5 times the voltage.
The more common method for on-line detection of partial discharges (PD) is the use of acoustical sensors mounted external to the transformer. One example of a commercially available acoustic emission monitoring instrument is the Corona 500, by NDT International, Inc., which is designed to detect partial discharge of electrical transformers while on-line. The main difficulty with using acoustical sensors in the field, however, is in distinguishing between internal transformer PD and external PD sources, such as discharges from surrounding power equipment. Also, localization of the fault is not possible in this method.
An alternative to the above method is by detection of ultrasonic emissions by using sensors mounted at specific points on the tank which are then converted electronically to oscilloscope traces or audible frequencies and recorded. By triangulation, a general location of a fault (corona or arcing/sparking) may be determined so that an internal inspection can be focused in that location.
14.5 Liquid level indicator, pressure and temperature gauges
14.5.1 Liquid level indicator
These indicators are precision instruments composed of two main parts, the bezel and the body. The bezel or outer assembly includes the calibrated dial and indicating needle. The indicating needle is directly mounted on the forward end of a shaft; the other end carries a powerful actuating magnet (as shown in Figure 14.8). The bezel, when in place, covers and protects the mounting screws with which the body is attached to the flange or boss on the transformer tank or equipment.

Dial type liquid level indicator
The body is sealed against liquid leakage and encloses a second powerful magnet opposite the magnet in the bezel. The magnet in the body is mounted on a shaft coupled to the float arm. In operation, the float arm rotates the body magnet, which in turn positively displaces the bezel magnet to which the indicating needle is attached.
Liquid level indicators are usually shipped mounted on the transformer tank, or equipment, and require no maintenance. Table 14.2 gives the variations in the temperature levels for corresponding liquid levels.
Variation in temperature levels for corresponding liquid levels
| Intensity | Average Liquid Temp. (ºC) | Correct Filling Level (% of Scale Above or Below 25ºC Level) |
| High | 85 70 55 40 |
100 75 50 25 |
| Normal | 25 10 -5 |
0 -33 -67 |
| Low | -20 | -100 |
14.5.2 Pressure gauges
Most transformers are equipped with a pressure gauge. The gauge assembly consists of:
- a pressure sensitive element (a bulb or a diaphragm)
- an indicator attached to the element
- a dial calibrated for the required vacuum range of the tank
Maintenance of the pressure gauge should be performed if there are no changes noted during the inspection intervals (see Figure 14.9).

Sudden pressure relay
14.5.3 Temperature gauges
Temperature gauges are either of the hot spot or average tank temperature type. Average reading and hot spot temperature gauges can use a bulk-type detecting unit that is immersed in the oil either near the top of the oil level (Figure 14.10), or near the windings at the spot that is expected to be the hot test. A capillary tube is connected to the bulb and brought out of the tank. The temperature indication is provided either by a linear marking on the tube itself or by a dial-type indicator (Figure 14.11).
Dial type indicators have three sets of contacts to actuate any of the following devices:
- The lowest setting usually actuates external cooling fans that will turn on and off depending upon the temperature level.
- The contacts can also be set to actuate remote alarm which will alert the maintenance personnel of the transformer condition.
- Critical contact setting on the temperature gauge is connected to a relay or a circuit breaker which will trip and de-energize the transformer.
Most dial-type gauges have red indicating needle to indicate the highest temperature since it was last reset. This reading should be recorded for each inspection interval and the needle should be reset to ambient temperature for future readings.

Temperature gauge

Dial type temperature gauge
14.6 Transformer inspections
14.6.1 Routine inspections
Routine inspections should include current readings, voltage readings and ambient temperature readings.
- Load current readings: If the load current readings exceed the rated full load current then steps should be taken to maintain rated load current.
- Voltage readings: Under-voltages or over-voltages can be cause damage to the load and transformer as well. Therefore, such conditions should be determined and corrected to nominal nameplate values.
- Ambient temperature readings: Transformers will perform satisfactorily at rated output when the temperature does not exceed 40°C. Serious over heating may result if the unit is operated for sustained periods at above rated voltage, above rated current, or at lower rated frequency. Operating a transformer above the recommended temperature will shorten the life of the insulation and substantially increase the risk of failure. Therefore, it is important that the ambient temperature should be maintained within the desired limits.
14.6.2 Special inspections
Prior to other repairs or inspections, visual inspection should be performed. While inspecting the transformer must be de-energized, tagged and locked-out. In general transformers have no moving parts; the only maintenance required is listed below:
- Check for cracked or loose insulators or coil spacers.
- Check for the dirt accumulation that obstructs the cooling medium.
- Check for dirt accumulation on internal leads and insulating surfaces.
- Check for tracking and carbonization over insulating surfaces.
- Check for corrosion and loose connections at all primary, secondary, tap and ground connections.
15
CT Testing
15.1 Major tests on a CT
IEC 60044 Part 1 specifies the testing requirements for current transformers. The major tests recommended as per the standard are as below.
15.1.1 Type tests
The following are the type tests and these are not normally done on all the manufactured current transformers.
- Short-time current tests.
- Temperature rise test
- Lightning impulse test
- Switching impulse test (Um ≥ 300 kV)
- Wet test for outdoor type transformers
- Determination of errors
- Radio interference voltage measurement (RIV) – for Um ≥ 123 kV
All the dielectric type tests should be carried out on the same transformer, unless otherwise specified. After transformers have been subjected to the dielectric type tests, they shall be subjected to all the routine tests as below.
15.1.2 Routine tests
The following tests apply to individual current transformer before each is accepted for dispatch.
- Verification of terminal markings/polarity
- Power-frequency withstand test on primary winding
- Partial discharge measurement (Um ≥ 7.2 kV)
- Power-frequency withstand test on secondary windings
- Power-frequency withstand tests, between sections
- Inter-turn over voltage test
- Determination of errors
The order of the tests is not standardized, but determination of errors should be performed after all the other tests.
15.1.3 Special tests
The following are special tests that are to be performed based on an agreement between the manufacturer and the purchaser:
- Chopped lightning impulse test
- Measurement of capacitance and dielectric dissipation factor (Um ≥ 72.5 kV)
- Multiple chopped impulse test on primary winding
- Static withstand load tests (Um ≥ 72.5 kV)
- Measurement of transmitted over voltages (Um ≥ 72.5 kV)
15.2 Test procedures
15.2.2 Short time current Ith withstand test
For this test the CT shall initially be at a temperature between 10°C and 40°C and the test is made with the secondary winding(s) short-circuited. A current I for a time t is circulated such that I2×t is not less than the square of the rated thermal current Ith2 and provided the time t has a value between 0.5 and 5 seconds.
The dynamic test shall be made with the secondary winding(s) short-circuited, and with a primary current peak value not less than the rated dynamic current Idyn for at least one peak. The dynamic test may be combined with the thermal test, provided the first major peak current of that test is not less than the rated dynamic current. The transformer shall be deemed to have passed these tests if, after cooling to ambient temperature, it does not show any visual damage, it retains its earlier recorded accuracies, etc.
15.2.2 Temperature rise test
Done similar to the power transformer temperature rise test with the test conducted at an ambient of 10 to 30ºC with the CT mounted in a manner representative of the service condition. If practicable this is done by measuring the increase in resistance.
15.2.3 Impulse tests
The test is done by applying the applicable voltage between the primary terminal and earth with frame, core and secondary terminals connected to ground. The applicable test voltages are as per the following tables.
Rated insulation levels for CTs with Um< 300kV
| Highest system Voltage Um (kV peak) | Rated short-duration power-frequency withstand voltage kV (r.m.s) | Rated lightning impulse withstand voltage kV (peak) |
| 0.72 | 3 | — |
| 1.2 | 6 | — |
| 3.6 | 10 | 20/40 |
| 7.2 | 20 | 40/60 |
| 12 | 28 | 60/75 |
| 17.5 | 38 | 75/95 |
| 24 | 50 | 95/125 |
| 36 | 70 | 145/170 |
| 52 | 95 | 250 |
| 72.5 | 140 | 325 |
| 123 | 185/230 | 450/550 |
| 145 | 230/275 | 550/650 |
| 170 | 275/325 | 650/750 |
| 245 | 395/460 | 950/1050 |
Note: Choose the highest value for exposed installations)
Rated insulation levels for CTs with Um ≥ 300kV
| Highest system Voltage Um (kV peak) | Rated switching impulse withstand voltage (kV peak) | Rated Lighting impulse withstand voltage (kV peak) |
| 300 | 750/850 | 950/1050 |
| 362 | 850/950 | 1050/1175 |
| 420 | 1050/1050 | 1300/1425 |
| 525 | 1050/1175 | 1425/1550 |
| 765 | 1425/1550 | 1950/2100 |
Note: Choose the highest value for exposed installations
PF withstand voltages for CTs with Um ≥ 300 kV
| Rated lightning impulse withstand voltage (peak) kV | Rated power frequency withstand voltage (r.m.s.) kV |
| 950 | 395 |
| 1050 | 460 |
| 1175 | 510 |
| 1300 | 570 |
| 1425 | 630 |
| 1550 | 680 |
| 1950 | 880 |
| 2100 | 975 |
F For windings with Um < 300 kV, the lightning impulse voltage test is done on both positive and negative polarities by applying 15 consecutive impulses on each polarity. In case of CTs having Um 300kV and above the test is done by applying three consecutive impulses on each polarity. The CT passes the test if there are no disruptive discharges and no flashovers along the external insulation.
Switching impulse test voltages are applied on positive polarity only and fifteen consecutive switching impulses as appropriate corrected to atmospheric conditions is applied. For outdoor transformers, the test is done in wet condition. A maximum of two flashovers is allowable across the external insulation under this test.
In regard to wet PF tests for windings with Um < 300 kV the test is performed with the applicable voltage while for Um ≥ 300 kV, it is the switching impulse voltage on the positive polarity.
15.2.4 RIV test
The test is done with ambient temperature limited between 10 to 30ºC and a humidity level of 45 to 75%.
The test voltage shall be applied between one of the terminals of the primary winding of the test object and earth. The frame, case (if any), core (if intended to be earthed) and all terminals of the secondary winding(s) shall be connected to earth. The measuring circuit is provided in IEC. The measuring circuit should preferably be tuned to a frequency in the range of 0.5 MHz to 2 MHz, the measuring frequency being recorded. The results shall be expressed in micro volts. The impedance between the test conductor and earth (Zs + (R1 + R2)) shall be 300 Ω ± 40 Ω with a phase angle not exceeding 20°. A capacitor Cs may also be used in place of the filter Zs and a capacitance of 1 000 pF is generally adequate.
The filter Z shall have high impedance at the measuring frequency in order to decouple the power frequency source from the measuring circuit. A suitable value for this impedance has been found to be 10 000 Ω to 20 000 Ω at the measuring frequency.
The radio interference background level (radio interference caused by external field and by the high-voltage transformer) shall be at least 6 dB (preferably 10 dB) below the specified radio interference level.
A pre-stress voltage of 1.5 Um/√3 shall be applied and maintained for 30 s. The voltage shall then be decreased to 1.1 Um/√3 in about 10 s and maintained at this value for 30 s before measuring the radio interference voltage.
The CT is considered to have passed the test if the radio interference level at 1.1 Um/√3 does not exceed the limit prescribed per IEC. Some times by agreement between manufacturer and purchaser, this test may be replaced by partial discharge test. In such case the allowable PD value is 300 pC at 1.1 Um/√ 3.
15.2.5 Partial discharge test
Procedure A: The partial discharge test voltages are reached while decreasing the voltage after the power-frequency withstand test.
Procedure B: The partial discharge test is performed after the power-frequency withstand test.
The applied voltage is raised to 80% of the power-frequency withstand voltage, maintained for not less than 60 s, then reduced without interruption to the specified partial discharge test voltages.
If not otherwise specified, the choice of the procedure is left to the manufacturer. The test method used shall be indicated in the test report.
15.2.6 PF voltage tests
The applicable test voltage shall be applied for 60 seconds in sequence between the short-circuited terminals of each winding section, or each secondary winding and the earth. The frame, core (if there is a special earth terminal), and the terminals of all the other windings or sections shall be connected together and to earth when one winding/section is tested.
15.2.7 Inter-turn over-voltage test
Procedure A: with the secondary windings open-circuited (or connected to a high impedance device which reads peak voltage), a substantially sinusoidal current at a frequency between 40 Hz and 60 Hz and r.m.s. value equal to the rated primary current shall be applied for 60 sec to the primary winding. The applied current shall be limited if the test voltage of 4.5 kV peak is obtained before reaching the rated current.
Procedure B: with the primary winding open-circuited, the prescribed test voltage (at some suitable frequency) shall be applied for 60 seconds to the terminals of each secondary winding, ensuring that the r.m.s. value of the secondary current is not exceeding the rated secondary current. The value of the test frequency shall not be greater than 400 Hz. At this frequency, if the voltage value achieved at the rated secondary current is lower than 4.5 kV peak, the obtained voltage is to be regarded as the test voltage.
The procedure to be adopted is based on agreement between manufacturer and the purchaser.
15.2.8 Chopped impulse test on primary winding
The test shall be carried out with negative polarity only, and be combined with the negative polarity lightning impulse test. The voltage shall be a standard lightning impulse, chopped between 2 µs and 5 µs. The chopping circuit shall be so arranged that the amplitude of overswing of opposite polarity of the actual test impulse shall be limited to approximately 30% of the peak value. The test voltage of the full impulses shall have the appropriate values based on the highest system voltage and the specified insulation level.
The sequence of impulse applications shall be as following:
For windings having Um < 300 kV:
- One full impulse
- Two chopped impulses
- Fourteen full impulses.
For windings having Um ≥ 300 kV:
- One full impulse
- Two chopped impulses
- Two full impulses
Differences in wave shape of full wave applications before and after the chopped impulses are an indication of an internal fault. Flashovers during chopped impulses along self-restoring external insulation shall be disregarded in the evaluation of the behavior of the insulation.
15.2.9 Capacitance and dielectric dissipation factor
The measurement of capacitance and dielectric dissipation factor shall be made after the power-frequency withstand test on the primary windings. The test voltage shall be applied between the short-circuited primary winding terminals and earth. Generally the short-circuited secondary winding(s), any screen, and the insulated metal casing shall be connected to the measuring bridge. If the current transformer has a special device (terminal) suitable for this measurement, the other low-voltage terminals shall be short circuited and connected together with the metal casing to the earth or the screen of the measuring bridge.
15.2.10 Transmitted over voltages measurement
A low-voltage impulse (U1) shall be applied between one of the primary terminals and earth.
For single-phase current transformers for GIS metal-enclosed substations, the impulse shall be applied through a 50 Ω coaxial cable adapter with the enclosure of the GIS section connected to earth as to be done in service. The terminal(s) of the secondary winding(s) intended to be earthed shall be connected to the frame and to earth.
The transmitted voltage (U2) shall be measured at the open secondary terminals through a 50 Ω coaxial cable terminated with the 50 Ω input impedance of an oscilloscope having a bandwidth of 100 MHz or higher which reads the peak value. If the current transformer comprises more than one secondary winding, the measurement shall be successively performed on each of the windings.
In the case of secondary windings with intermediate tappings, the measurement shall be performed only on the tapping corresponding to the full winding. The over voltages transmitted to the secondary winding (Us) for the specified over voltages (Up) applied to the primary winding shall be calculated as follows:
Us = (U2 / U1) × Up
In the case of oscillations on the crest, a mean curve should be drawn, and the maximum amplitude of this curve is considered as the peak value U1 for the calculation of the transmitted over voltage.
The current transformer is considered to have passed the test if the value of the transmitted over-voltage does not exceed the limits given in the IEC table.
15.2.11 Ratio verification test
The CT ratio is typically represented as 100/5 amps, 200/1 amps where 100, 200 are the primary currents and 1 and 5 the corresponding secondary currents. This ratio shall be inverse to the turn’s ratio as per transformer fundamentals.
The ratio verification is similar to the turn’s ratio test done on a transformer. The primary current is passed through the primary and the secondary currents are measured to ensure that the secondary current follows a proportionate change in line with primary current variations. The ratio test is more relevant for a metering CT where the secondary currents follow the primary current with minimum error in the 50 to 100% range. Generally, present day current transformers exhibit a good characteristic even at around 20% rated primary current.
The errors in the protection CT are permitted in the lower range and again readings should preferably be taken higher than the rated current. The main issue would be the withstand time and hence fast reading instruments which apply the current for a few seconds and automatically display the secondary current are to be used for the same.
15.2.12 Accuracy class verification
Type tests to prove compliance with accuracy classes in the case of CTs of classes 0.1 to 1, should be made at each value of current given as per Table 54.1 at 25 % and at 100 % of rated burden (subject to 1 VA minimum). Transformers having extended current ratings greater than 120 % shall be tested at the rated extended primary current instead of at 120 % of rated current. Transformers of class 3 and class 5 shall be tested for compliance with the two values of current given in table at 50 % and at 100 % of rated burden (subject to 1 VA minimum).
15.2.13 Polarity test
Figure 15.1 shows the simple testing arrangement for verifying the CT polarity markings at the time of commissioning electrical systems. The factory test is similar in principle except for the large power source.

Testing of a C.T polarity
Connect the battery negative terminal to the current transformer P2 primary terminal. This arrangement will cause a current to flow from P1 to P2 when +ve terminal is connected to P1 till the primary gets saturated due to the DC Voltage. If the polarities are correct, a momentary current will flow from S1 to S2.
A center zero galvanometer is connected across the secondary of the current transformer. Touch or flick the +ve battery connection to the current transformer primary terminal P1. If the polarity of the current transformer is correct the galvanometer should flick in the +ve direction.
15.2.14 Test for CT magnetizing curve
It is necessary to test the characteristics of a CT before it is put into operation, since the results produced by the relays and meters depend on how well the CT behaves under normal and fault conditions. Figure 15.2 shows a simple test connection diagram that is adopted to find the magnetic curve of a CT.

Circuit to test magnetization curve
In the above circuit the current is passed through the secondary from zero to the full rated current across S1 and S2. Hence a mille-ammeter is used to measure the currents, and the corresponding voltages across S1 and S2 are measured. This basically indicates the voltage generated at the secondary terminals corresponding to the currents flowing in the winding.
The readings shall be taken until the effect of increase in the current does not generate a proportionate in the voltage. The curve is to be drawn and the exact knee point is decided where the current increase of 50% causes less than 10% change in the excitation voltage.
15.2.15 Short circuit test
This is normally a destructive test and hence not done as a routine test. The short circuit ratings are generally defined to match the switchgear ratings in which they are used.
15.3 Safety precautions
Current transformers generally work at a low flux density. Hence the core is made of very good metal to give small magnetizing current. On open-circuit mode, secondary impedance becomes infinite and the core saturates. This induces a very high voltage in the primary – up to approximately system volts and the corresponding volts in the secondary will depend on the number of turns, multiplying up by the ratio (i.e. volts/turn × no. of turns). Since CT normally has much more turns in secondary compared to the primary, the voltage generated on the open circuited CT will be much more than the system volts, leading to Flashovers.
HENCE AS A SAFETY PRECAUTION, NEVER OPEN-CIRCUIT A CURRENT TRANSFORMER ON LOAD!!!
The general safety procedures to be followed while handling HV or MV equipment shall be applicable while testing the CT.
16
VT Testing
16.1 Tests on voltage transformers
Following are the tests recommended per IEC 60044 Part 2
16.1.1 Type tests
- Temperature-rise test
- Short-circuit withstand capability test
- Lightning impulse test
- Switching impulse test
- Wet test for outdoor type transformers
- Determination of errors
- Measurement of the radio interference voltage (RIV) (Um ≥ 123 kV)
All the dielectric type tests should be carried out on the same transformer, unless otherwise specified. After transformers have been subjected to the dielectric type tests, they should be subjected to all routine tests.
16.1.2 Routine tests
The following tests apply to each individual transformer:
- Verification of terminal markings
- Power-frequency withstand tests on primary windings
- Partial discharge measurement (Um ≥ 7.2 kV)
- Power-frequency withstand tests on secondary windings
- Power-frequency withstand tests between sections (see 9.3);
- Determination of errors
The order of the tests is not standardized but determination of errors should be performed after the other tests. Repeated power-frequency tests on primary windings should be performed at 80 % of the specified test voltage.
16.1.3 Special tests
The following tests are performed upon agreement between manufacturer and purchaser:
- Chopped impulse test on primary winding
- Measurement of capacitance and dielectric dissipation factor(Um ≥ 72.5 kV)
- Static withstand load tests (Um ≥ 72.5 kV)
- Transmitted over voltage measurement (Um ≥ 72.5 kV)
16.2 Test procedures
The test procedures are mostly similar to the current transformers but are reproduced to have a review on the same.
16.2.1 Temperature rise test
Done similar to the power transformer temperature rise test with the test conducted at an ambient of 16 to 30ºC with the VT mounted in a manner representative of the service condition. If practicable this is done by measuring the increase in resistance.
The voltage to be applied to the transformer for the temperature rise test should be one of the following (as applicable).
- All voltage transformers irrespective of voltage factor and time rating should be tested at 1.2 times the rated primary voltage. If a thermal limiting output is specified, the transformer should be tested at rated primary voltage, at a burden corresponding to the thermal limiting output at a unity power factor without loading the residual voltage winding. If a thermal limiting output is specified for one or more secondary windings, the transformer should be tested separately with each of these windings connected, one at a time, to a burden corresponding to the relevant thermal limiting output at a unity power factor. The test should be continued until the temperature of the transformer has reached a steady state.
- Transformers having a voltage factor of 1.5 or 1.9 for 30 seconds should be tested at their respective voltage factor for 30 s starting after the application of 1.2 times rated voltage for a time sufficient to reach stable thermal conditions; the temperature rise should not increase by more than 16ºK the value specified in the standard table (given in the previous earlier chapter). Alternatively, such transformers may be tested at their respective voltage factor for 30 seconds starting from the cold; the winding temperature rise should not exceed 16ºK.
- Transformers having a voltage factor of 1.9 for 8 hours should be tested at 1.9 times the rated voltage for 8 hours starting after the application of 1.2 times rated voltage for a time sufficient to reach stable thermal conditions; the temperature rise should not exceed 16ºK the values specified in the table.
Acceptable temperature rise for VT
| Class of insulation | Maximum temperature rise K |
| All classes immersed in oil | 60 |
| All classes immersed in oil and hermetically sealed | 65 |
| All classes immersed in bituminous compound | 50 |
| Classes not immersed in oil or bituminous compound : | |
| Y | 45 |
| A | 60 |
| E | 75 |
| B | 85 |
| F | 116 |
| H | 135 |
16.2.2 Short-circuit withstand capability test
For this test, the voltage transformer should initially be at a temperature between 16°C and 30°C. The voltage transformer is energized from the primary side and the secondary terminals are shorted.
One short circuit should be applied for the duration of 1 second. During the short circuit, the r.m.s. value of the applied voltage at the transformer terminals should not be less than its rated voltage. In the case of transformers provided with more than one secondary winding, or section, or with tappings, the test connection should be agreed between manufacturer and purchaser.
The transformer is accepted to have passed this test if, after cooling to ambient temperature,
- It is not visibly damaged
- Its errors do not differ from those recorded before the tests by more than half the limits of error in its accuracy class
- It withstands the dielectric tests with the test voltage reduced to 90 %
- The insulation next to the surface of the primary and the secondary windings does not show significant deterioration (e.g. carbonization)
16.2.3 Impulse test on primary winding
Typical insulation test voltages are as given in Tables 55.5 to 55.7. The test voltage should be applied between each line terminal of the primary winding and earth. The earthed terminal of the primary winding or the non-tested line terminal in the case of an unearthed voltage transformer, at least one terminal of each secondary winding, the frame, case (if any) and core (if intended to be earthed) should be earthed during the test. The reference impulse voltage should be between 50% and 75% of the rated impulse withstand voltage. The peak value and the wave shape of the impulse should be recorded. For failure detection the record of current(s) to earth or of voltages appearing across the secondary winding(s), should be performed in addition to the voltage record.
16.2.4 Lightning impulse test
For Windings having Um < 300 kV the test should be performed with both positive and negative polarities. Fifteen consecutive impulses of each polarity, not corrected for atmospheric conditions, should be applied. The transformer passes the test if for each polarity
- No disruptive discharge occurs in the non-self-restoring internal insulation
- No flashovers occur along the non-self-restoring external insulation
- No more than two flashovers occur across the self-restoring external insulation
- No other evidence of insulation failure is detected (e.g. variations in the wave shape of the recorded quantities)
For unearthed voltage transformers, approximately half the number of impulses should be applied to each line terminal in turn with the other line terminal connected to earth.
For windings having Um ≥ 300 kV the test should be performed with both positive and negative polarities. Three consecutive impulses of each polarity, not corrected for atmospheric conditions, should be applied.
The transformer passes the test if:
- No disruptive discharge occurs
- No other evidence of insulation failure is detected (e.g. variations in the wave shape of the recorded quantities).
Rated insulation levels for VTs with Um < 300kV
| Highest system Voltage Um(kV peak) | Rated short-duration power-frequency withstand voltage kV (r.m.s) | Rated lightning impulse withstand voltage kV (peak) |
| 0.72 | 3 | — |
| 1.2 | 6 | — |
| 3.6 | 10 | 20/40 |
| 7.2 | 20 | 40/60 |
| 12 | 28 | 60/75 |
| 17.5 | 38 | 75/95 |
| 24 | 50 | 95/125 |
| 36 | 70 | 145/170 |
| 52 | 95 | 250 |
| 72.5 | 140 | 325 |
| 123 | 185/230 | 450/550 |
| 145 | 230/275 | 550/650 |
| 170 | 275/325 | 650/750 |
| 245 | 395/460 | 950/1050 |
(Note: Choose the highest value for exposed installations)
Rated insulation levels for VTs with Um ≥ 300kV
| Highest system Voltage Um (kV peak) | Rated switching impulse withstand voltage (kV peak) | Rated Lighting impulse withstand voltage (kV peak) |
| 300 | 750/850 | 950/1050 |
| 362 | 850/950 | 1050/1175 |
| 420 | 1050/1050 | 1300/1425 |
| 525 | 1050/1175 | 1425/1550 |
| 765 | 1425/1550 | 1950/2100 |
(Note: Choose the highest value for exposed installations)
PF withstand voltages for VTs with Um ≥ 300 kV
| Rated lightning impulse withstand voltage (peak) kV | Rated power frequency withstand voltage (r.m.s.) kV |
| 950 | 395 |
| 1050 | 460 |
| 1175 | 510 |
| 1300 | 570 |
| 1425 | 630 |
| 1550 | 680 |
| 1950 | 880 |
| 2100 | 975 |
16.2.5 Switching impulse test
The test voltage should have appropriate values, depending on the highest voltage for equipment and the specified insulation level. The test should be performed with positive polarity. Fifteen consecutive impulses, corrected for atmospheric conditions, should be applied. For outdoor-type transformers the test should be performed under wet conditions.
The transformer passes the test if:
- No disruptive discharge occurs in the non-self-restoring internal insulation
- No flashovers occur along the non-self-restoring external insulation
- No more than two flashovers occur across the self-restoring external insulation
- No other evidence of insulation failure is detected (e.g. variations in the wave shape of the recorded quantities)
16.2.6 Wet test for outdoor type transformers
For windings having Um < 300 kV, the test should be performed with power-frequency voltage of the appropriate value depending on the highest voltage for equipment applying corrections for atmospheric conditions. For windings having Um ≥ 300 kV, the test should be performed with switching impulse voltage of positive polarity of the appropriate value, depending on the highest voltage for equipment and the rated insulation level.
16.2.7 RIV test
The test is done with ambient temperature limited between 16 to 30ºC and a humidity level of 45 to 75%.
The test voltage should be applied between one of the terminals of the primary winding of the test object and earth. The frame, case (if any), core (if intended to be earthed) and all terminals of the secondary winding(s) should be connected to earth. The measuring circuit is provided in IEC. The measuring circuit should preferably be tuned to a frequency in the range of 0.5 MHz to 2 MHz, the measuring frequency being recorded. The results should be expressed in micro volts. The impedance between the test conductor and earth (Zs + (R1 + R2)) should be 300 Ω ± 40 Ω with a phase angle not exceeding 20°. A capacitor Cs may also be used in place of the filter Zs and a capacitance of 1 000 pF is generally adequate.
The filter Z should have a high impedance at the measuring frequency in order to decouple the power frequency source from the measuring circuit. A suitable value for this impedance has been found to be 10 000 Ω to 20 000 Ω at the measuring frequency.
The radio interference background level (radio interference caused by external field and by the high-voltage transformer) should be at least 6 dB (preferably 10 dB) below the specified radio interference level.
A pre-stress voltage of 1.5 Um/√3 should be applied and maintained for 30 seconds. The voltage should then be decreased to 1.1 Um /√3 in about 10 seconds and maintained at this value for 30 s before measuring the radio interference voltage.
The VT is considered to have passed the test if the radio interference level at 1,1 Um/ √3 does not exceed the limit prescribed by IEC. Some times by agreement between the manufacturer and purchaser, this test may be replaced by the partial discharge test. In such a case the allowable PD value is 300 pC at 1.1 Um /√ 3.
16.2.8 Power frequency withstand test
This is normally a routine test and similar to those done on power transformers. For separate source withstand test, the duration should be 60 seconds. For the induced voltage withstand test, the frequency of the test voltage may be increased above the rated value to prevent saturation of the core. The duration of the test should be 60 seconds.
If, however, the test frequency exceeds twice the rated frequency, the duration of the test may be reduced from 60 seconds as below:
Duration of test (in seconds) = (twice the rated frequency/test frequency) × 60 with a minimum of 15 seconds.
For windings having Um < 300 kV test values are as per table based on the system’s highest voltage.
The applicable test voltage should be applied for 60 seconds in sequence between the short-circuited terminals of each winding section, or each secondary winding and the earth. The frame, core (if there is a special earth terminal), and the terminals of all the other windings or sections should be connected together and to earth when one winding/section is tested.
16.2.9 Partial discharge test
Procedure A: The partial discharge test voltages are reached while decreasing the voltage after the induced voltage withstand test.
Procedure B: The partial discharge test is performed after the induced voltage withstand test.
The applied voltage is raised to 80% of the induced voltage, maintained for not less than 60 seconds, and then reduced without interruption to the specified partial discharge test voltages.
If not otherwise specified, the choice of the procedure is left to the manufacturer. The test method used should be indicated in the test report.
For unearthed transformers two tests are done by applying voltages alternately to each of the HV terminals with the other terminal connected to ground (along with the other windings and frame).
16.2.10 Chopped impulse test on primary winding
The test should be carried out with negative polarity only, and be combined with the negative polarity lightning impulse test. The voltage should be a standard lightning impulse, chopped between 2 µs and 5 µs. The chopping circuit should be so arranged that the amplitude of over swing of opposite polarity of the actual test impulse should be limited to approximately 30% of the peak value. The test voltage of the full impulses should have the appropriate values based on the highest system voltage and the specified insulation level.
The sequence of impulse applications should be as following:
For windings having Um < 300 kV:
- One full impulse
- Two chopped impulses
- Fourteen full impulses
For unearthed transformers, two chopped impulses and approximately half the number of full impulses should be applied to each terminal.
For windings having Um ≥ 300 kV:
- One full impulse
- Two chopped impulses
- Two full impulses
Differences in wave shape of full wave applications before and after the chopped impulses are an indication of an internal fault. Flashovers during chopped impulses along self-restoring external insulation should be disregarded in the evaluation of the behavior of the insulation.
16.2.11 Capacitance and dielectric dissipation factor
The measurement of capacitance and dielectric dissipation factor should be made after the power-frequency withstand test on the primary windings. The test voltage should be applied between the short-circuited primary winding terminals and earth. Generally the short-circuited secondary winding(s), any screen, and the insulated metal casing should be connected to the measuring bridge. If the current transformer has a special device (terminal) suitable for this measurement, the other low-voltage terminals should be short circuited and connected together with the metal casing to the earth or the screen of the measuring bridge.
16.2.12 Transmitted over voltages measurement
A low-voltage impulse (U1) should be applied between one of the primary terminals and earth.
For single-phase current transformers for GIS metal-enclosed substations, the impulse should be applied through a 50 Ω coaxial cable adapter with the enclosure of the GIS section connected to earth as to be done in service. The terminal(s) of the secondary winding(s) intended to be earthed should be connected to the frame and to earth.
The transmitted voltage (U2) should be measured at the open secondary terminals through a 50 Ω coaxial cable terminated with the 50 Ω input impedance of an oscilloscope having a bandwidth of 160 MHz or higher which reads the peak value. If the current transformer comprises of more than one secondary winding, the measurement should be successively performed on each of the windings. In the case of secondary windings with intermediate tappings, the measurement should be performed only on the tapping corresponding to the full winding. The over voltages transmitted to the secondary winding (Us) for the specified over voltages (Up) applied to the primary winding should be calculated as follows:
Us = (U2 / U1) × Up
In the case of oscillations on the crest, a mean curve should be drawn, and the maximum amplitude of this curve is considered as the peak value U1 for the calculation of the transmitted over voltage.
The voltage transformer is considered to have passed the test if the value of the transmitted over voltage does not exceed the limits given per IEC table.
16.2.13 Ratio and accuracy class verification test
These are both type tests and routine tests. The requirement is that the voltage error and phase displacement at rated frequency should not exceed the values (given earlier) at any voltage between 80% and 120% of rated voltage and with burdens between 25% and 100% of rated burden at a power factor of 0.8 lagging. To prove compliance with this, type tests should be made at 2%, 5% and at 100% of rated voltage and at rated voltage multiplied by the rated voltage factor, at 25% and at 100% of rated burden at a power-factor of 0.8 lagging.
The routine tests for accuracy are in principle the same as the type tests, but routine tests at a reduced number of voltages and/or burdens are permissible, provided it has been shown by type tests on a similar transformer that such a reduced number of tests is sufficient to prove its characteristics.
For measuring voltage transformers of accuracy class 0.1 and 0.2 and having a rated burden lower than 10 VA an extended range of burden can be specified. The voltage error and phase displacement should not exceed the values given in the table, when the secondary burden is any value from 0 VA to 160 % of the rated burden, at a power factor equal to 1. This requirement is mostly requested for certified accuracy of energy measurements.
The measurement errors should be determined at the terminals of the voltage transformer and should include the effects of any fuses or resistors as an integral part of the VT.
17
Oil Testing
17.1 Transformer oil – dielectric properties and uses
Till about 30 years back (around 1975) the oil used for transformers was produced by acid refining of naphtha crude. Basically, acid refining removes undesirable components from the oil by using sulphuric acid to turn the impurities to form sludge. The acidic sludge is subsequently removed by a centrifuge. The acid salts resulting in the process were removed by neutralization. Water and alcohol are removed by a steam ‘stripper’, and remaining polar contaminants are removed by an earth treatment. This process was costly, and disposal of the sludge had caused environmental concerns and criticism. Environmental pressures have forced refiners to curtail the use of the acid refining technique and develop new refining techniques. Presently, two types of refining, hydrogen and solvent, are being utilized by several refiners. These methods are less wasteful, potentially cheaper, and involve fewer environmental problems than acid refining. The oil used in today’s electrical industries is called mineral oil and all country standards clearly define the requirements of this oil.
Oil filled transformers are the most common types of transformers used for high voltage and medium voltage applications. Though dry type transformers using cast resin insulation are evoking some interest in medium voltage transformers, using oil cannot be ruled out for high voltage winding transformers above 33 kV. The main reason is that the capacity of the transformers with cast resin is limited both in terms of voltage as well as capacity. Added to this are the difficulties of having on load tap changers for these new types.
The major reason for limiting capacities of dry type cast resin transformers is the high temperature to be taken care of and generally these types of transformers are not suited for outdoor applications. Hence the chances of increased failure rates of cast resin types are also more if proper care is not taken for dissipating the heat generated by the transformers. Though these are very helpful in cutting down major maintenance needs of oil filled types, the limitations in capacities, etc make the oil filled transformers the preferred choice in many installations. This is especially so in power plants and utility industries which use voltages up to 865 kV with capacities in hundreds of MVA.
Since the mineral oil is obtained from raw petroleum crude, it is a mixture of a large number of hydrocarbons which only differ from one another in their structure and molecular weight. The oil in a transformer basically serves three purposes when a transformer is in service.
- The insulation (dielectric) properties of the oil ensure good insulation required between the windings of different phases and between the windings leading to the core.
- The oil is also acting as a coolant and the rise in oil temperature is an indication of overloading on transformers. Oil filled transformer capacity is related in reference to the maximum allowable temperature rise of the transformer oil. Radiators are provided to allow natural circulation of hot oil to travel to the top and surfaces and ensure fast heat dissipation to the atmosphere. The basic capacity of the oil filled transformer is also referred as ONAN capacity meaning the maximum loading allowed with natural oil circulation and natural air cooling.
- It also acts as an arc quenching medium like the oil in oil circuit breakers.
Transformer oil is normally a bought-out item in a transformer as far as the transformer manufacturers are concerned but their quality is vital to keep the transformers in service. The condition and safe operation of an oil filled transformer can be verified by testing the oil. This section describes the recommended tests on transformer oil and their importance, acceptable values, etc.
Typical acceptable values for transformer oil characteristics are as below and a value deviating from these values for any parameter needs immediate attention and correction as otherwise the transformer will not be able to meet its purpose and may ultimately fail during its service.
| Viscosity at 400C | 11~16.5 mm2/sec |
| Minimum flash point | 145ºC |
| Maximum pour point | –40ºC (very cold climates demand –60ºC) |
| Maximum neutralization value | 0.03 mgKOH/g |
| Maximum acidity | 0.4 mgKOH/g |
| Maximum water content | 35 ppm |
| Min. electric strength | 30 kV |
| Dielectric dissipation factor | 0.005 (max) |
| Interfacial tension | 45 dynes/cm |
| Specific Gravity at 15.6ºC | 0.865 to 0.91 |
| Polychlorinated biphenyl (PCB) | Nil |
17.2 The need for testing transformer oil
During its service the oil undergoes oxidation leading to the formation of peroxides, water and organic acids along with sludge. These products lead to the deterioration of the cellulose which is the common insulation used in transformer windings. Sludge can impair the heat transfer capabilities of the oil as it forms a layer over the winding and the tank. In addition sparks and discharges inside the transformer lead to the disintegration of oil leading to the formation of gases, which mainly remain dissolved in the oil. The early detection of the deterioration of the oil will lead to considerable increase in the life of the oil and the transformer leading to improved performance.
As we have seen earlier insulation is very vital for keeping any electrical equipment in service. Naturally with transformers being major electrical equipment its oil which serves as the insulation must maintain its dielectric properties to keep the transformers in healthy operating conditions. Hence oil testing is very important to ascertain insulation properties and other properties of the transformers as discussed in the subsequent paragraphs.
It is a usual practice for the oil manufacturer to provide a test report confirming the condition of the oil meeting the above specified parameters, in line with any bought-out item. Hence a transformer manufacturer normally does not conduct oil tests to verify all the above characteristics, while supplying the transformer. But it is the responsibility of the buyer to ensure that the oil manufacturer’s test report is submitted by the transformer manufacturer and the oil is properly handled in the transformer factory. In case considerable time has elapsed between the time of tests by the oil manufacturer and the transformer testing, it is necessary to verify almost all the above parameters by testing a small sample of oil. This is done in some approved laboratory.
Nevertheless the dielectric strength is to be verified as part of a transformer’s routine tests and it is considered healthy only if the oil conditions meet the dielectric properties as per standards.
The life of the transformer oil insulation is also based on its operating temperature as noted in the following table.
Oil life affected by operating temperature
| Operating Temperature | Transformer Oil Life |
| 60°C | 20 years |
| 70°C | 10 years |
| 80°C | 5 years |
| 90°C | 2.5 years |
| 100°C | 13 months |
| 110°C | 7 months |
A major reason for transformer failure is due to oil properties getting affected during operation. It is possible that the transformer may not be continuously loaded but still there could be occasional overloading and a temperature rise due to ambient conditions, which in turn affect’s the oil and the transformer life. Hence oil testing does not end at a manufacturer’s factory but has to be carried on during service to take proactive steps to ensure that the transformer does not suddenly fail. Oil sample test is one major critical test to ensure that the oil retains its characteristics during its operating life.
17.3 Dielectric test
The dielectric strength of the insulation is defined as the maximum voltage that can be withstood by the insulation when the voltage is applied across the conductor and the ground or the conductor and its insulation which is at ground potential. However the oil is a floating medium and hence it is difficult to verify its dielectric strength in a similar way and it is necessary to device alternate means. As we have seen earlier, air is also an insulation medium the air breaks down and allows conduction in the form of a flash arc when the distance between two different potential sources is reduced below a tested distance. This breakdown voltage also reduces in case the air properties separating the live parts or live part to the ground are affected due to climatic conditions (like higher altitude areas). The dielectric test on the oil is based on this principle where two electrodes are immersed in the oil with a voltage applied across the electrodes. The oil dielectric test measures the voltage at which the oil breaks down. In case it is below acceptable limits, it means that the insulation property of the oil has deteriorated and the oil needs to be replaced or repaired to avoid insulation breakdown within the transformer oil tank.
This test setup consists of two spherical electrodes with provisions to adjust the gap between them. A high voltage is applied across these two electrodes. This is normally increased slowly from zero, by maintaining a gap of 2.5 mm (0.1 inch) with oil in between the electrodes. The dielectric strength of the oil prevents a flashover across the electrodes up to some voltage after which it breaks down. The acceptable flashover voltage across the electrodes is around 30 kV as per standards when transformers are in service, though new oil gives a value as high as 80 kV. This voltage is termed as the break down voltage (BDV) of the oil being used. Lower values of voltage indicate the presence of contaminating agents like moisture, fibrous materials, carbon particles, sludge’s, sediments, etc in the oil and oil filtration is necessary to remove these contaminants to increase its BDV.
The test instrument is shown in Figure 17.1. The oil is collected in a small beaker and electrodes are immersed in the sample. The voltage is slowly increased from zero and a provision exists to cut off the voltage supply as soon as a flashover occurs between the electrodes. The value is displayed in the digital window. The test is normally repeated for a minimum of 3 to 6 times and the BDV recorded. The average of these readings is taken as the BDV of the main oil from which the sample is taken.

Oil dielectric test kit of AVO industries
17.4 Improvement of oil by filtration
Figure 17.2 illustrates how the dielectric strength of the oil is affected by impurities and foreign matters present inside. As can be seen, the dielectric strength goes on decreasing as the impurity contents increase. The oil is likely to fail if considerable impurities are present which can bring down the dielectric strength to as low as 10 kV at 2.5 mm gap.

Oil dielectric strength changing with impurity contents
Moisture also plays an important role in bringing down the BDV; even below the values given in the graph. The obvious way of improving the dielectric strength is by removing the impurities and the moisture. Whether a transformer is in service or not, considerable use of paper in transformer construction makes the insulation fail due to the presence of impurities and the moisture.
The variation of dielectric strength with increasing moisture content is given in Figure 17.3. It presents a picture similar to detiriotation in the presence of impurities.

Dielectric strength variation with moisture content
Accordingly filtration of the transformer oil is a MUST whenerver the transformer is not in srevice for a long time or if it had been under service for about one year. The filtartion unit is generally brought to the site of installation and has provisions to circulate the oil through this machine. The following graph is an indication on how the transformer oil can provde an acceptable result once impurities are removed.

Oil dielectric strength improvement after filtrations
It is to be noted that the impurities are not completely removed after filtration but the size of impurity particles alone is restricted. Hence filtration is not the solution for aged transformers and it is normally recommended to replace the oil every five years of service. This if of course depends on operating conditions.
17.5 Oil filtration units
These units use a combination of a high vacuum treatment and fine filtration systems. High vacuum is used for extracting water, present in the form of vapors in the oil which are then condensed. This is then followed by fine filtration of oil. Finally the oil is passed through a column of activated alumina for correction of its acidity.
These units are available as mobile units or portable units, so that they can be moved from one place to another. Naturally an industry is not ready to buy these units and hence invariably these are organized through an agency/contractor. They are normally mounted on a trailer which can be towed to any location. The system is pre-piped and pre-wired and is practically ready for use. For making the system operational, only the following things are required to be done at the place of use.
- Inlet and outlet connections by flexible hose.
- Connecting three phase electrical supply.
Typical oil filtration units are shown in Figure 17.5.

Typical oil filtration units
The systems are designed to remove harmful contaminants such as moisture, dissolved gases and carbon particles and hence preserve the dielectric properties of the transformer oil. The system is also capable of removing sludge and other types of suspended solids. The system is designed on a low temperature and high vacuum principle. When a high degree of vacuum is applied, the boiling point of water and vapor pressure of volatile substances comes down drastically. Water vapors and vapors of volatile substances escape from the oil, thus improving dielectric properties. By using high vacuum systems the ppm level of moisture content can be brought down to as low as 5 ppm and dissolved gas content can be brought down to 0.1% to 0.2% by volume.
The unit comprises of following main components.
- Inlet pump:
It sucks oil either from the transformer or from the transformer oil storage tank. It is a positive displacement pump.
- Heat exchanger
The inlet pump sucks oil and delivers it into a heat exchanger. Electrical heaters are flitted inside the heat exchanger. Generally, oil is heated to 60ºC to 70ºC. It contains indirect low watt density (less than 2 W/cm2) bobbin type electric heaters. Oil temperature is controlled with a thermostat. A suitable oil distribution system is provided to ensure uniform flow of oil over the heaters.
- Filter press
It is coarse filter or pre-filter for an edge filter or a membrane filter. Some parts of sludge, free water and carbon are removed in this filter press. The pre -filter is a strainer with magnet and removes magnetic and coarse suspended particles and protects inlet pump from damage due to abrasion.
- Ionic reaction column
If the oil is acidic it is passed through an ionic reaction column where the acidity is reduced by ion exchange.
- Edge filter/fine filter
Oil is then pumped into an edge filter column for fine filtration, where suspended solids are easily and effectively removed.
- Dehydrator/degassing column
A dehydrator is a highly efficient system in reducing dissolved gas and moisture content in oil. Also, it removes volatile acids which may be present. The number of stages for degassing and the type of vacuum pumping system depend upon the moisture content requirement at the outlet of the system.
The units are available as single stage and multi stage units. If requirement of dissolved gas content and moisture content is not stringent then single stage vacuum treatment plants are most suitable. For more stringent requirements multi-stage vacuum treatment plants can be used. Typical capacities of these units vary from 500 liters per hour to more than 10,000 liters per hour. The power consumption will vary from 10 kW to beyond 150 kW depending on the volume to be handled and the heating requirements.
The amount of moisture which can be dissolved in oil increases rapidly as the oil temperature increases. Therefore, insulating oil purified at too high a temperature may lose a large percentage of its dielectric strength on cooling because the dissolved moisture is then changed to an emulsion. Experience has shown that the most efficient temperature at which to filter insulating oil is between 20 and 40°C (68 and 100°F). Below 20°C the viscosity increases rapidly, while at temperatures above 40°C, the moisture is more difficult to separate from the oil.
The following factors govern whether the filtration is proper or not:
- Vacuum in the filtration machine
- The temperature of the transformer windings
- Time or number of times the oil is circulated
- The variation in the IR value of the transformer before it stabilizes
- The BDV value achieved after filtration.
A good vacuum will ensure speedy and good filtration.
17.6 Test of acidity
The oil in service gets oxidized not only because of contact with atmospheric air but also because of the large amount of copper present in the transformer. Acids formed due to these effects give rise to sludge, which precipitate out and deposit on the windings and other parts of the transformer. This affects oil circulation and transformer performance. The acids can also deteriorate the cellulose insulation.
The extent of oxidation is generally expressed as a simple number which is called Acid Neutralization Number. This number not only indicates the extent of oxidation of the oil but also identifies the extent of free organic and inorganic acids present in the oil.
The test measures the quantity of base component that is required to neutralize the acidic contents present in the oil. The test comprises of mixing the known amount of oil sample with a base compound (Potassium hydroxide – KOH) until the indicator solution turns bright pink. The neutralization number is expressed in terms of the amount of KOH in mg that takes to neutralize the acid in one gram of oil. i.e. in mg KOH/gm. Though the minimum specified is 0.03, the acceptable value under operating conditions can go up to 0.05 mg KOH/gm. However values of more than 0.1 are totally unacceptable. The difficulty in performing this test may be detecting the color change in slightly dark oil.
17.7 Other tests
17.7.1 Interfacial tension test (IFT)
The surface tension of clean pure water is strong enough to allow a carefully placed (small) needle to float without sinking. Adding detergent to the water reduces the tension and the needle sinks.
Normally oil floats on water with a surface tension between a clean oil and clean water being around 50 dynes/cm. The contaminations in the oil decrease this value and an acceptable value is around 30 dynes/cm. Values below 30 dynes/cm are unacceptable and need improvement.
This test measures the tension between the oil and water content in terms of dynes per cm or mille Newton per meter. The lower the value, the higher is the degree of sludge in the transformer oil, which needs to be filtered out or removed.
This is a laboratory test where a metal ring is mounted in a beaker parallel to the surface of the water and a sensitive balance is used to measure the force required to pull the ring from the water. The presence of acidic compounds and peroxides in the transformer oil will lower the strength of the surface film of oil on water.
The new oil should have a value of 0.04 n/m (40 dynes/cm). The values fall during service and the decrease is proportional to the concentration of oil contamination. The fall of value during the initial stage is mainly due to dissolution of varnish etc from within the equipment. Subsequent falls can then be related to the deterioration of oil. Sludge formation is possible if its value goes below 0.18 n/m.
An interesting graph as per AIEE transactions 1955 is given in Figure 17.6. It shows how the interfacial tension and acidity vary with the length of service.

Typical values of IFT and acidity for oil under service
It is seen that the rate of change of IFT is also a more sensitive indication of early deterioration. The IFT measurements are particularly useful in identifying (at an early stage) new oil with poor life expectancy. It permits corrective actions to be taken while it is still practical and indicating when oil should be discarded and replaced. The rate of change of acidity is often a more sensitive indication of deterioration near the sludge point. However, this is only true if the oil does not contain alkali impurities. Such impurities neutralize the acids as they are formed, resulting in a low-acidity value.
17.7.2 Color
New oil is relatively clear and the change in oil color over a period of service is inspected.
A sample of oil can be compared to a standard color disc assigned with a color number. The color standard ranges from 0.5 to 8.0 – the lower the number, the better the oil. Following are the typical numbers that are adopted.
- #1 STRAW COLOR
- #2 PALE YELLOW
- #3 YELLOW
- #4 ORANGE
- #5 RED-BROWN
- #6 BROWN
Change in color may be due to moisture, dissolved copper compounds or suspended particles. The lab test is conducted by comparing a sample of oil to some color standards and applies to all types of oil including transformer oil. The color value of around 3.5 is generally acceptable. Any appreciable change in color (value exceeds 3.5 denoting darker oil), may indicate the presence of contaminations.
17.7.3 Relative density
The specific gravity of the oil is measured by using a hydrometer. The normal value is around 0.91, which may go down to values around 0.85 over a period of time. If the specific gravity is more than 0.91, it could indicate the presence of contaminants.
A value lower than 0.84 indicates the presence of paraffin’s in the oil. However the measurement of specific gravity does not give a true picture, since the accidental mix up of dielectric liquid with lubricants, fuel oil etc, may also give values between 0.85 and 0.91, making it difficult to detect whether the oil is free from such lubricants, etc.
Further the acceptable value is normally based at a temperature of 29.5ºC. It also ensures that water remains as ice at the bottom for temperatures up to –10ºC.
17.7.4 Dielectric dissipation factor
This factor gives the relative percentage of current that leaks through the oil in a test cell, something similar to the dielectric strength giving the flashover value. The test cell consists of two metal shells with a small gap and the gap is filled with the dielectric liquid. Then a test voltage is applied and the leakage current through the oil is measured like a capacitance current. It is preferable to conduct this test at two temperatures viz., 25ºC and 100ºC. This is because lower temperature measurements may not detect contamination in the oil. New refined oil has a low factor in the range of less than 0.1% at 20ºC and below 3% at 100ºC. Respective values exceeding 0.3% and 4% are unacceptable.
The above factor is represented by tan δ for an oil-filled transformer. A similar test is conducted for dry type transformer where the power factor of the winding is measured by passing the current and finding the ratio of watts to VA input. This test is referred to as the power factor test.
17.7.5 Water content
The amount of free and dissolved water is termed as the moisture content and is normally expressed in mg of water/kg of oil (ppm – parts per million). Presence of moisture in oil is harmful because it adversely affects the electrical characteristics of the oil and subsequently accelerates the deterioration of the solid insulation as well. A value beyond 35 ppm is generally unacceptable.
17.7.6 Flash point
The oil normally produces some vapor at higher temperatures. The flash point basically decides the temperature at which the oil releases sufficient quantity of this vapor, which when mixed with air forms an ignitable substance and gives a momentary flash on application of flame (under
certain conditions).
17.7.7 Viscosity
Viscosity is a measure of resistance offered by oil to flow without any external forces. Transformer cooling is achieved by radiators, which in turn depend on the mobility of hot oil at the top and relatively cooler oil at the bottom. Normally viscosity increases with decreasing temperature and hence the viscosity should be as low as possible (at low temperatures).
17.7.8 Pour point
The lowest temperature at which the oil freely flows is termed as its pour point and below this point the oil becomes too viscous or gets solidified thus affecting the flow. Excessive cooling of the transformer severely affects the pour point.
17.7.9 Specific resistance
Resistivity is expressed in ohm-cm, which is numerically equivalent to the resistance between opposite faces of a centimeter cube of liquid. A low resistance value represents the presence of moisture and possible contaminants. Low transformer resistance values also affect the insulation resistance value of the transformer windings.
17.8 Dissolved gas analysis
17.8.1 Features and importance
Another important test on transformer oil under use is to take up a dissolved gas analysis to find the break up of gas contents present in used oil. The generation of gases in oil filled transformers due to sparks and arcs and severe overheating cannot be ruled out. The gases are produced due to chemical reactions during such times.
Initially the Hydrogen content was an indication for a possible fault within the transformer. However later it was recognized that there are also chances of hydrocarbons being present. For low temperature faults methane and hydrogen are generated. As the temperature of the fault increases, ethane is produced reducing the methane content. Hence the ethane-methane ratio is also an indication of the severity of the fault. At higher temperatures ethylene starts increasing overtaking the ethane content. At still higher temperatures, acetylene is produced and it ultimately becomes predominant. International standards define interpretation of gas analysis results that indicate the severity of internal faults.
The other way of testing is passing the gas sample evolved through a Buchholz relay then catching it in a balloon and analyzing its contents directly. Though both carbon monoxide and carbon dioxide are also present in the oil, it has been recognized that as long as their values remain without much change, there is no reason for concern.
It is very important to also conduct a dissolved gas analysis on oil samples. This analysis of the various constituents can provide some valuable information as to the rate of deterioration (or otherwise) of the transformer insulation.
Major faults in transformers are usually the result of the electrical and thermal stresses in the transformer oil or its insulation materials. Such excessive stresses normally produce a mixture of gases, which get dissolved in the oil. A study on the dissolved gas gives an indication of the type and location of such faults.
Electrical Faults in a transformer can result in
- Arcing
- Sparking
- Partial discharge
Similarly thermal faults inside a transformer can be classified as
- Local over heating 150–300ºC
- Local over heating 300– 1000ºC
- Local over heating >1000ºC
- Overheating of cellulose
17.8.2 Basic gas analysis inferences
Normally oil is taken out for making an analysis of the dissolved gases at regular intervals, the period normally depending on the loads and the faults faced by the transformers when in service. The nature of transformer operation is normally indicated by an analysis on the quantum of the following gases present in the oil.
1. Normal H2, O2, N2, CO, CO2, CH4
2. Abnormal H2, CH4, C2H2, C2H4, C2H6
3. Deterioration CO, CO2, CH4
Various faults in oil and insulation produce gases like Hydrogen, Methane, Ethylene, Ethane, Carbon dioxide, Carbon monoxide. The extraction of gas is done under vacuum and the gases are separated for knowing their respective concentration using a gas chromatographer.
Different faults result in different kinds of gases and hence the presence of each gas gives a direct indication of a corresponding fault. The following gases are produced under different fault conditions.
1. Over heating of solid insulations CO, CO2
2. Over heating of liquid and solid insulation CH4, C2H4, CO, CO2, H2
3. Arcing in oil CH4, C2H4, H2
4. Arcing of liquid and solid insulation CO, CO2, H2, C2H2
The percent of combustible gas in the sample oil is a reflection of internal conditions. A general evaluation is as per the table below:
Typical Inference from gas analysis results
| Percent Combustible Gas | Evaluation |
| 0 – 1 | Check each transformer every 12 months. |
| 1 – 2 | Equipment shows some indication of contamination or slight incipient fault. Readings in this range should be followed immediately with a dissolved gas analysis. Take readings at 3- to 6-month intervals to establish a trend. |
| 2 – 5 | Take readings at monthly intervals. If trend continues upward, prepare to investigate cause, preferably by internal inspection. |
| Greater than 5 | Remove equipment from service as soon as possible. Investigate by internal inspection. Prepare to move equipment to service shop. |
17.8.3 DGA study methods
The dissolved gas analysis study may adopt any of the following methods.
- Permissible gas concentration limits
- Regression method
- Combustible gas method
- Key gas method
The key gas method is mainly to identify the key gases that get dissolved in the oil over a period of time, which indicates whether the transformer operation had been normal or whether any internal undetected faults existed prior to the analysis.
- Ratio method – Rogers and IEC
- Duval’s Triangle method
The combustible Gas method evaluates the total ppm of dissolved gases without going into their individual components and the results can identify any of the following based on the total concentration. This is almost in line with the earlier table.
| 0-500 | Satisfactory |
| 500-1000 | Decomposition of oil in excess of normal aging-monitor |
| >1000 | Significant decomposition – frequent analysis required to establish trend |
| >2500 | Substantial decomposition – possibility of fault to be confirmed by testing/opening |
Roger’s ratio method compares the ratio of gases present in the oil. In the following table, 0 represents the ratio is less than 1 and 1 represents the ratio is above 1. Continuous 4 zero’s represent normal condition.
Roger’s ratio chart
| CH4/H2 | C2H2/CH4 | C2H4/C2H6 | C2H2/C2H4 | Observation |
| 0 | 0 | 0 | 0 | If ratio < 0.1, partial discharge possible, else OK |
| 1 | 0 | 0 | 0 | Slight overheating >1500C |
| 1 | 1 | 0 | 0 | Overheating >150 < 2000C |
| 0 | 1 | 0 | 0 | Overheating >200 < 3000 C |
| 0 | 0 | 1 | 0 | General overheating |
| 0 | 0 | 0 | 1 | Flash over |
| 0 | 1 | 0 | 1 | Tap selector breaking current |
| 0 | 0 | 1 | 1 | Arcing/ Sparking |
The ratios of gases present are ascertained to decide the happenings inside a transformer as noted below. Table 17.4 contains the IEC recommendations.
Ratio chart as per IEC
| C2H2/C2H4 | CH4/H | C2H4/C2H6 | Observation | |
| No fault | 0 | 0 | 0 | Normal aging |
| Partial Discharge of low intensity | 0 | 1 | 0 | Discharges in gas filled cavities resulting from incomplete impregnation or super saturation or high humidity. |
| Partial Discharge of high intensity | 1 | 1 | 0 | Leading to tracking or perforation of solid insulation |
| Discharge of low energy | 1 to 2 | 0 | 1 to 2 | Continuous sparking in oil between lead connection of different potential or floating potential |
| Discharge of high energy | 1 | 0 | 2 | Discharges with power flow through arcing. Breakdown of oil between windings or coil to earth. |
| Thermal fault < 1500 C | 0 | 0 | 1 | General overheating |
| Thermal fault 150 to 3000C | 0 | 0 | 2 | Local overheating of core due to flux concentration. |
| Thermal fault 300 to 7000C | 0 | 2 | 1 | Increasing hot spot temperature, bad contacts, and tank circulating current |
| Thermal fault > 7000C | 0 | 2 | 2 | Overheating of copper |
17.8.4 Duval triangle method
Duval triangle method is an accurate and trustworthy method, using dissolved gas analysis for deduction of transformer problems. It is the most widely used technique for analyzing faults in transformers, with about one million DGA analyses being performed every year by more than 400 laboratories worldwide.
In Duval method, the cause of the problem is determined based on the concentration percentages of combustible gases evolved due to the problem. Table 17.5 shows the main gases analyzed by DGA.
Key gases analyzed by DGA
| Hydrogen | H2 |
| Methane | CH4 |
| Ethane | C2H6 |
| Ethylene | C2H4 |
| Acetylene | C2H2 |
| Carbon monoxide | CO |
| Carbon dioxide | CO2 |
| Oxygen | O2 |
| Nitrogen | N2 |
The method was developed empirically by Dr. Michel Duval, by using the database belonging to thousands of transformers, spanning many years. However, it is recommended to use Duval method after confirming the existence of a problem in the transformer by the presence of hydrocarbon gases and their rates of evolution. Table 17.6 below can be used as a guide to confirm the existence of a problem in the transformer. At least one of the individual gases must be at L1 level or above and the gas generation rate at least at G2 level to indicate the presence of the problem.
L1 Limits and Gas generation rate/month Limits
| Gas | L1 Limits | G1 Limits (ppm per month) | G2 Limits (ppm per month) |
| H2 | 100 | 10 | 50 |
| CH4 | 75 | 8 | 38 |
| C2H2 | 3 | 3 | 3 |
| C2H4 | 75 | 8 | 38 |
| C2H6 | 75 | 8 | 38 |
| CO | 700 | 70 | 350 |
| CO2 | 7000 | 700 | 3500 |
Figure 17.7 below shows the Duval triangle.

Duval Triangle
PD – Partial Discharge
T1 – Thermal Fault less than 300°C
T2 – Thermal Fault between 300°C and 700°C
T3 – Thermal Fault greater than 700°C
D1 – Low Energy Discharge (Sparking)
D2 – High Energy Discharge (Arcing)
DT – Mix of Thermal and Electrical faults
The following Table 17.7 shows the faults ascribed to each of the segments shown in the Duval triangle.
Faults identifiable using Duval triangle
| Symbol | Fault | Examples |
| PD | Partial Discharge | Corona discharge in voids, gas bubbles with possible formation of X-wax in paper |
| D1 | Discharges of low energy | Partial discharges of the sparking type, inducing pinholes, carbonized punctures in paper Low energy arcing inducing carbonized perforation or surface tracking of paper, or the formation of carbon particles in oil |
| D2 | Discharges of high energy | Discharges in paper or oil, with power follow-through, resulting in extensive damage to paper or large formation of carbon particles in oil, metal fusion, tripping of equipment and gas alarms |
| T1 | Thermal Fault T<300ºC | Evidenced by paper turning brownish (>200ºC) or carbonized (>300ºC) |
| T2 | Thermal Fault, 300<T<700 ºC | Carbonization of paper, formation of carbon particles in oil |
| T3 | Thermal Fault, T<700ºC | Extensive formation of carbon particles in oil, metal coloration (800ºC) or metal fusion (> 1000ºC) |
| DT | Electrical Fault and Thermal Fault | Development of one type of fault into another type of fault |
To use the Duval triangle, the following procedure is followed. First of all, establish that a real problem exists in the transformer, using table 17.8. Once the problem has been confirmed to exist, use the Duval triangle to plot the percentages of the three gases in the triangle to diagnose the nature of the problem. The percentage of each of the key gases CH4 (methane), C2H2 (acetylene) and C2H4 (ethylene) evolved in the transformer is calculated from the individual gas quantity and the total quantity of the three gases evolved after the sudden increase in evolution of gas. Subtracting the amount of gas generated prior to the sudden increase from the present amount gives the amount of gas generated since the fault began. The percentages thus obtained are then marked on the Duval triangle against each side representing that particular gas. Lines are then drawn across the triangle for each gas, parallel to the tick marks shown on each side of the triangle as shown in sample in the figure 17.4. In majority of the cases, acetylene % would be closer to zero, since presence of acetylene indicates an abnormally high temperature condition like arcing inside the transformer.
Example below shows a case study of using the Duval triangle. Table 17.8 shows the calculation of % of the three key gases for plotting of the Duval triangle.
Calculation of key gas % for Duval triangle plotting
| Name of Key Gas | Quantity of gas prior to fault | Quantity of gas after fault occurrence | Increase in gas quantity | Gas increase as % of total quantity |
| C2H4 | 82 | 180 | 98 | 62.8 % |
| CH4 | 140 | 195 | 55 | 35.2 % |
| C2H2 | 5 | 8 | 3 | 1.9 % |
| Total Quantity of gas collected | 227 | 383 | 176 | 100 % |
Figure 17.8 below shows lines drawn in the Duval triangle with the above data. These lines have been drawn parallel to the tick marks on the sides of the triangle.

Plotting of gas percentages in Duval triangle
As can be seen, the intersection point of the lines falls within the T3 area of the triangle, which corresponds to a thermal fault greater than 700°C. Having identified the nature and the temperature range of the fault, next we find out whether there is deterioration in the cellulose insulation material by calculating the CO2/CO ratio. Let the CO2 and CO quantities in this case be 2412 and 212 respectively which gives a ratio value of 11.38. Since the ratio is more than 7 there is no concern regarding deterioration of the paper insulation (ratio less than 7 requires further investigation).
Figure 17.9 shows a triangular graph paper, which facilitates manual plotting of the lines corresponding to the gas percentages. Such a graph paper can be obtained free of charge in electronic form by email from duvalm@ireq.ca. The graph can also be plotted automatically by using software. Kelman company in UK and Serveron US provide such software with their on-line monitors. Delta-X Research company in Canada also provides such a display.

Duval triangle graph sheet for plotting Data
Dual Triangle should not be used without confirming the existence of a problem in the transformer, since there may always be a percentage available for the key gases and this would erroneously indicate a problem to be present in the transformer irrespective of whether there is a real problem or not.
17.8.5 DGA case studies
Tight control of procedures and testing can prevent transformer faults occurring, whereas protection relays only operate after the event when the damage has been done. Gas analysis of samples taken form the Buchholz relay can also prove enlightening and reveal potential major problems. Tables 17.9 and 17.10 show typical DGA case studies for two different transformers.
Case study – 1
| Case 1: Transformer Rating: 250 MVA Voltage : 400/30 kV Circumstances : Buchholz trip but no obvious faults |
||
| Gas | Main Tank | Buchholz Oil |
| H2 | 13 | 1458 |
| CO | 4 | 12 |
| CH4 | 3 | 376 |
| CO2 | 51 | 56 |
| C2H4 | 3 | 204 |
| C2H6 | 1 | 7 |
| C2H2 | 6 | 576 |
Diagnosis: Findings: Discharges of high energy, arcing, sparking and overheating.
Flash over from dislocated connection in bushing turret.
Findings:
Case study – 2
| Case 2: Transformer Rating : 11 MVA Voltage :20/6.6 kV Circumstances : Old unit in service for + 17 years |
||
| Gas | Main Tank | Conservator |
| H2 | 219 | 51 |
| CO | 1791 | 2300 |
| CH4 | 1197 | 731 |
| CO2 | 14896 | 11152 |
| C2H4 | 2273 | 1880 |
| C2H6 | 663 | 526 |
| C2H2 | 11 | 9 |
Diagnosis: Thermal faults of high temperature. Overheated oil and cellulose.
Interturn flash over between winding layers.
Findings:
For dissolved gases, IEEE C-57-104-1991 (table 4) provides the basic clues, which are explained below:

Condition 1: Total dissolved combustible gas (TDCG) below this level indicates the transformer is operating satisfactorily. Any individual combustible gas exceeding specified levels in table 4 should have additional investigation.
Condition 2: TDCG within this range indicates greater than normal combustible gas level. Any individual combustible gas exceeding specified levels in table 4 should have additional investigation. A fault may be present. Take DGA samples at least often enough to calculate the amount of gas generation per day for each gas.
Condition 3: TDCG within this range indicates a high level of decomposition of cellulose insulation and/or oil. Any individual combustible gas exceeding specified levels in table 4 should have additional investigation. A fault or faults are probably present. Take DGA samples at least often enough to calculate the amount of gas generation per day for each gas.
Condition 4: TDCG within this range indicates excessive decomposition of cellulose insulation and/or oil. Continued operation could result in failure of the transformer.
If TDCG and individual gases are increasing significantly (more than 30 ppm/day), the fault is active and the transformer should be de-energized when Condition 4 levels are reached. A sudden increase in key gases and the rate of gas production is more important in evaluating a transformer than the amount of gas. One exception is acetylene (C2H2). The generation of any amount of this gas above a few ppm indicates high energy arcing. Trace amounts (a few ppm) can be generated by a very hot thermal fault (500 °C). A one-time arc caused by a nearby lightning strike or a high-voltage surge can generate acetylene. If C2H2 is found in the DGA, oil samples should be taken weekly to determine if additional acetylene is being generated. If no additional acetylene is found and the level is below the IEEE Condition 4, the transformer may continue in service. However, if acetylene continues to increase, the transformer has an active high energy. internal arc and should be taken out of service. Further operation is extremely hazardous and may result in catastrophic failure. Operating a transformer with an active high energy arc is extremely hazardous.
Above Table assumes that no previous DGA tests have been made on the transformer or that no recent history exists. If a previous DGA exists, it should be reviewed to determine if the situation is stable (gases are not increasing significantly) or unstable (gases are increasing significantly). Deciding whether gases are increasing significantly depends on your particular transformer.
Case Study 1
The types of gases normally generated based on different faults have been covered earlier and the diagnosis is in line with the gases shown in bold and italics and points 2,3 and 4 shown below.
1. Over heating of solid insulations CO, CO2
2. Over heating of liquid and solid insulation CH4, C2H4, CO, CO2, H2
3. Arcing in oil CH4, C2H4, H2
4. Arcing of liquid and solid insulation CO, CO2, H2, C2H2
Tables 17.7 and 17.8 illustrate typical readings on anonymous samples and it is important to interpret trends rather than absolute levels. There are no hard and fast rules that can be applied and even oil filtration/purification companies fight shy of interpreting results.
Case Study 1
In case 2, the diagnosis points more towards problems in solid insulation, which seems to match with the finding as shown in the points 1 and 4 below.
1. Over heating of solid insulations CO, CO2
2. Over heating of liquid and solid insulation CH4, C2H4, CO, CO2, H2
3. Arcing in oil CH4, C2H4, H2
4. Arcing of liquid and solid insulation CO, CO2, H2, C2H2
| Serial No : 7324/3 | Design.: | TXR3 |
| Customer : | Rating: | 10 MVA |
| Site : | Main Sub Voltage: | 33/11 kV |
Typical gas analysis summary
| SAMPLE: B M T | ||||||
| DATE | 92-09-02 | 92-11-23 | 93-05-12 | 93-07-09 | 93-08-30 | 93-08-31 |
| NEXT DATE | 93-09-02 | 93-11-23 | 94-05-12 | 04-07-09 | 94-02-26 | 94-08-31 |
| SAMPLE NO | 1 | 2 | 3 | 4 | 5 | 6 |
| REPORT NO | 1346 | 1441 | 16009 | 1693 | 1718 | 1714 |
| H2 | 0 | 0 | 5 | 16 | 55 | 41 |
| 02 | 35119 | 22433 | 20421 | 24759 | 21705 | 21480 |
| N2 | 62326 | 58357 | 49992 | 59046 | 53134 | 63174 |
| CO | 19 | 16 | 17 | 22 | 2 | 0 |
| CO2 | 459 | 323 | 469 | 281 | 133 | 124 |
| CH4 | 5 | 1 | 1 | 19 | 0 | 0 |
| C2H4 | 4 | 3 | 3 | 23 | 41 | 1 |
| C2H6 | 1 | 0 | 0 | 8 | 109 | 5 |
| C2H2 | 22 | 33 | 31 | 16 | 4 | 0 |
| TCG | 51 | 53 | 55 | 104 | 211 | 47 |
| TGC% | 9.7 | 8.1 | 7.6 | 8.5 | 7.7 | 8.7 |
Note: TCG is sum of all combustible gases (excluding O2, N2, CO2). TGC – the total gas content derived using a meter. TGC% is the content of total gas expressed in percentage from the total ppm of the gases present.
| Serial No : 7324/3 | Design.: TXR3 |
| Customer : | Rating: 10 MVA |
| Site : | Main Sub Voltage: 33/11 kV |
Typical gas analysis on transformer oil
| Sampling No: 6 | Sample: B M T | |
| Sampling Date : 93-08-31 | Next date : 94-08-31 | |
| Gas Detected in Samples | Sample Values | Production Rates |
| Hydrogen | 41 ppm | –14.00 ppm/day |
| ………………………………………….. | ||
| H2 | 21480 ppm | —- |
| Oxygen | 63174 ppm | —- |
| …………………………………………. | ||
| O2 | 0 ppm | –2.00 ppm/day |
| Nitrogen | 124 ppm | –9.00 ppm/day |
| …………………………………………. | ||
| N2 | 0 ppm | 0.0 ppm/day |
| Carbon Monoxide | 1 ppm | –40.00 ppm/day |
| ………………………………………….. C | ||
| O | 5 ppm | –104.0 ppm/day |
| Carbon Dioxide | 0 ppm | –4.00 ppm/day |
| ………………………………………….. C | 47 ppm | –164.0 ppm/day |
| O2 | ||
| Methane | 8.7 % | —- |
| ………………………………………….. C | ||
| H4 | ||
| Ethylene | ||
| ………………………………………….. C | ||
| 2H4 | ||
| Ethane | ||
| ………………………………………….. C | ||
| 2H6 | ||
| Acetylene | ||
| ………………………………………….. C | ||
| 2H2 | ||
| Total Combustible Gas | ||
| ………………………………………….. T | ||
| CG | ||
| Total Gas Content | ||
| ………………………………………….. T | ||
| GC |
A typical interpretation would be as follows:
Interpretation of historical results/trends
The high level of Ethane (C2H6) detected in sample no. 5 is a cause for concern. This is consistent with localized overheating having taken place in the transformer. The level of Ethylene (41 ppm) is also consistent with this conclusion.
Conclusion
The transformer appears to have had a localized hot spot between samples 4 & 5 but now appears to be fine. If the oil was purified between samples 5 & 6, then the results of sample 6 may not be significant and further samples should be drawn in 6 months time.
For dissolved gases, IEEE C-57-104-1991 (table 4) provides the basic clues, which are explained below:
Condition 1: Total dissolved combustible gas (TDCG) below this level indicates the transformer is operating satisfactorily. Any individual combustible gas exceeding specified levels in table 4 should have additional investigation.
Condition 2: TDCG within this range indicates greater than normal combustible gas level. Any individual combustible gas exceeding specified levels in table 4 should have additional investigation. A fault may be present. Take DGA samples at least often enough to calculate the amount of gas generation per day for each gas.
Condition 3: TDCG within this range indicates a high level of decomposition of cellulose insulation and/or oil. Any individual combustible gas exceeding specified levels in table 4 should have additional investigation. A fault or faults are probably present. Take DGA samples at least often enough to calculate the amount of gas generation per day for each gas.
Condition 4: TDCG within this range indicates excessive decomposition of cellulose insulation and/or oil. Continued operation could result in failure of the transformer
If TDCG and individual gases are increasing significantly (more than 30 ppm/day), the fault is active and the transformer should be de-energized when Condition 4 levels are reached. A sudden increase in key gases and the rate of gas production is more important in evaluating a transformer than the amount of gas. One exception is acetylene (C2H2). The generation of any amount of this gas above a few ppm indicates high energy arcing. Trace amounts (a few ppm) can be generated by a very hot thermal fault (500 °C).
A one-time arc caused by a nearby lightning strike or a high-voltage surge can generate acetylene. If C2H2 is found in the DGA, oil samples should be taken weekly to determine if additional acetylene is being generated. If no additional acetylene is found and the level is below the IEEE Condition 4, the transformer may continue in service. However, if acetylene continues to increase, the transformer has an active high energy. internal arc and should be taken out of service. Further operation is extremely hazardous and may result in catastrophic failure. Operating a transformer with an active high energy arc is extremely hazardous.
Above Table 4 assumes that no previous DGA tests have been made on the transformer or that no recent history exists. If a previous DGA exists, it should be reviewed to determine if the situation is stable (gases are not increasing significantly) or unstable (gases are increasing significantly). Deciding whether gases are increasing significantly depends on your particular transformer.
Referring to the case studies:
| Case 1 : Transformer Rating : 250 MVA Voltage : 400/30 kV Circumstances : Buchholz trip but no obvious faults |
||
| Gas | Main Tank | Buchholz Oil |
| H2 | 13 | 1458 |
| CO | 4 | 12 |
| CH4 | 3 | 376 |
| CO2 | 51 | 56 |
| C2H4 | 3 | 204 |
| C2H6 | 1 | 7 |
| C2H2 | 6 | 576 |
Diagnosis: Findings: Discharges of high energy, arcing, sparking and overheating.
Flash over from dislocated connection in bushing turret.
Findings:
The TH manual identifies (in an earlier page), the types of gases normally generated based on different faults and the diagnosis matches with the gases shown in bold italics points 2,3,4 shown below.
1. Over heating of solid insulations CO, CO2
2. Over heating of liquid and solid insulation CH4, C2H4, CO, CO2, H2
3. Arcing in oil CH4, C2H4, H2
4. Arcing of liquid and solid insulation CO, CO2, H2, C2H2
In case 2, the diagnosis points more towards problems in solid insulation, which seems to match with the finding.
| Case 2: Transformer Rating : 11 MVA Voltage :20/6.6 kV Circumstances : Old unit in service for + 17 years |
||
| Gas | Main Tank | Conservator |
| H2 | 219 | 51 |
| CO | 1791 | 2300 |
| CH4 | 1197 | 731 |
| CO2 | 14896 | 11152 |
| C2H4 | 2273 | 1880 |
| C2H6 | 663 | 526 |
| C2H2 | 11 | 9 |
Diagnosis: Thermal faults of high temperature. Overheated oil and cellulose.
Interturn flash over between winding layers.
Findings:
1. Over heating of solid insulations CO, CO2
2. Over heating of liquid and solid insulation CH4, C2H4, CO, CO2, H2
3. Arcing in oil CH4, C2H4, H2
4. Arcing of liquid and solid insulation CO, CO2, H2, C2H2
17.9 Precautions to be taken when sampling oil
- The validity of the oil sample test results is dependent upon whether the oil sample is truly representative of the full oil in the equipment. Hence it is essential that the sample container of whatever type be free of contaminants and the sampling taps and connecting tubing shall be purged before the sample is taken.
- Ordinarily, samples for physical tests may be taken in 1 liter glass bottles, plastic containers with screw top, Teflon-lined containers, or stainless steel cylinders. Glass bottles may either be with a cork or glass stopper or fitted with screw caps having cork or aluminum liners (inserts). Cork should be of good quality. DO NOT use rubber stoppers. Gas-in-oil samples may be taken in 170 or 1,000 ml stainless steel cylinders. The 1,000 ml cylinders provide enough samples for both physical and gas-in-oil tests.
- Steel containers, except Teflon-lined, should be rinsed in chlorothene or another comparable nonflammable solvent, dried, and washed in strong soapsuds. Then they should be thoroughly rinsed with water, dried in an oven at 105°C (220°F) for several hours, and removed from the oven. They should be corked while still warm. As the bottles cool, they should be sealed by dipping the necks in wax, then, the bottles should be stored for future use.
- These bottles should be opened only when the bottle temperature and the ambient temperature are the same or nearly so. The Teflon-lined containers are easily cleaned in Stanisol and air dried.
- Because of the importance of properly cleaned and treated containers, laboratory-approved containers should be used. Clean, dry, glass sample containers are available from most laboratories that perform testing services.
- Oil samples in glass or other clear containers should be kept out of sunlight. Sunlight will break down materials in the oil and affect the test results.
- At least 2 liters of oil should be taken as a sample for dielectric, acidity, and IFT tests. Allow space at the top of the container for expansion. If two 1 liter (1-qt) bottles are used for a sample, label the bottles ‘1 of 2’ and ‘2 of 2’.
- Samples from outdoor apparatus should be taken on clear days when the humidity is near normal and the oil is at least as warm or warmer than the surrounding air. Cold oil may condense enough moisture from a humid atmosphere to seriously affect its insulating properties and hot oil may absorb enough moisture from the air to give very inaccurate results when cooled to room temperature.
- Samples should never be drawn in rain or when the relative humidity of the atmosphere exceeds 70 percent. Guard against wind and dust.
- When taking samples from an opening, such as a valve, clean the valve thoroughly and allow enough liquid to run out (about 1 liter) to remove any moisture or foreign material.
- In a sealed transformer, which has a vacuum, be sure to add nitrogen to a positive pressure before drawing the sample.
- Place the sample in the freezing compartment of a refrigerator overnight if possible. If the sample is cloudy when viewed the next day, it contains free water. Since free water is undesirable, take another sample to determine whether water is in the oil or was in the sample container.
- Special stainless steel containers should be used for collecting samples of oil for gas-in-oil analysis using a gas chromatograph. These stainless steel containers are NOT to be used for any other purpose. Normally, the laboratory performing the required testing services cleans these containers to eliminate all contaminants and purges them with dry air for shipment to the field.
- This procedure should be followed if the gas sample is at atmospheric or negative pressure.
- Attach a minimum length, approximately 152 mm (6 in), of clear plastic sample tubing to the transformer sampling valve.
- With both valves closed, connect the sampling cylinder to the plastic sampling tube.
- The sample must be drawn with a vacuum pump or a hand aspirator bulb with a one-way valve connected to the outlet end of the container instead of the bladder.
- Open valve on outlet end of sampling cylinder while the vacuum pump (or hand aspirator) is in operation. With the sampling cylinder completely evacuated, close the valve on outlet end of sampling cylinder.
- Open transformer sampling valve for 2 or 3 seconds, then shut off. Repeat this step five times.
- Close valve on transformer end of sampling cylinder. With all valves closed, remove sample cylinder and connecting tubing.
- DO NOT wrap ANY kind of tape around valves or filling nozzles of the sample cylinders.
- Fill in tag attached to container and put container in shipping box.
18
Protection of Motors
In this chapter, we will learn about some fundamentals related to motors, their performance and protection. In the subsequent chapters of this part we shall learn about aspects related to installation of motors, fault finding and failure analysis of motors. In the last chapter we shall learn about the aspects related to motor maintenance and cleaning.
Learning objectives
- Principles of protection
- Faults and protective relays used for motors
- Installation and fault finding
- Failure analysis
- Motor maintenance and cleaning
18.1 Introduction
Of all motors, squirrel cage induction motors, particularly the TEFC type (Totally Enclosed, Fan Cooled), have become extremely popular mainly because of their simple, rugged construction and good starting and running torque characteristics. The TEFC design improves the mechanical life of the motor because dust and moisture are excluded from the bearings and windings. This type of motor has proved to be extremely reliable with an expected lifetime of up to 40 years when used in the correct application.
However, the industry is witnessing failures in this kind of motors also, for various reasons, in spite of these much-improved designs and the continually improving maintenance practices. According to the statistics gathered by the ABB Group, as shown in Figure 18.1, 81% of such motor failures could have been avoided by using an accurate and effective relay for protecting the motor concerned.

Protective functions needed to detect the motor drive faults
Thermal overload protection
Normally a motor’s operational heating curve and cooling circuit efficiency curve, as shown in Figure 18.2, can be represented as two exponential curves showing the temperature rise and drop against a particular time frame respectively. During normal running of a motor passage of load current through the winding results in I2R copper losses and other magnetic losses that will ultimately rise the temperature of the motor. This is represented by the heating curve. As the motor gets heated up, the rate of rise of temperature reduces and hence it is an exponential curve. In the same way, a running motor when stopped it looses the heat in it, to the environment. Also this temperature drop is also an exponential curve. In the normal running of a motor, the rate of heating and the rate of cooling strike a balance, specifically for a particular load.

Temperature rise versus time for a motor
At this point, the temperature of the motor remains constant for a particular load, at a particular ambient temperature. As the load on the motor changes, this stabilized temperature varies depending on the balance between the heating and cooling phenomena. At higher, persistent loads the motor temperature may reach dangerous values. If the motor is left to continue in these conditions, for long, the stator insulation may start breaking down resulting in the failure of the motor. Even if the motor doesn’t break down immediately, the high temperatures to which the insulation system is subjected to, will accelerate the degradation process of the insulation system. In this context it is worth remembering that higher the operating temperature of a motor the lesser the service life of the motor. Also, it has been proven empirically that for every 10 0C rise in temperature, the life of a motor reduces to half.
Hence, the basic intention of the thermal overload protection is to safeguard the motor against such overheating of the stator insulation system so as to extend the life of the motor. However, there is a trade-off between the loading of a motor and its protection. This demarcation line drawn between the load current and time is called as thermal capability curve or motor thermal withstand characteristic of the motor. Also it will have two different curves – the cold one involving no thermal trip and the hot one connected with a thermal trip. Operation of the motor above the thermal capability curve can be detrimental to the motor’s life in the long run, if not immediately, and the motor is said to be thermally overloaded. Therefore, this protection is called as thermal overload protection.
Also known as running protection, this is intended to protect the motor against only persistent overloads, while in operation. The National Electric Code (NEC) defines Motor Overload Protection as that which is intended to protect motors, motor-control apparatus, and motor branch-circuit conductors against excessive heating due to motor. This is not expected to protect the components against a ground fault or a short circuit fault. Hence a protection against thermal overloads is aimed at enhancing the longevity of a motor.
Motors can be protected against thermal overload by two broad methods – indirect method is by simulating the motor internal conditions by sensing the current flowing through it and direct method by sensing the temperature within the motor. Indirect methods employ thermal overload relays or magnetic overload relays or through differential current sensing systems. Direct methods can be are of inherent type or thermostat type. Inherent type engages bi-metallic strip to sense the ambient temperature, motor internal temperature, internal motor heating and the current flowing in the circuit. These are used for small (FHP) motors. Using thermostat type the motor winding temperature is directly sensed and the contact is used for tripping the motor. Usually it is used in conjunction with thermal overload relays.
Thermal time constants
The time constant T (tau) is defined (IEC 255-8) as the time in minutes required for the temperature of a body to change from an initial temperature θ0 to 63% of the difference between θ0 and the new steady state temperature θ∞.
Unfortunately the thermal time constant T of the motor is frequently not known. Table 18.1 gives typical values in relation to motor ratings and mechanical design.
The cooling time constants during operation are approximately equal to those for temperature rises, while at standstill they are four to six times the values given in the table.
Mean thermal time constants of asynchronous motors from Brown Boveri in relation to motor rating and type
| A[mm] | ||||||||||||
| Type | 355 | 400 | 450 | 500 | 560 | 630 | 710 | 800 | 900 | 1000 | 1120 | 1250 |
| O | 20 | 25 | 28 | 30 | 35 | 40 | 50 | 60 | 65 | 70 | ||
| R | 45 | 50 | 55 | 60 | 70 | 80 | 90 | 100 | 110 | |||
| U | 30 | 35 | 40 | 45 | 50 | |||||||
| A = Shaft height (mm) | ||||||||||||
| O = Open Type (IP23) | ||||||||||||
| R = Closed type with air/air heat-exchanger (IP54) | ||||||||||||
| U = Fully clad with cooling finds (IP54) | ||||||||||||
Early relays and new digital relays
Some of the early designs of motor protection relays had a single function whose purpose was to protect the motor against overloading. This was done by continuously monitoring the electrical current drawn by the motor and arranging for the motor to be disconnected when the current exceeded the rated current for a certain period of time. The higher the overload current, the shorter the permissible time before disconnection. This time delay was achieved in various ways. An example is the “solderpot” relay, which relied on the time taken for solder in the measuring circuit to melt when the load current was passed through it. The bimetal type relays disconnect the motor when the load current passing through a resistor heated in a bimetallic strip sufficiently to bend it beyond a preset limit. This released the trip mechanism. In recent years, electronic relays utilise an analogue replica circuit, comprising a combination of resistors and capacitors, to simulate the electrical characteristics of the stator and rotor. The main principle linking all these methods is the design of a replica system to simulate as closely as possible the electrical characteristics of the motor.
It has in the past been common practice to detect high temperatures for temperature dependent elements built into the winding of the motor. However, this form of temperature measurement is in most cases unsatisfactory as it is not taken directly from the current conductor. Instead it is taken through the insulation which gives rise to considerable sluggishness. Due to insulation considerations, insertion of thermocouples in high-voltage motors can cause problems. Furthermore, after a fault (e.g. a break in the measuring lead inside the machine) high repair costs are encountered. Another problem is that no one can accurately predict, during the design, how many and where the “hot spots” will be.
Consequently, protection is preferably based on monitoring the phase currents instead. Because the temperature is determined by the copper and iron losses, it must be possible to derive it indirectly by evaluating the currents in the motor supply leads.
The performance of a Motor Protection Relay depends on how closely and accurately the protection simulates the motor characteristics. The ideal simulation occurs when the heating and cooling time constants of the motor windings are matched by the relay under all operating conditions. In some of the early devices, the protection could underestimate the heating time of the windings from cold and could trip before a motor/load combination with a long run-up time had reached running speed.
On the other hand, during several sequential starts and stops, the device could underestimate the cooling time of the windings, allowing the motor windings to overheat. This situation can very easily arise with the bimetallic thermal overload relays commonly used on motor starters even today. Under certain conditions, bimetallic thermal overload relays do not provide full protection because the device does not have exactly the same thermal heating and cooling characteristics as the motor which it is protecting. The heating and cooling time constants of a bimetallic relay are much the same but in actual installations it should be borne in mind that a stopped motor has a longer cooling time constant than that for a running motor. When a motor has stopped, the fan no longer provides a forced draft and cooling takes longer than when the motor is running on no load. A simple bimetallic device is a compromise and is calibrated for normal running conditions. As soon as an abnormal situation arises, difficulties can be expected to arise.
To illustrate the point, take the case of a motor that has been running at full load for a period of time when the rotor is suddenly stalled. Figure 18.1 shows typical temperature curves of the winding temperature (solid line) compared to the heating and cooling curve of the protective device (dotted line). Starting at a normal continuous running temperature of 120°C, the current increases for the locked rotor condition and temperature rises to 140°C when the thermal device trips the motor after some seconds. After about 10 minutes, the bimetal will have cooled to ambient, but the windings will only have reading 100°C. With the bimetal reset, it is then possible to attempt a restart of the motor. With the rotor still locked, high starting currents cause the temperature to quickly rise to 165°C before the bimetal again trips the motor.
Considering that a similar sequence of events as described above can again be repeated, where the different cooling times of the motor and bimetal strip allow the bimetal to reset before the windings have cooled sufficiently, and if the motor is again restarted after another 10 minutes, the winding temperature is likely to exceed 180°C, the critical temperature for Class B insulation materials. This illustrates the importance of an accurate simulation by the protection device in both conditions where the motor is running and when the motor is stopped.
Nowadays, solid-state electronic relays are able to deliver various functionalities integrated under one casing. They extend all the protections offered earlier by electromechanical relays. Apart from this, they can be programmed as universal relays suitable for even the smallest motor to even a multi MW rated motor. With the earlier relays, one was required to specify the rating of a motor for which it is intended to be used. These digital relays have lot of special features to their credit as mentioned blow:
- Compact as compared to their conventional equivalents.
- Very stable against temperature variations
- Longer calibration accuracy – some of the relays hardly require any testing
- Versatility – there is no need of specifying the motor rating before hand
- Reliability is very high
- Very low power consumption
The most recent versions of motor protection relays are digital, microprocessor based ones and have the capability to incorporate various, programmable protections. Even their prices are also making them very attractive as compared to their earlier counterparts, especially after considering the various functionalities.
Typically a new generation microprocessor based motor protection relay can fulfill the following protections for any rating motor:
- Overload protection
- Locked rotor protection
- Phase and ground fault protection
- Unbalanced current protection
- Load jam
- Load loss of induction motor etc.
All these are covered accurately with the bare minimum data that needs to be fed into the relay at site. Typical information required for the purpose are:
- Motor full load current
- Locked rotor current
- Locked rotor thermal limit time
- Motor service factor etc.
They use an element that accounts for the I2r heating effect of both the positive- and negative-sequence current. The element is a thermal model defined by the motor nameplate data entered as settings. The model estimates motor temperature and compares it to thermal limit trip and alarm thresholds. The relay trips to prevent overheating for the abnormal conditions of overload, locked rotor starting, too frequent or prolonged starts, and unbalanced current.
These relays typically include:
- Thermal overload protection, monitoring all three-phases with thermal replicas for direct and frequency convertor controlled drives
- Short circuit protection
- Start-up and running stall protection
- Phase unbalanced protection
- Single-phasing protection
- Earth fault protection
- Undercurrent protection
- Digital read-out of set-values, actual measured values and memorized values
- Self supervision system
- Outstanding accuracy
- Optimum philosophy
The present day concept is use of microprocessor based numerical relays for both HV and LV motors (say beyond 50 KW), as the relays come with lot of features which allow them to be interchangeable, ensures site settings and give valuable feedback on the load details whenever a trip occurs or not.
Starting and stalling conditions
As the magnitude and duration of motor starting currents and the magnitude and permissible duration of motor stalling currents are major factors to be considered in the application of overload protection, these will be discussed. It is commonly assumed that the machines started direct on line the magnitude of the starting current decreases linearly as the speed of the machine increases.
This is not true. For normal designs the starting current remains approximately constant at the initial value for 80-90% of the total starting time.

Motor Current during Start Conditions
When determining the current and time settings of the overload protection it can be assumed that the motor starting current remains constant and equal to the standstill value of the whole of the starting time.
18.2 Stalling of motors
Refer to Figures 18.5 and 18.6. Should a motor stall when running or be unable to start because of excessive load, it will draw a current from the supply equivalent to the locked rotor current. It is obviously necessary to avoid damage by disconnecting the machine as quickly as possible if this condition arises.

Relay operation times less than stall withstands time: relay gives stall protection

Relay Operation time greater than stall with stand time: Relay does not give stall protection
It is not possible to distinguish this condition from a healthy starting condition on current magnitude.
Majority of the loads are such that the starting time of normal induction motors is about or less than 10 seconds, while the allowable stall time to avoid damage to the motor insulation is in excess of 15 seconds.
If a double cage drive is to be protected, it might be that the motor cannot be allowed to be in a stall condition even for its normal start-up time. In this case a speed switch on the motor shaft can be used to give information about whether the motor is beginning to run up or not. This information can be fed to suitable relays which can accelerate their operating time [Refer Figure 18.7 (a) and (b)].

Typical Motor Start

Blocked Rotor Condition
Whether or not additional features are required for the stalling protection depends mainly on the ratio of the normal starting time to the allowable stall time and the accuracy with which the relay can be set to match the stalling time/current curve and still allow a normal start.
18.3 Over current / overload
Over current protection for motors is usually required to safeguard the motor against short circuit mainly to take care of phase faults. In order to provide an effective protection, phase fault current shall be greater than starting current. Otherwise the protection will act during normal starts. In such extreme cases, differential protection shall be provided for the motor. An instantaneous, high set, simple protection provides reliable, inexpensive coverage against phase faults. The operation of this instantaneous protection may involve, typically, 70 – 130 milli second at twice the current setting.
IDMT characteristics suiting the motor’s thermal capability curve are realized using the overload units to provide protection against long duration, light and medium overloads. NEC recommends provision of such overload coverage in each phase. However thermal capability curve of a motor represents an approximate average of the safe thermal zone of operation only and cannot be the exact model of the motor. Also the overload protection requirement varies considerably with size and design.
Phase-phase faults
Because of the relatively greater amount of insulation between phase windings, faults between phases seldom occur. As the stator windings are completely enclosed in grounded metal the fault would very quickly involve earth, which would then operate the instantaneous earth fault protection.
Differential protection is sometimes provided on large (2 MW) and important motors to protect against phase-phase faults, but if the motor is connected to an earthed system there does not seem to be any great benefit to be gained if a fast-operating and sensitive earth fault is already provided.
Terminal faults
High set instantaneous overcurrent relays are often provided to protect against phase faults occurring at the motor terminals, such as terminal flashovers. Care must be taken when setting these units to ensure that they do not operate on the initial peak of the motor starting current, which can be 2.5 times the steady state r.m.s. value. The asymmetry in the starting current rapidly decreases, and has generally fallen to its steady state value after one cycle. A typical motor starting current is shown in Figure 18.8.

Transient over current during first few cycles when starting a motor
18.4 Under-voltage / over-voltage
As per NEMA MG1 standards, AC induction motors shall operate satisfactorily at rated load, with the voltage varying within + / – 10 % of rated value at rated frequency. With a voltage decrease in this range, the power factor of the AC induction motor increases. In the same way, an increase in voltage results in a decrease of the power factor. The torque developed by the motor, whether of locked rotor or of breakdown will be proportional to the square of the voltage applied.
Average accelerating torque is given as:
[(voltage available at motor bus / rated motor voltage) 2 (rated torque)] – Load torque
Hence, due to the reduced accelerating torque, the motor will have problems in starting and reaching full speeds. Also a running motor may lose speed and draw heavy currents.
Hence under voltage protection is invariably provided for induction motors. Typically, by sensing a bus under voltage condition all the connected motors to that bus are tripped out.
The under voltage setting is normally 75 to 80 %.
Either an increase or a decrease in voltage results in increased heating of the motor at the rated load and hence may accelerate the deterioration of the insulation system, in the long run.
Similarly, over voltage can be detrimental to the insulation system as the temperature rises because of increased slip due to either an under voltage or an over voltage.
18.5 Under-frequency
AC motors operate successfully under running conditions at rated load and at rated voltage with a variation in the frequency up to 5 percent above or below the rated frequency.
Performance within this frequency variation will not normally be as per the standards established for operation at rated frequency.
At a frequency lower than the rated frequency, the speed is decreased. Since the magnetic flux in the machine, which is proportional to the inverse of frequency at a particular voltage increases, locked-rotor torque also increases and power factor decreases.
Also this may result in over magnetization of the core of the motor that, in turn, may result in overheating of the stator due to increased iron losses. If left unchecked, this may cause severe damage to the motor.
Normally, the result being overheating that is protected separately, motor feeders will not be separately provided with this protection. Frequency cannot be different from the source to even the remotest utilization point, unlike voltage that can drop even atrociously. However the impact of this aspect being very serious the protection is provided at the source itself, be it generator or the switchgear incomer of the particular plant.
18.6 Pole slip / out of step
These aspects are purely applicable to synchronous machines only. During a pole-slip condition, negative currents can be induced into the field which is opposite of the normal positive current flow produced by the excitation system.
Hence, a large negative induced current with no current path will result in a very high positive voltage transient across the power rectifiers. The large voltage transient can cause damage to the solid-state devices and produce severe pitting on the slip rings.
With the application of the crowbar SCR circuit, the voltage sensing circuit will detect the positive induced field voltage and gate on the appropriate SCR to allow the negative current to flow from the field through the discharge resistor. When the crowbar circuit turns on, the rectifier bridge will be inhibited to prevent overload into the crowbar discharge resistor.
The out-of-step conditions (loss of synchronism) of a synchronous machine may occur as a result of pole slipping and hence pole slipping protection also detects loss of synchronism, but with the excitation intact.
Synchronous motors can develop torque only in synchronism. Overloading, beyond motor’s capability, may result in slowing down of the rotor. Once synchronism is lost, the motor will not be able to develop any torque. This is called ‘a motor going out of step’.
Since the rotor of a synchronous motor is applied DC voltage and the rotor doesn’t have any induced voltage, no AC voltage is supposed to be present when the motor is operating synchronously. Hence synchronous motors with brush type excitation can be easily protected against out of step or loss of synchronism by means of AC detection circuits connected to the rotor. Such circuits will detect pullout resulting from excessive shaft load or too-low supply voltage and protect the motor against overheating and the resulting damages.
Both effects may cause severe mechanical and thermal stresses to the machine. Loss of excitation protection is generally used to guard against the consequences of a partial or complete failure of the excitation. An under impedance relay is used to recognize this event.
18.7 Loss of excitation
Synchronous motors can be protected against loss of excitation by a low-set undercurrent relay connected to the field. This relay should have a time delay drop out.
On large synchronous motors an impedance relay is frequently applied that operates on excessive VAR flow into the machine, indicating abnormally low field excitation. If an under voltage unit is part of the relay, its function should be shorted out because loss of motor field may produce little or no voltage drop. Operation of synchronous motors drawing reactive power from the system can result in overheating in parts of the rotor that do not normally carry current. Some loss-of-field relays (device 40) can detect this phenomenon.
18.8 Inadvertent energization
Inadvertertent energization protection is needed for synchronous motors especially to avoid any accidental closing of the breaker when the supply to the motor fails and the motor is coasting down. Due to the stored energy in the drive, especially from the driven side, motor starts acting like a Generator. Under such circumstances, the supply being restored will be out of phase with motor generated voltage and there can be a resultant flashover.
While giving permissive start to a motor, there can be an accidental energization which can cause physical damages to the equipment in spite of all precautions to avoid closing of the breaker of a motor satisfying all the mandatory conditions.
18.9 Over fluxing
At frequencies lower than the rated frequency, the speed decreases. Since the magnetic flux in the machine, which is proportional to the inverse of frequency at a particular voltage increases, locked-rotor torque also increases and power factor decreases. Also this may result in over magnetization of the core of the motor that in turn may result in overheating of the stator, due to increased iron losses. If left unchecked, further fall in frequency will result in saturation of the magnetic core thereby impairing its torque delivering capability.
This kind of protection must invariably be provided in applications where the frequency of the supply is varied in order to obtain variable speeds. All modern day variable frequency drives have this protection built into the logics and hence they are called as variable voltage variable frequency drives, VVVF drives in short.
By reducing the over fluxing of the motor, and hence the iron losses, the motor runs cooler and more efficiently, the power factor is maintained at the most appropriate value for every condition of load, which, in turn, reduces the apparent reactive power. This will bring about a significant reduction in the apparent power demand which may reduce the input real power as well. This kind of protection is popularly known as V/Hz protection or “V / f” control.
18.10 Stall protection / acceleration time
Stall condition of a motor is the result of a hard-to-start load causing a blockage of its rotation. This results in the motor drawing heavy current without any scope for reduction on its own. One of the easiest ways to detect such conditions is sensing of the motor’s speed. It can safely be concluded that motor is stalled, if the zero speed (standstill) condition of the motor continues, even after energizing the motor. However, it may not always be feasible to provide such detection and the circuits must depend on the current drawing pattern to discriminate against a normal starting current. The motor manufacturer will give the motor’s withstanding capability. The protection must be strictly in agreement with this. Else the motor will be seriously damaged.
This majority of loads are such that the starting time of normal induction motors is about or less than 10 seconds, while the allowable stall time to avoid damage to the motor insulation is in excess of 15 seconds. It may not always be possible to distinguish this condition from a healthy starting condition on current magnitude, especially using the conventional thermal overload detection models.
A typical stalling protection circuit is able to determine stalling based on the current drawn and the duration of the current flow, instead of depending on the simulation of a thermal model, providing a reliable protection for the motor.
Acceleration time
Acceleration time for electric motors is directly proportional to total inertia and inversely proportional to the electric motor torque. For electric motors with constant acceleration torque, acceleration time is:

where WK2 = rotational inertia in lb-ft2, (N2 – N1) = the speed difference, and Tx = acceleration torque in lb-ft.
Acceleration torque decreases with the motor’s voltage squared. It decreases with the load torque, which normally increases as a function of the increasing speed, and higher frictional losses and windage losses. Hence it can be summed up as a composite function of several parameters and cannot be a constant throughout its starting period. An approximation method is necessary to find the electric motor’s acceleration time if the acceleration torque is not linear during speed increase. The quickest method is to break up the speed versus torque curves of the electric motor and the driven machine into segments and calculate acceleration time for each segment. Accurate electric motor acceleration times usually result.
Start up supervision
Typical startup supervision includes monitoring of the time taken for the motor to draw the huge inrush current. Out of experience and through the wisdom passed on by the fore-runners, it has been a regular practice to keep the record of the starting details of various, especially critical, motors of higher rating (above 200 kW). Such a typical record would contain the date and time of starting, the supply voltage in all the three lines, starting current range, as it declines over the period of starting, the starting time – right from the breaker closure to the resumption of normal current, breaker operation counter reading etc.
However all such data is being logged by the modern day, intelligent relays and even some of them support additional information. Apart from the regular features they give information about harmonic current, thermal parameters like the equivalent heat generated etc. Based on such data it will be possible to see the time remaining for the thermal overload to act at the present load. Accordingly, the operational personnel can be warned. In case the motor trips on overload, instead of relying on the conventional number of starts, the time required for a safe restart will be made available through the algorithm incorporated in it and based on the data entered by the user & actual data acquired by it.
Unbalanced supply voltages
The voltage supplied to a three phase motor can be unbalanced for a variety of reasons: single phase loads, blown fuses in p.f. improvement capacitors etc. In addition, the accidental opening of one phase lead in the supply to the motor can leave the motor running, supplied by two phases only.
It might seem that the degree of voltage unbalance met within a normal installation (except when one phase is open circuited) would not affect the motor to any great extent, but this is not so. It should be remembered that it is not the unbalanced voltage that is important but the relatively much larger negative sequence component of the unbalance current, resulting from the unbalanced voltage.
Loss of one phase represents the most dangerous case of unbalance. It is therefore essential for motors that are protected again short circuit by fuses (limited breaking capacitor of the breaker) to be equipped with fast operating loss of phase protection.
Voltage unbalance is defined as the percentage maximum voltage deviation from average voltage with respect to the average voltage. Higher voltage unbalances will result in reduced efficiency, overheating of the motor calling for derating of the power rating of the motor. This is because, rated performance of polyphase motors assumes a balanced power supply at the motor terminals and hence, unbalanced voltage affects the motor’s current, speed, torque, temperature rise and efficiency. A minor voltage unbalance in voltage significantly increases the losses and reduces the efficiency considerably. For instance, it is noticed that the usage an energy efficient motor that can reduce the losses by 20 % was offset by a voltage unbalance of 3.5 % on the energy front.
NEMA Standard MG 1–14.35, recommends the derating of the motor where the voltage unbalance is between 1% and 5% beyond which operation shall not continue.
Basically, unbalanced voltages, single phasing in the extreme case, will give rise to a pulsating flux in the rotor bars. This will result in uneven heating of the rotor bars and hence localized overheating will be taking place. Uneven expansion due to the localized heat of the rotor bars can be detrimental to the rotor’s integrity. This can result in the development of cracks ending up finally as rotor bar failures.
However this kind of protection against unbalanced voltages will safeguard the motor against an unbalance based on the magnitude of the voltages. This can turn out to be a sort-of-overbearing for the motor. The motor may be able to continue in service, satisfactorily, even with an appreciable amount of unbalance – that may not result in too dangerous overheating. To detect whether the unbalance can have a deleterious effect or not, it is required to analyze the three phase voltages both by means of the phase angle as well as magnitude difference, not just magnitude alone. This gives a picture about the quantum of negative sequence currents that are present, which will be contributing to the ultimate additional overheating of the rotor winding.
18.11 Negative sequence currents
Analysis of negative sequence currents (one of the three symmetrical components of any type of current) are particularly of more importance in the case of large rating motors (1000 HP and above).
Symmetrical components of three phase currents consist of:
- Positive-sequence currents: normally present during a typical steady state condition.
- Negative-sequence currents: present only during unbalance.
- Zero-sequence currents: present only when earth is also involved in the unbalance.
Negative- and zero-sequence currents are usually only present in substantial levels during unbalanced, faulted conditions.

The Positive, Negative and Zero Components
The method of symmetrical components consists of reducing any unbalanced three phase systems of vectors into three balanced systems: the positive, negative and zero sequence components. The positive sequence components consist of three vectors equal in magnitude 120° out of phase, with the same phase sequence or rotation as that of the source of supply. The negative sequence components are three vectors equal in magnitude, displayed by 120° with a phase sequence opposite to the positive sequence. The zero sequence components consist of three vectors equal in magnitude and in a phase.
Larger rating motors are more prone to dangers arising out of negative sequence currents flowing. The presence of negative sequence can be expressed as a percentage with respect to the positive sequence currents.
Based on this value, the motor rating needs to be derated. The derating effect is more pronounced in the case of motors with high starting current to running current ratio. For example a motor with this ratio as 6 (starting current = 6 times the full load current) needs to be derated by 20 % for an unbalance (100 * negative sequence current / positive sequence current) of 5 %. For the same level of unbalance, a motor with this ratio as 4 needs to be derated by less than 10 %.
The reduction in output for the machines having ratios of starting to running current of 4, 6 and 8 respectively is shown in Figure 18.10.

Maximum continuous output versus voltage unbalance
18.12 Derating factors
The performance of AC induction motors, or for that sake any equipment, is influenced by various factors like ambient temperature, quality of the incoming power supply etc. these factors need to be specified explicitly while procuring, especially when the operating conditions differ widely from the standard values. For instance, when an induction motor is required to be operated at an ambient temperature exceeding 40 degree C, it must be clearly spelled out at the procurement stage itself.
Once a standard motor is available and needs to be utilized for an application with the operating conditions differing from the originally intended ones, the motor’s rating has to be suitably derated.
The factors that need to be considered in derating a motor’s performance are:
- Supply Voltage
- Supply Frequency
- Ambient Temperature
- Altitude of the location of installation
AC motors are designed to operate on voltages and frequencies that are well standardized. For example, NEMA standards specify voltage ratings of 380 V, 400 V, 415 V … at 50 Hz. Similarly, for 60 Hz of supply frequency, voltage ratings of 115 V, 200 V, 230 V, 460 V, 575 V are standardized.
A small variation in supply voltage can have a great influence on a motor’s performance. For example, when the voltage is 10% below the rated voltage of the motor, the motor has 20% less starting torque. This reduced voltage may prevent the motor from getting its load started or keeping it running at rated speed. A 10% increase in supply voltage, on the other hand, increases the starting torque by 20%. This increased torque may cause damage during startup. A conveyor, for example, may lurch forward at startup.
A voltage variation will cause similar changes in the motor’s starting amps, full-load amps, and temperature rise. It can be generalized that a 10 % rise in voltage will result in an increase in motor performance of 20 %.
In the same way, an increase in frequency of 5 % results in a corresponding increase in the speed and a 10 % decrease in the motor starting torque. Conversely, a decrease in the supply frequency by 5 % results in a proportionate reduction in speed and a 11 % increase in the starting torque. Hence suitable corrections have to be applied to the standard motors accordingly.
Standard motors are designed to operate below 3300 feet (1000 m). The motors operating at temperatures above 1000 meters have to be derated because of the impaired cooling of the motor due to the light air at higher altitudes. The thin air at higher altitudes will have less cooling effect on the motor as the net heat transfer, due to the reduced air mass, goes down. At an altitude of above 5000 ft, the derating factor becomes 0.94. Roughly for every 1600 feet rise in altitude, the derating factor reduces by 0.04.
18.13 Earth faults – core balance, residual stabilizing resistors
Faults that occur within the motor windings are mainly earth faults caused by a breakdown in the winding insulation. This type of fault can be very easily detected by means of an instantaneous relay, usually with a setting of approximately 20% of the motor full load current, connected in the residual circuit of three current transformers.
It is important to note that unbalanced load currents do not cause nuisance earth-fault trips. If there is no leakage to earth, unbalanced load currents add to zero and do not cause an output from a core-balance CT.

Earth fault protection
Care must be taken to ensure that the relay does not operate from spill current due to the saturation of one or more current transformers during the initial peak of the starting current; this can be as high as 2.5 times the steady state r.m.s value, and may cause operation, given the fast operating speed of the normal relay. To achieve stability under these conditions, it is usual to increase the minimum operating voltage of the relay by inserting a stabilizing resistor in series with it (refer Figure 18.11).
Current sensing is the best method to detect and locate earth faults. However, system capacitance, unbalanced loads, current-sensor limitations, and harmonics affect current measurement and limit the lower level of practical earth-fault detection.
Current flowing to earth has only two paths—it can flow to earth through an earth fault or it can flow to earth through distributed capacitance. Current flowing to earth through distributed capacitance can cause sympathetic tripping during an earth fault and it can cause nuisance tripping during normal operation. If the earth-fault trip level is high enough to eliminate sympathetic tripping, nuisance tripping due to unbalanced and harmonic capacitive current is usually not a problem. Charging current is defined as the current that flows to earth when one phase of an unearthed system is faulted to earth.
When a motor is started across the line, the inrush current can have a DC-offset component that can cause an output from a core-balance current transformer. Such transient characteristics are unpredictable because the switch can close at any point in the electrical cycle. Transient conditions typically last less than 100 ms and nuisance earth-fault trips can be avoided by setting a longer trip delay time or by using a digital filter to reject the dc component. All current transformers, including the window-type core-balance CTs used to detect earth-fault (zero-sequence) current, have practical limitations. A minimum excitation current is required in the primary coil before there can be a proportional output current. Excitation current is a function of burden, CT construction, and size. Sensitive earth-fault detection requires excitation current to be small. A large fault current, such as a phase-to-phase fault or an earth fault on a solidly earthed system, can saturate a current transformer. Saturation occurs when a CT cannot maintain a secondary current waveform proportional to a large primary current. Secondary current characteristics in this case are unpredictable and earth-fault protection may not operate. Stability against external faults is guaranteed thanks to the use of a stabilizing resistor.
To detect high-impedance faults and provide machine-winding protection, the earth-fault current pickup level should be less than 20% of the prospective earth-fault current. The pickup level of all system earth-fault protection devices should be the same, and coordination should be accomplished by varying trip delay times.
18.14 Calculation of protective relay settings
A digital motor protection relays, typically, require the following details to be entered / programmed into the unit (the appropriate calculations / justifications for the settings are indicated in the remarks column). As an example, protective relay (microprocessor based relay) settings for a 700 kW, 3.3 kV, 147A squirrel cage induction motor driving a fan having an acceleration time of 44 seconds is considered and the settings will be as shown in Table 18.2. Example of a typical protection logic for a synchronous motor and an induction motor are shown in Figures 18.12 and 18.13 respectively.
Protective Relay Settings
However, most recent developments have made this new generation, digital (microprocessor based) relays much more intelligent, requiring very few parameters to be set by the user at site. At the same time they provide very fast, reliable response in clearing the faults.
ANSI Device numbers used in these circuits:
12 = Over speed
24 = Over excitation
25 = Synchronization check
27 = Bus/Line under voltage
32 = Reverse power (anti-motoring)
38 = Over temperature (RTD)
39 = Bearing vibration
40 = Loss of excitation
46 = Negative sequence / unbalance (phase current imbalance)
47 = Negative sequence under voltage (phase voltage imbalance)
49 = Bearing over temp (RTD)
50 = Instantaneous over current
51 = Time over current
51V = Time over current — voltage restrained
55 = Power factor
59 = Bus over voltage
60FL = Voltage transformer fuse failure
67 = Phase/Ground directional current
79 = Auto re-close
81 = Bus over / under frequency
37 Under current
48 Incomplete Sequence
49S (26) Locked Rotor
49/51 Over load
50 Short Circuit
50GS/51GS Ground Fault
51R Jam (Running)
59 Over voltage
60V Voltage unbalance
62 Timer
66 Successive
81L/H Under-and Over frequency
87M Differential
86M Lock-out Auxiliary
Addl. Protection for a Synchronous motor:
26F Ammortisseur Winding Over temperature
(Include if field is accessible)
27DC Under voltage Relay
37 Undercurrent
50 Short Circuit
55 Out of Step Protection/Power Factor
95 Reluctance Torque Synchronizing and Re-Synchronizing
96 Auto loading/Unloading Relay

Typical protection logics for a Synchronous motor

Typical protection logics for an Induction motor
19
Installation and Fault Finding
19.1 General installation and environmental requirements
Modern power electronic AC VVVF converters, which are used for the speed control of electric motors, are usually supplied as stand-alone units with one of the following configurations:
- IP00 Rating
- Designed for chassis mounting into the user’s own enclosure, usually as part of a Motor Control Centre (MCC)
- IP20/IP30 Rating
- Designed for mounting within a “clean environment”, such as a weatherproof, air-conditioned equipment room. The environment should be free of dust, moisture and contaminants and the temperature should be kept within the specified limits
- IP54 Rating
- Designed for mounting outside in a partially sheltered environment, which may be dusty and/or wet
The first two are the most common configurations.
19.2 General safety recommendations
The manufacturer’s recommendations for installation should be carefully followed and implemented. The voltages present in power supply cables; motor cables and other power terminations are capable of causing severe electrical shock.
In particular, the local requirements for Safety, which is outlined in the wiring rules and other codes of practice should always take priority over manufacturer’s recommendations. The recommended safety earthing connections should be carefully installed before any power is connected to the Variable Speed Drive equipment.
AC Variable Speed Drives have large capacitors connected across the DC link. After a VSD is switched off, a period of several minutes must be allowed to elapse before any work commences on the equipment. This is necessary to allow these internal capacitors to fully discharge. Most modern converters include some form of visual indication when the capacitors are charged.
Hazardous areas
In general, power electronic converters should not be mounted in areas which are classified as Hazardous Areas, even when connected to an Ex rated motor, as this may invalidate the certification. When necessary, converters may be mounted in an approved enclosure and certification should be obtained for the entire VSD system, including both the converter and the motor.
Environmental conditions for installation
The main advantage of an AC Variable Speed Drive (VSD) is that the TEFC squirrel cage motor is inherently well protected from poor environmental conditions and is usually rated at IP54 or better. It can be reliably used in dusty and wet environments.
On the other hand, the AC converter is far more sensitive to its environment and should be located in an environment that is protected from:
- Dust and other abrasive materials
- Corrosive gases and liquids
- Flammable gases and liquids
- High levels of atmospheric moisture
When installing an AC Converter, the following environmental limits should be considered:
- Specified Ambient Temperature: ≤ 40oC
- Specified Altitude: ≤ 1000 meters above sea level
- Relative Humidity: ≤ 95%
De-rating for high temperature

Typical temperature de-rating chart for PWM Converter
In regions or environments where there is a high ambient temperature above the accepted 40oC specified in the standards, both the motor and the converter need to be de-rated, which means that they can only be run at loads that are less than their 40oC rating to avoid thermal damage to the insulation materials.
The manufacturers of AC converters usually provide de-rating tables for high temperature environments that are above 40oC. The design of AC converters is different from various manufacturers, so the cooling requirements are never the same. The cooling requirements of different models from the same manufacturer may also be different.
De-Rating for high altitude
At high altitudes, the cooling of electrical equipment is degraded by the reduced ability of the air to remove the heat from the motor or the heatsink of the converter. The reason is that the air pressure falls with increased altitude, air density falls and consequently, its thermal capacity is reduced.
In accordance with the standards, AC converters are rated for altitudes up to 1000 meters above sea level. Rated output should be de-rated for altitudes above that.
The manufacturers of AC converters usually provide de-rating tables for altitudes higher than a 1000m. A typical characteristic is given in Figure 19.2 for a modern IGBT-type AC converter. Note that this table is NOT applicable to all AC converters. The de-rating of converters with high losses, such as those using BJTs or GTOs, will be much higher than the de-rating required for low loss IGBT or MOSFET converters. The higher efficiency of the latter requires less cooling and would therefore be less affected by altitude changes.

Altitude de-rating chart for IGBT-type converter(Compliments of Allen-Bradley)
19.3 Power supply connections and earthing
In accordance with accepted practice, power is normally provided to a VSD from a Distribution Board (DB) or a Motor Control Centre (MCC). Adequate arrangements should be made to provide safety isolation switches and short-circuit protection in the connection point to the power supply. The short-circuit protection is required to protect the power cable to the AC converter and the input rectifier bridge at the converter. The converter provides down-stream protection for the motor cable and the motor itself.
Adequate safety earthing should also be provided in accordance with the local Wiring Rules and Codes of Practice. The metal frames of the AC Converter and the AC Motor should be earthed as shown in Figure 19.3 to keep touch potentials within safe limits. The chassis of the AC converter is equipped with one or more Protective Earth (PE) terminals, which should be connected back to common safety earth bar.

Power supply, motor and earthing connections
Power supply cables
The variable speed drive should be connected to the power supply by means of a cable that is adequate for the current rating of the VSD. The AC converter requires a 3-phase supply cable (red/white/blue) and a protective earth conductor (green/yellow), which means a 4-core cable with copper or aluminum conductors. A neutral conductor is not necessary and is usually not brought to the frequency converter.
The AC converter is a source of harmonic currents that flow back into the low impedance of the power supply system. This conducted harmonic current is carried into other electrical equipment, where it causes additional heat losses and interference. Sensitive electronic instrumentation, such as magnetic flow-meters, thermocouples and other microprocessor based equipment, ideally should not be connected to the same power source, unless via a filtered power supply.
In addition, interference can be radiated from the power supply cable and coupled into other circuits, so these cables should be routed well away from sensitive control circuits.
The power supply cable should preferably be laid in a metal duct or cable ladder and shielded in some way to reduce the radiation of EM fields due to the harmonic currents. Steel Wire Armored (SWA) cables are particularly suitable for this purpose. If the power cable is unshielded, control and communications cables should not be located within about 300mm of the power cable.
The conductor sizes should be selected in accordance with normal economic cable selection criteria, which take into account the maximum continuous current rating of the VSD, the short-circuit rating, the length of the cable and the voltage of the power supply system. The relevant local safety regulations should be strictly observed.
However, when selecting the cable cross-sectional area for the power supply cables and upstream transformers, a de-rating factor of at least 10% should be included to accommodate the additional heating due to the conducted harmonic currents. If a supply side harmonic filter is fitted at the converter, this may not be necessary. Three-phase systems composed of three single-conductor cables should be avoided if possible. Power cables with a trefoil configuration produce a lower radiated EM field.
Cables between converter and motor
The cable from the AC converter to the motor carries a switched PWM voltage, which is modulated at high frequency by the inverter. This results in a higher level of harmonics than the power supply cable. Harmonic frequencies are in the frequency spectrum of 100kHz to 1MHz. The motor cable should preferably be screened or located inside a metal duct. Control and communications cables should not be located close to this cable. The level of radiated EM fields is higher for cables with 3 separate single cores, laid horizontally on a cable ladder, than a trefoil cable with a concentric shield.
The recommended size for the cable between the AC converter and the motor should preferably be the same as the power supply cable. The reasons are:
- It will be easier to add a bypass device in parallel with the frequency converter at a later date, using the same cable, cable lugs and connections
- The load-carrying capacity of the motor cable is also reduced by harmonic currents and additionally by the capacitive leakage currents
It should be borne in mind that the AC converter VSD provides short-circuit and overload protection for the cable and motor.
A separate earth conductor between the converter and motor is recommended for both safety and noise attenuation. The earth conductor from the motor must be connected back to the PE terminal of the converter and should not be connected back to the distribution board. This will avoid any circulating high frequency currents in the earth system.
When armored or shielded cables are used between the converter and motor, it may be necessary to fit a barrier termination gland at the motor end when the cable is longer than about 50m. The reason is that the high frequency leakage currents flow from the cable through the shunt capacitance and into the shield. If these currents return via the motor and other parts of the earthing system, the interference is spread over a larger area. It is preferable for the leakage currents to return to the source via the shortest route, which is via the shield itself. The shield or Steel Wire Amour (SWA) should be earthed at both the converter end and to the frame of the motor.
Control cables
The control cables should be provided in accordance with normal local practice. These should have a cross sectional area of at least 0.5 mm2 for reasonable volt drop performance. The control and communications cables connected to the converter should be shielded to provide protection from EMI. The shields should be earthed at one end only, at a point remote from the converter. Earthing the shield to the PE terminal of the drive should be avoided because the converter is a large source of interference. The shield should preferably be earthed at the equipment end.
Cables which have an individual screen for every pair provide the best protection from coupled interference. The control cables should preferably be installed on separate cable ladders or ducts, as far away from the power cables as possible. If control cables are installed on the same cable ladder as the power cables, the separation should be as fast as possible, with the minimum distance being about 300mm. Long parallel runs on the same cable ladder should be avoided.
Earthing requirements
As mentioned earlier, both the AC converter and the motor must be provided with a safety earth according to the requirements of local standards. The main purpose of this earthing is to avoid dangerous voltages on exposed metal parts under fault conditions.
When designing and installing these earth connections, the requirements for the reduction of EMI should also be achieved with these same earth connections. The main earthing connections of an AC converter are usually arranged as shown in Figure 19.3.
The PE terminal on the converter should be connected back to the system earth bar, usually located in the Distribution Board. This connection should provide a low impedance path back to earth.
Common cabling errors
The following are some of the common cabling errors made when installing VSDs:
- The earth conductor from the AC converter is run in the same duct or cable ladder as other cables, such as control cables and power cables for other equipment. Harmonic currents can be coupled into sensitive circuits. Ideally, instrument cables should be run in separate metal ducts or steel conduit
- Running unshielded motor cable next to the supply cable to the AC converter or the power cables for other equipment. High frequency harmonic currents can be coupled into the power cable, which can then be conducted to other sensitive electronic equipment. Other cables should be separated from the motor cable or converter power cable by a minimum of 300mm
- Running excessively long cables between the AC converter and the motor. These should be no longer than 100m. If longer cables are necessary, motor filters are necessary to reduce the leakage current. Alternatively, the switching frequency may be reduced. In the recent past, there is considerable improvement regarding this point. Some of the Manufacturers are supplying inverters where there is no bar on the length of this cable.
19.4 Installing contactors in power circuit
Contactors are used to switch a large amount of electrical power through their contacts. Contactors typically have multiple contacts, and those contacts are usually (but not always) open. Power to the load will be normally routed through those contacts so that the power gets shut off when the coil is de-energized. The most common industrial utility for contactors is the control of power supply to electric motors.
As a practical example let us consider the case of a current source inverter, as shown in Figure 19.4, feeding an electrical motor, driving a pump, requiring typically power up to 500 kW. Since the cost of a LV / MV frequency converter is much cheaper as compared to that of a HV, the motor is selected to be a LV motor. Hence the power circuit starts with a step down transformer, typically a Dy11 transformer. For the sake of its protection from over temperature, a Pt100 RTD (resistance temperature detector) is embedded in the transformer core and is connected to the Transformer protection relay.

Single line diagram of a typical current source inverter
The secondary of the transformer is connected to an isolator, which is used only for the sake of maintaining the inverter panel. This power, through appropriately rated fast acting fuses, branches out into power circuit, auxiliary fans & auxiliary circuits. The contactor, being used for extending power, is in the power circuit between such fuses and the inverter assembly. The output of the inverter is connected to the motor through power cables.
It has to be appreciated that the contactor’s position cannot be in the downstream of the inverter as the opening out of the contactor for some reason will subject the inverter to a sudden, step load throw off situation which will create over voltage on the inverter output.
Similarly, the contactor cannot be in the upstream of the power fuse, as the dropping of the contactor will result in total powering down of the controller even.
19.5 Installation of AC converters into metal enclosures
If the environmental conditions are likely to exceed these accepted working ranges, then arrangements should be made to provide additional cooling and/or environmental protection for the AC converter. The temperature limits of an AC converter are far more critical than those for an electric motor. Temperature de-rating needs to be strictly applied. However, it is unlikely that a modern PWM converter will be destroyed if the temperature limits are exceeded. Modern AC converters have built-in thermal protection, usually a silicon junction devices, mounted on the heat sink. The main problem of over-temperature tripping is associated with nuisance tripping and the associated downtime.
Although the efficiency of a modern AC converter is high, typically ± 97%, they all generate a small amount of heat, mainly due to the commutation losses in the power electronic circuits. The level of losses depends on the design of the converter, the PWM switching frequency and the overall power rating. Manufacturers provide figures for the losses (Watts) when the converter is running at full load. Adequate provision should be made to dissipate this heat into the external environment and to avoid the temperature inside the converter enclosure rising to unacceptably high levels.
Converters are usually air-cooled, either by convection (small power ratings) or assisted by cooling fans on larger power ratings. Any obstruction to the cooling air flow volume to the intake and from the exhaust vents will reduce efficiency of the cooling. The cooling air volume flows and the power loss dissipation determine the air-conditioning requirements for the equipment room.
The cooling is also dependent on there being a temperature differential between the heat sink and the cooling air. The higher the ambient temperature, the less effective is the cooling. Both the AC converter and motor are rated for operation in an environment where temperature does not exceed 40oC.
When AC converters mounted inside enclosures, care should be taken to ensure that the air temperature inside the enclosure remains within the specified temperature limits. If not, the converters should be de-rated in accordance with the manufacturer’s de-rating tables.
In an environment where condensation is likely to occur during the periods when the drive is not in use, anti-condensation heaters can be installed inside the enclosure. The control circuit should be designed to switch the heater on when the drive is de-energized. The heater maintains a warm dry environment inside the enclosure and avoids moisture being drawn into the enclosure when the converter is switched off and cools down.
AC converters are usually designed for mounting in a vertical position, to assist convectional cooling. On larger VSDs, cooling is assisted by one or more fans mounted at the bottom or top of the heatsink.
Many modern converters allow two alternative mounting arrangements:
- Surface mounting, where the back plane of the converter is mounted onto a vertical surface, such as the back of an enclosure
- Recessed mounting, where the heat sinks on the back of the converter project through the back of the enclosure into a cooling duct. This allows the heat to be more effectively dissipated from the heat sinks.
Sufficient separation from other equipment is necessary to permit the unrestricted flow of cooling air through the heat sinks and across the electronic control cards. A general rule of thumb is that a free space of 100mm should be allowed around all sides of the VSD. When more than one VSD are located in the same enclosure, they should preferably be mounted side by side rather than one above the other. Care should also be taken to avoid locating temperature sensitive equipment, such as thermal overloads, immediately above the cooling air path of the VSD.
Adequate provision must be made to dissipate the converter losses into the external environment. The temperature rise inside the enclosure must be kept below the maximum rated temperature of the converter.
Calculating the dimensions of the enclosure
The enclosure should be large enough to dissipate the heat generated by the converter and any other electrical equipment mounted inside the enclosure. The heat generated inside an enclosure is transferred to the external environment mainly by radiation from the surface of the enclosure. Consequently, the surface area must be large enough to dissipate the internally generated heat without allowing the internal temperature to exceed rated limits.
The surface area of a suitable enclosure is calculated as follows:

Where,
A Effective heat conducting area in m2 (Sum of surface areas not in contact with any other surface)
P Power Loss of heat producing equipment in Watts
TMax Maximum permissible operating temperature of Converter in oC
TAmb Maximum temperature of the external ambient air in oC
k Heat transmission coefficient of enclosure material
Example
Calculate the minimum size of an IP54 Cubicle for a typical PWM type Frequency Converter rated at 22kW.
The following assumptions are made:
- The converter losses are 600 Watts at full rated load
- The converter is to be mounted within an IP54 cubicle made of 2mm steel.
- The enclosure is effectively sealed from the outside and heat can only be dissipated from the enclosure by conduction through the steel and by radiation from the external surface into the outside air
- The cubicle stands on the floor with its back against the wall in an air-conditioned room with a maximum ambient temperature 25oC
- The converter can operate in a maximum temperature of 50oC
- The Heat transmission coefficient is 5.5 (typical for painted 2mm steel)
The first step is to calculate the minimum required surface area of the enclosure. This can be done by applying the formula for surface area.

If the cubicle is standing on the floor against a wall, this area applies only to the top, front and two sides of the enclosure. A suitable cubicle can be chosen from a range of standard cubicles or could be fabricated for this installation. In either case, it is important to take into account the dimensions of the converter and to ensure that there is at least 100mm space on all sides of the converter.
With these requirements in mind, the procedure is to choose or estimate at least two of the dimensions and the third can be derived form the above equation. This calculated dimension must then be checked to ensure that the required 100mm clearance is maintained.
For a cubicle with dimensions H x W x D standing on the floor against the wall, the effective heat conducting area is
A = HW + 2HD + WD
Assuming that a standard cubicle is chosen with a height of 2.0m and a depth of 0.5m, the width is derived from:
A = 2.0W + 2 + 0.5W
A = 2.5W + 2
Using the required heat dissipation area from the above calculation
4.36 = 2.5W + 2
or,
2.5W = 2.36
W = 0.94
Based on the requirements of heat dissipation, the width of the cubicle would have to be larger than 0.94m. In this case a standard width of 1.0m would be selected.
Clearances around the sides of the converter should be checked. With typical converter dimensions of H x W x D = 700 x 350 x 300, the cubicle chosen would provide more than 100mm of clearance around all the converter and also leave sufficient space for cabling and other components.
From this calculation, it is clear that the overall dimensions of the cubicle can be reduced by the following changes:
- Standing the cubicle away from the wall, at least 200mm
- Reducing the ambient temperature by turning down the air-conditioning
- Providing ventilation to the cubicle to improve heat transfer
Ventilation of the enclosures
The enclosure can be smaller if some additional ventilation is provided to exchange air between the inside and outside of the cubicle. There is several ventilation techniques commonly used with converters, but they mainly fall into two categories:
Natural ventilation
This type of ventilation relies on the convectional cooling airflow through vents near the bottom and top of the cubicle and is normally called the “chimney” effect.

Natural ventilation of a converter in a cubicle
Forced ventilation
This type of ventilation relies on cooling airflow assisted by a fan located either near the top or the bottom of the cubicle. It is difficult to maintain a high IP rating with ventilated cubicles, so ventilated cubicles need to be located in a protected environment, such as a dust-free equipment room.
For cooling purposes, a certain volume of airflow is required to transfer the heat generated inside the enclosure to the external environment. The required airflow can be calculated from the following formula:

Where,
V Required airflow in m3 per hour
P Power Loss of heat producing equipment in Watts
TMax Maximum permissible operating temperature of Converter in oC
TAmb Maximum external ambient temperature in oC

Forced ventilation of a converter in a cubicle
Example
Calculate the airflow ventilation requirements of the 22kW Converter used in the example above, using the same assumptions.
The required airflow to maintain adequate cooling:

An airflow of 75 m3/h is necessary to remove the heat generated inside the enclosure by the converter and to transfer it to the outside. In this case, the dimensions of the cubicle are based purely on the minimum physical dimensions required for the converter and any other equipment mounted in the cubicle.
This airflow could be achieved by the convectional flow of air provided that the size of the top / bottom openings is large enough and the resistance to airflow is not unnecessarily restricted by dust-filter pads. Alternatively, a fan assisted ventilation system would be necessary to deliver the required airflow.
Alternative mounting arrangements
One of the main problems associated with the ventilation of converter cubicles is that it is very difficult to achieve a high IP rating with a ventilated cubicle. In addition, if filters are used, an additional maintenance problem is introduced, as the filters need to be checked and replaced on a regular basis.
A solution which is rapidly gaining popularity is the recessed mounting. This technique has now been adopted by many of the converter manufacturers.
Most of the heat generated by a converter is associated with the power electronic components, such as the rectifier module, inverter module, capacitors, reactor and power supply. These items are usually mounted onto the heatsink base of the converter and most of the heat will be dissipated from the surfaces of this heatsink. The digital control circuits do not generate very much heat, at the most a few watts.
If the heatsink is recessed through the back mounting plane of the enclosure, most of the heat will be dissipated to the environment external to the cubicle. The portion of the converter with the control circuits remains within the enclosure. With a suitable seal around the converter, the enclosure can be relatively small and rated at >IP54 without the need for forced or convectional airflow ventilation.
The heatsink portion projecting outside the enclosure can be exposed to the environment with a lower IP rating (eg IP20) or it can be arranged to project into a cooling airduct system, which ducts the heat outside the building. Figure 19.7 shows a typical mounting arrangement of this type of converter with the heatsinks projecting into a cooling duct.

Converter mounted with heatsink outside the cubicle
20
Motor Failure Analysis
A failure of electric motor can be either due to mechanical fault(s) or electrical fault(s) or due to both. A mechanical failure, in turn, can be either due to a bearing problem or due to improper mechanical fitting of the components of the motor or even a root cause lying in the electrical system may show up the symptoms mechanically. In either case there is a possibility of vibrations giving a sufficient clue. If the vibrations are monitored and trended properly an impending failure may show up as an increasing vibration. In the earlier days, electrical symptomatic problems could be gauged only during off-line testing. But nowadays there are lot of methods to diagnose such dormant problems and if applied and analyzed properly can avoid repeated failures or even breakdowns.
It is the duty of the electrical maintenance professional to gain a good understanding about various mechanisms that can cause motor failures. Then effective usage of discretion in diagnosing the root cause of a failure must be applied. Based on these findings, practical action plans have to be devised. These plans shall be meticulously implemented in order to overcome the problems permanently. An electrical engineer must always remember that the obvious defect noticed may not be the real cause. The very cause of the failure may still be lying dormant in the system and again may result in the same failure or in a different failure for the same basic reason. Unless this approach is adopted the Plant will be witnessing repetitive failures and unplanned outages. Hence each and every motor failure has to be investigated thoroughly and, if required, the issue may be taken up with the OEMs (Original Equipment Manufacturers).
20.1 Types of motor failure
Motor failures can be broadly classified as:
- Insulation failure
- Rotor bar failure
- Mechanical failure
- Auxiliaries failure
Insulation failures (as covered in Chapter 1, are related to stator insulation mainly) is the most important type of failure mode for an electric motor. This mode alone contributes a major chunk to the cases of motor failures. It is believed that more than 50 % of the motor failures are due to insulation failure alone. It can occur due to the stresses resulted by the thermal, electrical, mechanical & environmental processes that are deviating from the designed values or from the specification originally envisaged in the detailed engineering. These failures can manifest in various forms like winding shorts, insulation to ground faults etc.
Thermal processes harming insulation systems are usually a result of overheating of the winding due to various reasons like overload, too-frequent starts, a higher ambient temperature than the designed one, inadequate ventilation, hard-to-start (also known as high inertia) loads etc. Motor ventilation related problems, i.e., inadequate cooling will be mainly due to, congestion on fan cover, improper spacing at the end of motor etc.
Rotor bar failure is an important failure mode of especially large motors. It can be due to the manufacturing defects or complications developing out of improper operational & maintenance practices. Design problems that can create this problem are casting defects, loose laminations, improper protection provided for operation in harsh environments etc.
Operational problems that can contribute to this failure are frequent starts, inadequate cooling for the motor etc.
Maintenance problems like incorrect fitting, incorrect alignment can cause excessive vibration & overheat in the rotor.
Rotor failures can also arise due to rubbing with stator because of bearing failure, eccentricity of the rotor resulting out of bent shaft or improper air gap.
Mechanical failures are primarily caused by various reasons like misaligned couplings, sheaves out of alignment, poor shimming of feet, soft foot, dynamic imbalance of load, internal imbalance of motor rotor etc.
Most common failure under this category is bearings related. This can be due to excessive loading (causing bearing clearance problems), improper lubrication, general wear out, improper engineering of the system, non-suitability of the bearing for the particular application, corrosion etc.
Auxiliaries failure are failures related to the power supply, electrical circuits & cable termination. Unless due care is taken to fix these problems the motor may go out of service. In some extreme cases like imbalance in voltage, negative sequence currents etc., the motor insulation failure and even vibrations can be seen.
20.2 Common causes of motor failure
Some of the very common causes of motor failure are discussed below:
Frequent starts
This is very critical factor for a large rating motor (usually 200 kW and above) started directly on-line. Hence it doesn’t apply for soft started motors.
A motor is said to be frequently started if the number of starts in an hour exceeds the one specified by the designer / manufacturer. Usually it is 3 Nos. of cold starts per hour or 2 Nos. of hot starts per hour. Cold start means when the motor is normally started without a preceding thermal overload trip in the previous start / operation. Hot start is the one involving a thermal trip.
To gain an understanding about the underlying principles, one has to appreciate the fact about the amount of inrush currents flowing through both the stator & the rotor and their deleterious heating effect. A motor’s temperature (mainly of the winding as it is the main concern) typically rises exponentially in response to the time taken for the motor to start. Even in operation this temperature continues to increase but with a declining rate of temperature rise.

Typical heating and cooling curves of a motor
Typical motor heating curve is shown in Figure 20.1. As shown in this figure, a motor will have another curve called as cooling curve. Based on the heat dissipating efficiency of the cooling circuit – comprising the cooling fans assembly, finned structure of the yoke etc. – the temperature of the motor drops exponentially with respect to time, once the motor is de-energized and allowed to coast down.
As the motor is started, since the starting currents and hence the power dissipated is very high the temperature keeps on increasing. During this period the cooling circuit will be almost ineffective.
If the motor gets tripped at time t1 with the motor temperature T1 and then allowed to cool down, the motor temperature decreases and would have touched T3 after time t2. Instead, if the motor is re-started, before complete cool down, the temperature of the motor will shoot up to a temperature (T2 as shown in the figure) which will be much higher than T3. This temperature may be tolerable for the motor as this re-start being the first one. However, if another such step is repeated the temperature of the motor may attain dangerous proportions unless it the motor is designed for such purpose. In practice, the values of these vary from each rating of motor to the other. Also for the same rating they differ from manufacturer to manufacturer and based on the specification given by the user.
Hence too-frequent-starts is the most detrimental aspect to the life of a motor, as both the stator and rotor get heavily stressed out during every start. Stator’s insulation degradation process rate gets multiplied with the rise in temperature.
Also the rotor’s thermal aging process gets accelerated. This is because the rotor will be running at much lesser speeds during starting and hence the induced currents are also high. Because of this excessive heat and the resulting thermal uneven expansion, the rotor bars may crack (at the joints where the bars are welded to the shorting ring) after expanding unevenly even with respect to the rotor. Due to the cracks the electrical resistance of the bars increases and hence heating of the rotor bars also increases. Since the current is diverted through other rotor bars, they get overheated. All these result in a localized overheating of the rotor bars. These high temperatures of the rotor may cause bowing effect thereby reducing air gap / bearing clearances. This can result in mechanical damage to the rotor.
High inertia
Motor failures due to high inertia loads normally go undetected, as a hard-to-start load can’t be easily identified. Due to high inertia of the load, the motor takes excessive time to accelerate to full speed. As a motor draws very high current during acceleration phase, the windings get overheated. Typical high-inertia loads are certain fans, blowers, pumps, and some kinds of machine tools. Even though it can’t be considered as a definition, if the load’s moment of inertia is more than twice that of the motor, the acceleration gets prolonged and it can be considered as a high inertia load-motor combination. However the details of inertia may not always be available to the end user. Hence a practical way can be devised as follows: Observe and record the acceleration time needed to reach full speed during every start. If this time is more than a few seconds, and if the application requires frequent starting, there’s a good chance that inertia is the problem. A high inertia load usually demands high torque and hence lesser torque – difference of motor torque and the load torque – is available for acceleration. This lesser acceleration torque requires a much longer time to take the load to full speed. Hence the associated copper losses will also be huge, thereby overheating the motor. This often leads to the burnout of the motor.
When an energy efficient motor – which has a much higher starting current and somewhat lower starting torque – is used for replacing a standard motor the motor starting torque may not be sufficient for driving a high inertia load. Starting current can also be excessively high causing possible damage to equipment.
In motor-reversing applications, the motor needs to be selected / designed properly. This is because, certain types of electrical braking can impose substantial losses. For example a full-voltage reversal (plugging) will result in four times the normal acceleration losses.
To take care of these factors various protection techniques can be employed and are as follows:
Internal temperature protection: In case of a repeated failure of a motor, direct measurement of the temperature can be resorted to, in order to safeguard the motor against overheating. While rewinding in the motor shop, internal-temperature protectors can be embedded within the new winding. Such devices sense the actual winding temperature directly and will trip the motor starter when it reaches an unsafe temperature. This way the protection can be made very reliable as compared to the inherently less-sensitive indirect relay-sensing methods. Furthermore, the direct temperature-sensing method takes care of the motor’s thermal storage and cooling capacities – instead of utilizing the extrapolation techniques used by the indirect temperature measurement relay.
Solid-state protection: The advent of modern solid-state protective relays has simplified the job. In these, the motor’s losses are actually computed from current measurements using sophisticated “symmetrical component” techniques. Based on this, the motor temperature profile is developed and then adjusted to the cooling profile. Such an extrapolation is used to determine an approaching unsafe temperature. This provides a much closer degree of protection than indirect methods under more difficult conditions of operation. The great strides in the development of electronics and the reducing costs of solid-state protective devices have made this kind of protection available in less costly designs. So the application of these relays even for lower rating motors is turning out to be economical.
Earlier generation relays, typically electromagnetic ones, used to simulate a motor’s heating and cooling characteristics by means of thermal sensitive heater elements. Since there cannot be any discrimination employed between the heating associated with starting and in normal conditions, the heater element needs to be designed for not responding to 600 %. This makes the relay to be a bit insensitive during normal operation. The problem used to get further compounded when used for high load inertia loads which have longer-than-normal starting times. This kind of application drastically reduces the degree of protection with an increased probability of a motor burnout.
In order to cater to the needs of a high inertia load, if efficiency is not a bar, NEMA Design D motor can be used. But a careful evaluation is needed while selecting this motor and a good compromise between its price and the efficiency is required. This type of motor accelerates and decelerates the load much more rapidly and develops high torque from zero to full speed.
Another feasible solution is to enhance the quality of the winding insulation while re-winding the motor.
Inadequate cooling
Insulation system plays a vital role in the life of a motor and its major enemy is heat, so it’s important to be sure to keep the motor within temperature limits. There is a rule of thumb that says a 10 degree Celsius rise reduces the insulation’s useful life by half, while a 10 degree Celsius decrease doubles the insulation’s life. From this it can be safely deduced that if we can keep a motor cool enough, the winding will last longer, which covers up other factors like moisture, vibration, chemicals and abrasives in the air that also attack insulation systems.
While selecting a motor for a particular application, due study needs to be carried out regarding the environmental conditions. This is because, at high ambient temperatures or at high altitudes, above 3,300 feet (1005.84m), the air will be light and has less cooling potential. Accordingly standard motors need to be de-rated or requirement is to be specified to make the motor suitable for use under these conditions. The cooling ineffectiveness needs to be addressed for variable speed drives as they can run at lesser temperatures and hence the shaft mounted cooling fan may not be able to give sufficient air flow. In such cases separate cooling fan driven externally may have to be provided depending on the operational requirements. Resistance to the ventilation air must be maintained to be the least. Also the cooling air system must be checked and always ensured to be without any short passes of air.
Congestion on fan cover
Another environmental concern is dirt, insects and fibers, which can clog ventilation openings, form a thermal insulating layer over the heat dissipating surfaces and cause a variety of mechanical problems. Hence regular maintenance schedule must include cleaning the fan covers effectively. The time interval has to be decided at site based on the ambient conditions and the prevailing operating and maintenance conditions differing on a case-by-case basis.
Improper spacing at end of motor
The layout preparation for a Project will normally be done at a very early stage where there will be not much of concrete information available. Hence they must be reviewed periodically as the detailed engineering proceeds.
The main driving force behind restricting the load on a motor is the thermal capability of the motor. As a motor gets loaded, the current drawn by the motor heats the windings by virtue of the copper (I2R) losses. The rate at which the winding temperature rises for a particular load, is dependent upon the characteristics of insulation material employed. This is an exponential function and hence the rate comes down at higher temperatures. Same way the cooling of the motor is a function of the heat exchange arrangement and the ambient temperature. The heat exchange mechanism typically consists of at least one external fan and for higher rating motors, one or two internal cooling fans. This mechanism will help in the cooling of the motor with an exponential rate, which is high at higher temperatures and reduces with lesser temperatures. A normal motor, under steady state conditions, stabilizes to a temperature for a particular load and ambient temperature, which is an intersection point between the heating and cooling curves of the motor. The heating of the motor gets accelerated during starting due to the higher copper losses due to large starting currents. As the motor’s heating is much more rapid than the cooling, the motor must be given sufficient time to cool down before another start is taken.
Incorrect belt alignment
Simple, regular checks on the belt coupling can save a lot of time and trouble due to various reasons that can otherwise result in huge repair costs. These checks are mostly connected with proper alignment and tensioning of the belt and hence the maintenance personnel shall always endeavor for ensuring them.
Before going into the maintenance aspects, there are certain checks that must be taken care of during installation / design and are as follows:
- Wherever possible, make lower side of the belt the driving side.
- Pulley ratio must not exceed 8:1. If not, the manufacturer must approve it.
- The drive sheave on the motor should be centered on the shaft extension.
- The overhung load (OHL, a bending moment that results from drive tension) shall be kept to a minimum. An increase in OHL can gave doubling effect in the reduction of the L10 bearing life. Reducing the shaft extension can minimize this.
- When using a belt drive on a horizontal application, any belt sag should be on the top. Optimum drive/pulley contact occurs when the tight segment of the belt is on the bottom.
- Vertical belt drives cause more problems than horizontal belt drives. If an application requires a vertical belt drive, make arrangements to mount the drive pulley at the top. Optimum belt / drive pulley contact is achieved when the tight part of the belt is pulling upward.
A belt drive, as shown in Figure 20.2, must be not be too tight as to overload the motor or put unwanted extra force on the motor bearings. At the same time it should be tight enough to avoid it from slipping. Adjust the tension by changing the distance between the motor and driven load. The tension must be just enough to prevent excessive bow on the slack side.

Typical Belt drive
Belt tension is determined by the sound the belts make when the drive is first started. Belts will produce a loud squeal that slowly vanishes as the speed approaches rated value. If the belt tension is too tight or too loose the operation becomes inefficient and damages can occur. Do not change the pulley pitch diameter to change tension. This will result in a different fan speed than desired.
Misalignments in belt drives can be categorized as angular and parallel.
Angular misalignment normally results from improper mounting of motor / reducer. A skewed bushing or a bent shaft can also contribute to angular misalignment. It is measured as angle between shafts or in Mils per Inch of coupling diameter. Normally an angular misalignment of less than 0.002 in for each inch diameter of pulley is considered to be fine.
Parallel misalignment is the misalignment arising out of mounting of motor / reducer on different planes as shaft centerlines don’t coincide. It is normally measured in Total Indicated Run out, TIR in Mils (0.001”).
Bearing misalignments can be classified as static and dynamic.
Static misalignment arises due to a non varying static load (like deflection) and is due to axes being not co-linear or the supports being not in the same plane.
Dynamic misalignment normally arises due to a bent shaft, which results in a balance problem as well as clearance problems in the bearings resulting in undue fatigue.
Motor / Reducer Soft Foot is a problem associated with warped or bent machine foot or an uneven mounting base. This in turn causes high stress on motor housing and bearings thereby resulting in higher vibrations. Such problems can be confirmed by using a dial indicator. Observation has to be made for any excessive movement while loosening one foot at a time.
Adjust belt alignment by moving the motor or driven load pulley inward or outward along the shaft.
The pulley’s horizontal alignment can be carried out by ensuring that the pulley face is perpendicular to the centerline of the conveyor. This ensures the bearings are co-linear. Slightly oversized bearing mounting holes on the conveyor structure along with welded adjusting bars facilitate proper installation. Vertical alignment is done by ensuring that the shaft centerline is matching the elevation of the reducer shaft centerline.
Solid belt guards
It is important that belt drives be protected from abrasive damage by using adequate drive guards. Keep drive guards clear for proper ventilation and clean pulley grooves to remove the build-up of dust, grime, rust or other foreign materials. Belt guards must be designed for adequate drive protection, yet provide ventilation and suitable access for oiling / greasing. Belt guards shall be open mesh type to aid in situ visual inspection of the belts. Belt guards shall have tachometer openings for motor and fan shafts.
Solid belt guards will normally be useful as fire proof construction apart from protecting the operator and other personnel moving around in the area. They are supposed not to interfere with efficiency and create no new hazard.
Excessive loading causing bearing clearance problems
Excessive loading of the bearings due to reduced internal clearances is often encountered in industry. As the reduction in internal clearances can’t be seen directly, motors will be allowed to run. Normally this is accompanied by a change in appearance of the lubricant. Once the problem becomes more pronounced, the roller elements will be subjected to high heat and hence the draining grease can be seen in very dark color.
One of the possible reasons for such upset can be due to the bearing housing being out of round or a over size of the shaft. Hence at the time of overhauling a motor, it is advisable to take measurements of all dimensions, like shaft outer diameter, inner diameter of bearing housing etc. Any of the abnormalities noticed in the clearance between the bearing & shaft or bearing & housing are to be cleared. Also run out of the shaft has to be taken to detect whether the shaft is straight or any bend is there.
The bearing housing when it is being outer race to shrink, increasing the load. This kind of external cooling, if needs to be resorted to, has to be done away with at the earliest. Root cause analysis needs to be carried out and suitable permanent rectification can be carried out. It can be either replacement of the grease with synthetic, high temperature tolerant grease or upgrading the motor itself.
In case the motor has a tapered shaft, due care is to be taken to avoid driving the bearing beyond its intended position.
The pump side problems like cavitation, excessive axial thrust, water hammer in the lines or misalignment between the pump and motor, unbalance in the rotating assembly can also result in the reduction of bearing clearances.
Insulation failures
The insulation system of an AC induction motor mainly consists of:
- Ground wall insulation – the slot liner paper that protects the insulated copper to ground
- Phase-to-phase insulation – a sheet of insulation paper that is laid between the phases
- Turn-to-turn insulation – often the weakest link in the insulation system, the enamel on the copper of a random wound motor or the tape found on form coils. This insulation’s purpose is to protect from copper to copper failures.
The developments being witnessed in the modern day have introduced good quality insulation material that can endure higher temperatures with little negative impact on their longevity. In spite of all these things, motor insulations do fail and hence needs a check mechanism to keep the deterioration under control or to take a corrective action pro-actively. To do so, the insulation degradation process needs to be understood properly.
Basically, this degradation process can be attributed to the ageing phenomenon, which gets further accelerated with various types of stresses due to thermal, electrical, mechanical or environmental reasons.
Thermal Stresses are imposed on the insulation by the operating temperature. Whenever an electrical motor is started or stopped it is subjected to thermal cycle of heating and cooling. Overloads will also cause the motor temperature to rise steeply, for very short periods may be, causing the degradation of the mica / resin bond. Whether it is conventional thermoplastic insulation or new thermosetting insulation, the excessive heat generation impairs the mica / resin bond. In the former case, delamination will take place and in the latter case embrittlement would occur.
Electrical Stress is a result of the working voltage of the machine and increases as the voltage is raised above normal values, even for brief time intervals. Unless deliberately suppressed, impulse due to system faults or opening of breakers can result in severe short time electrical stresses. Discharge treeing / erosion can be caused by discharges occurring in insulation voids or cavities.
Mechanical stresses are due to the operating philosophy. For example, direct on-line starting of motors will exert severe forces on the end winding structure. This effect gets multiplied during system faults. Another factor is vibration that results in insulation wear by fretting. Also the differential rates of expansion of the core and conductors result in tearing of the insulation.
Environmental stresses are a result of oxidation of the organic material, contamination (from water, oil, dust, carbon, salinity, sand, corrosion etc), deposition etc. As a result of these, the insulation can age and crack. Surface deposition and ingress of moisture make the stator windings to suffer a lot. This is very common in high humidity conditions and can damage the insulation system, if proper care by way of enclosure heating is not carried out.
All these processes are interrelated as thermal cycling may cause differential expansion. This will lead to void formation and in turn can aid propagation of electrical discharges. These in turn can cause electrical and subsequent electrochemical deterioration. The electrical factors like voltage imbalance, negative sequence currents etc. can cause undue overheating.
As a result of these various ageing factors in service delamination, shrinkage of wedges & side packing etc can take place. These in turn result in vibration abrasion and loss of the functionality of gradient control coatings. All these will invariably result in partial discharges, which increase in severity as the deterioration progresses. Partial discharge in turn contributes to the additional damage rate. Slot discharges, which are the discharges occurring between the electrical shield of the stator bar and the core, will ensue and are detrimental as they attain high energy levels that can damage over a period.
Bearing current problems
Bearing currents are produced in different forms and almost all rotating machines, either large or small in size, have a bearing current problem whether it is DC or AC. Even though bearing current is caused by an electrical phenomenon, it results in mechanical damages. That’s why it went undetected for so many years and was the reason for the slow pace of progress in studying these phenomena and solving the associated problems. Electric current flow in bearings can be seen simultaneously on both the races and the rolling element. The bottom of the depression will be dark in color and is known as fluting as shown in Figure 14.3.

Fluting of a bearing
The various sources of shaft voltage can be broadly categorized as electromagnetic induction, electrostatic coupled from internal sources and electrostatic coupled from external sources.
Electromagnetic induction from the stator winding to the rotor shaft is more prevalent in long axial machines. The shaft voltage is due to small dissymmetries of the magnetic field in the air gap that are inherent in a practical machine design. Most induction motors are designed to have a maximum shaft voltage to frame ground of < 1 V rms. The induced shaft voltages cause bearing current to flow in a circulating path from the shaft, thru drive end non-insulated bearing, thru the stator frame, thru non-drive end non-insulated bearing and back to the shaft. This circuit basically has very low resistance. Hence even though the induced shaft voltage is low in magnitude, a high circulating current flows through both motor bearings. Hence, theoretically it is advisable to provide insulated bearing at least on one side to break this circuit, whenever the estimated the likely shaft voltage is going to be higher. This may happen typically for motors with a rating greater than 250 horsepower. However, during transient start and stop conditions across the AC line, magnetic dissymmetries appear as increased shaft voltage, resulting in bearing current flow and reduced life. The traditional electromagnetic solution to induced shaft voltage on larger frames is to insulate the non-drive end bearing. This does not mitigate shaft voltage but rather the resulting bearing current. Voltage pulses fed by the inverter contain such high frequencies, that the leakage inductances of the motor winding provide paths for currents to leak to earth. This induces a voltage between the shaft ends. If the induced voltage is high enough to overcome the impedance of the lubrication film of the bearings, a circulating type of high frequency bearing current occurs.
Electrostatic induced shaft voltage may be present in any situation where rotor charge accumulation can occur. Examples are belt driven couplings, ionized air passing over rotor fan blades or high velocity air passing over rotor fan blades as in steam turbine. The electrostatic solution is to keep the shaft and frame at the same potential by installing a shaft grounding brush to reduce electrostatic build up and reduce shaft voltage to 70 – 400 mV. This value is not enough to cause damaging bearing current to flow.
Electrostatic coupled shaft voltage from external rotor sources, such as a static exciter in a turbine generator, is possible and historically solved with the application of a shaft grounding brush. Electrostatic coupled shaft voltage from external stator sources, such as a PWM inverter.
The shaft voltage magnitude measured is commonly used as an indicator of the possible bearing current that results. It is the magnitude and passage of electrical current thru the bearing that results in ultimate mechanical damage. Bearing damage caused by electrical current is characterized by the appearance of either pits or transverse flutes burnt into the bearing race. Electrical pitting continues until the bearing loses its coefficient of friction, further increasing the losses and breaking up bearing surface.
However, while modern motor design and manufacturing practices have nearly eliminated the low frequency bearing currents induced by the asymmetry of the motor, the rapid switching in modern drive systems may generate high frequency current pulses through the bearings. If the energy of these pulses is sufficiently high, metal transfer between the ball and races occurs. This is known as Electrical Discharge Machining (EDM). As a result, the bearing may need replacing after only a short time in service.
Each individual item of a drive system, such as the motor, the gearbox or the drive controller, considered alone is the product of sophisticated manufacturing techniques, and normally carries a favorable Mean Time Between Failure (MTBF) rate. It is when these components are combined together and the system integrated as a whole has a much lesser MTBF.
20.3 Modern developments
Present drive technology, incorporating Insulated Gate Bipolar Transistors (IGBT), create switching events 20 times faster than those considered typical ten years ago. Recent years have seen a rising number of EDM-type bearing failures in drive systems relatively soon after start up, within one to six months. The extent to which this occurs depends on the drive system architecture and the installation techniques used.
Bearings in the initial stages of EDM destruction exhibit more of a satiny finish distributed fairly evenly, depending on how a particular system is operated. The discharges tend to be a bit more random if the speed is being varied continually. However the earliest bearing damage cannot be detected through vibration monitoring.
When the oil film thins locally from variations in temperature or viscosity—or from changes in radial loading or vibration—and voltage on the shaft exceeds the dielectric strength of the oil film, electrical energy discharges, he said. If the energy is great enough, the discharge melts a tiny pit in the surface of the race.
Higher-quality bearings, with their smoother raceways and balls, exhibit fewer irregularities than their lower grade counterparts. Shaft voltage discharges less often with the better bearings. Consequently, voltage builds up to a higher level than it would in rougher bearings. Hence a high-quality bearing will see fewer, yet stronger, discharges than a low-grade bearing, and, as a result, will sustain deeper damage.
An inverter approximates the waveform with a series of voltage pulses and does not actually produce a sinusoidal shaped waveform to feed the motor. Unlike the three phases of sinusoidal power supply that always add to zero, the three phases of the PWM (Pulse Width Modulated) drive, although they balance in peak amplitude, do not balance between phases instantaneously because the pulses are of different widths. The resulting common mode voltage is a source of bearing currents.
Regular three-phase sinusoidal power supply is balanced and symmetrical under normal conditions, i.e., the peak-to-peak voltages are equal for all the three lines and the shape of each of the three waveforms is identical. Hence, the vector sum of the three phases always equals to zero. Thus, it is normal that the neutral is at zero volts, however this is not the case with the PWM inverter’s output. While the voltages may be balanced in peak amplitude, it is impossible to achieve perfect balance between phases instantaneously, when pulses of different widths are produced. When this happens, the neutral will not be zero and the voltage can be defined as a common mode voltage source. This creates a potential between the inverter output and earth which will force currents through stray impedances present between anything connected to the inverter phases, such as the motor cables and motor windings, and earth. This is known as common mode current.
Frequency converters built with BJTs (bipolar junction transistor), SCRs (silicon controlled rectifier) or GTOs (gate turn-off thyristors) are operable at a switching frequency less than 600Hz and hence make lot of audible noise. However, the IGBT (insulated gate bipolar transistor) came onto the scene and these represented a huge improvement in drive technology, increasing the switching frequency up to 20 kHz, reducing harmonics and audible noise. But these improvements have been bought at a price: IBGT technology has resurrected bearing problems due to electrical discharge, creating a new challenge to manufacturers of electric motors. The new problems arose because PWM inverters equipped with IGBT inverters distort the sinusoidal supply generating high frequency harmonics and high (dv/dt)s. The inverter switching mechanism also creates what is called common-mode voltage.
Due to the high switching frequencies of IGBT inverters, parasitic capacitances between stator winding and stator, and between rotor and stator winding become relevant. These capacitances result from the common mode voltage and lead to a common mode current flowing through the motor bearings. They are called on to handle two types of bearing currents that have been identified. The first these, conductive-mode bearing current, is discharged continuously during a period of time when bearings exhibit good conductivity. In contrast, the second type, discharge-mode bearing current, is discharged in discrete time intervals. The former prevails at lower speeds, because the good electrical contact between the rolling elements and bearing raceways connects the rotor to ground through the outer bearing race, whereas the latter is more significant for higher inverter output frequencies, as the electrical conductivity of the bearing decreases, enabling the capacitive voltage to build up till it is able to break down the dielectric resistance of the grease. Although both types of currents are present at the same time, it can be said that the discharge bearing current is the more critical. The conductive bearing current is usually less harmful to bearings, as it is a low-amplitude current that flows continuously without arcing. However, it increases bearing temperature, accelerating grease deterioration and reducing bearing life. On the other hand, the high energy level of the discharge bearing current works like an electro-erosion machine, resulting in bearing pits or flutes. The amplitude of bearing currents depends on operating conditions such as speed, temperature, lubrication type, motor size etc.
From all these factors, motor size is probably the most significant, as the larger the motor the larger its parasitic capacitances. Motor design can also have reasonable influence over bearing current amplitudes. Manufacturers offer a number of options as a means of overcoming the damage to bearings caused by electrical discharge. The most obvious of these is insulated bearings, which are used where it is desirable to achieve perfect insulation of the bearing from its application environment. However, the method increasingly used to achieve insulation is ceramic coating, which is very expensive, typically adding anything from GBP 600 to 700 to the price of motors with frame sizes in the range from 315 to 355. Another option for applications where some passage of current can be accommodated is a shaft grounding brush. A much less costly option than insulated bearings, the shaft brush reduces stray current through the motor bearings by half, as a result of short-circuiting the path between rotor and stator. By employing a shaft brush it is possible to keep voltages below the so-called “fritting voltage” which is responsible for the development of bearing defects due to electric current discharge. Although damage cannot be completely prevented by employing this measure, the extent of damage can be kept within such limits that the life expectancy of the bearing is not affected.
ABB has recently patented a motor winding designed to eliminate circulating bearing currents. The design divides the stator winding into an even number of equal parts per phase. The groups are then distributed uniformly between ac supply connections at both ends of the stator. This generates a high-frequency net current flowing equally, and in opposite directions, through the windings. By dividing the windings into two branches, we have a better chance of balancing the high-frequency common mode currents and getting more symmetric flux distribution
The solution pits one high-frequency net current against a current of equal magnitude flowing in the opposite direction. The currents, in effect, cancel each other out, and the bearings roll on, unmolested.
22
Maintenance and Cleaning
22.1 Introduction
The key to minimizing motor problems is scheduled routine inspection and service. The frequency of routine service varies widely between applications.
Including the motors in the maintenance schedule for the driven machine or general plant equipment is usually sufficient. A motor may require additional or more frequent attention if a breakdown would cause health or safety problems, severe loss of production, damage to expensive equipment or other serious losses.
Written records indicating date, items inspected, service performed and motor condition are important to an effective routine maintenance program. From such records, specific problems in each application can be identified and solved routinely to avoid breakdowns and production losses.
The routine inspection and servicing can generally be done without disconnecting or disassembling the motor. It involves the following factors:
22.2 Factors effecting motor performance
22.2.1 Dirt and corrosion
- Wipe, brush, vacuum or blow accumulated dirt from the frame and air passages of the motor. Dirty motors run hot when thick dirt insulates the frame and clogged passages reduce cooling air flow. Heat reduces insulation life and eventually causes motor failure.
- Feel for air being discharged from the cooling air ports. If the flow is weak or unsteady, internal air passages are probably clogged. Remove the motor from service and clean.
- Check for signs of corrosion. Serious corrosion may indicate internal deterioration and/or a need for external repainting. Schedule the removal of the motor from service for complete inspection and possible rebuilding.
In wet or corrosive environments, open the conduit box and check for deteriorating insulation or corroded terminals. Repair as needed.
22.2.2 Lubrication
Lubricate the bearings only when scheduled or if they are noisy or running hot. Do NOT over-lubricate. Excessive grease and oil creates dirt and can damage bearings. Lubrication on a scheduled basis, in conformance with the manufacturer’s recommendations, provides optimum bearing life. Thoroughly clean the lubrication equipment and fittings before lubricating. Dirt introduced into the bearings during lubrication probably causes more bearing failures than the lack of lubrication. Too much grease can over pack bearings and cause them to run hot, shortening their life. Excessive lubricant can find its way inside the motor where it collects dirt and causes insulation deterioration. Many small motors are built with permanently lubricated bearings. They cannot and should not be lubricated.
Oiling sleeve bearings
Fractional horsepower motors with a wick lubrication system should be oiled every 2000 hours of operation or at least annually. Dirty, wet or corrosive locations or heavy loading may require oiling at three-month intervals or more often. Roughly 30 drops of oil for a 3-inch diameter frame to 100 drops for a 9-inch diameter frame is sufficient. Some larger motors are equipped with oil reservoirs and usually a sight gage to check proper level. As long as the oil is clean and light in color, the only requirement is to fill the cavity to the proper level with the oil recommended by the manufacturer (See figure 22.1).

Cross Section of the Bearing System of a Large Motor
Do not overfill the cavity. If the oil is discolored, dirty or contains water, remove the drain plug. Flush the bearing with fresh oil until it comes out clean. Coat the plug threads with a sealing compound, replace the plug and fill the cavity to the proper level.
When motors are disassembled, wash the housing with a solvent. Discard used felt packing. Replace badly worn bearings. Coat the shaft and bearing surfaces with oil and reassemble.
Greasing ball and roller bearings:
PLS (Positive Lubrication System) patented open-bearing system that provides long, reliable bearing and motor life regardless of mounting position. Its special internal passages uniformly distribute new grease pumped into the housing during regreasing through the open bearings and forces old grease out through the drain hole. The close running tolerance between shaft and inner bearing cap minimizes entry of contaminants into the housing and grease migration into the motor. The unique V-groove outer slinger seals the opening between the shaft and end bracket while the motor is running or is at rest yet allows relief of grease along the shaft if the drain hole is plugged. (Figure 22.2)

Cross Section of PLS Bearing System (Positive Lubrication System)
The frequency of routine greasing increases with motor size and severity of the application. Actual schedules must be selected by the user for the specific conditions.
During scheduled greasing, remove both the inlet and drain plugs. Pump grease into the housing using a standard grease gun and light pressure until clean grease comes out of the drain hole.
If the bearings are hot or noisy even after correction of bearing overloads (see “Troubleshooting”) remove the motor from service. Wash the housing and bearings with a good solvent. Replace bearings that show signs of damage or wear. Repack the bearings, assemble the motor and fill the grease cavity.
Whenever motors are disassembled for service, check the bearing housing. Wipe out any old grease. If there are any signs of grease contamination or breakdown, clean and repack the bearing system as described in the preceding paragraph.
22.2.3 Heat, noise and vibration
Feel the motor frame and bearings for excessive heat or vibration. Listen for abnormal noise. All indicate a possible system failure. Promptly identify and eliminate the source of the heat, noise or vibration.
Heat: Excessive heat is both a cause of motor failure and a sign of other motor problems.
The primary damage caused by excess heat is to increase the aging rate of the insulation. Heat beyond the insulation’s rating shortens winding life. After overheating, a motor may run satisfactorily but its useful life will be shorter. For maximum motor life, the cause of overheating should be identified and eliminated.
As indicated in the Troubleshooting Sections, overheating results from a variety of different motor problems. They can be grouped as follows:
- Wrong motor: It may be too small or have the wrong starting torque characteristics for the load. This may be the result of poor initial selection or changes in the load requirements.
- Poor cooling: Accumulated dirt or poor motor location may prevent the free flow of cooling air around the motor. In other cases, the motor may draw heated air from another source. Internal dirt or damage can prevent proper air flow through all sections of the motor. Dirt on the frame may prevent transfer of internal heat to the cooler ambient air.
- Overloaded driven machine: Excess loads or jams in the driven machine force the motor to supply higher torque, draw more current and overheat.
- Excessive friction: Misalignment, poor bearings and other problems in the driven machine, power transmission system or motor increase the torque required to drive the loads, raising motor operating temperature.
- Electrical overloads: An electrical failure of a winding or connection in the motor can cause other Windings or the entire motor to overheat.
Whenever noise or vibration is found in an operating motor, the source should be quickly isolated and corrected. What seems to be an obvious source of the noise or vibration may be a symptom of a hidden problem. Therefore, a thorough investigation is often required.
Noise and vibrations can be caused by a misaligned motor shaft or can be transmitted to the motor from the driven machine or power transmission system. They can also be the result of either electrical or mechanical unbalance in the motor.
After checking the motor shaft alignment, disconnect the motor from the driven load. If the motor then operates smoothly, look for the source of noise or vibration in the driven equipment.
If the disconnected motor still vibrates, remove power from the motor. If the vibration stops, look for an electrical unbalance. If it continues as the motor coasts without power, look for a mechanical unbalance.
Electrical unbalance occurs when the magnetic attraction between stator and rotor is uneven around the periphery of the motor. This causes the shaft to deflect as it rotates creating a mechanical unbalance. Electrical unbalance usually indicates an electrical failure such as an open stator or rotor winding, an open bar or ring in squirrel cage motors or shorted field coils in synchronous motors. An uneven air gap, usually from badly worn sleeve bearings, also produces electrical unbalance.
The chief causes of mechanical unbalance include a distorted mounting, bent shaft, poorly balanced rotor, loose parts on the rotor or bad bearings. Noise can also come from the fan hitting the frame, shroud, or foreign objects inside the shroud. If the bearings are bad, as indicated by excessive bearing noise, determine why the bearings failed.
Brush chatter can be caused by vibration or other problems unrelated to vibration.
22.2.4 Winding insulation
When records indicate a tendency toward periodic winding failures in the application, check the condition of the insulation with an insulation resistance test. Such testing is especially important for motors operated in wet or corrosive atmospheres or in high ambient temperatures.
Except for expensive, high horsepower motors, routine inspections generally do not involve opening the motor to inspect the windings. Therefore, long motor life requires selection of the proper enclosure to protect the windings from excessive dirt, abrasives, moisture, oil and chemicals.
Whenever a motor is opened for repair, service the windings as follows:
- Accumulated dirt prevents proper cooling and may absorb moisture and other contaminants that damage the insulation. Vacuum the dirt from the windings and internal air passages. Do not use high pressure air because this can damage windings by driving the dirt into the insulation.
- Abrasive dust drawn through the motor can abrade coil noses, removing insulation. If such abrasion is found, the winding should be revarnished or replaced.
- Moisture reduces the dielectric strength of insulation which results in shorts. If the inside of the motor is damp, dry the motor per information in “Cleaning and Drying Windings”.
- Wipe any oil and grease from inside the motor. Use care with solvents that can attack the insulation.
- If the insulation appears brittle, overheated or cracked, the motor should be revarnished or, with severe conditions, rewound.
- Loose coils and leads can move with changing magnetic fields or vibration, causing the insulation to wear, crack or fray. Revarnishing and retying leads may correct minor problems. If the loose coil situation is severe, the motor must be rewound.
- Check the lead-to-coil connections for signs of overheating or corrosion. These connections are often exposed on large motors but taped on small motors. Repair as needed.
- Check wound rotor windings as described for stator windings. Because rotor windings must withstand centrifugal forces, tightness is even more important. In addition, check for loose pole pieces or other loose parts that create unbalance problems.
- The cast rotor rods and end rings of squirrel cage motors rarely need attention. However, open or broken rods create electrical unbalance that increases with the number of rods broken. An open end ring causes severe vibration and noise.
Testing windings:
Routine field testing of windings can identify deteriorating insulation permitting scheduled repair or replacement of the motor before its failure disrupts operations. Such testing is good practice especially for applications with severe operating conditions or a history of winding failures and for expensive, high horsepower motors and locations where failures can cause health and safety problems or high economic loss.
The easiest field test that prevents the most failures is the ground-insulation, or &127megger,” test. It applies DC voltage, usually 500 or 1000 volts, to the motor and measures the resistance of the insulation.
NEMA standards require a minimum resistance to ground at 40 degrees C ambient of 1 megohm per kv of rating plus 1 megohm. Medium size motors in good condition will generally have megohmmeter readings in excess of 50 megohms. Low readings may indicate a seriously reduced insulation condition caused by contamination from moisture, oil or conductive dirt or deterioration from age or excessive heat.
One megger reading for a motor means little. A curve recording resistance, with the motor cold and hot, and date indicates the rate of deterioration. This curve provides the information needed to decide if the motor can be safely left in service until the next scheduled inspection time.
The Megger test indicates ground insulation condition. It does not, however, measure turn-to-turn insulation condition and may not pick up localized weaknesses. Moreover, operating voltage peaks may stress the insulation more severely than Megger voltage. For example, the DC output of a 500-volt Megger is below the normal 625-volt peak each half cycle of an AC motor operating on a 440-volt system. Experience and conditions may indicate the need for additional routine testing.
A test used to prove existence of a safety margin above operating voltage is the AC high potential ground test. It applies a high AC voltage (typically, 65% of a voltage times twice the operating voltage plus 1000 volts) between windings and frame.
Although this test does detect poor insulation condition, the high voltage can arc to ground, burning insulation and frame, and can also actually cause failure during the test. It should never be applied to a motor with a low Megger reading.
22.2.5 Brush and commutator care
Many factors are involved in brush and commutator problems. All generally involve brush sparking usually accompanied by chatter and often excessive wear or chipping. Sparking may result from poor commutator conditions or it may cause them.
The degree of sparking should be determined by careful visual inspection. The illustrations shown in Figure 22.3 are a useful guide. It is very important that you gauge the degree number as accurately as possible. The solution to the problem may well depend upon the accuracy of your answer since many motor, load, environmental and application conditions can cause sparking.
It is also imperative that a remedy be determined as quickly as possible. Sparking generally feeds upon itself and becomes worse with time until serious damage results.
Eliminating brush sparking, especially when it is a chronic or recurring problem, requires a thorough review of the motor and operating conditions. Always recheck for sparking after correcting one problem to see that it solved the total problem. After grinding the commutator and properly reseating the brushes, sparking will occur until the polished, brown surface reforms on the commutator.

Degrees of Generator and Motor Sparking
NOTE: Small sparks are yellow in color, and the large sparks are white in color. The white sparks, or blue-white sparks, are most detrimental to commutation (both brush and commutator).
First consider external conditions that affect commutation. Frequent motor overloads, vibration and high humidity cause sparking. Extremely low humidity allows brushes to wear through the needed polished brown commutator surface film. Oil, paint, acid and other chemical vapors in the atmosphere contaminate brushes and the commutator surface.
Look for obvious brush and brush holder deficiencies:
- Be sure brushes are properly seated, move freely in the holders and are not too short.
- The brush spring pressure must be equal on all brushes.
- Be sure spring pressure is not too light or too high. Large motors with adjustable springs should be set at about 3 to 4 pounds per square inch of brush surface in contact with the commutators.
- Remove dust that can cause a short between brush holders and frame.
- Check lead connections to the brush holders. Loose connections cause overheating.
Look for obvious commutator problems:
- Any condition other than a polished, brown surface under the brushes indicates a problem. Severe sparking causes a rough blackened surface. An oil film, paint spray, chemical contamination and other abnormal conditions can cause a blackened or discolored surface and sparking. Streaking or grooving under only some brushes or flat and burned spots can result from a load mismatch and cause motor electrical problems. Grooved commutators should be removed from service. A brassy appearance shows excessive wear on the surface resulting from low humidity or wrong brush grade.
- High mica or high or low commutator bars make the brushes jump, causing sparking.
- Carbon dust, copper foil or other conductive dust in the slots between commutator bars causes shorting and sometimes sparking between bars.
If correcting any obvious deficiencies does not eliminate sparking or noise, look to the less obvious possibilities:
- If brushes were changed before the problem became apparent, check the grade of brushes. Weak brushes may chip. Soft, low abrasive brushes may allow a thick film to form. High friction or high abrasion brushes wear away the brown film, producing a brassy surface. If the problem appears only under one or more of the brushes, two different grades of brushes may have been installed. Generally, use only the brushes recommended by the motor manufacturer or a qualified brush expert.
- The brush holder may have been reset improperly. If the boxes are more than 1/8″ from the commutator, the brushes can jump or chip. Setting the brush holder off neutral causes sparking. Normally the brushes must be equally spaced around the commutator and must be parallel to the bars so all make contact with each bar at the same time.
- An eccentric commutator causes sparking and may cause vibration. Normally, concentricity should be within .001″ on high speed, .002″ on medium speed and .004″ on slow speed motors.
- Various electrical failures in the motor windings or connections manifest themselves in sparking and poor commutation. Look for shorts or opens in the armature circuit and for grounds, shorts or opens in the field winding circuits. A weak interpole circuit or large air gap can also generate brush sparking.
22.3 Motor cleaning methods
Abrasive blasting:
This process results in some level of cleanliness and roughness with sand being the most common blasting media. Like all open blasting, sandblasting creates fugitive dust, and this dust is usually toxic. In all cases, it is a nuisance, creating mess and dramatically shortening the life of all nearby moving parts through wear.
Soda blasting:
Soda Blasting is generally an effective cleaning method. However, Soda Blasting, like all open blasting, creates a great deal of secondary waste. Often, the time spent blasting is matched, if not doubled by the time it takes to clean up the extra waste soda blasting creates. In fact, the residue and waste left behind by soda blasting can adhere to wood and other substrates being blasted.
(Ultra-)High pressure water blasting:
While it is among the fastest methods of cleaning, water blasting nevertheless has limited applications. On steel surfaces, for example, it cannot create any specific surface profile, which is a key parameter in paint performance. Also, the use of water induces flash rusting, which makes paint or coating application more difficult and risky. Furthermore the use of water blasting on production equipment including automated welding lines, presses, motors and machine tools can result in severe electrical problems.
Solvent cleaning:
Most solvent cleaning processes involve substances that are detrimental to the environment and worker safety. When solvents are used to dissolve unwanted surface materials, a subsequent flushing, rinsing or hand tool operation is frequently required to remove the dissolved materials. Equipment must often be disassembled or extensively prepared prior to the solvent cleaning to protect sensitive portions. Solvent management and disposal are also costly issues.
Dry Ice blasting:
Dry ice pellets are propelled out of the blasting gun at supersonic speed and impact the surface. The energy transfer knocks off the contaminant without abrasion. The force of this impact is the primary means of cleaning. The cold temperature of the dry ice pellets hitting the contaminant creates a micro-thermal shock (caused by the dry ice temperature of -79º C) between the surface contaminant and the substrate breaking the bond between the two. Cracking and de-lamination of the contaminant then occurs.
The final phase has the dry ice pellet explode on impact, and as the pellet warms it converts to a harmless CO2 gas which expands rapidly underneath the contaminant surface. This removes the contaminant from behind. The contaminant is then relocated, typically falling to the ground. Since the dry ice evaporates, only the contaminant is left for disposal.

Comparison of dry ice blast and other cleaning methods
| Blast Cleaning Comparison Chart | |||||
| Blasting Cleaning Technique | Waste for Disposal | Abrasive | Toxic | Electrically Conductive | Performance Comparison |
| Dry Ice | No | No | No | No | Excellent |
| Sand | Yes | Yes | No* | No | OK |
| Glass Beads | Yes | Yes | No* | No | OK |
| Walnut Shells | Yes | Yes | No* | No | Limited |
| Steam | No | No | No | Yes | Poor |
| Solvents | Yes | No | Yes | Yes | Limited |
| * Each of these blast cleaning materials becomes contaminated upon contact if used to clean hazardous objects. When that happens, these materials are then classified as hazardous waste requiring safe disposal. | |||||
23
Cables – Failure Modes and Fault Detection
In this chapter we will review the possible reasons for common failures of HV cables and termination and how documentation of various parameters helps in analyzing the failures. One accepted approach is predictive maintenance practice such as partial discharge measurement, which will also be reviewed along with other general practices.
Learning objectives
- Introduction
- Types of cables
- Reasons for failures
- Documentation of work
- Documentation of failures
- Analysis of failures
- Predictive approach
- Common tests and inference
23.1 Introduction – Low and high voltage cables
Cables need to be manufactured for a wide range of voltages. Low voltage cables (often rated as 1100volts, grade as well as higher voltages such as 3.3kV, 6.6kV, 11kV, 23kV and 33kV). While the lower voltage cables are used for consumer loads such as lighting and motive power, higher voltages often become necessary for economy of distribution and for direct feed to larger rating of loads.
Normally power produced by the generators at the utility stations varies from 6600V to about 15000V depending on the output rating. Thus, power produced at the above voltage can be used at the same voltage level for consumers living in the same or nearby locality by the use of a properly designed distribution system. For consumers living in far off places or for consumers situated in a huge, well spread out factory such as an integrated iron and steel works, it is not economically possible to make the above connections (called transmission of power) at the generated voltage, due to increase in energy losses.
Transmissions at higher voltage say 33kV, 66kV, 110kV, 132kV, 230kV etc. mitigate the above drawback and bring down the energy loss levels significantly. In order to achieve a higher transmission voltage level, the voltage level of the generated power needs to be stepped up or increased using step-up transformers. At the consumer end, step-down transformers are used to bring back or change the voltage to a lower value suitable for the consumer.
In addition, loads such as electric motors operate at higher voltages at higher output ratings. In general, Table 23.1 gives the relation between motor ratings in kW and their voltage level of operation:
Motor output and commonly used voltage rating
| Motor rating in kw | Operating voltages in Volts |
| Up to 200kw | 415V |
| Between 200 to 500kw | 3300V |
| Between 500kw to 2500kw | 6600V |
| Above 2500kw | 11000V |
From the above table it can be seen that large motors need power supply at higher voltages and therefore require the use of high voltage cables. There are other examples of loads which would need operation at high voltage such as furnace transformers, electrostatic precipitators in dust control systems etc.
Thus, we see that for the basic needs of power distribution inside a factory or for transmitting to far off consumers, high voltage cables are needed.
23.2 Various types of cables
We can classify high voltage cables broadly into different types based on the insulation medium used. These are:
- PVC insulated cables
- VIR insulated cables
- Low pressure oil filled cables
- High pressure oil filled cables
- Paper insulated cables
- Polyethylene (PE) insulated cables
- Cross linked polyethylene (XLPE) cables
Cables can also be classified according to the voltage grades, such as low voltage cables, medium voltage cables, high voltage (HV) cables and extra high voltage (EHV) cables, which in turn is decided by the system voltage where a cable is used. In fact, the type of insulation discussed above is very much dependent on the voltage grade of the cable. The voltage grade based classification can however vary between different countries as no uniform classification is followed internationally. In the forthcoming chapters, we would learn more about the construction and use of these various cables. While MV and HV cables are very common in industrial plant applications, the use of EHV cables is almost restricted to utilities in distribution circuits.
Power cables are also grouped according to the number of cores: single-core, 2-core, 3-core and so on. Multi-core cables are commonly used only up to MV levels. HV and EHV cables are always of the single core type.
23.3 Cable jointing (splicing) accessories
Cable manufacturers produce cables in standard lengths ranging from 300m to 1000m and deliver them to the customers wound on drums. The above lengths depend on the type and unit weight (kg/m) of the cable that is being manufactured. The weight of the cable drums is substantial and a typical drum with 500m of 3cx240 sq. mm of XLPE insulated cable can weigh up to 7500 kg. This introduces a bottleneck in terms of the handling capacity at the cable factory. In addition, large unwieldy drums can pose problems during transportation and installation of the cables at site. Thus, cables need to be supplied in pre-agreed lengths. If the feeder length in any system exceeds the standard lengths, it is necessary to use multiple lengths of cable for that feeder; this is when joints are needed. Cable joints as the name implies, joins the tail end of the first cable and the head end of the second cable. Cable companies themselves, or some other manufacturers who specialize only in joints, offer “jointing kits”. We use these kits whenever we need a joint. Also in the case of cable failure in an existing installation, it would be prudent to remove the damaged portion and replace this section with a new length by jointing to the healthy portions of the cables.
Every user would prefer to install their cables without joints, but due to inevitable reasons (some explained above), cable joints become a necessity. In general, users feel that a cable joint is a weak point in the distribution chain. On the contrary, jointing kit manufacturers vouch that a properly made joint is as good as the original cable. In addition, joints are required when two cables of dissimilar construction are to be jointed. This happens when an expansion takes place in an existing factory. Likewise, “T” joints are required in certain distribution schemes. Another type of joint is the “branch Y” joint which is used in a few applications.
We can group the various types of joints broadly as:
- Straight through
- Branch Y joints
- T joints
- Transition joints
23.4 Installation
Installation of cables includes the following:
- Storage
- Handling and transportation to the place of use
- Unreeling and laying
- Threading through buried pipes where warranted
- Jointing or splicing where necessary
- Termination at either end
Jointing and termination of power cables will be discussed in other subsequent chapters in detail, as they form a very critical part of any cable installation.
Cables are essentially laid in the following ways:
- Buried directly in ground
- Through steel pipes/conduits buried in ground
- Through formed cable trenches and supported by suitable cable supports
- On supports fixed to walls, roof slab, structural members and within ceiling cavities
In areas handling explosive gases or vapors, the cable trenches are sometimes filled with sand to prevent collection of heavier-than-air gases. This however poses problems of conduction of heat, locating faults and repairing. It is preferable to avoid the use of trenches in locations where gas collection hazard is likely and instead run the cables above ground level on support structures.
23.4.1 Storage
Cables are supplied in cable drums of steel/wooden construction. The drums are covered along the curved periphery by wooden battens. The site chosen for storage of cable drums should be drained of water and should preferably have a concrete or other well-compacted surface. The drums should be stored so as to leave sufficient space between them for air circulation. In no case should the drums be stored flat i.e. with flanges horizontal, but should stand with the flanges vertical and resting on battens placed directly under the flanges. Drums can be stored in open area and normally overhead covering is not essential except in heavy rainfall areas. Cables should, however, be protected from direct rays of the sun by leaving the battens on or by providing some form of sunshield.
23.4.2 Handling and transportation
When unloading the drums from the lorry/trailer or railway wagon, a crane or suitable handling system with chain pulley arrangement should be used. The drums should be carefully lifted and deposited on the ground. When this type of arrangement is not available at the worksite, the drums should be connected to a winch with brakes and rolled down a suitable ramp or rails. The drums should never be dropped to the ground as it may result in serious damage to the inner layers of the cables. Cable drums should always be slung by a bar or spindle inserted through the central hole of the drum and the spindle should have adequate strength to carry the total weight of the cable and the drum. The drums should be rolled only in the direction of the arrow marked by the manufacturer. Transportation from storage site to work spot should be done using a trailer or a vehicle with low loading platforms. Once the drum reaches the work spot, it should be supported by jacks placed on both sides of the drum and supported on a well-compacted surface to make the pay off arrangement stable. Suitable provision should be made for braking the drum during cable laying.
Care is needed at all stages of the installation to avoid damage to the cable in the process of its laying. Damage can be caused by over bending the cable. The bending radius should never be less than the minimum recommended values. The minimum bending radius is applicable to bends of even a fraction of an inch in length, not just the average of a long length being bent.
The force required to pull the cable and place it in its final location should not exceed the recommended pulling tension. The value of permissible pulling tension will be decided by the size of the conductor, the type of construction of the cable and the method of pulling. As a thumb rule, the following recommendations given in IEEE Red book can be used:
‘When the cable is to be pulled by its conductors, the maximum tension in pounds is limited to 0.008 times the area of the conductors, in circular mils, within the construction. The allowable tension should be reduced by 20 to 40% when several conductors are being pulled simultaneously since the tension is not always evenly distributed among the conductors. This allowable tension must be further reduced when the cable is pulled by a grip placed over the outer covering. A reasonable figure for most jacketed constructions would be 1000 lb per grip; but the calculated conductor tension should not be exceeded.’
The ends of cables during storage and installation must be kept sealed to avoid entry of moisture. XLPE insulation is particularly susceptible to moisture and the ends are therefore sealed using special type of end covers. The seals may be removed just prior to termination. This practice is also required in order to avoid unnecessary corrosion of the conductors and to safeguard against entry of moisture into the conductor strands; this would generate steam under overload, emergency loadings, or short-circuit conditions after the cable is energized and result in internal pressures thus affecting the integrity of the insulation.
23.4.3 Installation – directly buried cables
When we have one or two cables to be laid for distributing power, the commonly adopted practice is to bury the cable directly in the ground. This needs the ground to be excavated and backfilled after laying the cable or cables. This method is however not very desirable when large number of cables are involved or when they feed critical facilities. Thus, in industrial distribution, power cables to major loads are not installed in this fashion. While direct burial of cable is usually a less expensive method, it is often prone to mechanical damage due to extraneous reasons. Also, it is difficult to trace a fault in a directly buried cable and thus restoration of supply takes longer. A few precautions are therefore necessary for protecting such cables from mechanical damage and to be able to quickly identify and repair a cable fault.
When multiple cables are laid in soil they must not be bunched together. The accepted practice is to have at least a gap of one cable diameter in the case of LV cables and about 200 mm in the case of HV cables. This enables the heat loss in the cables to be dissipated without interference from adjacent cables. Cables should only be placed in a single layer; under no circumstances should installation of multiple layers be resorted to.
The excavation should provide adequate width at the base to permit the clearance and should be wide enough to permit easy laying. The depth of the trench should be at least 750 mm to cushion any shocks that may be transmitted from the surface. A layer of clean sand should be used to provide a compact plane for laying and the cables should be laid on this bed and should be covered by sand once again until the cables are well covered. On the top surface of the sand, a protective layer of concrete slabs (or a layer of bricks) must be laid with minimum gaps so as to fully cover the cables beneath them. This protects them against mechanical damage through inadvertent digging. The trench should then be backfilled with the excavated coil and then compacted. (Some references advocate the use of special backfill material to ensure proper conduction of heat). When a cable has to cross a road or a railway track, additional protection by way of a steel pipe enclosure is necessary. The arrangement will be described in the next section.
In order to identify the location, cable markers should be placed on the ground at suitable intervals and where there are bends in the cable route, near each bend. The voltage of the cable and the depth/offset must also be mentioned, along with the feeder identification if needed.
23.4.4 Installation – cables in conduits
The direct buried installation of cables occupies much, space as cables are to be laid in a single layer with stipulated clearances. When the number of cables is large, this approach is not feasible and other methods need to be resorted to. Also, the possibility of mechanical damage in buried cables is very real. One of the alternatives is the laying of cables through conduits.
Conduit systems offer better flexibility in preventing mechanical damage and permitting replacement of existing conductors with new ones compared to direct buried cables. However, in the case of fire or short-circuit current faults, it may be impossible to remove the conductors from the conduit. In this case, it is necessary to replace both conduit and wire, which results in considerable cost and delay. Also, during fires, conduits may transmit corrosive fumes into equipment and this can cause extensive equipment damage. To keep flammable gases out of such areas, fire seals must be installed. With magnetic conduits, an equal number of conductors of each phase must be installed in each conduit; otherwise, losses and heating will be excessive. For example, a single conductor should not be installed in steel conduit. In this case, non-magnetic metal conduits (such as aluminum) or non-metallic conduits may be opted for. In order to reduce the footprint of cable in direct-buried installations, it is possible to use multiple conduits with a number of them arranged in several tiers to form a block. The current carrying capacity will have to be derated based on the number of cables in the duct block. It is also possible to have more than one cable running through the same conduit. However the fill factors must be considered so that there is no overfilling of the conduit, which will make cable pulling difficult. The blocks can be encased in concrete blocks for additional mechanical protection.
The pulling of cables through conduits takes a lot of force and if there are bends in the conduit, the force becomes even greater. It must be ensured that the tension value arrived at for an installation must not exceed the safe limit indicated by the cable manufacturer. As far as possible, straight runs of conduits with pull-chambers at intermediate points and at bends can be used to keep the pulling tension from becoming excessive. These chambers must be dimensioned adequately to enable cable pulling with provision for supporting the cable lengths within the pull-chambers and will also have a suitable manhole with cover for protection.
If cables are pulled through conduit bends, they will be subjected to a lateral pressure (called sidewall pressure), which can become excessive if the radius of the bend is too small or if the pull tension is too high. This will result in damage to the cable and therefore due care must be exercised. Pulling devices must be equipped with tension measuring devices and cut-off switches in case the tension becomes excessive. We have to consider the probability of jamming or wedging of cables during the pull installation when sizing a new conduit or verifying if an existing conduit is of sufficient size. Jamming usually happens when three or more cables lay side by side in a single plane. As we pull cables through a bend, the curvature of the bend tends to squeeze the cables together, causing a jam that can result in insulation damage.
Lubricants of non-combustible and non-hardening properties must be used to reduce pull force. At the feeding end, the radius of cable bending in the feeding device must not be lower than the minimum permissible radius. Cables must be pulled only into clean raceways. A mandrel is pulled through all underground ducts prior to cable pulling. All abrasions or sharp edges that might damage the cable must be removed. Bare wire rope is not to be used to pull cable into conduits because of possible damage to the conduits. Cable pulling winches and other necessary installation equipment must be of adequate capacity to ensure a steady continuous pull on the cable.
For installations involving many bends, it is preferable to feed the cable into the end closest to the majority of the bends and pull from the other end. Each bend gives a multiplying factor to the tension it sees; therefore, the shorter runs to the bends will keep this increase in pulling tensions to a minimum. However, it is best to calculate pulling tensions for installation from both ends of the run and install from the end requiring the least tension. Many third party software applications are available to estimate the pull tension and can be used to verify that the safe limits of pulling tension are not exceeded.
Cable should be pulled into ducts at a constant speed throughout the entire pull and should not be allowed to stop midway through the pull; the drag due to friction is greatly increased when pulling is restarted. The recommended speed is 10-20 m/minute. If this speed cannot be achieved, the minimum speed of 5 m/minute should be maintained. Pulling tensions at all times should be restricted to 20kN for duct installations. With many duct runs there is a preferred end at which the drum should be set up. As a rule of thumb this should be at the end nearest the sharpest bend. The total angle of bends in a conduit run should not exceed 3000 and must be limited preferably to 2700. The ends of the cables must be sealed to prevent entry of moisture and contamination. The cable end within the pulling device must be cut before the end termination work is taken up.
23.4.5 Installation – cables on trays
When a large number of cables have to be installed within a restricted space (an example being major substations and industrial plants), the methods discussed earlier will impose limitations. In such cases, the practice is to run them on cable support structures specifically designed for this purpose. These supports include ladders, troughs and channels, and have become very popular in industrial electrical systems for the following reasons: low installation cost, system flexibility, improved reliability, accessibility for repair or addition of cables, and space saving (when compared with conduit) where a larger number of circuits with common routing are involved. Cable supports are available in a number of styles, materials, and mechanical load-carrying capabilities. Special coatings and materials for corrosion protection are also available. Cable supports (usually referred to as trays) can be arranged in one or more layers. While these trays can be mounted exposed to view in industrial plants and substations, they will need to be placed in concrete trench/tunnel when cables are to be run between buildings. In some industries, where piping for various services are run above ground level, the support structures are extended to provide space for running cables as well. In other cases, overhead structures are provided exclusively for cables. Cable tunnels wherever provided, will have to be well-ventilated, adequately lit and must have fire detection and alarm devices to alert operating personnel any incidence of cable fires.
Cables are placed on ladder type trays (sometimes called cable ladders), which in turn are supported by brackets at intervals of about 1.5 m mounted on other structures. Several ladders can be supported in a single structure (called a cable tree). A typical prefabricated ladder type tray is shown in Figure 23.1. The support members of the tray are fixed across the two end rails and are usually placed 300 mm apart. The supports will also have provision for fixing of clamps to hold the cables firmly to the tray. Control and signaling cables are laid on perforated trays made of sheet metal since they require better support than what can be afforded by a ladder tray.

Typical ladder tray (source: NEMA Publication VE 2 2006)
The normal practice is to have the tray support brackets at 300 mm vertical intervals and main supports at 1500 mm intervals along the tray run. These main supports must be fixed to the concrete by adequately rated anchor fasteners. In the case of shop floor cable routing, the trays may be suspended from the floor deck or structural members. The suspension arrangement shown in figure 23.2 illustrates one type of support. The trays and supports are fabricated using sheet steel profiles obtained by folding and are galvanized to prevent corrosion. Other materials such as aluminum and composites are also used by some vendors and are used for specific requirements such as presence of corrosive chemical vapors. These systems are pre-engineered so that any type of configuration can be made by assembling standardized components. The sections are suitably slotted so as to provide facilities such as extensibility by splicing, adjustable spacing, elbows, bends, cross-over sections etc. in x, y and z axes.
For example, in Figure 23.2 below, note that the cross supports are slotted so that trays of different widths can be fitted depending upon the requirements and their positions may also be adjusted as required:

Typical cross support and vertical support (Source: NEMA Publication VE 2 2006)
LV cables can be laid on the trays touching each other in a single layer but HV cables are laid with a space of about 75 mm between cables. This means that a 600 mm tray can carry 3 to 4 nos. of HV cables only. Where single core cables are used, they will be arranged in a trefoil formation and retained in place using die-cast aluminum trefoil clamps. Usually a 600 mm cable tray will be adequate for two sets of trefoil cables only. It is good engineering practice to leave space for addition of cables in each tray and space for adding cable trays in each run. In cable tunnels and trenches, cable trays can be arranged on both sidewalls. However, a working clearance of at least 700 mm must be made between the rows. In the case of tunnels, the clearance may be increased to about 900mm to permit easy movement. Cables used for duplicate feeds to the same service must be run on separate trays or even in separate rows so that both do not get damaged. When signal and power cables are run in the same trench/tunnel, the minimum tray spacing/cable clearances must be as per applicable standards to avoid electromagnetic interference (EMI).
All metallic cable trays and its supports must be earthed and must provide end-to-end earth continuity. Bonding straps must be placed across tray splices to ensure that there is no loss of continuity. Refer to Figure 23.3 below, showing a typical arrangement. An alternative is to run an earth bar along the tray run and connect all supports and tray sections to this earth bar to ensure earth continuity.

Bonding jumper spanning a tray splice (Source: NEMA Publication VE 2 2006)
Cable tray systems must be pre-engineered and their installation completed as per standards/guidelines such as NEMA Publication VE 2 2006. Site modifications must be kept to a minimum, though changes during execution cannot altogether be avoided.
23.5 Special locations
Cabling in hazardous locations requires special care. Equipment and the associated cabling system approved as intrinsically safe is permitted in any hazardous location for which it has been approved. However, the installation must prevent the passage of gases or vapors from one area to another. Intrinsically safe equipment and wiring is not capable of releasing sufficient electrical or thermal energy under normal or abnormal conditions to cause ignition of a specific flammable or combustible atmospheric mixture in its most easily ignitable concentration. In areas where flammable mixtures are continuously present, no other construction is allowed. It is obvious that no normal LV appliances or power cabling can be allowed in these areas.
In other less hazardous locations, where hazardous atmosphere can only be present occasionally, electrical equipment and cable fittings of approved construction such as flame-proof cable glands and terminal chambers can be used. Also, aluminum cables and fittings are not suited for such atmospheres and it is safer to use copper cables. Seals must be provided in the wiring system to prevent the passage of the hazardous atmosphere along the wiring system from one zone to another or from a hazardous to a non-hazardous location. The use of multi-conductor cables with a gas/vapour tight continuous outer sheath, either metallic or non-metallic, can significantly reduce the sealing requirements.
23.6 Fire prevention and fire protection for cable installations
Cable fire scenarios can involve a sequence of steps: often overheating followed by arcing and ignition. For example, a cable may become overheated due to excessive current or a poor connection. This may soften the insulation enough that a short circuit occurs where the wire is bent or passes a metal edge. This will cause arcing and ignition of combustibles may occur at that time. In most cases, cables are ignited by external heating from an ongoing fire. However, a small number of cases exist where fire started due to non-fire heating applied to wiring. A typical situation would involve wiring run through an environment where the temperatures are unsuitable for it as, for example, in a chimney.
Cables, in particular their outer jackets, are made of combustible materials and can burn when exposed to flame. Once a cable catch fire, the fire can spread to other cables in the vicinity. In locations with high density of cables such as cable tunnels and cable galleries (vaults), the fires can be devastating and can stop the functioning of an industry for many days or even months depending on the severity. Two major problems associated with cable fires are dense smoke and release of hydrogen chloride gas. The latter is due to the presence of hydrogen and chlorine molecules in organic compounds such as PVC used as cable sheathing materials. When mixed with moisture, the gas forms hydrochloric acid, which can destroy the copper strata in printed circuit boards. This can cause serious problems to electronic control panels and may require total replacement of control equipment. Thus, it is evident that cable fires pose a serious threat. The following are the ways of addressing the threat:
- Fire prevention
- Passive fire protection by arresting prorogation of fire, smoke and gases by containment
- Active fire protection by fire alarm and fire extinguishing systems
23.6.1 Fire prevention
The saying ‘prevention is better than cure’ is very apt for cable fires. Cable fires can easily be prevented by educating people about fire prevention. Cables are normally electrically well-protected using several levels of protection. Prolonged short circuits and consequent fires is therefore a rarity in well-engineered installations. Fires can start theoretically due to arcing from failed joints but usually adequate mechanical protection is given over cable joints to prevent this kind of fire. Fires often start from external causes and can be easily prevented by taking a few simple precautions. No open flames should be permitted in the vicinity of cables and combustible materials must never be kept in cable tunnels and cable vaults. Cables, when run in areas where they can be exposed to flame, must be protected using fireproof coatings or other covering materials. In the case of locations handling combustible dust such as pulverized coal, the cable vaults must be ventilated using filtered air and maintained under positive pressure to avoid entry of combustible dust, which can settle over the outer surface of the cable and thus add to the danger of accidental fires. In open areas such accumulation should be removed and the cable surface cleaned periodically using compressed air.
23.6.2 Passive fire protection
In spite of proper precautions, if cable fires do happen, a dual approach of containment and extinguishing the fire can help to minimize the extent of damage. An important first step is to contain the fires within a limited areas and prevent the combustion products from causing harm. As we have already seen, use of special fire-retarding compounds for cable jackets limits the fire from spreading too quickly. Low smoke property makes fire fighting easier. Low halogen content limits the formation of corrosive hydrochloric acid. Spreading of fires can be achieved by passive fire protection elements such as fire partitions and fire seals. Passive fire protection, which is compartmentalization of the fire through the use of walls and floors and their components, are designed to withstand fire of a standard duration and intensity, by organizing the fire into compartments; this may consist of one or more rooms or floors, allowing evacuations and protection of critical building components. The partitions segregate a cable vault into several sections and fire in one section is prevented from spreading to the adjacent sections. The fire partitions (as well as the other walls, ceilings and metal supports forming the cable vault) must be capable of withstanding the effects of a cable fire for a rated duration (example: 2 hour fire rating) without suffering structural damage. Any openings in the walls and partitions must be blocked using fire seals and this includes wall openings through which the cables pass from one section to the next. Similarly, ceiling openings used for taking the cables into the panels in the switchgear/control rooms above a fault must also be sealed. This includes all unused openings and free conduits. One of the approaches used is to seal the openings with compounds which expand due to heat and make the seal effective in the event of a fire even if the cable jacket itself may disintegrate. Any passages between compartments must be protected with fire-rated doors. Several proprietary sealing products are available and can be chosen by the installer. Typical arrangements of fire seals are shown in Figures 23.4 and 23.5:

Typical fire seal approach using mortar in a partition wall. Note the fire door on the left side.
In areas where the above type of sealing is not possible, fire-proof coating discussed earlier may be used to stop the fire spread. However, the fumes and smoke can still go from one compartment to another even though the cable fire itself may be prevented from spreading. There are different variants to this approach:
- Cable coating by application of fire-retardants to reduce flame spread and smoke development of combustible cable-jacketing
- Spray fireproofing by application of suitable coatings to maintain operability of the item to be protected by keeping its temperature low for a certain period of time.
- Fireproofing cladding boards used for the same purpose and in the same applications as spray fireproofing
- Enclosures (boxes or wraps made of fireproofing materials, including fire-resistive wraps and tapes to protect cables)
23.6.3 Active fire protection
While passive fire protection acts as fire containment and limits the extent and spread of the fire, it is necessary to also extinguish the fire. Passive elements cannot withstand a fire indefinitely and the sooner a fire is put out, the better is the chance that fire partitions and seals do not lose their integrity and collapse. Active fire protection systems perform the function of locating and alerting the incidence of a fire so that manual intervention for fire fighting can be initiated. Optionally, components can be added for extinguishing the fires using automated devices. The design of fire protection systems is required to be performed by competent engineers with experience in fire protection and are licensed within the geographical area of practice. Extensions of existing systems should be done using the original specification for the system and more than likely will be proprietary to match the existing equipment. Active fire protection system contains the following sub-systems:
- Fire detection
- Fire alarm
- Fire extinguishing (optional)
An early detection is necessary from the point of view of minimizing the damage. A fire detected at the incipient stage will involve few cables and thus the extent of disruption will be minimized. Various types of fire detection systems are available and can be used to precisely pinpoint the spot of occurrence of the fire:
- Smoke detectors
- Ionization detectors
- Linear heat-sensing cables
Usually, different types of detectors are used in combination for positive detection of any type of fire. The spot where the fire occurs can be discovered based on which detector has activated. Modern detector systems operate over a data network in the form of a bus with each detector having its own address, using which the origin of the fire can be identified. In addition to detectors, manual fire call points (usually protected by a break-glass cover) can also be provided and wired to the fire alarm panel for manually assisted fire detection.
A fire alarm system controls all the fire alarm components in a building. Fire alarm systems are subject to stringent bounding. A fire alarm system should include, but not be limited to, alarm initiating devices, alarm notification appliances, control units, fire safety control devices, annunciators, power supplies, and wiring. Fire alarm units are mounted at different locations of an installation and each unit oversees a certain number of detectors so that the integrity of the entire detection system is not compromised by a single failure. Besides annunciation of fires, a fire alarm unit is also used for performing the following tasks:
- Evacuation alarms for personnel to exit from the area of fire
- Stopping of ventilation systems feeding into the fire location. This prevents supply of fresh air, which can exacerbate combustion further
- Activating automatic fire extinguishing systems
A central fire control panel supervises the whole system and linked to emergency services agencies by communication channels. Figure 23.5 shows a typical fire control panel:

A typical fire control panel
Fire alarm and control panels require reliable power supply and are normally fed from independent uninterrupted power sources (UPS) backed by secondary storage batteries.
23.6.4 Fire extinguishing system
Fire extinguishing systems range from simple fire buckets containing water or sand, to automated sprinklers and carbon dioxide flooding systems. Handheld fire extinguishers of various designs are available and can be used for cable fires. Gaseous CO2 type extinguishers are well suited for cable fires compared to foam or other powder type extinguishers. The disadvantage with extinguishers is that they can only be used to fight small, localized fires and the location of the fire has to be a manned area so that someone is always available to use the extinguisher. This may not always be the case. Large cable vaults are invariably provided with automatic systems for fire fighting.
Automated extinguishing schemes use water sprinklers or water mist nozzles in cable faults. Depending on the fire zone as indicated by the activation of one or more detectors, specific deluge valves open and spray high-pressure water in the form of a fine spray or a mist to envelop and quench the fire. This system will require firewater pumps, control system for these pumps including a low capacity jockey pump and an adequate supply of water. The draining of accumulated water needs to be planned in advance. Water mist systems however consume appreciably less water compared to water sprinkling systems and are therefore increasingly finding application. CO2 flooding is also an effective method for tackling cable fires but their use in cable vaults will require a large storage of gas for flooding the entire vault. More importantly, accidental asphyxiation of persons can occur if they are trapped in the enclosed vault when CO2 flooding occurs. Though it is mandatory to provide alarm for evacuation, its effectiveness will depend on audibility, escape route and time delay between the alarm and flooding. Also, the mandatory delay can worsen the fire and cause more extensive damage. In view of these factors, water-based fire extinguishing is a better alternative.
23.7 Types of failures in high voltage cables
High voltage cable networks represent a major capital asset in electricity companies and industries. Failures of cable systems are disruptive, expensive and hazardous to personnel. They disrupt business processes and increase the overall cost of the system. While some of the failures are not so common, it is invariably possible to identify some shortcomings in design, installation, operation and maintenance practices as being the reasons for such failures. Cable failures may be primarily classified as mechanical failures and electrical failures. Figure 23.1 provides the statistical results of the causes for cable failures in a large utility system having huge cable networks. It can be seen that damages due to non electrical causes and cable joints constitute 95% of the causes of cable failures:

Reasons for Cable system failures
23.7.1 Electrical failures
Failures on account of electrical phenomena come under this classification. These are failures due to:
- Partial discharge
- Excessive heating due to overloads
- Short circuits
- Lightning surges
- Insulation failure due to voltage stress
- Insulation failure due to moisture ingress
23.7.2 Mechanical failures
Mechanical damages are mostly due to activities or work near underground cables (directly buried type) that inadvertently lead to damaging of cable insulation and/or conductors. Examples for mechanical damages are:
- Damages inflicted by digging operations
- Stresses due to passage of heavy vehicles on top of earth beneath which cables are buried
- Damages due to heavy vibration from adjacent rail tracks
- Loose connection in joints and terminations
- Stresses due to insufficient bending radius
- Insulation damage due to chemical attacks, rodents etc.
23.8 Reasons for failures
Cable failures can usually be attributed to shortcomings in design, installation, operation and maintenance practices. The reasons for failures can be due to one or more factors and can be generally classified as follows:
23.8.1 Design errors related to sizing
Design errors in selection of appropriate size of the cable can lead to very costly and sometimes permanent consequences. Sizing errors could happen by not taking due consideration of the starting currents of huge motors and failure to take into consideration adequate heat dissipation of cables, fault current availability etc. Cable sizes could be wrongly selected based on criteria of the planned loads without taking into consideration load additions or enhancements at a later date, incorrect neutral sizing without adequate consideration of third harmonic currents etc. Such conditions would result in cables carrying excessive currents beyond their rated capacities, leading to excessive heating and consequently their premature failure.
23.8.2 Improper selection of cable type for the application
Improper selection of cable core material (Al or Cu), insulation material (paper, PVC or XLPE) can lead to premature failures. As an example, selection of Al cable instead of Cu cable for an application where there is space constraint would result in insufficient heat dissipation of cables, elevated operating temperatures and reduced life. Selection of an unarmored cable, for an application where the cable is prone to mechanical damages, can result in failures.
23.8.3 Installation mistakes
Selection of the proper cable alone is not an end by itself. Installation of the cable carries as much importance in ensuring its reliability and long life. The following mistakes committed during cable installation can lead to their premature failures:
- Improper backfill of soil, insufficient depth of laying
- Lack of adequate mechanical protection such as sand bedding, brick laying etc.
- Failure to take into consideration proper grouping factors
- Damages to insulation due to rough handling
- Failure to prevent moisture ingress through ends of cable before termination
- Insufficient bending radius in curves
Extreme care should be exercised during installation of the cable to prevent stresses on account of excessive bending. The permanent radius of the bend after installation should be within the limits recommended by the cable manufacturer. The minimum bending radius is the minimum radius to which a cable can be bent while under pulling tension without exceeding the maximum side wall pressure. Bends decrease the insulation system life in several ways and cause premature failure of cables:
- Insulation portion on the outside of the bend is more prone to tearing, cutting or stretching thin, resulting in deterioration of the insulation and consequent penetration of contaminants like moisture, chemicals, exposure to UV radiation etc.
- Bending stresses result in deterioration of the insulation through heat cycling and voltage stress
- Insulation on the outer radius of the bend inherently gets thinner due to stretching and results in reduced insulation properties and deterioration
- Increased voltage stress and moisture penetration promote faster growth of water trees and electrical trees and cause accelerated deterioration of the cable
- Minimum bending radius is stipulated in terms of multiples of the diameter of the cable irrespective of whether the cable is shielded, unshielded, armored or unarmored.
23.8.4 Operating and service conditions
Cables can and do fail when subjected to operating and service conditions beyond their capacity and range. Lightning strikes, overloading of cables either due to faults or wrong operation, voltage surges, damages due to digging operations, damages due to rodents are some of the causes under operating and service conditions by which cables can fail. Human error during operation can result in cables carrying currents in excess of their design capacity and can consequently lead to failure.
23.8.5 Ageing
Cable insulation, like any other material, is liable to degradation by the ageing process. Dielectric strength and insulation resistance of the insulation deteriorate over time and on account of the following causes:
- Dielectric stress due to voltage
- Thermal degradation
- Degradation due to radiation exposure
- Degradation due to exposure to chemicals, solvents etc.
- Degradation due to mechanical stresses, i.e. Cable bends
- Water Trees and Electrical Trees
Thermal ageing causes hardening of the insulation which may lead to cracks. Development of cracks leads to the penetration of moisture and other contaminants into the cable, resulting in its premature failure.
23.8.6 Treeing in XLPE
Polymeric materials such as ethylene propylene rubber, polyethylene and cross linked polyethylene are the most common types of cable insulation materials used nowadays. Under electric stress, a series of tiny hollow channels can develop within these insulation materials when exposed to water. The base of the tree is located at the point where the tree originated and its extremities tend to grow in a direction parallel to the direction of the electrical field. Water trees require both moisture and an electric field to grow. A tree originating at the stress relieving layer at the conductor shield of a cable grows radially until the cable fails. Water trees begin to form when a cable is exposed to water and subjected to normal operating voltage over an extended period of time. Tree growth continues in the presence of an electrical field and water until the total insulation wall thickness is bridged; when this occurs, the cable fails.
Almost all polymeric insulation compounds have ‘tree retardant’ additives to slow down the growth of water trees. In addition to additives, the following measures are also taken to prevent water ingress into the cable:
- Metal sheath
- Strand blocking material to prevent water flowing along the strands of the conductor
Electrical trees are similar to water trees, but develop in the absence of water when very high electrical stresses are involved. These high electrical stresses can arise due to switching surges or lightning strokes, or from localized stresses attributable to major defects in the cable.
If a new TR-XLPE cable has extensive water treeing, the problem can be attributed to a manufacturing defect. If the cable has strand blocking, water absorbing tape or a hermetically sealed shield and still it develops water trees within a short time, the possible root causes could be a manufacturing problem, mechanical damage or shield corrosion.
23.8.7 Voltage stress
Electrical stress resulting from a non uniform electrical field inside the cable insulation is one of the major causes for cable failures. The insulation of a cable, particularly those rated for medium voltage and high voltage systems is subjected to large voltage stress across a relatively small thickness of material. The electrical stress is maximum at the surface of the conductor, lowest at the insulation shield and varies logarithmically with the cable geometry. Cables or accessories with partially damaged or missing semicon or metallic shields may experience very high electric stress, resulting in partial discharges and premature failure of the cable.
Similarly, when a cable is jointed with another cable or is terminated on an equipment, the alterations that are made to the cable’s insulation, affect the distribution of stress considerably and unless properly controlled, can result in premature failures.
Continuous application of voltage stress in addition to the normal ageing process, leads to failure of the insulation and the life time T in years is found to be inversely proportional to power of the voltage to an ageing coefficient; it is generally given by the following empirical formula:
T = K / (VN)
Where,
V = Electric stress in kV/mm
N = Ageing / endurance coefficient (8 to 12 for AC and 12 to 15 for DC)
K = Constant based on the type of insulation
The distribution of electrical stress across the insulation from the surface of the conductor inside the cable is related to temperature conditions and termination/ joints. Figure 23.7 shows non uniformity of stress distribution at the termination point of the cable:

Non uniform voltage stress distribution at cable termination point
Figure 23.8 below shows how the voltage distribution is made uniform, using a stress cone:

Stress control using stress cone
A stress cone is a prefabricated cable termination device made from a high permittivity material. Once applied to a cable with an appropriate design, a stress cone provides stress relief. Prefabricated stress cones with geometric-capacitive stress control, were initially developed for medium voltage cables; now they represent the standard solution for sealing ends on all types of polymer-insulated cables and for all voltage levels up to 500 kV.
To install the stress cone, the cable end is prepared and the insulation shield is cut circumferentially at a certain distance from the cable end. After the cable is prepared, the stress cone is slipped over the cable and made to sit over the insulation shield cutback. When installing the stress cone, silicon grease is normally used as a lubricant and as filler for the voids that may be present between the cable and the stress cone. Stress-control sleeves are designed to control the high electrical stress at the end of the cable insulation shielding. When the stress-control sleeve with adequate volume resistivity and dielectric constant is applied to the cable, the reliability of performance of the termination and the joint is increased. Drawbacks of stress cones are:
- Availability in limited voltage ranges
- Inventory has to be maintained, thus increasing inventory costs
Temperature and temperature gradients
Temperature and temperature gradients in the cable insulation may vary with the load and also due to external factors. The temperature differences between the innermost and outermost parts of the insulation can distort the gradient of electrical stress in the insulation. Under low load conditions, the voltage stress in the insulation is maximum near the surface of the conductor. However, under high load conditions, when the temperature of the insulation that is closer to the conductor is high, the resistivity of insulation near the core is reduced, resulting in the shifting of voltage stress away from the cable core towards the periphery of the insulation. Figure 23.9 shows the relative electric stress with respect to the average stress in a cable under different load conditions:

Electrical stress (relative to the average stress) distribution for a 20mm wall cable
It can be seen that the electric stress close to the conductor screen could be quite high when the cable is not carrying load but with full voltage applied to the conductor. It can also be seen that the stress level tends to flatten with increasing load and is almost constant for up to 20 mm distance from the conductor screen surface at or near full load operating conditions.
Basics of stress control approach
There are methods such as control tubing, stress cone, use of flexible tapes, etc. that are designed to take care of the geometric shape of the joints and terminations without any voids and air gaps that could lead to stress related failures. These various methods of stress control are covered in the following paragraphs.
Stress control tubing
Shrink Polymer Systems employ heat shrinkable, high permittivity, and low resistivity stress control tubing which is shrunk on to a stress relief tape previously applied over a cable joint. This has the effect of achieving a more uniform distribution of electric field lines and therefore lesser stress on the insulation.
When designing jointing systems, the thickness of the insulation over the bare conductor (i.e., ferrule) should have a safety factor in excess of 15 percent of the original cable. Shrink polymer systems employ a one-piece, combined dual wall (insulation/semi conductive) tube of appropriate diameter to match this insulation at voltages to 12 kV. At 17.5, 24, and 36 kV additional insulation tubes are added to meet these cable specifications. The installer must remember to shrink this material all around the tube to avoid inconsistent wall thicknesses on full recovery.
Stress-relieving tapes
This type of tape generally has permittivity values between seven and thirteen (test method IEC 250). The tape possesses high tack, high stretch, and low viscosity void-filling qualities with a permittivity value of minimum nine. Stress-relieving tape must be used in conjunction with heat shrinkable installations. This is applied in a half width overlap with stretch and must also be applied to any indents left by the tooling. Gaps between the end of the primary insulation and a connector must also be filled in. Push-on molded components are also widely used, eliminating the need to fill voids and use of stress tapes. Push-on molded components have several disadvantages. On three-core cables the molded components prove to be very bulky and have no design features to eliminate moisture penetration unless used in conjunction with large diameter shells and resins.
The stress control tape use is an accepted practice with results showing improvements of AC breakdown voltages when compared with the use of normal tape, as shown in Figure 23.10:

Advantage of stress control sleeve
23.8.8 Workmanship of joints
The most common failure mode for cable is insulation failure. Insulation failure has many reasons including accessories especially where a joint or termination has been made. Insulation failures in cable joints may be attributed to one or more of the following reasons:
- Incorrect sealing
- Improper core clearances
- Poor workmanship
- Failure to restore the electrical and mechanical properties of the joint/termination to those of the original cables (attributable to design of accessory kits or failure to follow manufacturer’s instructions)
Cable accessories, including splices or joints, and terminations or elbows, are some of the most vulnerable parts of an underground cable installation that can easily fail. The most common cause of failure in accessories is generally found to be improper installation. It is difficult to check the quality of the termination immediately after installation, because most of the tests are relative in nature i.e. they are related to some earlier noted values and if found satisfactory, the terminations are considered acceptable. Visual inspections also do not show any major defect even if there is a problem in the joint. Sometimes a poor installation may not result in a failure for many years. For example, the improper termination of the cable’s metallic and semi-conducting shields could cause a failure in the long run.
23.8.9 Vandalism and illegal activity
Cable failures can also be attributed to vandalism and illegal activities. These however are beyond the scope of this manual.
23.9 Fault location
Locating of underground cable faults is an exercise that can be difficult and time consuming. However, many methods are available for the detection of locating cable faults. These methods can be basically categorized into:
- Electrical test methods
- Mechanical test methods
- Visual check methods
Visual inspection of exposed cables
All the investigation tools at ones disposal, including sensory organs, should be used for the detection and analysis of faults. Visual inspection of cables is an in-situ technique for detection of cable abnormalities. Visual inspection is a qualitative assessment of cable condition; it is inexpensive, does not require expensive equipment and is comparatively easy to perform and suitable for cables laid over ground. Many a fault problem gets solved through detection by sensory organs. More subtle signals however, can only be detected by means of special instruments and test equipment.
A keen mind and an observant eye are of great value in the detection of symptoms and evidences in visual inspection. Following are the observations that can be made during visual inspection:
- Discoloration of cable insulation
- Development of cracks on the insulation surface
- Distortion, swelling, shrinkage and dimensional changes
- Signs of melting, charring, emission of light due to overheating
- Changes in surface hardness of cable insulation by feel of touch
- Emission of unusual smell (ozone due to corona, burnt smell due to faults etc.)
For the observations to be successful, the observer should know what to look for and where to look for it. Accurate observation coupled with the gathering of all relevant data can go a long way in the successful identification of the root cause of cable problems. Since human memory can at best be faulty, it is advisable to take photographs of a fault site for further reference and analysis. The main drawback of visual inspection is that the complete cable may not be easily accessible for performing visual inspection. The other drawback is that this method is suitable only for cables laid over ground.
Manhole installations
Manholes are not usually located inside buildings. Terminations and splices of non-lead cables should be squeezed in search of soft spots, and inspected for tracking or signs of corona. The ground braid should be inspected for corrosion and tight connections. Inspect the bottom surface of the cable for wear or scraping due to movement at the point of entrance into the manhole and also where it rests on the cable supports.
Inspect the manhole for spalling concrete or deterioration above ground. If the manhole is equipped with drains, these may require cleaning or, in some instances, it may be necessary to pump water from the manhole prior to entrance. Do not enter a manhole unless a test for dangerous gas has been made and adequate ventilation gives positive assurance that entry is safe. High voltage cables may be present fireproofed with asbestos containing materials which pose additional health hazards. Potheads should be inspected for oil or compound leaks and cracked or shipped porcelains. The porcelain surfaces should be cleaned and if the connections are exposed, their tightness should be checked. Since inspection intervals are normally one year or more, comprehensive records are an important part of the maintenance inspection. They should be arranged so as to facilitate comparison from one year to the next. Cables in manholes, ducts or below grade installations should be inspected for the following:
- Sharp bends in the cables.
- Physical damage
- Excessive tension
- Cables laying under water
- Cable movement or dangling
- Insulation swelling
- Soft spots
- Cracked protective coverings
- Damaged fireproofing
- Poor ground connections or high impedance to ground
- Deterioration of metallic sheath bond
- Corrosion of cable supports or trays
Raceway and cable tray installations
Since the raceway or cable tray is the primary mechanical support for the cable, it should be inspected for signs of deterioration or mechanical damage. The cable jacket should also be checked for abrasions or mechanical damage.
Reports of underground faults by observers in the vicinity
Interviewing of personnel who happened to be close to the fault location during its occurrence can provide vital information and clues as to the location and cause of the fault. These clues can include:
- Observation of smoke, fire or spark at the fault site
- Abnormal smell
- Abnormal noise from the location
23.10 Cable testing
Testing is mainly performed to ensure that:
- any new design of cable will perform satisfactorily for a reasonable life-time and
- cables as manufactured meet specification requirements for quality, e.g. conductor resistance and minimum thickness
- The tests can be classified in to four categories:
- routine tests by the manufacturer on every finished length of cable (or, for spark testing, during manufacture) to ensure compliance with construction requirements and demonstrate the integrity of the cable;
- sample tests which are not practicable on every complete length of cable; they are made on samples of cable to represent production batches and provide a periodic check on manufacturing consistency;
- type tests to be carried out during the development of a new grade of insulation or cable design to establish performance characteristics; they are not repeated unless changes are made which could alter these characteristics;
- Site tests after installation made to demonstrate the integrity of the cable and its accessories as installed.
23.10.1 Cable insulation testing
The electrical test most often conducted to determine the quality of low voltage cable insulation is the insulation resistance test. It is performed as a routine maintenance test for cables already in service or as an acceptance test for new cables. DC overpotential testing is another way of testing cable insulation. This test is performed primarily on medium and high voltage cables to test their dielectric strength and is not recommended for routine maintenance testing of low voltage cables.
The insulation resistance test for low voltage cables is usually performed using a megohmmeter. It is a simple, quick, convenient and nondestructive test that can indicate the contamination of insulation by moisture, dirt or carbonization. Before testing any cable, the circuit must be de-energized.
Once that is done, it is usually best to disconnect the cable at both ends in order to test only the cable, and to avoid error due to leakage across or through switchboards or panelboards. For an acceptance test, cable less than or equal to 300 V maybe tested at 500 V and cable greater than 300 V but less than 600 V maybe tested at 1,000 V. For a routine maintenance test, test voltage should be restricted to 60 percent of the factory test voltage. The test voltage should be applied from phase to ground on each conductor with the shielding tapes and metallic jackets also connected to ground (Fig 23.11). While no general standard exists for minimum acceptable insulation resistance values for cables in service, a “rule-of-thumb” of one megohm of resistance (mini- mum) per 1,000 V of applied test voltage is accepted.

Test on single conductor cable

Test on multi-conductor cable

Use of the guard terminal to eliminate measure of surface leakage across exposed insulation at one end of cable

Use of a spare conductor to guard both ends of a multi-conductor cable

Use of a guard to eliminate all surface leakages except conductor under test.

Connection for testing total resistance between one conductor and all others plus ground

Testing one conductor leakage to ground only

Testing one conductor to others in the bundle-leakage to ground eliminated by guard
If a cable should fail the test, then further cable testing is required to pinpoint the failure location. A cable locator/fault finder can trace the exact path of buried or above ground cable and locate a fault. The insulation resistance test should be performed at regular periods and a record kept of the readings. Insulation resistance decreases with an increase in temperature. Thus, in order to properly interpret the results and to permit a reliable comparison of periodic readings, the readings should be corrected to a base temperature. It should be noted that persistent downward trends in insulation resistance indicate insulation deterioration even though the readings may be higher than minimum acceptable values.
23.10.2 Other tests
Transmitter-receiver test
The exact location of a fault can be detected using a Transmitter-receiver type cable fault detector. The exact route of the cable should be known and should be accessible for using this method. The instrument consists of a transmitter and a hand held portable receiver. Figure 23.18 shows the principle of operation of the detector:

Locating of Fault using Transmitter-Receiver instrument
The transmitter is connected to the faulty cable at one end after disconnecting the cores as well as the ground at the other end of the cable. The transmitter sends signals along the cable and this signal gets returned back to the transmitter through the fault in the cable. The portable receiver consists of two spike probes as shown, which have to be inserted into the ground above the cable as shown in the figure. The current in the soil spreads out like the spokes of wheel from the fault. The ground spikes provide entry and exit paths for this current and is detected by the receiver. The receiver is dropped into the soil along the cable path every few feet during fault location. As the fault location is approached, the receiver indicates higher and higher readings. When the probes are astride the fault, the instrument produces a null, thereby indicating the fault to be below the probes.
Thumper test
Locating faults in high voltage cables is different from that of low voltage cables due to the following reasons:
- Distance between the conductor and earth is more (higher thickness of insulation)
- Concentric neutral wraps around the outside of the cable
Low voltage cable testing uses the flow of the tester current between the faulted conductor and earth for locating the fault. The low voltage values used in low voltage cable testing would not be enough to arc the longer distance between the conductor and earth in high voltage cables.
The thumper test is a typical test method for locating high voltage cable faults. The principle of the method is to connect a large capacitor between the conductor and the concentric neutral. The capacitor is then charged up to a high voltage, which would result in a discharge and cause an arc between the conductor and the neutral. The arc ionizes the air, causes an explosion (thump) which is monitored during the test. Since this test involves high voltages, there is a possibility that the test itself may cause damage to an otherwise healthy cable.
23.11 Electrical tests for detection of cable faults
Detection of faults in an overhead line system can be comparatively easier when compared with fault detections in underground cable systems owing to non visibility of the fault. Rectification of the fault can also be more cumbersome and more time consuming and expensive than for an overhead line. Several techniques and instruments are available to ease the job of cable fault location.
Different types of cable faults require different techniques for identification of the fault location; therefore, it is first necessary to determine the type of fault in order to select the appropriate technique. A persistent fault to earth is generally easily located using the transmitter-receiver instrument. Open circuit and short circuit faults are best tackled using Time domain reflectometry (TDR) test. A flashing fault that happens only at high voltages requires a high voltage surge generator or ‘thumper’ test.
23.11.1 Loop tests
Murray loop test
Murray loop method makes use of an electric bridge circuit for locating cable faults. Two arms of the bridge consist of resistors and the other two arms are made up of the faulty and healthy cores. The values of the resistances in three arms in the bridge are known and using these, the resistance of the fourth arm is calculated. Using this resistance value and the resistance per unit length of the cable, the distance of the fault can be calculated. However, this method has the following limitations:
- It is useful only for shunt faults and only if at least one healthy conductor is available
- The fault resistance should be below 200 ohms
- The test is not applicable for open circuit faults
- Only approximate location of the fault can be identified
- The other end of the cable should also be accessible for fixing a jumper
The principle of this test method is illustrated in the Figure 23.19

Murray Loop test
Two arms in the bridge are known resistances Ra and Rb. The third arm of the bridge is made up of the healthy core plus part of the defective core with resistance R1 and the fourth arm made up of the faulty core up to the point of the fault with resistance R2. The relationship between the resistances is given by:
Ra / Rb = R1 / R2
The bridge is then balanced by adjusting the variable resistance ‘Rb‘ to obtain a null point in the galvanometer. The ratio ‘R1 / R2‘ is obtained. The total resistance ‘R’ (= R1 + R2 ) is then measured using wheat-stone bridge principle by making the total cable loop as an arm of the wheat-stone bridge. Using the above two relationships between ‘R1‘ and ‘R2‘ and the resistance per unit length of the cable, the distance of the fault from the measuring point can then be calculated.
23.11.2 Electro-acoustic detection
Acoustic detection method is a non destructive test method and is used for detecting partial discharges in cables. The method is an important diagnostic tool especially for medium voltage and high voltage cables. The main advantages of acoustic detection test method are:
- It is immune to electrical interference
- It can be performed on energized cables without shutting down power
The acoustic signals are detected using high precision, broad bandwidth microphones. The main drawback of this test method is the attenuation of the signals during propagation, needing close proximity to the problem location (app. within 20 mts of the problem location) for detection.
23.11.3 Time domain reflectometry
Time Domain Reflectometry (TDR) also called by various names such as ‘Pulse echo method’, ‘Cable radar’ and ‘Pulse reflection method’, is a method used for the detection of short circuits and open circuits in cables. The technique is similar to the radar system used for the detection of flying aircraft. Using the TDR method, it is possible to detect changes in the cable along the measurement of distance at which these changes are located.
The cable is tested by connecting one end of the cable to the TDR instrument. The TDR instrument generates and injects short duration pulses at a high repetition rate into the cable between the phase conductor and the shield (neutral) of the cable. A time domain reflectometry test injects a 20-ns to 500-ns pulse to determine cable profile in terms of discontinuities or joint locations. Changes in the impedance of the cable result in reflection of these pulses back to the instrument which detects and displays the reflected pulses using either a CRT or a LCD display. The reflections are displayed with the elapsed time along the horizontal axis (x-axis) and the amplitude of the reflection along the vertical axis (y-axis). The magnitude of the change in cable impedance is translated to a corresponding change in the amplitude of pulse on the display. Cable shorts result in negative deflection of the display and open circuits result in a positive deflection. Consequently, the end of the cable which is in effect, an open circuit, would result in a positive deflection.
Apart from cable defects, splices and T-connections which result in a change in cable impedance, also result in deflections on the display. Knowing the speed of propagation of the pulse in the cable, it is possible to calculate the cable length to the source which had caused a deflection on the display. TDR method is not suitable for non linear faults. Figures 23.20, 23.21 and 23.22 show the equivalent circuit of the cable and the displays corresponding to a healthy open ended cable, a cable with its end shorted and a cable having a short circuit respectively.

Healthy cable open ended

Cable with shorted ends

Cable with short
23.12 Safety issues in fault location
Checking of cables involves application of high voltages and therefore it is imperative that all necessary precautions are taken whilst performing tests on cable installations. Following are some guidelines towards safe carrying out of cable tests:
- High Potential testing involves usage of high voltage and hence great caution should be exercised to avoid hazard to life and equipment
- High potential test should not be conducted in an explosive atmosphere
- Wear HV safety rubber gloves and safety shoes
- Test is performed on the cable, with the cable in de-energized condition
- Isolate the cable in compliance with the standard Tag-out and Lock-out procedures
- Test the cores of the isolated cable for presence of voltage using High voltage Tester
- Discharge the cores of the cable to ground
- Disconnect both ends of the cable from the connected equipment
- Reinsure before starting repair work on the cable that the right cable has been selected for performing the repair and that the cable has been de-energized
- Barricade both ends of the cable and install warning signs indicating that the cable is under High voltage testing
Hi Potential test instruments are normally provided with automatic discharge facility after the test. Ensure that the discharge has been fully completed before touching the cores that had been under testing. Hazardous high voltage can remain in the cable long after the test has been completed. The discharge can be expedited by grounding the core through a resistor. Once the voltage at the test point has reduced to zero, a solid ground has to be connected to the core before the resistor is removed to prevent shock hazard. Following are the safety precautions necessary:
- The cable should be discharged (shunted or shorted out) for at least as long as the test voltage was applied in order to be absolutely safe for the person conducting the test
- An Insulation Tester should never be used in an explosive atmosphere
- For safety, make sure all switches are blocked out and cable ends marked properly
- It takes longer for absorption current to reach a static point as compared to the time taken by a charging current. Similarly it takes longer to bleed off. Hence, on large or long cables, it is important to short out the cable or ground the tested end after the test to eliminate the possibility of shock to the person conducting the test
It is obvious that the instrument generates a high voltage, which, if applied to a human, may cause electrocution. Though the source has limited power, it can still cause considerable damage. This is to be avoided by grounding the positive terminal to a local ground to discharge the voltage completely immediately. The use of hand gloves is recommended to avoid accidental contacts.
23.12.1 Spike test
Before commencing work on a cable, cable maintenance personnel must positively ensure that the cable they are going to start work on has been de-energized. For example, when a cable trench is opened up for cutting a cable, most of the time it becomes impossible to identify the right cable from the many cables that may be lying in the trench. For safety sake it is absolutely important for the cable line man to positively identify the cable and also to confirm that the cable is in a de-energized state. It is first recommended that the cable be identified by the use of “as constructed” drawings and pulse the cable using an electronic signal from the cable termination point. The “pulsed” cable is then identified at the trench location. The next step is to ascertain that the cable is in a de-energized state to avoid a lethal shock.
A positive method of ensuring the de-energization is through the spike method. The spike method is a safety device for maintenance line personnel to prevent injury or loss of life. The spike method makes use of a low velocity, charge actuated device which pushes a 2-5/8” spike into the cable to verify that the cable is de-energized prior to cutting. Figure 23.23 shows the construction details of the spike:

Construction of Spike Tool
The pike is designed to be operated remotely at a distance of 35 feet to prevent potential injury. Following are the salient features of the spike test method:
- Spike provides positive assurance that the cable is not energized
- Spike is operated remotely and thereby provides protection to cable maintenance personnel
- The test method can be used on thermoplastic or thermosetting insulation materials and oil impregnated paper insulation cables
- The method is suitable for aluminum and lead sheathed cable and interlock armored cables
- Spike test creates minimal cable damage
- Spike test kit is portable, easy and quick to use
23.13 Analysis of failures
Faults should be diagnosed logically and technically to prevent their recurrence. Superficial resolving of a fault may make it disappear only temporarily and it may only be a question of time before the fault reappears again in a more serious form. The various causes for the fault should be investigated using metering and data recorders and the root cause arrived at.
A prerequisite for detecting the root causes of problems is keen observation. The symptoms and evidences observed during a fault provide valuable clues to the identification of the cause of the problem. The evidences at the fault site should not be disturbed before the site has been inspected thoroughly, since vital evidence can get lost during the disturbance. The situation can be more or less compared with that of a sleuth at the site of crime who gathers evidence. Recording of the various events and their sequences during the fault (relay operation, meter indications, emanation of noise, smell etc.) will be of great assistance and help in the analysis. Evidences (damaged insulation/ conductors) should be collected from the fault site to aid analysis. Error in observing the vital clues may jeopardize the whole course of the investigation process itself.
Identification of the cause is the next critical step that follows observation and collection of evidences. Pinpointing the root cause is important from the point of view of not only solving the particular incident, but also to prevent similar occurrences in other places in the future. Sound technical knowledge, analyzing ability, logical and lateral thinking capability, patience, sound and unbiased judgment are all required for the correct identification of the root cause of the problem. Sometimes, suspicion itself without hard facts at hand may help in looking for clues to confirm the suspicion. Over confidence can be an obstacle in performing a proper analysis.
During the analysis of a fault, all the contributing factors and parameters need to be considered so as not to miss out an important detail. However, the collected and observed facts and data need to be sifted and examined to isolate the pertinent information from irrelevant data. Thorough knowledge of the system coupled with unbiased, logical and systematic thinking is required for analyzing the data. Sometimes, even a seemingly improbable factor could be an important factor for analyzing the fault. Hence, it is imperative that even trivial evidences should not be ignored, as they might contain the clue for resolving the problem.
A cable failure is normally detected as either an open circuit or a short circuit. Open circuits are more common in low voltage cables than at medium or high voltage due to the magnitude of voltage which can survive with minimum clearance to ground. However, in the case of higher voltage systems, conduction continues with arcing in the conduction path, ultimately leading to localized overheating, failure of the insulation at the arcing area and consequently a short circuit.
The three most commonly seen problems in PILC cables are:
- Partial discharge (in cable itself and in joints)
- Moisture ingress
- Thermal aging
If the failure is related to a polymeric cable, checking of the following would be of great assistance:
- Detailed examination of the conductor including possible metallurgical examination
- Dissecting the insulation close to the failure
- Insulation resistance measurements
- AC breakdown level tests on a long sample near the failure site
- Chemical tests on the insulation
- Semicon resistivity at elevated temperature near the failure site
- Metallurgical tests on the shield or sheath if present
- Chemical tests on the jacket if present
In any failure analysis it is recommended to take up a close visual examination of the failed part at and near the failure site and also talking to or reading accounts of the failure from the personnel involved. Depending on the circumstances and the observations, some more investigations or tests may be required, or more information may be requested from the cable user. Overheating may indicate a possible root cause of failure of the system. The other possible reasons that should be checked during the analysis are:
- Backup protection
- System ampacity
- Thermal runaway
- Lack of cooling
Signs of over heating may warrant further chemical or metallurgical tests to determine the maximum temperature reached. It may be necessary to take up further investigation into the system operations to determine the root cause of this type of failure. In case of overheating the possible root causes could be any one of the following, or something else:
- Erroneous initial ampacity calculations leading to selection of undersized cables
- Improper backup protection which does not isolate the cable quickly during higher currents
- Failure of proper backfill leading to unfavorable conditions
- Adverse environment such as the presence of a closely installed hot pipe
Another possible root cause of failure is the manufacturing defect in cables and accessories, which may be detected by visual examination after some period of service but which may not be visible when the items are new. Visual inspections after some time or after faults, may show voids or inclusions in the insulation or protrusions from the semicon. Voids could be simply bubbles in the insulation, while inclusions are the presence of some foreign matter. Protrusions could be sharp points extending from the semicon into the insulation. Any of these observations indicate a manufacturing defect as the cause of failure. Any or all of these lead to highly localized electrical fields, which may lead to partial discharge at the site or rapid growth of water or electrical trees near the defect. Unfortunately, the defect which may have caused the failure, is mostly destroyed at the time of fault, but generally can be observed in the other phases which can give sufficient evidence of poor manufacturing quality. However, modern cables are produced in highly controlled environments which should not lead to such defects. A cable having strand blocking, water absorbing tape, or a hermetically sealed LC shield, develops extensive water treeing in a short time; the possible root cause could be a manufacturing problem or a mechanical damage or shield corrosion.
Another type of failure is accompanied by signs of burning or arcing on the surface of the semicon. If the burning or arcing becomes extensive, the cable shield can get corroded. The cause is generally found to be the jackets getting damaged by arcing allowing corrosive ground water to enter the cable leading to severe corrosion of the metallic shield. Corrosion is found to be a serious form of shield damage in both copper and lead, even in fully jacketed cables.
Copper shields or neutrals over polymeric cables may suffer mechanical damage during installation, or experience damage from temperature cycling over a period, particularly near cable clamp locations. The lead sheath on PILC cables may be subjected to fracture and creep, resulting in cracks and breaks. Breaks in the metallic shield on polymeric cables may lead to points of high electrical stress, which may lead to local partial discharge and ultimately failure.
To investigate a failure in an accessory, in addition to the usual visual examination and gathering of environmental and operating information, other work specific to accessory failure analysis may include:
- Comparison of failed accessory with healthy accessories in adjacent phases in terms of visual appearance and the installation practice
- Contact resistance measurements in connectors
- Comparing dimensions with assembly drawings of the accessory
- Signs of poor workmanship, if any
- Signs of surface tracking, if any
- Electrically floating metal electrodes, if any
Analysis of various failures in the PILC and XLPE cables and cable termination indicate the combination of various factors shown in the Table 23.1
Typical causes for cable insulation and accessories failures

Analysis of failures for PILC cables indicate that moisture entry in PILC cable is one of the major factors leading to premature aging and even to failure. There are instruments available to assess the moisture content in the cable using tan delta measurements. Table 23.2 shows the typical values of the dissipation factor and the corresponding average moisture content for PILC cables. If the cable is estimated to be having moisture content of 2% and higher, it may be concluded that cable replacement may be necessary in the near future (assuming that the cable is loaded to its full capacity).
Moisture analysis in PILC cables

23.14 Documentation of work
Documentation of work carried out on cable installations is an important activity in asset maintenance. It is very important that clear documentations are available on the installed cables and the terminations carried out on them, in order to assess the conditions of the cable, to locate faults or to perform predictive maintenance activities. Documentation of the type of cable is also important since any diagnostic testing must take into account cable design and construction. Preparation of records is vital on account of the following reasons:
- Records would serve as reference and help in future trouble shooting
- Others can access the records and utilize them for their use
- Dissemination of information would enable ease of trouble shooting at other locations
- Documentation would enable identification of similar potential problem locations and help in taking preventive countermeasures to avoid failures
- Any mistakes committed during the fault detection would create an awareness to avoid the same pitfall in future trouble shooting practices
- Data on the fault detection would enable more accurate resource planning in terms of man power, time and funds for future use
Cable condition assessment testing can be broadly divided into five parts:
- Check on quality of insulation material
- Checking of Metallic shield or neutral
- Check on Jacket materials
- Check on accessories including splices and terminations
- Local environment and operating conditions
Documentation of the above check results would enable tracking of the condition of the cable and detect any deterioration over time.
Documentation of following on a continuous basis can help in assessing the condition of the installation, which is one of the major causes of failures in termination:
- Temperature measurements
- Partial discharges
Operating temperatures can easily be measured on an energized, current carrying accessory using hand-held, infrared detectors. The load current must be recorded during the temperature measurement test to ensure that future readings are compared. Obviously, the higher the current, the higher the temperature. It is also necessary to record the surface temperature of the incoming cable. In general, the surface temperature on a splice or termination should be lower than the surface temperature on the incoming cable. If not, an accessory problem is indicated.
Partial discharges (PD) in accessories can be located using a number of off-line or on-line techniques and many equipment/devices are available to conduct the tests in the field with minimum efforts. Ultrasonic or Radio Frequency detectors are very useful in measuring and locating partial discharges in terminations or accessible splices. Non-contact probes can find only surface discharges, which may indicate contamination at the surface that may lead to a breakdown. A contact sonic probe or RF detector is required to detect internal discharges. Since cables must be energized for PD testing, contact probes should be electrically isolated from the person performing the test for safety reasons.
Some points of the operating environment, which must be documented, are:
- Cable current loading compared to cable ampacity
- Ambient temperature
- Type of backfill around direct buried cables or ducts
- Moisture or chemicals in contact with the cables and accessories
- Lightning impulses and other system induced over-voltages
- Switching operations
23.15 Documentation of failures
Initially, a failure investigation should be directed towards the collection of all relevant background and historical information. This information should include reconstruction of the events leading to the failure, manufacturing data, service records, operating conditions and details of any repairs, maintenance or modifications. Such information can be of great help in understanding the failure mechanism. The important details that are needed for the assessment are:
- Current loading and duty cycle
- Fault occurrence data
- Previous failures
A record on the failures should identify:
- Date of fault
- Nature of fault
- Location of fault
- Tests and investigations carried out
- Results of such tests and investigations
- Rectification carried out
- Test results after rectification
Photographs taken of a major fault, aid in further analysis and can be kept as a record for future reference. Such records would help in minimizing the time needed to ascertain the location of the fault, enabling faster restoration of power supply to the affected area. The records would also assist in ensuring that the same types of faults may not repeat at the same locations. Additionally, a clear documentation of past failures and/or case studies will definitely help in narrowing down the search in the case of new faults. Testing agencies, utility and distribution companies would especially benefit to a great extent through access to data on different types of faults and the solutions adopted.
23.16 Summary
There are many possible reasons for failures in cable systems; however, they may be broadly classified as mechanical damages and insulation failures. Mechanical damages can be restricted to some extent by underground networks with proper markers and protection. The more common reasons for failure of terminations is found to be installation methods; good termination and joint practices are vital to minimize the faults on terminations and joints. Corrosion is also found to be one of the factors for accelerated aging of cables and subsequent failures. Documentation of works and faults help in minimizing the time spent for locating and rectifying faults. All periodical inspection, observations and rectification works, need to be properly documented for future reference.
The failures of HV cables are found to be the result of partial discharges, ingress of moisture and thermal aging. Past test results provide the trend values for acceptable dissipation factor to check the moisture content. Moisture content above 3.5% is diagnosed with tan d value of > 0.01. While analyzing the failures it is necessary to review the other factors such as backup protection, system loading, cooling provisions, etc. to decide the root cause. Manufacturing defects could also be a possible reason for failures which would require inspection of healthy phases after faults/failures.
It is preferred that a condition based maintenance (CBM) or a predictive approach is adopted to monitor the cable systems. Though insulation resistance checks was one of the most common tests, other tests such as PD measurements have gained acceptance due to the availability of portable instruments and the appreciation of results obtained with such instruments. There are different types of PD measurements (online, offline, OWTS). Online tests are preferred as they maintain supply continuity. With the PD measurements obtained, it is possible to categorize the cables. Typical acceptable values are available to make decisions after taking the measurements. There are other tests such as LVTDR that can indicate the location of faults in splices and joints.
24
Introduction to Power Quality
In this chapter we shall learn about the key issues related to power quality in the introductory chapter of this section and in the following chapter we shall review the checklist of considerations for power quality in any installation.
Learning objectives
- Introduction to power quality
- Power quality defects
- Installation guidelines for power quality considerations
24.1 Introduction
Power quality is the concept of powering and earthing or grounding sensitive equipment in such a manner that is suitable to the operation of that equipment. The definition of reliability is the means of providing steady-state voltage and current with a minimum of disturbances to the user/customer.
A perfect power supply would be one that is always available, always within voltage and frequency tolerances, and has a pure noisefree sinusoidal wave shape. Just how much deviation from perfection can be tolerated depends on the user’s application, the type of equipment installed and the requirement of the particular application.
Power quality defects mainly fall into the following categories:
- Effects due to sags and swells
- Effects due to surge and transients
- Effects due to harmonic sources
- Noise effects
24.2 Sags and swells

Sag – Momentary and Sustained
Figure 24.1 of a momentary and sustained sag (remember that the sagging definition is a slow, average decrease in voltage) is showing the RMS. This is the reduction by means of the line to neutral voltage sag as experienced by a BMI type of power disturbance analyzer.

Swell
The opposite of sagging, the new terminology now for the slow, average increase of voltage or temporary increase, is swelling, or the definition of the word swell, for either momentary or sustained condition as shown in Figure 24.2.
24.3 Surges and transients

24.3.1 Transient impact

Impact of a Transient
In Figure 24.3 we see the impact of a transient phenomena making for high field strength and dielectric stress as well as a very high rate of change of voltage with regard to time, producing a high current component. Just a reminder to us: transient phenomena can be very dangerous.
24.3.2 Transient clipping

Onrushing Surge
In Figure 24.4, we see the onrushing surge coming into a transient voltage surge suppression device (TVSS), now becoming better known as surge protection device (SPD), and having its upper portion limited or chopped before it comes to the load. The surge protection element actually is taking off or limiting that high transient phenomena and sending it back into the earth path where it will do very little harm.
24.3.3 Protection locations

Typical Location of Power Distribution TVSS/SPD
Figure 24.5 shows a diagram demonstrating the overall electric utility supply and internal wiring .
The black boxes marked on our drawing as SPDs (Surge Protection Devices) first appear connected
at the service entrance equipment inside the building where it receives power from the
service transformer. Next we see an SPD device at a panel board or sub-panel assembly.
Finally, we may find a lower voltage style device as a discrete device either plugged in at an outlet or perhaps approaching the mounting of this device within a particular piece of sensitive equipment itself.
24.4 Harmonics and distortions

When talking about harmonics in power installations it is the current harmonics that are of most concern because the harmonics originate as currents and most of the ill effects are due to these currents. No useful conclusions can be drawn without knowledge of the spectrum of the current harmonics but it is still common to find only the total harmonic distortion (THD) figures quoted.
When harmonics propagate around a distribution system, that is, to branch circuits not concerned with carrying the harmonic current, they do so as voltages. It is very important that both voltage and current values are measured and that quoted values are explicitly specified as voltage and current values. Conventionally, current distortion measurements are suffixed with ‘I’, e.g. 35 % THDI, and voltage distortion figures with ‘V’, e.g. 4 % THDV.
Types of equipment that generate harmonics
Harmonic load currents are generated by all non-linear loads. These include:
Single phase loads, e.g.
- _ Switched mode power supplies (SMPS)
- _ Electronic fluorescent lighting ballasts
- _ Small uninterruptible power supplies (UPS) units
Three phase loads, e.g.
- _ Variable speed drives
- _ Large UPS units
Problems caused by harmonics
Harmonic currents cause problems both on the supply system and within the installation. The effects and the solutions are very different and need to be addressed separately; the measures that are appropriate to controlling the effects of harmonics within the installation may not necessarily reduce the distortion caused on the supply and vice versa.
Harmonic problems within the installation
There are several common problem areas caused by harmonics: –
_ Problems caused by harmonic currents/voltages:
- _ overloading of neutrals
- _ overheating of transformers
- _ nuisance tripping of circuit breakers
- _ over-stressing of power factor correction capacitors
- _ skin effect
- voltage distortion_
Harmonic mitigation measures
Mitigation methods fall broadly into three groups; passive filters, isolation and harmonic reduction transformers and active solutions. Each approach has advantages and disadvantages, so usually there is no single best solution.
24.5 Interruptions


Two Types of Interruption – Abrupt and Decaying
Figure 24.6 speaks for itself. Obviously, the momentary loss for something having a half cycle up to two seconds worth of duration and then the definition of having a complete loss would be that power interruption that takes place over a few seconds long period.
24.6 Noise disturbances
Electrical noise is unwanted electrical signals, which produce undesirable effects in the circuits of the sensitive electronic equipment in which they occur.

Noise
Electrical noise is shown in a variety of ways by the graphs in Figure 24.7. The undesirable effects on the circuits that serve sensitive electronic equipment are shown here. Again, neutral to ground impulses, as they used to be called, what we now call a transient surge and then various interruptions that take place in the bottom graph on the line to neutral voltage wave shape.
24.7 Notching


Notch
Our next definition is for an electrical notch, which is a switching or other type of disturbance in the voltage wave form, having a particular duration and having a particular polarity and depth. Firstly, the power and logic voltages of present day devices has been drastically reduced and at the same time the speed of these devices has increased with propagation times now measured in Pico seconds.
24.8 Noise definitions

Noise – Common Mode/Transverse Mode
In our electrical noise definitions we have the definition for common mode noise and the definition for transverse mode noise. The common mode noise is more of what we might call the mystery noise circulating in the building where the noise appears between the wires, either the neutral wire or the power phase wire and the common reference.
This noise is not visible between the phase wires themselves or phase to neutral conditions as we will see later on in our explanations. But rather noise that is seeking to find the common conductor, the ground or earthing conductor that we would have in our wiring. By compliment, the transverse noise is the other type of noise. Noise that is not so much a mystery. Noise that we will see occurring in the various types of disturbances from line to line or line to neutral as it is wired in the power circuit. The transverse or the normal mode noise we can see with line to line measurements. The common mode noise is always going to have to be examined with respect to the earthing conductor or the earth ground.
24.9 Earthing conductor

Equipment Grounding Conductor
24.10 Isolated/insulated connection

Isolated Equipment Earth
24.11 Ground/earth loops


Ground/Earth Loop
24.12 Site examination flow chart

Flow Chart for Solving Power Quality Problems

Flow Chart for Solving Power Quality Problems
Figure 24.13(a) and 24.13(b) represent a flow chart for solving power quality problems. What we do is examine the perceived power quality problem first and then ask ourselves the necessary questions. Is our wiring correct? Does it comply with the various requirements for sensitive equipment? If not, we will correct it and move on. Is the earthing or grounding done in proper fashion so that we have operational integrity?
Not only is there the safety issue of keeping personnel and equipment at a common zero voltage for safety, but does the equipment operate with a stable signal reference position? Next, have we made available the surge transient protection and how have we gone about it? If it is exposed and we have very little protection then we need again to re-design, re-engineer and move on. Finally, the monitoring of power and the analysis of those monitoring results will lead us to which extreme, if you will, to employ in terms of mitigation? Do we apply a power line conditioner or do we go as far as a battery supported uninterrupted power supply, which is represented by the application of a UPS system? We will be verifying the results of surveys we have taken and then verifying the results of the application to make sure that the whole mitigation process has accomplished what it was intended to do.
25
Installation Guidelines
We are going to look at several of the guidelines, how to do check listing and how we can make sure that we have covered the various bases in our power analysis and in our equipment descriptions.
25.1 Checklist of considerations for power quality
A checklist reference follows of what we believe is a comprehensive set of co-ordination guidelines for sensitive loads. It consists of the considerations for the suitable power, earthing, communications, life safety and environmental control aspects to be found in a comprehensive computer room construction project. Please do not be turned away from the use of this list simply because we have marked it as being originally summarized for computer room work. Many of the individual component areas of the seventeen points on this list have direct application to everything that is of a digital control nature.
A brief review of the list follows:
In section 1.0, Continuity of Processing Operations, you might want to ask yourself the questions that pertain to what kind of down time can be tolerated and what kind of power quality related events will interrupt what you are doing.
In section 2.0, Facility Location Considerations, you may want to check several of the things we have found to be important over the years. One man, jokingly, said to me that he was in his building and was not intending to move from it; therefore, he did not need to consider the various things having to do with his facility location. When he found out that there was the potential for airborne microwave interference, he thought the better of not wanting to examine what things were taking place around him.
In section 3.0 you need to work closely with your commercial power supplier to study his system to see how the two of you can work together to make it the most effective system for your purposes.
Section 4.0 is a discussion of your interactions, co-ordination and planning with the supplier of your sensitive equipment. Several of the questions may be important to you: what kind of power quality makes your system run well, what kind of susceptibility do you have to the disturbances that occur in your area, what compatibility is there between the load equipment and the power source.
Then there are the questions of what conditions will make the system fail; what types of interruptions of energy flow occur; what kind of electrical noise gets into the signal circuits; and what kind of noise interaction is in the component degradation and failures.
All of these may seem like they apply only to a mainframe computer application, but the questions in their generic form will help you understand more of what you are trying to operate in a satisfactory manner.
In section 5.0 a series of questions are posed in matching the system power requirements to the various available power conditioning alternatives. We have spent some time talking about the variety of those alternatives and, hopefully, some are more favorable to your situation than others. Through these kinds of questions you may be able to determine what the best cost approach is for your site.
The list goes on through a total of seventeen sections. Bear in mind of course that some of those sections will be more applicable to your location than others.
| Considerations for Suitable Power, Earthing, Communications and Environmental Control | |
| 1 | Continuity of processing operations. |
| 2 | Facility location considerations. |
| 3 | Commercial power considerations. |
| 4 | Co-ordination & planning with CPU vendor specifications. |
| 5 | Matching system power requirements to available power conditioning alternatives. |
| 6 | Earthing for consistent noise suppression. |
| 7 | Redundancy requirements. |
| 8 | Data communications protection. |
| 9 | Room construction and access security. |
| 10 | Fire protection. |
| 11 | Process cooling. |
| 12 | Radiated interference protection system. |
| 13 | Environmental control and life safety co-ordination. |
| 14 | Static electricity. |
| 15 | Lightning protection. |
| 16 | Single center of responsibility and technical supervision. |
| 17 | Documentation. |
25.1.1 Continuity of processing operations
- How much down-time can be tolerated in your operations?
- What length of time will cause problems? Many operations may withstand 5-20 milliseconds of down-time by their internal capacity.
- How frequently can down-time occur? Some locations tolerate 1-3 power outages in a year’s time, but require some additional protection if occurrences total several times a month or 20-25 times per year.
- Are momentary interruptions acceptable? Some hardware and software systems provide for “hold” or “hold & store” methods of preserving data in case of momentary interruptions.
- What is the cost of the above events in terms of lost data, “re-boot” time, damaged hardware or software, corrupted intercommunications, and lost processing “throughput” or revenues? The cost of interruption may justify investment in power and earthing improvements.
- What power quality related events will interrupt data input, processing and useful output? For example, even with continuous power to processing hardware, interruption of a separately powered process cooling plant could halt operations. While water cooled processors may be able to stand a few degrees of temperature change, they cannot stand loss of circulation.
- Are operations dependent upon communications lines which also require continuity of electrical power? Should your telephone system be on conditioned power?
- Is the “back-up” or “alternate” site operated from the same power source? Are its communications also dependent upon electrical power? You should avoid dependence on common facilities wherever possible (i.e. same power poles, same side of the street, or same underground trench).
25.1.2 Facility location considerations
- Will your site be subjected to:
Natural hazards – storm damage from wind, rain, snow, sleet, ice, lightning, flooding, tidal waves or moving ice; also fire, earthquakes, slides? (An ice storm can break overhead conductors and topple power distribution poles on a massive scale and high winds may cause inadvertent breaker operations).
Man made hazards – vandalism, sabotage, malicious mischief, arson, collisions from vehicles, plus riots, insurrections, or war?
Off-site damage to power and communications lines and essential services such as gas, water, and sewage pipes upon which supporting services depend?
Lightning and excavation damage, even in underground protected services? If there is more than one power feeder and more than one communications cable to the building, each should be placed in a separate trench rather than in the same trench. - Are the local electrical safety and other building codes overly restrictive in the construction materials and assembly methods which are permitted? Unnecessary restrictions can dictate the use of expensive labor, intensive construction materials, and assembly methods which increase initial installation costs and continuing maintenance expense in some instances.
- Compare electricity costs at different locations. Is the cost of electricity excessively high at the proposed location? What are the demand charge penalties and the lower power factor penalties? What effect will system efficiency have on actual operating dollars? (A 250 kW load would have an energy bill of more than $200,000 per year at $0.10 per kWh. Power at $0.075 per kWh could save $50,000 per year). “Partial Load” operations will effect long term costs totaling two to three times the apparatus capital expense!
- Can separate distribution lines be fed from separate substations in the event one circuit is accidentally disabled or taken out of service for maintenance? Also, can the same strategy be followed for telephone and data communications cables?
- Are those responsible for commercial and for electrical wiring and apparatus installation reasonably responsive to the CPU vendor’s equipment and the sensitive user’s needs? Are they adequately trained and do they have the necessary technical understanding to work co-operatively with users to help them solve power quality related problems? Can they merge noise control procedures with their construction practices?
25.1.3 Commercial power considerations
- Review power outage and disturbance records of the local electrical utility. Note that some utilities record only “outages” which may be defined typically as, “An interruption of power lasting more than 5 minutes.” Intermittent breaker operations of 5-20 cycles may not normally be recorded. Ask for the number of breaker operations counted on your feeder, per quarter or per year.
- Utilize the site analysis surveys offered by site preparation and co-ordination firms. These studies indicate what items are typically measured and reported. How does the local utility power quality history (if available) compare with these?
- Ask other users in the area to review with you their power quality records and system operating performance. Be sure to compare each history with the different types of power conditioning devices in use.
- Start your own recording of power quality. Use a Power Disturbance Analyzer, which records the varying values of slow-averaged RMS line voltage as well as the surges, sags and impulses. Wherever possible obtain graphics display and recordings of both normal mode and common mode noise disturbances.
- Be sure to direct your designers in the planning stages, to have heating, ventilation and air conditioning (HVAC) equipment supplied by a transformer and feeders other than the one(s) to be used for the sensitive system. Processing power should be provided by separate transformers and feeders, not shared with other loads.
- Examine the support level of the local electrical utility. Many utilities are making available to their customers with sensitive electronics systems, a variety of programs for analysis, design, and equipment selection in order to assist in the enhancement of data processing, powering and earthing. Be sure to investigate and consider their assistance which may even include equipment leasing or provision of premium quality power supplied directly from a utility owned power conditioning substation.
- Be sure to study with the local utility representatives all available options for the normal feeder conditions as well as possible “back-up” feeder availability. Many locations can be served with “dual feeder” capability, which may eliminate expensive long term power support equipment, such as UPS, batteries and engine generators.
25.1.4 Co-ordination and planning with CPU vendor specifications
- Obtain from the selected or prospective processing equipment vendors the following:
General specifications for overall power quality, earthing and communications installation.
Proposed equipment list with the following information:– Line frequency with tolerance limits and maximum rate of change.
– Line voltage(s), phases, nominal value(s) with upper and lower limits.
– Load characteristics of each EDP unit, including kVA, kW, phases and amperes on each phase for both normal running and starting.
– Combined system kVA, kW, power factor, amperes (both RMS and peak), and heat output in BTU/hr or equivalent metric units.
– Maximum starting inrush currents for units having the 10 largest values.Site preparation and installation planning manuals.
- Discuss the proposed system with your CPU vendor to determine the characteristics of not only how well it will operate, but also how it will fail. Concentrate on the specifications obtained above (4.1) in determining specific areas of power and earthing enhancement
or failure protection, in accord with IEEE P-1100, and the outline below. Compare the following area with conditions to be encountered at the site and obtain agreement with your vendor as to the areas of protection that will provide the best operating integrity for the system:What makes the system run well?
– Power system quality:
– Be sure to provide a constant source of relatively undisturbed electrical power of adequate load capacity, suited for its loads, and maintained within arbitrary practical limits established for nominal values of line voltage, frequency, wave shape distortion (harmonics), voltage sags, impulse surges, transients, electrical noise and other attributes of the power source.
– Sensitive electronic equipment susceptibility:
– Equipment should be designed to withstand the disturbances and aberrations of electrical environments in which it is expected to operate (especially the power source).
– Compatibility of load equipment and power sources:
– This includes harmonizing their respective characteristics including the interaction between electronic equipment and their power sources. Where source and load both consist of high, dynamic, internal impedances, the risk of distorting the electrical wave shape is high. These distortions can easily lead to power conditioning applications causing more interference than they are supposed to remove.
– Earthing, referencing and shielding:
– Be sure to provide equipotential signal referencing and shielding which is compatible with earthing requirements for safety.
– Power distribution:
– Avoid unwanted coupling through isolation and co-ordination of power circuits and their respective earths.
– Conductor sizing and over current protection:
– Offer protection for faults and overloads, with special attention to the effects of harmonic load currents.
– Lightning and surge suppression/protection:
– Provide lightning, power switching and electrostatic discharge (ESD) protection systems.What conditions will make the system fail?
– Interruption of energy flow (function of time):
– The definition of “power interruption” involves time duration. The fact that single phase AC line voltage varies sinusoid ally and passes through zero twice each cycle does not mean there was a power failure every 1/120th of a second. Electronic equipment is typically designed to store enough energy in its DC filtering elements to ride-through each AC zero crossing plus some additional time. Most electronic equipment can withstand one half cycle interruption without disturbing the filtered and regulated DC power supplied to logic circuits.
– Electrical noise coupling into signal circuits:
– A source of digital data corruption is the superimposition of electrical impulse noise on an intended digital signal. It can cause a change of state where none was intended (drop-in), or failure to complete a change of state where one was intended (drop-out). The signal error which either one creates can cause unwanted changes in data, instructions or addresses. The problems which are created can be obvious and show up immediately, or can be stored, only to show up later when the stored information is used. Coupling of noise and data signals can be caused when both signal currents use common conductors such as the earthed signal reference. The coupling mechanism can also be inductive, Capacitive, or electromagnetic radiation. The frequency spectrum of concern is from DC to 100 MHz or more.
– Noise interaction with signals:
– When impulse noise is observed on signal lines using an oscilloscope, it is often assumed, just because the digital circuits are still working, that the noise is below the threshold which can cause problems. This is not so. Digital circuits characteristically latch in either a “high” or a “low” state in which they are relatively stable. It takes a strong, deliberate signal to move a latched circuit from one state to another. Moreover, most circuits spend most of their working life in one state or the other, and very little time in transition between states. However, when a bi-stable circuit is in transition between states, it is very susceptible and sensitive to interference. The circuit behaves as a positive feedback amplifier and can amplify very weak signals to the point of saturating the semiconductor. Thus a very weak noise signal can cause data corruption if it occurs at the moment of state transition. Although it may have a 50-50 chance of driving the circuit in the direction which was intended, it also may have a 50-50 chance of driving it in the opposite direction, causing an error by changing the digital signal from that which was intended. This has been demonstrated by observing random impulse noise in digital cables interconnecting a processor and memory unit, and encountering only one or two data corruption events per day. When the noise source was reduced, the data corruption events fell to two in six months. Thus it is often fruitful to assume that impulse noise sources should be reduced to a minimum whether or not they appear to be the cause of malfunctions.
– Component degradation and failures:
– If a sensitive electronic component fails completely, it is much easier to locate and replace than if it is intermittently marginal in its ability to function. If the characteristics of a component are altered or damaged to the point where it will continue to deteriorate further with time or use, the component is said to have its latent failures. It is generally a matter of economics in choosing to replace all components in electronic equipment at the circuit board level if the board has been exposed to damaging transients. It is more difficult to try to diagnose, locate and replace each defective component (at the time it malfunctions) even if its failure rate has become significantly higher than before the lightning event occurred. - Compare the sensitive electronics unit power requirements with power which is available or can be made available. Remember that voltage transformation can easily be performed with a shielded transformer at the point of use with the added benefit of referring the secondary voltage to the computer central earthing point common mode voltage isolation). The feeder to the computer room area can be typically 480 V (or 600 V) three-phase when the utilization voltages at most sensitive units are typically 208 V or 120 V.
- If a power peripheral containing an isolating transformer and output circuit breakers is to be used to power other units, the power peripheral will require a branch circuit to supply its input voltage. This can be typically 208, 250, 480 or 600 V three-phase. The higher voltages are more efficient. They have lower percentage line voltage drop and generally cost less to install for a given kVA rating. In this type of installation, the secondary output circuit breakers and conductors to unit loads are not called branch circuits because they are system interconnections rather than part of the building wiring. As part of the sensitive system, the power peripherals and their connecting cables are subject to UL 478 examination and listing rather than inspection under NFPA 70-1981 or other applicable electrical codes for building wiring.
- Itemize the loads and draft a wiring connection schedule.
Place each sensitive load which draws more than 5 A, on a separate power peripheral circuit with its own circuit breaker and interconnecting power cable.
Arrange single-phase loads so they will be evenly distributed over the three phases to neutral.
All sensitive loads need not use the same power source to avoid earth potential differences. Using separate shielded isolating transformers, some loads may be operated from uninterruptible power systems (UPS) output while others not so critical (printers, for example) could operate on commercial power.
Separate shielded isolating transformers may be used to separate easily disturbed loads (memory, for example).
Be aware of any loads which have a DC load component of current such as created by a load with half-wave or unsymmetrical rectification or SCR control. Be aware, also, of loads having a very high harmonic content in their load currents. These can create operating problems due to saturation or overheating the first up-stream transformer or motor-generator set. Besides high temperature rise, the observable effects may be excessive operating costs, poor efficiency, and distorted output voltage and input current waves. Such effects can render a UPS inoperative and can cause very high peak magnetization current pulses at the inputs to some distribution transformers. Refer such problems to the CPU manufacturer first to see what can be done to eliminate or reduce the problem. Otherwise special line conditioning equipment may be required. Single phase harmonics may be additive in the neutral circuit by as much as 173% of phase currents! - Examine site layout proposals for environmental compatibility.
Have process cooling locations been placed and sized with respect to heat producing areas on the floor?
Have present and future under floor space needs been addressed?
What flexibility has been planned for expansion of the power, earthing or communications protection system?
Has a central operator station been planned for environmental control or access?
Has the routing, type and physical installation of data communications been planned for both present and future compatibility with the site? - Since some CPU vendors have included power conditioning internally in their processing units, you need to incorporate these considerations in your overall power quality implementation. Many power conditioning techniques will interact one with another to create “flip-flop” distortion. Make extensive examination of each device intended for the system to determine internal impedance. Proper co-ordination will be achieved when equipment with high dynamic impedance is interfaced only with equipment with low dynamic impedance. In this way the distortions occurring between highly sensitive power supplies are softened and disruptive interaction can be reduced.
- Incorporate unit cabling restrictions with room layout plans. Organize each unit so it will not interact physically with surrounding sensitive units (such as printer dust with open media disk drives).
- Review data communication installation requirements to ensure long term reliability and protection to minimize data errors. Be sure there are no signal paths susceptible to noise contamination which might produce error signals to “power fail” the processor.
25.1.5 Matching system power requirements to available power conditioning alternatives
- What capacity is needed in kVA, kW?
The sum total of power in a specific equipment list is the “connected load”. However, actual measured power use may be less because each unit may not have all options installed and may not draw maximum connected load continuously or simultaneously.
Make allowances for future systems growth. Power requirements for memory and the controllers, multiplexers and exchanges needed to address and share large memory may grow faster than the rest of the system.
Divide total power in watts by the room floor space devoted to processing use. Typical large systems use 50-60 W per square foot. A 50 x 100 ft room might use 250 kVA of power, for example.
If the proposed installation should be substantially more or less than this energy density, it may be worthwhile to verify the reasons.
Are the internal impedances and momentary overload characteristics of the power source adequate to handle the short term demands without installing larger capacity than needed for the steady-state load? Are the internal impedances low enough so that transient currents will not create excessive load induced line voltage disturbances? - Partial Load Efficiency – Has verification been made of the operating efficiency under partial load operation? The cost of additional electrical energy for a drop of 15% in efficiency (from 88% to 73%) can be in excess of $10,000 per year, for every 100 kW of load!
Has the estimated total load been compared with the expected steady-state actual running load of the system? Has this result been used in determining the “partial load” ratio as a percentage of the nameplate kVA/kW of the power conditioning device? Rarely are systems installed which run higher than 50-60% of the nameplate capacity of the power source!
In order to assure optimum efficiency, be sure to request manufacturer’s guarantees (in writing) at 50% load operation with the guarantee to compensate users for operations not meeting those standards. - “Ride-through” and other power conditioning requirements, if any.
What level of power continuity will satisfy sensitive operating requirements? Without supplementary energy storage devices, many units will ride-through a 5-20 ms interruption of power without malfunction, provided noise impulses associated with the interruption do not reach and corrupt digital signals by other paths.
Ferro resonant and synthesizer transformers may enhance ride-through slightly in some cases, provided the loads are not sensitive to phase shifts during their correction of line voltage variation, and loads can be limited to 75% of device rating.
Motor-generators can extend ride-through to as long as 20 seconds. Check the CPU manufacturer to determine whether synchronous 60 Hz power is needed or whether induction motor drives with lower (varying) frequency output power can be tolerated.
UPS can extend ride-through to typically 5-30 min or longer.
UPS installation with emergency standby diesel power can extend ride-through almost indefinitely.
Examine the power conditioner or independent power source for its limits on load current, kVA and kW output. This will vary with power factor of the load. Some devices such as static UPS have very little overload capability and depend upon a stiff, low impedance bypass power source (usually the public utility) to supply large starting loads. Verify that the power source and any bypass will supply all inrush needs and still provide the power quality which is needed.
If voltage regulators are used, verify that their response times are fast enough to follow line voltage changes, yet will not interact with regulators in the sensitive loads.
Determine if a step by step approach to power conditioning will benefit your installation. For optimum lowest dollar outlay consider first a power conditioner with “conversion” capability to battery support in the field, at some later date, without loss of initial investment. Recent developments in technologies provide installations at 50% of UPS dollars which perform at 95% to 98% of UPS levels. - What are the predicted line voltage sags, surges, and impulse transients? Note that ordinary switching of loads can be expected to create momentary impulse voltages as high as the peak value of the sine wave.
- What are the significant sources of load induced transients? Consider the following ideas to minimize their effects:
Specify and order “soft start” system options.
Put units with high inrush on separate circuits.
Put highly sensitive units and other units which create disturbances on separate shielded isolating transformers.
25.1.6 Earthing for consistent noise suppression
- Are earthing requirements of the sensitive electronics manufacturer consistent with FIPS PUB 94 and local wiring regulations? Differences and underlying rationale should be discussed and agreed to. There may be good reasons for differences.
- Is a shielded transformer required or recommended? This affects the point where computer logic earth conductors and power source neutral earthing points will come together at a common point.
- Will all conductors (power, communications and earth) be brought to the point of delivery to your system through one very close coupled “entrance” or “window”? Scattering the entrances and exits for the wiring increases the risk of noise voltages and transient impulses circulating through the system.
- Where will the system’s central earthing point be located? If a modular power center (power peripheral) is used, it may be located there.
- Will the computer room raised floor structure be specified with interconnecting bolted horizontal struts, suitable for use as a signal reference grid? This could save much money compared with construction using copper conductors or straps, and could enhance performance.
- Are the earth conductors for non-sensitive equipment separated from sensitive earthing conductors except at some upstream common connection, typically at the building service equipment or other common separately derived power source (such as a transformer)?
- Will the communications and power earthing systems in the building be bonded together at an appropriate upstream common point? This is needed for safety and to minimize noise voltage differences without providing conducting paths through the earth conductors of the sensitive system.
- Are all earthing conductors and conducting pipes which penetrate the sensitive area bonded together by short, robust connections before they enter the computer room.
- Are all sensitive units and their accessories listed or approved by UL or other acceptable safety testing laboratory which is recognized by the municipality in which the units are to be installed?
- Do the premises wiring meet the local/national electrical code requirements? Does installation comply with UL listing by the manufacturer?
25.1.7 Redundancy requirements
- Perform a simple failure analysis by assuming that each piece of equipment, its power source, and wiring devices can fail or must be de-energized for service. How will the sensitive system continue to function and recover in such instances? Will redundant bypass paths in the power sources around conditioning equipment and major pieces of electrical apparatus provide the ability to continue in the event of failure, service or replacement?
- Review the above in light of probable failure rates and frequency of necessary maintenance attentions.
- Should margin for future growth be supplied by redundant smaller units rather than initially selecting a single unit adequate for all expected future growth?
- Is there sufficient floor space and HVAC capacity to enable a new system to be installed and to become operational before dismantling the existing unit? Reserve amounts of power may not require power conditioning for this purpose, but once a new system is operational; there is the problem of transferring the power source with a minimum interruption of service.
25.1.8 Data communications protection
- What level of security is to be provided for data lines entering or exiting the computer room?
- Has consideration been given to the routing of data lines with regard to nearby induced interference?
- Will power and communication earthing be done to reject noise from the date lines?
- What level of protection has been incorporated in data lines leaving the building?
- What techniques for shield/protection have been approved by the CPU manufacturer?
- Is the installer qualified in the installation and termination of the specific cable system selected?
25.1.9 Room construction and access security
- Construction methods and planning considerations.
Will all mechanical and piping layouts be routed to avoid any damage to sensitive electronics and special power equipment (UPS)?
What consideration is to be made for on-site data back-up storage?
Will construction materials be chosen that will prevent degradation of site integrity?
Will room lighting distribution be adequate for both operations as well as for maintenance?
Does the floor space layout provide for optimum isolation of sensitive processing equipment from noise producing peripherals, i.e. – bursters, electronic printers, image processors etc.
Will special construction techniques be required due to unusual conditions near the facility (i.e. RF shielding, or “clean room” demands, or special operational requirements)? - Raised Floor Installation
Have strength requirements been evaluated in selecting floor vendor?
What type of “grid” support system has been selected?
Has floor surface been selected with an eye to maintaining low static and contamination properties?
Has floor design included a separate access system for data cables such as trays or racks?
What instructions have been given for sub-floor sealing?
Has the floor plan provided for ease of access?
Will high frequency noise damping be co-coordinated with 60 Hz noise rejection practices? - Fire Suppression Design and Implementation
Have CPU vendor requirements been used to select type of fire suppression system?
What considerations have been given to fire zone layout and control?
Will “back-up” or redundant systems be required? Will “dump tests” be required?
Have fire or smoke recovery plans been prepared?
Have insurance carriers been included in planning for maximum savings in rate structure? - Card Access Security System
Will the security system be self-contained (local) or part of an overall building system?
What variety of access levels will be required per physical area? Per machine? Per management level?
Will master microprocessor control features be required?
Will special reporting and support features be necessary for the system (Large transaction memory, “lost” communication capability, self-contained UPS)?
25.1.10 Fire protection
- Will a complete “Hazard Review” be performed in conjunction with the requirements of the insurance carrier or underwriter?
- Which application approach will serve the hazards protected?
A “total flooding” system consisting of a fixed supply of extinguishing agent permanently connected to fixed piping with fixed nozzles arranged to discharge agent into an enclosed space or enclosure about the hazard?
A “local application” system of a fixed supply of extinguishing agent permanently connected to a system of fixed piping with nozzles arranged to discharge directly into
the fire? - Will the protection system selected and its application approach reflect the most economical protection with the highest levels of recovery for your equipment?
Water and foam systems and the clean-up required?
Carbon Dioxide and Dry Chemical systems with residue?
Halon 1301 systems avoiding residue, clean-up and personal harm but needing more accurate control systems?
Selection of agent suitability for application systems? - Will detector selection be based upon multiple characteristics required? Ionization, photoelectric, ultra violet or infra-red detectors? What special characteristics of area of zone placement will be needed?
- Will the agent delivery system be central or distributed?
What type of delivery piping will be used (balanced or unbalanced)? Will release be simultaneous or staggered in successive areas? What concentration?
Will time delay warning and manual override be provided?
Will either a connected reserve or a concentration test be required? - Control interconnections.
Will interconnection to power shutdown, remote signaling or air flow dampers be required?
Will alarm signal be interfaced with entire building system or transmitted directly to fire stations or security companies?
25.1.11 Process cooling
- Has the CPU manufacturer been consulted for recommended design levels of temperature and humidity (not maximum tolerance levels)?
- Has the BTU load density and sensible heat ratio been taken into consideration? Will units employ step unloading controls?
- What decisions have been made about outside air quantity? Amount of air circulated? Method of air distribution? Emergency shutdown?
- Has raised floor plenum allowed for air flow around “congestion” or under floor obstacles (cables, pipes, trays, data lines)?
- Will room construction design employ a vapor barrier? Complete concrete floor seal? Sub-floor drains for water escape?
- Are there special particulate problems requiring customized filtration equipment? Have you placed “dust” producers near to air return instead of outflow?
- What considerations for redundant equipment have been made in the light of downtime consequences? Modern design dictates multiple compressor systems which are prepared to furnish full process cooling control by any 3 out of 4 compressors.
25.1.12 Radiated interference protection system
- Has an RFI or EMI study been performed on-site? Are results available to room planners?
- What radio frequency operations are located near the computer area (radar, microwave, transmitters, etc)?
- Has all the sensitive manufacturer’s equipment been certified with the latest FRI endorsements?
- Will your future sensitive equipment be susceptive to RFI?
- Have unshielded RF sources been employed in the room construction (fluorescent lamps, electronic air cleaners, etc)?
- Has consideration been given to room screening techniques during the general construction phase?
25.1.13 Environment control and life safety co-ordination
- Have overall design, installation, specification conformance, acceptance, testing and training been assigned to a single responsible co-coordinator?
- How will the overall system be tested or maintained without risk of discharging Halon, setting off fire alarms, or shutting down operations? (Has an “off-line” control system verification been designed into the planned configuration?)
- Is the designed system easy to understand, maintain and operate? Is its location convenient and conducive to its use?
- Will the total system be flexible for on-site expansion without necessitating piecemeal additions?
- Does the design consider all aspects of site environmental control including areas not yet selected by the owner?
- Can the minimum control system be upgraded to microprocessor computer control without major component replacement?
- Are ambient condition warning systems in place for all areas to be protected?
- Can functional control selection of each area be field modified (install trip, time delay trip, alarm only)?
25.1.14 Static electricity
- Humidity not less than 40% nor more than 60%.
- Appropriate floor covering (pressure laminate with upper limit of 20,000 megohms of resistance to earth and surface resistivity).
- Carpeting to have acceptable low propensity to static (below 2,000 V at 40% relative humidity).
- Appropriate static-free floor care materials and cleaning methods.
- Furniture surfaces and upholstery with low static propensity.
- Restrictions on static-prone clothing and footwear.
- Precondition printing media, tape and punched cards in controlled humidity storage area prior to bringing into the processing room.
- Select equipment which has been designed and tested to withstand electrostatic discharge (ESD) to 10 kV or more without failure.
25.1.15 Lightning protection
- Does the building structure have lightning protection (refer to Underwriters Laboratories Inc. Subject 96A, National Fire Protection Association, Lightning Code NFPA 78, AS/NZS-1768 or IEC-1025)?
- Building in which structural steel in bonded together by welding (as opposed to reinforcing steel in concrete which is electrically discontinuous or merely touching) offers better lightning protection of circuits within the building.
- Conductive parts from roof-mounted equipment (lightning rods) should not rate a path to earth via sensitive circuits. Air conditioning coolant pipes from the roof to computer room air handlers must not become a direct path for lightning to reach critical circuits, or room central earthing points. All metallic runs should enter and exit at a single access point where all points are bonded together and earthed to the building steel, in accord with Section 6.3.
- Are lightning protection conductors to earth separated by at least 2 meters (6 ft) from sensitive power or communications circuits to avoid induced noise? Are they taken to earth by a separate path from the equipment earth system?
- All incoming power and communications equipment conductors should be protected by surge protection devices having shunt overvoltage paths to earth and series impedances, to limit surge currents. The place for secondary lightning protection is at the building entrance. Supplementary protection should be placed at the input and output of load devices such as rectifier/chargers for UPS installations, motor-generators and voltage regulators, as well as at the load devices themselves, and their communication ports.
- Does secondary lightning protection include wave front modification? Does installation utilize most efficient “3 stage” transient suppression? The first part of secondary protection is necessary at the building service entrance. Here the large energy must be dissipated to the building service earth, without interference with sensitive electronics. The second part of this protection, at “downstream” locations, is to protect from low level voltage transients which may pass through the large energy protector. In order to achieve complete protection, it is critical that these two separate applications be done together with a co-coordinated approach capable of handling all lightning surge levels.
25.1.16 Single center of responsibility and technical supervision
- Will the responsible site preparation co-coordinator be selected on the basis of his record of comprehensive supervision of data processing electrical/mechanical enhancement on a regular basis?
- Does the co-coordinator have the capability to instruct and diagnose in the environment from the CPU manufacturer’s perspective, merging the operational integrity required with the provisions of safety codes and conventional construction practices?
- Will the co-coordinator supervise/train both installers and operators in the “up-time” operation and maintenance of the site? Training should be offered at repeated intervals, with “hands-on” experience required of those trained. Simulated faults or failures should be combined with use of the documentation during these sessions.
- Will the responsible co-coordinator perform and submit to the owner or his representative an “as-built” certification review defining the level of protection and operational integrity viewed from the CPU manufacturer’s perspective.
- It is recommended that a competent architect/engineer be employed to supervise the preparation of specifications, contract awards, inspection of delivered materials, and completion of installation. The architect/engineer’s services may be enhanced by the services of site preparation co-coordinators attending to the special needs of the site as viewed from the CPU manufacturer’s perspective.
- Acceptance criteria based upon performance tests after installation are recommended. These should be under the supervision of qualified site preparation co-coordinators, and should approach full load stress conditions if possible.
- Periodic re-inspections of the complete system should be scheduled not only to verify continued compliance with system integrity, but to re-train and re-emphasize operating sequences. Annual studies with graphics power disturbance analyzers should be performed in order to record any conditions in powering or earthing which would require attention before causing problems in the hardware or software, i.e. increasing harmonic distortion, radiated interference, or magnetic influences.
25.1.17 Documentation
- It is recommended that procurement specifications require delivery of documentation for all electrical apparatus. This should include instruction manuals, service manuals, schematics, part identifications adjustment criteria and all other information needed to properly service the equipment. This documentation and selected spare parts should be maintained on-site.
- All on-site wiring and interconnections, fuse or circuit breaker ratings, conductor wire sizes, terminal block connection schedules, and circuit identifications should be included and updated on “as built” drawings.
- Each panel board, disconnecting switch, fuse or circuit breaker should have labels identifying the power source as well as the loads controlled by each device. These should correspond to identifications on drawings and connection schedules. The size and type of each fuse should be clearly labeled on each device as well. Each interconnecting feeder should be identified by a name and/or number and be listed in a schedule of connections.
- Establish a maintenance log including a schedule of maintenance service to be performed, and the steps taken to diagnose and repair or adapt to the difficulties encountered.
- Create a record of change made to the documentation. Keep it current with “as built” and “as installed” configurations. Record all changes made from time to time. Make spare copies and keep originals in a separate place where they can be reproduced if working copies are lost, mutilated or destroyed.
- Oversee extended warranty and maintenance recommendations as presented and at the selection of the owner.
- One of the most effective methods to support your installation from first to last is to use audit software designed to provide all procedures from initial evaluations to detail application of the national codes and standards. You may keep your design directions and your power quality improvements all together in a single case file.
25.2 Equipment selection specifications
In our next diagrams we have recommendations for equipment specifications and the system considerations that you will face as you look at specifying equipment.
The most important aspects will be discussed below. Understanding the power factor and dynamic response conditions, especially in harmonic distortion characteristic, will be important as you select the piece of equipment to service your particular location. You may wish to study how your supplier could give your partial load efficiency in which you might get the optimum efficiency from a 40% to a 70% load operation, rather than a conventional way of increasing efficiency all the way up to a 100% load. Impedance considerations on your circuit will be important to make sure that you have the lowest possible impedance available so that the harmonic currents that are being drawn will be limited in the type of voltage distortion that they make.
Some other points to consider are: capability to judge the overload capacity, the magnitude of the amount of overload that you will be able to take, the ability to provide good load isolation in order to prevent the transfer of electrical noise, to be able to rely upon equipment transfer switching from output to bypass and back and forth. It will be important to you to decide how best your equipment configuration can serve you whether it should be a single unit or one of the forms of parallel or redundant operation that we discussed before.
One item that is often omitted from many specifications is concern about the site testing. Many times we have tests performed at the manufacturer’s location, but we fail to do any kind of acceptance testing or load bank testing when we actually have the equipment on site and are ready to perform a final acceptance on that equipment.
The area of preventive maintenance should not be neglected. First of all, it is important that those who are doing the maintenance might be able to understand the purpose behind the specifying of certain critical types of parameters. If the maintenance personnel are not committed to maintaining those special specifications, then all that went into specifying equipment may be lost when someone maintains it without the proper understanding of its function.
A summary of the considerations is as follows in Table 25.1.
Equipment Specification
| Equipment Specifications |
| System Considerations |
|
| On Site Testing |
|
| Preventative Maintenance |
|
25.3 Building maintenance analysis
Another way of looking at the maintenance check listing is according to Table 25.2 where we have outlined a building maintenance analysis list. The list consists of what we would call, in the left hand column, the normal electrical preventative maintenance. In the center column we have listed the category of the equipment to be examined. In the right hand column we have listed those systems of checks which we might call power quality system compatibility. These are items that would not normally be done in regular electrical preventative maintenance, which now become rather critical if we are going to maintain a solid up-time on our systems. You will notice as you go down the right hand column the various things that we have discussed in the manual that may involve you and a portion of your system and be something that is not normally found in the conventional form of electrical preventive maintenance.
25.3.1 Computerized maintenance schedules
Consider the man who is operating his facility on a total computerized maintenance plan and has used all of the information pertinent to his production line equipment and his auxiliary equipment. He has stored this data in a computer program that tells him when to perform maintenance, for how long, and provides him with an estimate of total operating up-time. Consider what would happen to this computerized maintenance program if some power quality incompatibility was to stop a production line for a short period of time or interfere with some other form of output. Our suggestion is that this facility might drop from a very high utilization up-time to something that is 10%, 15% or 20% below what is expected.
Building Maintenance Analysis
| Electrical Preventative Maintenance | Equipment Examined | Power Quality System Capability |
| Capacity checks, verify operations. | Data/computer systems. | Wiring system electrical noise corruption, shut downs and errors, overheated neutral wires. |
| Examine feeders, lighting level and efficiency. | Lighting systems. | Harmonic overload on wiring, interaction with building power. |
| Check size of wiring and operational behavior. | Electronic technology areas. | Inrush capacity, system distortion, power conditioner failure. |
| Load testing, battery examinations, system operating performance. | Special power systems. | UPS failure to accept load, harmonic distortion into power system. |
| Measure voltage, current and temperature. | Transformers, panels and wiring. | Measure current harmonics, voltage distortion, over heating from high frequency. |
| Electro/mechanical maintenance, batteries startup and transfer to load. | Engine generator systems. | Harmonic load acceptance, high frequency interaction, failure to synchronize. |
| Operating checks, conventional electrical tests. | Elevator systems. | Control interaction with power system, non-linear currents. |
| MCC sizing, control checks and operating sequence. | Air handling. | VAV false tripping, harmonic distortion, high motor noise, induction motor failures. |
25.4 Power quality versus reliability
In summary of our checklist, we might consider the following which list the question of power quality versus reliably. Several questions are raised giving you some lead as to where things are located and what has been happening to them. What kind of symptoms have you observed in your location? What types of physical evidence might indicate that power is the culprit? Has there been any recent work or any new equipment installed in the location? All of these are important in doing an assessment of what is taking place.
25.4.1 Which conditions are taking place?
Remember some of those terms we have been talking about: sags, swells, flicker, momentary or sustained outage, harmonics interaction, voltages that are high or low and electrical noise. Which one of these can be identified as only a power quality or a reliability problem?
Power Quality versus Reliability
| Power Quality vs. Reliability |
|
What symptoms are being observed in the site? Lights off or flickering Systems upsets Equipment/product damage Physical evidence implicating power? Circuit breakers Transformers Conductor connections Any recent work on the electrical distribution? – Any new equipment been installed? – Utility operation review Substation and distribution operation |
Power Quality or Reliability
| Power Quality or Reliability? |
|
Sag Swell Flicker Outage - Momentary - Sustained Harmonics High/Low voltage Noise Can any of the above be identified as only a Power Quality of Reliability problem? |
25.5 Typical project approach
The typical project approach is discussed briefly here. Here is an example of one used by one of the large international architectural and engineering firms, Lockwood Green Company. Like many other specialty functions you may add this type of consultation to the regular architectural, electrical, civil and master planning functions when you are doing a complete project.
In the selection of your project co-coordinators and vendors, remember to ask (and receive acknowledgement) of how they understand the latest standards for your area. How does the digital electronics supplier or vendor fit into the equation? Has anyone looked at the equipment interaction and co-ordination that is necessary? Will you make sure of the installation, operation and maintenance expectations for your project?
A table of typical considerations for selection of site preparation vendors is contained in Table 25.5.

Typical Project Approach
Considerations in Selection of Site Preparation Vendors
| Considerations for Selecting Site Preparation Vendors |
|
Latest Standards Extensive co-operation is necessary between site preparation vendors and the CPU manufacturers. Changes in hardware or operating systems may dictate major changes in site preparation practices. In the absence of a single “master” site preparation manual, new voluntary Federal guidelines (FIPS PUB 94) serve to bring to all site participants a better understanding of each critical perspective. CPU Vendor Expectations Understanding the problems of component stress, data corruption, latent hardware failures, and system degradation, permits site enhancement before encountering these phenomena. Vendor maintenance and service programs will depend on a high level of site protection. Equipment Interaction and Co-Ordination The practical application of the combined disciplines in site preparation co-ordination is essential in order to prevent equipment “interaction”. CPU power supply technology has been changing to improve system speed and capacity. Older power conditioning techniques now will not “match” with new style switching power supplies. Temperature, humidity, and fire protection must be coordinated so as to promote meaningful protection. Electrical noise rejection must be effective or unexplained “downtime” will rob operational efficiency or damage equipment. Installation, Operation and Maintenance Site co-ordination begins with standards and functional expectations, but must continue through installation, operation and maintenance. Separate installation provided with conventional construction methods may void the design intentions or open the door to site degradation. Operational instruction will be needed to match the CPU vendor expectations at the site, and maintenance practices will be a critical part of preserving operational integrity. |
26
Testing & Periodic Inspection and Maintenance of UPS Batteries
In this chapter, we will discuss the testing and periodic inspections of the equipment and also the description, operation, testing and maintenance of UPS batteries.
Learning objective
- Introduction to electrical testing
- Description of uninterruptible power supply (UPS)
- Operation of UPS system
- Commissioning test plan for the UPS system
- Installation Inspection and component testing of the UPS system
- Energizing and testing of UPS system
- Possible failures and corrective actions
- Test equipment
- Periodic inspection and maintenance of UPS Batteries
26.1 Introduction
The purpose of electrical testing on systems and their components is two-fold. The first is to check the installation of the equipment and perform component and systems tests to ensure that, when energized, the system will function properly. The second is to develop a set of baseline test results for comparison in future testing to identify equipment deterioration.
There are four categories of tests for electrical equipment:
- factory,
- acceptance,
- routine maintenance, and
- special maintenance.
Factory tests are performed at the factory to prove the equipment was manufactured properly and meets specific design parameters.
Acceptance tests are also proof tests performed on new equipment and systems usually after installation and before energization. Acceptance testing is a system verification and functional performance test which should be performed on the UPS system.
These tests will include installation inspections, individual component testing, testing on wiring, control and interlock functional checks, equipment energization and system operating measurements, and functional checks. The acceptance tests are usually run at 80 percent and the maintenance tests are usually run at 60 percent of the factory test voltage values to help indicate deterioration without being destructive.
Routine and special maintenance tests are run after the equipment has been in service for a certain amount of time to determine the degree of deterioration of certain equipment physical parameters as operating time increases. Routine tests are performed on a periodic basis and special tests are performed on defective equipment to help determine the cause of a failure and/or the extent of the damage. The same type of tests and measurements are performed for all of the categories using different voltage values.
Commissioning tests are usually performed by independent contractors, the installation contractor, or the manufacturer. Each commissioning test should be witnessed and approved by a person not associated professionally with the person performing the test.
The system should be initially checked for damage, deterioration, and component failures using specific component checks, inspections, and tests defined by the equipment manufacturer. Then the interconnection of the system components should be checked, using de-energized and energized methods, to verify the proper interconnection and operation of the components, including on/off control, system process interlocks, and protective relaying functions. Once the above tests are complete, the system can be energized and operational tests and measurements should be performed.
All steps and results of the testing should be carefully documented for review and for use in the future for comparison with the results of future tests. Many of the same component tests initially run will be performed at regular intervals as part of a maintenance program. The new results will be compared to the initial results, where variations may be indicative of problems like deterioration of insulation or dirty equipment. The steps involved are to review the system and equipment, develop a general system and specific equipment test plan, provide inspection and checks, perform component testing, verify and check the continuity of wiring, check control functions, calibrate instruments and relays, energize portions of the circuits and check for proper operation in a specific order, and, once complete, perform specific checks and control tests on the complete system during initial period of operation.

UPS
26.2 UPS systems
The first step towards acceptance of any device is verification of nameplate data. The nameplate on all equipment shall be checked against one-lines and schematics. All equipment shall be carefully examined upon receipt to ensure that no damage has occurred during shipment. The Static UPS System consists of the battery charger, inverter, battery, transfer switch, circuit breakers, and cables.
Of the UPS system (see figure 26.1), the component testing for the battery charger, battery, transfer switch, circuit breakers, and cables are described individually in this manual. The inverter is similar in construction to the charger. It converts dc power to ac power using solid state electronics. Therefore, this device should not be megger tested. The completeness of the assembly shall be confirmed.
A visual inspection should be performed to verify the correctness of installations, supports, grounding, and wiring. Verify that the air inlets are not obstructed. The interconnections shall be checked against the wiring schematic to ensure the proper phasing and voltage connections. For example, both the battery charger connections to the battery and the battery to the inverter should be checked to insure that they have the correct polarity. Measure the input voltage provided by the battery and record. Measure the output voltage and current from the inverter and record. Verify that these values correspond to the design values.
26.2.1 Description of uninterruptible power supply (UPS) system
The following is a sample uninterruptible power supply (UPS) system with associated one-line and wiring diagrams for use as a guide for implementing the test procedures described in the preceding chapters of this manual.
Figure description
The uninterruptible power supply system consists of the following equipment: 480V utility feeder breaker, 0V generator and feeder breaker, 480V transfer switch, 200 kVA redundant UPS (two 200 kVA modules), 126 Vdc NiCad batteries and a 208/120V UPS switchboard panel. Each 200 kVA UPS module consists of the following equipment: 480V incoming breaker, 126 Vdc rectifiers, redundant 120/208 VAC inverters, static switches, bypass switches and miscellaneous breakers. The equipment, accessories, interconnection, ratings, cabling, etc. are shown on Figure 26.2.

Uninterruptible power system single line diagram

Uninterruptible power system block diagram

Uninterruptible power system wiring diagram (figures only show part of typical diagrams).
Switching
The utility and generator breakers are metal enclosed free standing, manually operated, air power circuit breakers. The breakers have instantaneous, short time, and long time trip settings with manual control and position indication on the door of the breaker compartment. The 480V transfer switch is metal enclosed, break before make, dead bus transfer, automatic on loss of voltage, solenoid operated, and mechanically held complete with microprocessor controls and indication, four pole switch. Transfer time and time delay settings are adjustable. The transfer switch will supply start and stop signals to the back-up diesel generator upon loss of and restoration of utility power. These controls are timed and must be coordinated with the diesel generator manufacturer for start-up, loading, and cool down times. Remote indication, control, alarm, etc. functions are also available.
UPS operation
The UPS is a static solid state system with a battery for back-up power. The rectifiers convert ac to dc power for supply to the redundant inverters and for charging the battery. The inverters receive power from either the rectifier or battery, and convert it from dc to ac. The inverters also include power conditioning equipment and circuits to remove harmonics developed in the system. Because the input power is converted from ac to dc to ac, power system disturbances are also removed from the UPS output. This makes UPSs ideal for use with sensitive electronic equipment and computers. The rectifiers and inverters are constructed with power diodes or silicon control rectifiers along with controls and filtering circuitry. The UPS also contains thermal magnetic molded case circuit breakers and two bump less static switches. The switches will transfer the output of the UPS from one redundant inverter to the other upon failure of the lead inverter. The transfer between the inverters is accomplished with absolutely no loss of continuity of power to the load. In the sample system, as shown in figure 26.2, the two UPS modules are both sized to supply the entire load independent of one another. The 208/120 V switchboard is a metal enclosed, wall-mounted distribution panel with incoming and feeder unadjustable thermal magnetic molded case circuit breakers. The switchboard also receives a backup power supply from the utility power center for use during the maintenance of the UPS through two bypass switches.
Battery description
The nickel cadmium (NiCad) batteries are individual 1.2 volt cells in plastic or steel cases with nickel and cadmium plates in a potassium hydroxide solution. The cells are sealed, maintenance free and connected together in series on racks to supply 126 Vdc. The 120/208V UPS switchboard panel contains two main and numerous molded case thermal magnetic circuit breakers to distribute the power. The breakers have instantaneous and over current element trip characteristics. The UPS system provides normal and uninterruptible regulated power to sensitive emergency plant loads, like computers, communications, radar, security systems, lighting, etc.
26.2.2 Operation of uninterruptible power supply system
The UPS system should be tested in all modes of operation. Examples of operating modes for the UPS system are as follows:
Normal condition: Utility breaker closed, diesel generator not running but in auto mode, diesel generator breaker closed, transfer switch connected to utility, inverter A, primary module, connected through UPS static switch to UPS bus, all module circuit breakers closed, and UPS switchboard connected to the UPS (module A).
Loss of module one (primary): Loss of circuit breaker, rectifier, or inverter results in static switch changing to module two. Test should be performed with each component of module one malfunctioning.
Loss of module two (primary): Loss of circuit breaker, rectifier, or inverter results in static switch changing to module one. Test should be performed with each component of module two malfunctioning.
Loss of utility power: Battery supplies power to UPS bus through inverter A or B, transfer switch supplies start signal to diesel generator, diesel generator starts and ramps up to speed and transfer switch connects to diesel generator.
Restoration of utility: Utility power restored, transfer switch changes position to utility bus and diesel generator shuts down after a pre-set time.
26.2.3 Commissioning test plan for the UPS system
A system verification and functional performance test should be performed on the UPS system. These tests will include installation inspections, individual component testing, testing on wiring, control and interlock functional checks, equipment energization and system operating measurements and functional checks. The system operation should be verified for each mode of operation identified in the SOD and ascertain that system will operate as designed as components operate normally and/or abnormally (e.g., the pull-the-plug test).
26.2.4 Installation inspections and component testing of the UPS system
The following components are part of a typical UPS system. These components should be inspected and/or tested in accordance with information specified below. The checks can be considered part of the pre-checks or functional performance tests (FTPs).
Utility and generator circuit breakers: Check completeness of assembly, verification of nameplate, sizes and settings against drawings. Check for loose parts and insulation damage, breaker alignment and manual operation (leave circuit breaker open) and bus insulation resistance (if not previously energized).Figure 26.5 (DA Form 7469-R) shows a completed checklist for circuit breakers.

Sample of completed DA form
Transfer switch: Check completeness of assembly, verification of nameplate, sizes and settings against drawings. Check for loose parts and insulation damage, switch alignment and manual operation; switch insulation resistance (phase-to-phase and phase-to-ground), PT and control fuse size and continuity, ground connection and check timer settings. Figure 26.6 shows a completed DA Form 7471-R for a transfer switch inspection.

Sample of completed DA form (Transfer switch inspection)
UPS: Check completeness of assembly, verification of nameplate, sizes and settings against drawings, loose parts and insulation damage, proper settings, control fuse size and continuity, ground connection, proper neutral connection, proper phase and voltage connections (incoming, battery, inverter A, and inverter B) and manual operation of circuit breakers (leave open). Figure 26.7 shows a completed DA Form 7472-R for the UPS inspection.

Sample of completed DA form (UPS inspection checklist)
NiCad battery: Check completeness of assembly, verification of nameplate, sizes and connection against drawings, check loose parts, leaks, or damage, electrolyte level, vents sealed and plugs installed grounding and measure voltage. Figure 26.8 shows a completed DA Form 7473-R for a battery inspection.

Sample of completed DA form (battery inspection Checklist)
UPS switchboard: Check completeness of assembly, verification of nameplate, sizes and settings against drawings. Loose parts and insulation damage, ground connection, proper phase, voltage connections and manual operation of circuit breakers (leave open). Figure 26.9 shows a completed DA Form 7474-R for the switchboard inspection.

Sample of completed DA form (UPS switchboard inspection checklist)
Cabling: Verify proper use, voltage, labeling, and connection using drawings. Check tightness and neatness of termination and power cable insulation resistance (phase-to-phase and phase-to-ground). See figure 26.10 (DA Form 7466-R) for sample of completed checklist.

Example of completed DA form (switchgear inspection checklist)
Visual and electrical wiring inspections
The termination of each cable, shown on the cable block and wiring diagrams, should be checked to insure each conductor matches the wiring and schematic diagrams. This is performed by yellowing each connection between components on the schematic and wiring diagrams; visually inspecting each connection for cable number, wire number/color, and terminal; and checking point-to-point continuity or “ringing out” each wire from end to end including grounds. For example (figure 26.4) Cable BGATS1 from Automatic Transfer Switch to the Backup Generator should be checked to verify that the “black” wire is terminated as follows as shown on the schematic and wiring diagrams:
| Equipment | Terminal No. |
| Automatic Transfer Switch | B1 |
| Backup Generator | T1 |
As this is done, the wire on each drawing should be colored or highlighted to show its termination has been checked. This process should be completed for all field wiring as a minimum and internal wiring if not previously performed at the factory where practical.
26.2.5 Energizing and testing of the UPS system
The following steps are performed to energize and test the UPS system.
Initial energization: Individual components of the UPS system should be sequentially energized from the source through the loads. As each item is energized, control functions, interlocks, and alarms should be checked for proper operation. Voltage, phasing, and current measurements should be made at each step.
Utility breaker: Verify diesel generator breaker opens. The system operation should be verified for each mode of operation identified in the SOD and ascertain that system will operate as designed as components operate normally and/or abnormally. Verify incoming voltage, manually close the utility breaker, measure outgoing voltage and phasing of breaker, measure incoming voltage of transfer switch and note position of transfer switch and manually open breaker.
Diesel generator breaker: Verify utility breaker opens, start diesel generator, verify diesel generator voltage, verify diesel generator and utility voltage have same magnitude and phasing, manually close diesel breaker, measure outgoing voltage and phasing, measure voltage at transfer switch and note position of transfer switch, manually open breaker and stop diesel generator and place in auto.
Transfer switch: Verify diesel generator stopped and in auto, verify utility bus energized, manually close utility breaker. Verify position of transfer switch and indication light status, measure input and output voltage of transfer switch, check phasing of utility bus to output of transfer switch. Manually open utility breaker. Diesel generator should start and switch should transfer to diesel generator. Note timing of diesel generator start and transfer from opening of utility breaker. Manually close utility breaker. Switch should transfer to utility and diesel generator should stop after a preset time (verify timing). Note timing of transfer and diesel generator stop from closing of utility breaker. Push test switch to simulate normal source failure. Verify diesel generator starts and transfer switch changes to diesel generator power, return switch to utility feed and verify diesel generator stops.
UPS (rectifier/ battery charger/battery): Verify UPS incoming breaker open. Verify utility feed closed through to input of UPS and measure voltage and phasing. Verify rectifier/battery charger output A breaker open. Verify rectifier/battery charger output B breaker open. Verify battery breaker A open and measure battery voltage and polarity. Verify battery breaker B open and measure battery voltage and polarity. Verify inverter A and inverter B incoming breakers open. Close UPS incoming breaker A and measure rectifier/battery charger A output voltage, check dc output meter. Press battery “pre charge” button, if available, and close rectifier/battery charger A output breaker and close battery breaker A. Measure battery charger voltage. Allow unit to run until battery fully charged or for a minimum of 24 hours. Record time. Measure rectifier/battery charger A output current and read meter every 4 hours. Open UPS incoming breaker A. Operate UPS from battery until minimum voltage recorded (1 to 4 hours). Open battery breaker A. Close UPS incoming breaker B and measure rectifier/battery charger B output voltage, check dc output meter. Press battery “pre charge” button, if available, and close rectifier/battery charger B output breaker and close battery breaker B. Measure battery charger voltage. Allow unit to run until battery fully charged or for a minimum of 24 hours. Record time. Measure rectifier/battery charger B output current and read meter every 4 hours.
UPS (inverter/static switch): Verify UPS operational through rectifier/battery charger and battery. Verify UPS normal condition operation. (Conduct all procedures below with module one as primary. Repeat procedures with module two as primary.)
- Verify battery charged and on float.
- Measure float voltage
- Verify inverter A and inverter B breakers open.
- Verify static switch switched to inverter A.
- Close inverter A and B input breakers.
- Measure inverter A and inverter B output voltage and read meters.
- Verify inverter A and inverter B outputs in phase.
- Verify static switch in inverter A position.
Verify proper operation of static switches.
- Open inverter A incoming breaker.
- Verify static switch switches to inverter B.
- Measure voltage and ensure bump less.
- Close inverter A incoming breaker and verify static switch switches to A.
- Measure voltage and ensure bump less.
- Open inverter B incoming breaker and verify static switch stays connected to inverter A.
- Measure voltage and ensure bump less.
Verify low voltage trip.
- Open rectifier/battery charger output breakers.
- Open battery breakers.
- Verify inverter A and B trip on low voltage.
- Close rectifier battery charger B output breaker and battery breakers.
- Close inverter A and B input breakers.
- Open UPS incoming breakers.
- Verify inverter A and B output (feed from battery).
- Measure voltage and current.
- Close rectifier battery charger A output breaker and battery breakers.
- Open UPS incoming breaker.
- Verify inverter A and B output present (feed from battery).
- Measure voltage and current.
Loading UPS: Close incoming breaker to UPS bus. Verify UPS is energized through static switch. Verify all UPS loads connected properly and ready to start Close load breaker on UPS bus sequentially. Measure voltage and read UPS meters at each step. Add load until UPS loads equal normal design load. Run for 4 hours and check for overheating.
Utility trip test: Verify UPS is loaded and connected to utility. Manually open utility breaker. Verify battery picks up load. Read current. Verify diesel generator starts, transfer switch transfers to diesel generator, diesel generator picks up load, and battery returns to float charge mode. Measure voltage and current at UPS and ensure bump less transfer. Close utility breaker. Verify transfer switch transfers to utility, battery picks up load during transfer, diesel generator stops, and battery returns to float charge after utility picks up load. Measure voltage and current at UPS bus and ensure bump less transfer.
Inverter A to inverter B loaded transfer test: Verify UPS loaded and connected to utility. Open inverter A incoming breaker. Verify static switch switches to inverter B. Measure voltage and current at UPS bus and ensure bump less transfer. Close inverter A incoming breaker. Verify that static switch switches to inverter A. Measure voltage and current at UPS bus and ensure bump less transfer.
Battery discharge test: Verify UPS loaded and connected to utility. Notify plant of pending UPS trip. Open diesel generator breaker and block auto and manual start. Open utility breaker. Verify battery picks up load. Measure battery voltage and current. Measure UPS voltage and current and ensure bump less transfer. Operate UPS from battery until battery minimum voltage reached (1 to 4 hours). Record voltage. Verify inverter A and B trip when batteries reach minimum voltage. Notify plant of pending UPS re-energization. Reclose utility breaker. Close diesel generator breaker and return to auto start mode. Verify battery on float and charging, measure current. Verify when battery fully charged and record time to charge.
Checklists: The inspection is considered complete when the UPS System Inspection and Test (see Figure 26.11 for completed sample of DA Form 7475-R) is satisfactorily completed.

Example of completed DA form (UPS system inspection checklist)
26.2.6 Possible failures and corrective actions
Table 26.1 lists general problems that may arise during the testing of the equipment and systems along with possible troubleshooting techniques. For all problems, consult the equipment and component manuals for troubleshooting directions, check fuses/lights/breakers/etc. for continuity, check equipment calibration and settings, and look for faulty equipment or connections.
26.2.7 Test equipment
The amount of test equipment available should be appropriate to the amount of local use and should meet safety requirements. The user in some cases may have had some control over the amount of diagnostic and monitoring equipment, plus the special tools specified for UPS systems. In other cases, off-the-shelf equipment might have been installed. The maintenance personnel may be primarily electrically oriented. Such personnel may have had some training on UPS systems maintenance at one time. In some cases, highly qualified electronically oriented technicians may be available because of the need to service computer equipment. Because of the variations in UPS equipment and maintenance capability, a hard and fast list of recommended tools and test equipment cannot be given. Some general guidance is provided covering use of diagnostics, maintenance personnel, and ownership of equipment. Suggested checklists on maintenance test equipment are advisory only.
Circuit breaker corrective action

Rectifier/battery charger corrective action

Battery corrective action

Inverter/static switch corrective action

UPS system corrective action

Motor/engine corrective action

Generator corrective action

Suggested test accessory list for battery maintenance

Suggested test equipment list for troubleshooting an UPS module

26.3 Periodic inspection and maintenance of ups batteries
At present, there are no specific IEEE or ANSI standards that cover the testing or maintenance of UPS, radio, or other special application battery systems. However, based the recommendations of IEEE/ANSI 450 and IEEE/ANSI 1106, along with the manufacturers’ guidelines and user experience, an appropriate inspection and maintenance program can be evolved for such battery systems. A typical schedule is shown below.
26.3.1 Quarterly checks
| S. No. | Inspection activity recommended |
| 1 | Record the room temperature and examine the battery environment including the ventilating equipment. |
| 2 | Perform a detailed inspection of the battery system, including cells, racks, electrical connections, and grounding detector. Record and remedy such conditions as cracks, electrolyte leaks, post or connector corrosion or deposits, acid spills, and any other abnormal conditions. |
| 3 | Clean and/or eliminate any electrical ground leakage paths. |
| 4 | Clean inter-cell or inter-tier connectors and apply corrosion protection. |
| 5 | Measure and record the total float voltage and the voltage of the pilot cell. Measuring the pilot cell voltage serves as an indicator of battery condition between scheduled individual cell readings. |
| 6 | Check electrolyte level if applicable. |
| 7 | For lead-acid batteries, record the specific gravity of each cell, corrected to 77°F (25°C). |
26.3.2 Annual checks
| S. No. | Inspection activity recommended |
| 1 | Perform the recommended quarterly routine items. |
| 2 | Measure and record the cell-to-cell resistance and inspect and rehabilitate all inter-cell and interior connections as required |
| 3 | Perform a battery rundown test at approximately 50% of the rated battery time, rather than 100%, unless there is a specific requirement to do otherwise. |
| 4 | If convenient, perform a thermo graphic survey of all inter-cell and intertier connections and disconnecting devices during the rundown test. |
| 5 | Return the battery to service and perform a recharge cycle. |
| 6 | Record the total bank float voltage and individual cell voltages. |
27
Protective Relays
In this chapter we will learn the types of relays. Relays play a vital role in electrical protection system. Electromagnetic relays, static relays and microprocessor based relays are covered in detail. We will also discuss relay maintenance, and testing.
Learning objectives
- Primary and back-up protection
- classification of protective relays
- Electromagnetic relays
- Static relays
- Microprocessor based relays
- Maintenance and testing
27.1 Introduction
An electrical power system consists of generators, transformers, transmission and distribution lines, etc. Short circuits and other abnormal conditions often occur on a power system. The heavy current associated with short circuits is likely to cause damage to equipment if suitable protective relays and circuit breakers are not provided for the protection of each section of the power system. Short circuits are usually called faults.
If a fault occurs in an element of a power system, an automatic protective device is needed to isolate the faulty element as quickly as possible to keep the healthy section of the system in normal operation. The fault must be cleared within la fraction of a second. If a short circuit persists on a system for a longer period, it may cause damage to some important sections of the system. A heavy short circuit current may cause a fire. It may spread in the system and damage a part of it. The system voltage may reduce to a low level and individual generators in a power station or groups of generators in different power stations may lose synchronism. Thus, an un-cleared heavy short circuit may cause the total failure of the system.
A protective scheme includes circuit breakers and protective relays to isolate the faulty section of the system from the healthy sections. The function of a protective relay is to detect and locate a fault and issue a command to the circuit breaker to disconnect the faulty element. It senses abnormal conditions on a power system by constantly monitoring electrical quantities of the system (voltage, current, phase-angle and frequency), which differ under normal and abnormal conditions. A secondary function of protective relaying is to provide indication of the location and the type of failure.
A protective relay does not anticipate or prevent the occurrence of a fault; rather it takes action only after a fault has occurred. However, one exception to this is the Buchholz relay (a gas actuated relay), used for the protection of power transformers, gives an early warning of incipient faults, when a specified amount of gas is accumulated in the gas chamber.
27.2 Classification of protective relays
Protective relays can be broadly classified depending upon their technology and functionality. Classification of protective relays based on technology they are classified as follows:
- Electromagnetic relays
- Static relays
- Microprocessor-based relays
Electromagnetic relays: Electromagnetic relays include attracted armature, moving coil, induction disc and induction cup type relays. Electromagnetic relays contain an electromagnet (or a permanent magnet) and a moving part. When the actuating quantity exceeds a certain predetermined value, an operating torque is developed which is applied on the moving part. This causes the moving part to travel and close a contact to energize the trip coil of the circuit breaker
Static relays: Static relays contain electronic circuitry which may include transistors, ICs, diodes and other electronic components. There is a comparator circuit in the relay, which compares two or more currents or voltages and gives an output which is applied to either a slave relay or a thyristor circuit. The slave relay is an electromagnetic relay which finally closes the contact. Static relays possess the advantages of having low burden on the C.T. and P.T., fast operation, absence of mechanical inertia and contact trouble, long life and less maintenance.
Microprocessor-based protective relays: These are the latest protective relays. The inherent advantages of microprocessor-based relays over static relays with, or a very limited range of applications are attractive flexibility due to their programmable approach.
Electromagnetic relays: There are two principal types of electromagnetic relays:
- Attracted armature
- Electromagnetic induction
27.3 Attracted armature relay
Attracted armature relays include plunger, hinged armature, balanced beam and moving iron polarized relays. Plunger types operate by virtue of a plunger being drawn into a solenoid, or an armature being attracted to the poles of an electromagnet. These are the simplest type, which respond to ac as well as dc hinged armature relays are mainly used as auxiliary relays, e.g. tripping relays, ac and dc voltage and current relays.
27.4 Electromagnetic induction relays
These use the principle of the induction motor; this operating principle. Torque is produced when one alternating flux reacts with the current induced in the rotor by another alternating flux displaced in time and space but have the same frequency. Induction relays are widely used for protective relaying which involves ac quantities.
27.5 Overcurrent relays
The prefix “over” implies that the relay picks up to close a set of open contacts when the actuating quantity exceeds the magnitude for which the relay is adjusted to operate. An overcurrent relay is used for the protection of distribution lines, large motors, power equipment, etc. A scheme which incorporates overcurrent relays for the protection of an element of a power system is known as an overcurrent scheme or over current protection. Electromagnetic relays are widely used for overcurrent protection. The induction disc type construction is commonly used.
The operating time of all overcurrent relays tends to become asymptotic to a definite minimum value with increase in the value of current. This is inherent in electromagnetic relays due to saturation of the magnetic circuit. So by varying the point of saturation different characteristics are obtained; and the relays are further classified as:
- Definite time
- Inverse definite minimum time (IDMT)
- Very inverse
- Extremely inverse
27.6 Distance relays
Distance protection is a widely used protective scheme for the protection of high and extra high voltage (EHV) transmission and sub-transmission lines. The distance relays measure the impedance or some components of the line impedance at the relay location. The measured quantity is proportional to the line-length between the location of the relay and the point where the fault has occurred. As the measured quantity is proportional to the distance along the line, the measuring relays are called a distance relay.
A distance protection scheme is a non-unit system of protection. A single scheme provides both primary and back-up protection. The principal types of distance relays are:
- Impedance relay
- Reactance relay
- mho relay
- ohm relay
- Offset mho relay
27.7 Differential relays
The principle of operation depends on a simple circulating current principlewhere the difference of the currents of the two CTs flow through the relay under normal conditions or even under faults outside the protected section.
27.8 Static relays
The comparison or measurement of electrical quantities is performed by a static circuit which gives an output signal for the tripping of a circuit breaker. Most of the present day static relays include a dc polarized relay as a slave relay. The slave relay is an output device and does not perform the function of comparison or measurement. It simply closes contacts. It is used because of its low cost. In a fully static relay, a thyristor is used in place of the electromagnetic slave relay.
A static relay (or solid state relay) employs semiconductor diodes, transistors, zener diodes, thyristors, logic gates, etc. as its components. Now-a-days, integrated circuits are being used in place of transistors. They are more reliable and compact.
Induction cup units widely used for distance and directional relays were replaced by rectifier bridge type static relays which employed dc polarized relays as slave relays. Where overcurrent relays are needed, induction disc relays are in universal use throughout the world. But ultimately static relays will supersede all electromagnetic relays, except the attracted armature relays and dc polarized relays as these relays can control many circuits at low costs.
27.9 Comparators
When faults occur on a system, the magnitude of voltage and current, and phase angle between voltage and current may change. These quantities during faulty conditions are different from those under healthy conditions. The static relay circuit is designed to recognize the changes and to distinguish between healthy and faulty conditions. Either magnitudes of voltage/current (or corresponding derived quantities) are compared or phase angle between voltage and current (or corresponding derived quantities) are measured by the static relay circuitry and a trip signal is sent to the circuit breaker when a fault occurs. The part of the circuitry which compares the two actuating quantities either in amplitude or phase is known as the comparator.
There are two types of comparators:
- Amplitude comparator
- Phase comparator
27.9.1 Amplitude comparator
It compares the magnitudes of two input quantities, irrespective of the angle between them. One of the input quantities is an operating quantity and the other a restraining quantity. When the amplitude of the operating quantity exceeds the amplitude of the restraining quantity, the relay sends a tripping signal.
27.9.2 Types of amplitude comparators
As the ratio of the instantaneous values of sinusoidal inputs varies during the cycle, instantaneous comparison of two inputs is not possible unless at least one of the signals is rectified. There are various techniques to achieve instantaneous comparison. In some techniques both inputs are rectified. When only one input signal is rectified, the rectified quantity is compared with the value of the other input at a particular moment of the cycle. The amplitude comparison can be done in a number of different ways.
The following are some important methods which will be described to illustrate the principle.
- Circulating current type rectifier bridge comparator
- Phase splitting type comparator
- Sampling comparator
.
27.9.3 Phase comparator
A phase comparator compares two input quantities in phase angle, irrespective of their magnitudes and operates if the phase angle between them is ≤ 90°.
27.9.4 Type of phase comparators
Phase comparison can be made in a number of different ways. Some important techniques are described below:
- Vector product phase comparators
- Coincidence type phase comparators
27.10 Microprocessor based relays
With the development of economical, powerful and sophisticated microprocessors, there is a growing interest in developing microprocessor-based protective relays which are ore flexible because of being programmable and are superior to conventional electromagnetic and static relays.
27.10.1 Microprocessor based overcurrent relay
An overcurrent relay is the simplest form of protective relay which operates when the current in any circuit exceeds a certain predetermined value, i.e. the pick-up value. Using a multiplexer, the microprocessor can sense the fault currents of a number of circuits. If the fault current in any circuit exceeds the pick-up value, the microprocessor sends a tripping signal to the circuit breaker of the faulty circuit. As the microprocessor accepts signals in voltage form, the current signal derived from the current transformer is converted into a proportional voltage signal using a current to voltage converter. The ac voltage proportional to the load current is converted into dc voltage proportional to the load current.
27.10.2 Impedance relay
The characteristic of an impedance relay is realized by comparing voltage and current at the relay location. The ratio of voltage (V) to current (I) gives the impedance of the line section between the relay location and the fault point. The rectified voltage (Vdc) and rectified current (Idc) are proportional to V and I, respectively. Therefore, for comparison Vdc and Idc are used. The following condition should be satisfied for the operation of the relay.

Z < K
Where K1, K2 and K are constants
27.10.3 Directional relay
It senses the direction of the power flow. The polarity of the instantaneous value of the current at the moment of the voltage peak is examined to judge the direction of power flow. The program developed for this relay judges whether the fault point is in the forward or reverse direction with respect to relay location
27.10.4 Reactance relay
The characteristic of a reactance relay is realized by comparing the instantaneous value of the voltage at the moment of current zero against the rectified current. The instantaneous value of voltage at the moment of current zero is Vmsin Ø. For the operation of the relay, the condition to be satisfied is as follows:

Z sin Ø < K
X < K
27.10.5 Distance relay
In microprocessor-based distance relaying, the microprocessor calculates the active and reactive components (R and X) of the apparent impedance (Z) of the line from the relay location to the fault point from the ratios of the appropriate voltages and currents, and then compares the calculated values of R and X to the pickup value of the relay to be realized in order to determine whether the fault occurs within the protective zone of the relay or not.
27.11 Relay maintenance
Maintaining protective relays will ensure the highest degree of protection for the Power System Network. The protection engineer is concerned with limiting the effects of disturbances in a system network, which, if they persist, may damage the plant and interrupt the supply of energy. These disturbances, described as faults (short circuits and open circuits), or power swings, result from natural hazards, plant failure, or human error. The purpose of an electrical power system is to generate and supply electrical energy to consumers. The system should be designed and managed to deliver this energy to the utilization points with both reliability and continuity.
After a mint condition protective relay has been installed, deterioration may take place, which in time could interfere with the relay’s correct functioning. For example, contacts may become rough or burnt owing to frequent operation, or tarnished because of atmospheric contamination. Coils and other circuits may become open-circuited, electronic components may fail; mechanical parts may become clogged with dust or corroded to an extent that it may interfere with movement.
A peculiar difficulty of protective relays is that the time between operations may be measured in years, during which period defects may have developed unnoticed until revealed by the failure of the protection device to respond to a power system fault. For this reason, relays should be given simple basic tests, at suitable intervals, in order to check their reliability to operate has not deteriorated.
The other advantage of relay maintenance is that, using test results, relay coordination study and the conformity of the relay with the requirements of network protection can be checked. If the relay is not able to provide adequate discrimination of the protected zones, and if the relay does not have much selectivity, the relay maintenance will project whether protective gear needs an upgrade with new generation relays.
27.11.1 Periodic maintenance tests
The clearance of a fault on the system is correct only if the number of circuit breakers opened is the minimum necessary to remove the fault. A small number of faults are incorrectly cleared, the main reasons being:
- Limitations in protection design;
- Faulty relays;
- Defects in the Secondary wiring;
- Incorrect connections; and
- Incorrect settings.
Protective relay evaluation was started with:
- First generation: Electro-mechanical Relays
- Second generation: Static relays with Transistors
- Third generation: Static relays with Integrated Circuits
- Fourth generation: Processor based relays
Most of the relays of the first, second, and third generation relays do not have the capabilities of auto-testing of internal circuits or providing an alarm in case a failure is detected. Electro-mechanical relays have a lot of mechanical parts, which may become clogged with dirt or corroded due to environmental conditions, affecting both operation calibration and movement of the disks.
Static relays generally employ a lot of electronic components made by other manufacturers. If these electronic components are not tested with rigorous quality control, the chances of failure of components during the relay life time may exist. A reliable DC power source within the relay, to electronically measure circuits, has to be generated from available external power sources. Most of the static relays employ series, shunt, or switched mode power supply designs.
For a variety of reasons, if these power supplies fail, the measuring circuits are inoperative and the relay is dead for any measurements. No protection is available to the network. Most of the static relays in use do not have the means to detect the failure of power supply and initiate an alarm.
The fourth generation processor-based relays do have the watchdog feature which facilitates the checking of power supply rails, clock frequencies, and other patterns. Most of these relays have auto test features which test the electronic circuit functions.
The periodic maintenance tests performed after commissioning prove continued reliability; Accuracy limits; Levels of deterioration of components; Correctness in tripping circuit connections; Adopted settings and; fatal failure of a protective relay.
For periodic maintenance test results, we can also generate the following:
- Inadequacy of protection for the network
- Maintenance cycle required for particular type of relays
- Different manufacturers Protective relay functioning and behavior
- Requirements of upgrade with the new generation of relays
Protective relays may be in sound condition when first put into service, but many failures can develop unchecked because of infrequent operation. It is therefore advisable to inspect and test protective gear at regular intervals, approximately every 6-12 months. Maintenance tests may have to be conducted when the protected circuit is on load. It is desirable to carryout maintenance on protective gear at times when the associated Power apparatus is out of service.
Primary injection tests are not recommended during maintenance unless an error has occurred and protective gear is suspect. Secondary injection tests should be carried out to check the relay performance, and it is desirable that the relay should be allowed to trip the circuit breakers.
27.12 Automated testing
The quality of testing is an essential feature when assembling reliability and considering means for improvement. The test equipment and test procedures should be capable of producing the required outputs. Testing personnel must be technically competent and adequately trained.
Generally, to perform manual maintenance tests on relays at one substation, several pieces of test equipment need to be set up. Also, to start tests, electrical connections (sometimes complicated) of all the test equipment is required. Test setup takes a longer time than the actual testing itself.
Computer-based relay testing is becoming a vital asset in relay testing as a result of: reduced shutdown periods; uninterrupted power systems; and reduced skills required for relay tests
The speed, accuracy, and respectability come with the computer-based relay test equipment. Generally, single computer-based relay test equipment can produce all the output parameters required to test a wide variety of relays, thereby test setup time is minimized. Depending on the type of relay, test software can be developed with its manufacturer-stipulated test procedures and accuracy specification at its office. For any relay the accuracy limits can be defined, whereby the printouts will show the test results.
Computer-based relay testing provides consistent testing procedures with easy-to-read and understands result reports. Once the relay test software is setup in the database, it will be tested the same way every time, opening other options such as the Maintenance Audit.
For each relay the specific information can be stored which includes procedures for testing a certain relay, unique features, or adaptations of a particular relay, changes in test parameters.
Test results can be stored in database files and each year results can be compared and analyzed with the use of computer-based test equipment. Dynamic testing of relay can be performed for better understanding of a relay’s performance during abnormal conditions.
Also, the fault investigative reports can be generated by performing various dynamic testing and simulated inputs to the relay for observation of the relay behavior.
27.13 Safety precautions
A relay may encounter a variety of ambient conditions during actual use resulting in unexpected failure. Therefore, testing over a practical range under actual operating conditions is necessary. Application considerations should be reviewed and determined for proper use of the relay.
- Use that exceeds the specification ranges such as the coil rating, contact rating and switching life should be absolutely avoided. Doing so may lead to abnormal heating, smoke, and fire.
- Never touch live parts when power is applied to the relay. Doing so may cause electrical shock. When installing, maintaining, or troubleshooting a relay (including connecting parts such as terminals and sockets) is sure that the power is turned off.
- When connecting terminals, please follow the internal connection diagrams in the catalog to ensure that connections are done correctly. Be warned that an incorrect connection may lead to unexpected operation error, abnormal heating, and fire.
- If the possibility that faulty adhesion or contact could endanger assets or human life, take double safety precautions and make sure that operation is foolproof.
27.14 Basics on relay handling
- To maintain initial performance, care should be taken to avoid dropping or hitting
the relay. - Under normal use, the relay is designed so that the case will not detach. To maintain initial performance, the case should not be removed. Relay characteristics cannot be guaranteed if the case is removed.
- Use of the relay in an atmosphere at standard temperature and humidity with minimal amounts of dust, SO2, H2S, or organic gases is recommended. For installation in adverse environments, one of the sealed types should be considered. Avoid the use of silicon-based resins near the relay, because doing so may result in contact failure. (This applies to plastic sealed type relays, too.)
- Care should be taken to observe correct coil polarity (+, -) for polarized relays.
- Proper usage requires that the rated voltage be impressed on the coil. Use rectangular waves for DC coils and sine waves for AC coils.
- The coil impressed voltage does not continuously exceed the maximum allowable voltage.
- The rated switching power and life are given only as guides. The physical phenomena at the contacts and contact life greatly vary depending on the type of load and the operating conditions. Therefore, be sure to carefully check the type of load and operating conditions before use.
- Do not exceed the usable ambient temperature values listed in the catalog.
- Use the flux-resistant type or sealed type if automatic soldering is to be used.
- A use alcohol based cleaning solvent when cleaning is to be performed using a sealed type relay. Avoid ultrasonic cleaning of all types of relays.
- Avoid bending terminals, because it may cause malfunction.
28
Testing and Maintenance of Grounding Systems
In this chapter we will learn different types of grounding faults and their effects, causes for inadequate grounding and their remedies. We will also study about grounding system inspection, testing and monitoring and how to maintain grounding system.
Learning objectives
- Faults – Types and their Effects
- Causes of inadequate grounding
- Grounding System Inspection
- Testing and Monitoring
- Requirement for Testing
- Maintenance of Grounding System
- Grounding for Safety during Maintenance
28.1 Faults – types and their effects
It is not practical to design and build electrical equipment or networks so as to completely eliminate the possibility of failure in service. It is therefore an everyday fact of life that different types of faults occur on electrical systems, however infrequently, and at random locations.
Faults can be broadly classified into two main areas which have been designated “Active” and “Passive”. Active faults are classified into shunt and series faults. Further shunt faults are classified into symmetrical and asymmetrical faults.
28.1.1 Active faults
The “Active” fault is when actual current flows from one phase conductor to another (phase-to-phase) or alternatively from one phase conductor to earth (phase-to-earth). This type of fault can also be further classified into two areas, namely the “solid” fault and the “incipient” fault.
The solid fault occurs as a result of an immediate complete breakdown of insulation as would happen if, say, a pick struck an underground cable, bridging conductors etc. or the cable was dug up by a bulldozer. In mining, a rock fall could crush a cable as would a shuttle car. In these circumstances the fault current would be very high, resulting in an electrical explosion.
This type of fault must be cleared as quickly as possible, otherwise there will be:
- Greatly increased damage at the fault location.
- (Fault energy = 1² x Rf x t where t is time).
- Danger to operating personnel (Flash products).
- Danger of igniting combustible gas such as methane in hazardous areas giving rise to a disaster of horrendous proportions.
- Increased probability of earth faults spreading to other phases.
- Higher mechanical and thermal stressing of all items of plant carrying the current fault. (Particularly transformers whose windings suffer progressive and cumulative deterioration because of the enormous electromechanical forces caused by multi-phase faults proportional to the current squared).
- Sustained voltage dips resulting in motor (and generator) instability leading to extensive shutdown at the plant concerned and possibly other nearby plants.
28.1.2 Symmetrical & asymmetrical faults
Symmetrical and asymmetrical faults can also be called as Shunt and series faults. Symmetrical faults involve power conductor or conductors-to- round or short circuit between conductors. In asymmetrical faults, circuits are controlled by fuses or any device which does not open all three phases, one or two phases of the circuit may be opened while the other phases or phase is closed.
A symmetrical fault is a balanced fault with the sinusoidal waves being equal about their axes, and represents a steady state condition.
An asymmetrical fault displays a D.C. offset, transient in nature and decaying to the steady state of the symmetrical fault after a period of time 28282828
28.1.3 Types of faults on a three phase system
The types of faults that can occur on a three phase A.C. system are as follows (see Figure 28.1)

Types of faults on a three-phase system.
(A)Phase-to-earth fault
(B) Phase-to-phase fault
(C) Phase-to-phase-to-earth fault
(D)Three phase fault
(E) Three phase-to-earth fault
(F) Phase-to-pilot fault *
(G)Pilot-to-earth fault *
*In underground mining applications only
It will be noted that for a phase-to-phase fault, the currents will be high, because the fault current is only limited by the inherent (natural) series impedance of the power system up to the point of faulty (refer Ohms law).
28.1.4 Shunt faults (short circuits)
Shunt faults are characterized by increase in current and fall in voltage and frequency whereas series faults are characterized by increase in voltage and frequency and fall in current in the faulted phases.
The method of symmetrical components will be utilized to analyze the unbalancing in the system. The 3-phase fault is a balanced fault which could also be analyzed using symmetrical components.
These faults also disturb the symmetry in one or two phases and are, therefore, unbalanced faults. The method of symmetrical components can be used for analyzing such situations in the system.
28.2 Causes of inadequate grounding
Unintentional contact between an ungrounded conductor and earth or conductive body that serves in place of earth causes ground faults. Within a facility, this is typically a fault between a current-carrying conductor and the equipment-grounding path that results in the operation of the over current protection.
Solutions to inadequate grounding
To minimize the resistance between the grounding electrode system and the earth, the following should be done:
- Clean and tighten and test connections as needed, using appropriate safety precautions.
- Replace or repair damaged or corroded components.
- Size the grounding electrode conductor in accordance with Article 250 of NFPA 70, National Electrical Code.
- Use soil enhancement material as necessary.
The grounded conductor should be connected to the equipment-grounding conductor only as permitted by Article 250 of NFPA 70, National Electrical Code. The grounded conductor and the equipment-grounding conductor should be sized in accordance with NFPA 70.
Many of the grounding electrode corrosion problems are caused by galvanic action. This problem can be minimized by using a system of cathodic protection (active or passive). The use of dissimilar metals should be avoided.
28.2.1 Grounding of equipment
Electrical equipment grounding is primarily concerned with connecting conductive metallic enclosures of the equipment, which are not normally live to the ground system through conductors known as grounding conductors. For the grounding to be effective, the fault current (in the event of a failure of insulation of live parts within the equipment) should flow through the equipment enclosure to the ground return path without the enclosure voltage exceeding the Touch Potential. This is also applicable to other parts that are normally dead
The touch potential in such a case can be calculated by the application of Ohm’s law:
Vtouch = Ig × Zg
Where
Ig is the maximum ground fault current that is expected to flow and Zg is the impedance of the ground return path Ig is usually determined by the type of system grounding adopted and the protective devices that are used for fault detection and isolation.
28.3 Mitigation by multiple ground connection
One way of mitigating the problem is by bonding the ground conductor at different points to the building structures. This will prevent the voltage becoming very high by providing multiple earth return paths. But this has the effect of transferring part of the potential to building structures. In other words, potential differences may be observed between different points of the building structures. Also, the partial flow of fault currents through joints in the structure that are not meant to conduct currents may cause heating or sparking during faults. This solution has therefore to be applied with adequate caution. For example, when reinforced concrete members are used for grounding purposes it should be ensured that all reinforcing rods are properly connected together and joined with exothermic welds to the grounding earth conductor buried around the building. Proper attention to detail during the design and construction of high rise buildings can result in very low grounding impedances on almost every floor in a tall building.
28.3.1 Mitigation by reduction of conductor spacing
Since the touch potential during faults is dependent on the spacing between ground return conductor and the phase conductor, it follows that a reduction of spacing will have the effect of reducing the touch potential. One way to do this is to run the grounding conductor bundled with the phase conductors. This will cause the reactance of the ground path to become very low.
Another way is to arrange the ground conductor as a metallic sleeve surrounding the phase conductor. Besides reducing the reactance of the ground path, this has the effect of canceling the magnetic flux and preventing any induced voltages from appearing in external loops as discussed earlier in this chapter.
This approach is the basis for using the metal raceway as the ground conductor. Use of high section rigid steel conduits as grounding conductors has the effect of reduction of Touch potential and elimination of magnetically induced voltages in external circuits.
The following, however, needs attention:
Excessive raceway lengths can cause problems by increasing the drop along the grounding path and by reducing the flow of fault currents.
Raceway joints should be made without introducing any appreciable electrical resistance.
The raceway should have adequate cross sectional area for carrying ground fault currents for the length of time required for protection operation.
It is also possible to have a dedicated grounding conductor running along with the phase conductors within a metallic raceway, which also acts as a parallel ground return path which can mitigate some of the problems cited above.
28.3.2 EMI suppression
One of the unplanned benefits of using a metallic conduit as grounding conductor and as wiring raceway is that any electrical noise emanating from the electrical system conductors will get suppressed. The conduit acts like a screen for electromagnetic flux, which get trapped within the screen and does not radiate outside the enclosure.
This is of particular relevance in modern electrical systems where use of power semi conductors creates harmonic current flow through the system as well as line voltage notching, which can act as noise source by radiation from electrical power conductors. When the conductors supplying power to such equipment are enclosed within the metallic raceway, such Electro-magnetic interference (EMI) automatically gets suppressed.
28.3.3 Metal enclosures for grounding conductors
The earlier discussion was about the use of metallic raceway surrounding the phase conductors as grounding conductors for improved performance. But the use of a protective metallic sleeve around a grounding conductor from the service ground point to a grounding electrode presents a different problem.
These conductors carry current only when there is a ground fault and carry current one way. Other part of the current flows remotely in a different circuit through the grounding conductor, providing a steel protective sleeve, which is a magnetic material around this conductor, has the effect of increasing the reactance of the conductor by a factor of about 40.
Take for example, a coil wound on a former without core connected to an AC supply. Now put a magnetic core within the former. You will notice that the current drops sharply because of the increased inductance. The pipe sleeve behaves in a similar fashion as the core. Refer to Figure 60.10
To avoid this problem, it is necessary to bond the grounding conductor at both entrance and exit points with each integral section of the metallic enclosure. This results in reduction of impedance and therefore the voltage drops. Simultaneously, the metal sleeve also acts as a parallel grounding conductor and causes the voltage drop to reduce further.
28.3.4 Grounding connections for surge protection equipment
Special care is necessary for conductors that connect surge suppression equipment ground leads with ground electrodes. When the surge suppressors act to conduct line surges to ground, a steep fronted current wave passes through the device to ground. The voltage of the grounding terminal will depend on the inductance of the grounding conductor, which in turn depends on its length. For a typical lightning surge with a rate of rise 10 kA/µs. The voltage drop in the length of the grounding conductor is substantial. The voltage on the terminals of the equipment, which is to be protected, is the sum of the lightning surge suppressor’s breakdown voltage and the voltage drop in the grounding wire
28.3.5 Sensing of ground faults
A sensitive protection for ground faults will use one of the following approaches:
In case the power supply source (such as the transformer) is a part of the system, a CT and relay can be provided in the ground connection of the neutral of the transformer By a single current transformer enclosing all phase and neutral conductors (called core balance or zero sequence CT). Such a transformer detects the ground fault currents and can operate a sensitive relay By individual current transformer in phase and neutral conductors and providing a relay in summation circuit.
28.4 Grounding system inspection
A visual and physical inspection should be made to verify the integrity of the grounding and bonding conductors and associated connections.
The integrity of the grounding electrode system and substation grids should be checked on a periodic basis. The electrical connection to earth can be measured using one of several available methods and technologies. A ground loop impedance test should be performed on the equipment-grounding path with a four-lead, low-resistance ohmmeter such as a Wheatstone bridge, a Kelvin bridge, or a digital low-resistance ohmmeter. Impedances should be appropriate for the type, length, and size of the path.
Measure the voltage between the equipment-grounding conductor and the grounded conductor at multiple locations throughout the system, as applicable.
- At the bonding jumper, the voltage normally should be less than 0.1 volt ac.
- It is normal to find voltage downstream from the main bonding jumper in energized circuits, due to current flow in the grounded conductor. Readings in excess of 3 volts ac or less than 0.5 volt ac at locations remote from the bonding jumper should be investigated to determine if this represents a problem for the system.
The current on the equipment-grounding conductor should be measured for objectionable levels, which will depend on the location and type of the facility. The source of currents on equipment-grounding conductors should be determined and corrected. Use of a true rms ammeter is recommended.
The voltage from the chassis of equipment and an external ground point should be measured. Differences should be less than 2 volts. Continuous monitoring of ground and neutral currents in information technology areas is recommended.
Testing of the ground integrity of data communication cable shields might require special instrumentation and expertise. (Refer NFPA 70B recommended practice for electrical
equipment maintenance).
28.5 Testing and monitoring
28.5.1 Soil resistance
Though the ground itself being a very large body can act as an infinite sink for currents flowing into it and can be considered to be having very low resistance to current flow, the resistance of soil layers immediately adjacent to the electrode can be considerable. Refer Figure 28.2.
Soil has a definite resistance determined by its resistivity that varies depending upon the type of soil, presence of moisture and conductive salts in the soil and the soil temperature. Soil resistivity can be defined as the resistance of a cube of soil of 1m size measured between any two opposite faces. The unit in which it is usually expressed is ohmmeter.

Soil resistivity
Resistance of the sample of soil shown in Figure 6.1 can be arrived at by the formula:

Where
R is the resistance between the faces P and Q in Ohms
A is the Area of faces P and Q in m2
L is the length of the sample in meters and
ρ is the soil resistivity in Ohm meters
Soil resistivity for a given type of soil may vary widely depending on:
- The presence of conducting salts
- Moisture content
- Temperature
- Level of compaction
Conducting salts may be present naturally in the soil or added externally for lowering the resistivity. Chlorides, nitrates and sulphates of sodium, potassium, magnesium or calcium are generally used as soil additives. However the addition of such salts can be corrosive and in some cases undesirable from the environmental point of view. Especially, the presence of Calcium Sulphate in the soil is detrimental to concrete foundations and in case it is to be used for electrode quality enhancements, it should be limited to electrodes situated well away from such foundations. Also, over a period they tend to leach away from the vicinity of the electrode. Moreover these additive salts have to first get dissolved in the moisture present in the soil in order to lower the resistivity and provision should be made for addition of water to the soil surrounding the electrode to accelerate this process particularly in dry locations.
Moisture is an essential requirement for good soil conductivity. Moisture content of the soil can vary with the season and it is advisable for this reason to locate the electrodes at a depth at which moisture will be present throughout the year so that soil resistivity does not vary too much during the annual weather cycle. It is also possible that moisture evaporates during ground faults of high magnitude for long duration. The electrode design must take care of this aspect. We will cover this in more detail later in this chapter.
Temperature also has an effect on soil resistivity but its effect is predominant at or near 0 degree Celsius when his resistivity sharply goes up. Similarly compaction condition of the soil affects resistivity. Loose soil is more resistive in comparison to compacted soil. Rocky soil is highly resistive and where rock is encountered special care is to be taken.
One of the methods of increasing soil conductivity is by surrounding the electrode with bentonite clay, which has the ability to retain water and also provides a layer of high conductivity. Unlike salts mentioned earlier, bentonite is natural clay which contains the mineral monmorillionite formed due to volcanic action. It is non corrosive and does not leach away as the electrolyte is a part of the clay itself. It is also very stable. The low resistivity of bentonite is mainly a result of an electrolytic process between water and oxides of sodium, potassium and calcium present in this material. When water is added to bentonite it swells up to 13 times of its initial volume and adheres to any surface it is in contact with. Also, when exposed to sunlight it seals itself off and prevents drying of lower layers.
Any such enhancement measures must be periodically repeated to keep up the grounding electrode quality. A section later in this chapter describes about electrodes, which use these principles to dramatically lower the resistance of individual electrodes under extreme soil conditions. Such electrodes are commonly known as ‘Chemical Electrodes’.
IEEE 142 gives several useful tables which enable us to determine the soil resistivity for commonly encountered soils under various conditions which can serve as a guideline for designers of grounding systems.
These are reproduced below:
Effect of moisture content on soil resistivity
| Resistivity in Ohm M | |||
| Moisture content % | Top soil | Sandy loam | Red Clay |
| 2 | *** | 1850 | *** |
| 4 | *** | 600 | *** |
| 6 | 1350 | 380 | *** |
| 8 | 900 | 280 | *** |
| 10 | 600 | 220 | *** |
| 12 | 360 | 170 | 1800 |
| 14 | 250 | 140 | 550 |
| 16 | 200 | 120 | 200 |
| 18 | 150 | 100 | 140 |
| 20 | 120 | 90 | 100 |
| 22 | 100 | 80 | 90 |
| 24 | 100 | 70 | 80 |
Effect of temperature on soil resistivity
| Temperature Deg. C | Resistivity Ohm M |
| -5 | 700 |
| 0 | 300 |
| 0 | 100 |
| 10 | 80 |
| 20 | 70 |
| 30 | 60 |
| 40 | 50 |
| 50 | 40 |
28.5.2 Measurement of soil resistivity
Soil resistivity can be measured using a ground resistance tester or other similar instruments using Wenner’s 4-pin method. The two outer pins are used to inject current into the ground (called current electrodes) and the potential developed as a result of this current flow is measured by the two inner pins (potential electrodes). Refer to Figure 28.3.

Soil resistivity measurement
The general requirements for ground resistance testing instruments are as follows:
- The instrument should be suitable for Wenner’s 4-pin method. It should give a direct readout in ohms after processing the measured values of current injected into the soil and the voltage across the potential electrodes.
- The instrument should have its own power source with a hand driven generator or voltage generated using batteries. The instrument will use an alternating current for measurement.
- Direct reading LCD type of display is preferable. Resistance range should be between 0.01 and 1999 ohms with range selection facility for 20, 200 and 2000 ohms for better accuracy.
- Indications should preferably be available for warning against high current through probes, high resistance of potential probes, low source voltage and excessive noise in the soil.
- A minimum of four (4) steel test probes of length 0.5 m and sectional area of 140 Sq. mm. along with the necessary insulated leads (a pair of 30 m and another pair of 50 m) should be supplied with the instrument
All the pins should be located in a straight line with equal separating distance between them and the pins driven to a depth of not more than 10% of this distance. Care should be taken to ensure that the connections between the pins and the instrument are done with insulated wires and that there is no damage in the insulation.
The resistance of the soil between potential electrodes is determined by Ohm’s law (R=V/I) and is computed and displayed by the instrument directly. The resistivity of the soil is given by the formula.

Where
?? is the soil resistivity in Ohm meters
S is the distance between the pins in meters
R is the resistance measured in Ohms
Since the soil is usually not very homogeneous especially near the surface, the depth to which the pins are driven and the separation between the pins will cause resistivity figures to vary and can indicate the type of soil at different depths. The calculated value of resistivity can be taken to represent the value at the depth of 0.8S where S is the electrode spacing.
A study of the values will give some indication of the type of soil involved. A rapid increase of resistivity at increasing D values shows layers of soil with higher resistivity. A very rapid increase may indicate the presence of rock and will possibly prevent use of vertical electrode. On the other hand decrease of soil resistivity as D increases will indicate lower resistivity soils in deeper layers where vertical electrodes can be installed with advantage.
In the case of any abnormality in the values the test can be repeated after driving the pins along a different direction.
Errors can be caused by various factors in this measurement. These are as follows.
Errors due to stray currents
Stray currents in the soil may be the result of one or more of the following reasons:
- Differential salinity
- Differential aeration of the soil
- Bacteriological action
- Galvanic action (more on this later in the chapter)
- Ground return currents due to electric traction systems nearby
- Currents from multiple grounding of distribution system neutrals
These stray currents appear as potential drop across the voltage electrodes without a corresponding current from the instrument’s current source. Thus they result in exaggerated resistivity measurements. This can be avoided by selecting an instrument source frequency, which is different from the stray currents, and providing filters that reject other frequencies.
Coupling between test leads
Improper insulation may give rise to leakage currents between the leads which will result in errors. Ensuring good insulation and running the current and potential leads with a gap of at least 100 mm will prevent errors due to leakage.
Buried metallic objects
Buried metallic objects such as pipelines, fences etc. may cause problems with readings. If presence of such objects is known, it will be advisable to orient the leads perpendicular to the buried object.
Resistance distribution in soil surrounding a single electrode
The resistance of the soil layers immediately in the vicinity of the soil is significant in deciding the electrode resistance. To illustrate this let us see Figure 28.4 below.

Soil resistance distribution around a vertically driven electrode
A current that flows into the ground from a buried electrode flows radially outwards from the electrode. It is therefore reasonable to assume for the purpose of calculating the soil resistance that the soil is arranged as concentric shells of identical thickness with the electrode at the center. The total resistance can thus be taken as the sum of the resistance of each shell taken in tandem.
The resistance of each shell is given by the formula:

Where
R is the Resistance of the shell in Ohms
L is the thickness of the shell in meters
A is the inner surface area of the shell in sq. meters
And is the soil resistivity in ohm meters
The area of the shells keeps increasing as we move away from the electrode. Thus the resistance of the shells keeps reducing in value. IEEE 142 has tabulated this variation. (See Table 28.3)
Radial Variation of soil resistance around a rod electrode
| Distance from Electrode in Feet | App. % of total Resistance |
| 0.1 | 25 |
| 0.2 | 38 |
| 0.3 | 46 |
| 0.5 | 52 |
| 1.0 | 68 |
| 5.0 | 86 |
| 10.0 | 94 |
| 15.0 | 97 |
| 20.0 | 99 |
| 25.0 | 100 |
| 100.0 | 104 |
| 10000.0 | 117 |
It can be seen from the above table that the first 0.1’ accounts for 25% of the resistance value and the first 1’ for 68%. At 10’ (equal to the rod length) 94% of the resistance value has been achieved. For this reason, lowering of soil resistivity in the immediate vicinity of the electrode is the key to lowering the electrode resistance. Also placing more ground electrodes in the vicinity will only interfere with the conduction of current since the current from one electrode will increase the ground potential which will have the effect of decreasing the current flow from the other nearby electrode (and vice versa).
28.5.3 Use of multiple ground rods in parallel
When it is not possible to obtain the minimum resistance stipulations or the ground fault current cannot be dissipated to the soil with a single electrode, use of multiple ground rods in parallel configuration can be resorted to. The rods are generally arranged in a straight line or in the form of a hollow rectangle or circle with the separation between the rods not lower than the length of one rod. As we have seen earlier in this chapter, the soil layers immediately surrounding the electrode contribute substantially to the electrode resistance. More than 98% of the resistance is due to a soil cylinder-hemisphere of 1.1 times the electrode length. This is called the ‘critical cylinder’. Placing electrodes close to each other thus interferes with the conduction of current from each electrode and lowers the effectiveness.
It is also of interest to note that the combined ground resistance of multiple rods does not bear a direct relationship to the no. of rods. Instead it is determined by the formula:

Where
RN is the combined ground electrode system resistance for N no. of electrodes
R is the earth resistance of a single electrode and
F is the factor shown in Figure 6.8 for N no. of electrodes
The table in Table 28.4 shows the value of the factor F used above.
Factor F for multiple ground rods
| No. of Rods | F |
| 2 | 1.16 |
| 3 | 1.29 |
| 4 | 1.36 |
| 8 | 1.68 |
| 12 | 1.80 |
| 16 | 1.92 |
| 20 | 2.00 |
| 24 | 2.16 |
28.5.4 Measurement of ground resistance of an electrode
The resistance of a single ground electrode (as well as small grounding systems using multiple rods) can be measured using the 3-point (or 3 pin) method. The apparatus for this purpose is the same that is used for soil resistivity, viz., and the ground resistance tester. (See Figure 28.5 below) This method however may not yield correct results when applied to large grounding systems of very low resistance.
The measurement of electrode resistance is done in order to:
- Check on correctness of calculations and assumptions made
- Verify the adequacy after installation and
- Detect changes in an existing installation

Measurement of electrode resistance by 3-point method
In this case, the ground electrode itself serves both as a current and potential electrode. The other electrode farther from the electrode is the other current electrode and the nearer one is the second potential electrode. The resistance can directly be read off the instrument. To get correct results the current electrode must be placed at a distance of at least ten times the length of the electrode being measured and the potential electrode at half the distance. A very similar method can be adopted for the measurement of ground grids, which are used commonly in HV substations (usually outdoor switchyards). Refer to Figure 28.6 below.

Measurement of resistance of a Ground grid
The problems mentioned in the section on measurement of soil resistivity are applicable in this case too and appropriate precautions must be taken to ensure accuracy. A more detailed approach given in the South African standard SCSASAAL9 is described in Appendix-A and can be used for better results.
28.6 Requirement for testing
The impedance of a grounding system needs to be measured for the following reasons:
Ground grid design: Measurements help ensure that new ground grid designs are adequate. Computer modelling is a valuable tool for design but it is difficult to include all parameters which may affect the resultant ground grid characteristics.
Performance of a ground grid: Performance of a small size ground grid is inherently susceptible to variations of the surrounding soil. For true performance verification, regular testing should be conducted to monitor the condition of the grounding system over time. Subsequently a practical means of checking a grounding system is needed to ensure that a ground grid is operating correctly and that no voltage hazards exist both for people and equipment.
28.6.1 Grounding system test methods
The grounding system methods are based on simple portable tester measurements and current injection methods.
- Simple two point and three point methods
- Fall-of-potential and related methods
- Power frequency current injection
- Off-frequency current injection
The small portable ground testers can be used for simple resistance based techniques like the fall-of-potential method. However, portable ground testers are not practical for measuring touch and step voltages because long tests leads are required between the ground grid, meter, and the test point. Also, in some situations portable testers may not work due to:
- Electrical noise on the ground grid from power system equipment.
- Very low grid impedance (< 0.5 Ω).
- A very large and/or extensive ground grid.
One of the major significant issues when testing grounding systems is Noise. Noise may exist in a number of ways, including:
- Residual ground grid current (unbalanced loads)
- Third and higher order harmonic currents flowing in the ground grid
- Induction into grounding conductors and metallic objects (fences) from nearby HV lines
- Induction into test leads from nearby HV lines
A very low current (<50 mA) is used by most of the portal ground testers. Higher levels of current are required to distinguish between the test signal and any unwanted noise. Ground grid testing by current injection is used where portable ground testers are unsuitable.
Current injection at the fundamental frequency is one example. Provided the current is high enough then any noise on the system may be swamped. However, this is not usually a practical option since a significant power source is required (such as a power station generator). This method has the advantage that traditional RMS wide band multimeters can be used.
Finally, a particularly useful technique involves injecting current into the grounding system at a frequency close to the power frequency (known as off-frequency injection). A unique test frequency is chosen so that any voltages measured at this frequency must be created by the test current.
Off-Frequency Injection Testing
Off-Frequency Injection Testing provides more advantages over other methods, provided suitable test equipment is available. Due to the unbalanced loads, electrostatic and electromagnetic induction grounding systems frequently have residual voltages on them. Similarly, when testing grounding systems, the test leads may have significant induced voltage and current in them. The voltages will be at the power system fundamental plus harmonic frequencies.
Off-frequency injection using a unique signal is a practical and reliable method of discriminating against these interference signals. Off-frequency injection allows identification of relatively low signal levels against much higher background noise levels.
Off-frequency injection testing has many possible applications. New grounding systems will generally have been well designed using software such as CDEGS™. Upon completion of the construction, injection testing can be carried out to confirm the design.
28.6.2 Test method
Current Source
The test current can be obtained from a diesel generator or a portable solid state injector such as the LCI-2052 (Mitton Instruments Ltd). Diesel generators provide a constant voltage output and can be a disadvantage where the remote ground is comprised of driven ground rods. If there is sufficient current, the driven rods will heat up and dry out the surrounding ground leading to an increasing resistance. The test current will therefore decrease over time. A constant current level is required to ensure that voltages measurements are consistent for the duration of the testing.
Table 28.5 below gives a general comparison between using the LCI-2052 solid state injector and traditional generator based testing.
Current injection equipment comparison
| Diesel Generator | LCI-2052 |
| Generator must be frequency adjustable. | Frequency locked.(52 Hz) |
| Constant voltage. Injection current may decrease over time due to heating of driven rods. | Constant current. Remains constant even if injection circuit impedance varies. |
| Suited for very large grounding systems and/or where induced currents exist in injection circuit. | Tolerates limited induced current. Suited to small-medium ground systems. |
| Heavy. | Portable. |
Test frequency
A test frequency close to the power system fundamental frequency is used. This means that the characteristics of the grounding system can be determined without the need to compensate for higher or lower frequencies. (A small correction factor can be applied if the grounding system has significant reactance).
A frequency between 50 Hz – 60 Hz is recommended especially where a diesel generator is used. Most diesel generators can be adjusted between 50 Hz – 60 Hz.
For 60 Hz systems, a test frequency of 52 Hz is used. (For 50 Hz systems a frequency of 58 Hz is used). There are two reasons for this. The first is that it is a unique signal and it is almost impossible for 52 Hz or its harmonics to exist on a 60 Hz system. If the 52 Hz signal is detected anywhere on the grounding system then it must be a result of the 52 Hz injection current. The second reason is that it is practical to design a narrow-band tuned voltmeter at this frequency
Injection circuit
The injection circuit can comprise either an out-of-service distribution or transmission line or an independent cable. The basic injection circuit is shown below in Figure 28.7.
Typical Off-Frequency Current Injection Circuit
An out-of-service line is convenient if available. The line is connected to ground at its remote end or part way along. However, caution is required since any nearby lines may induce significant relative currents in the line being used for testing. In some cases the injection equipment will need to be adequately rated to carry the test current plus any induced current.
Independent cable can be run out from the grounding system under test if an out-of-service line is not available. The length of this cable should be at least six times the diagonal length of the grounding system under test.
Impedance measurements
To correctly determine the grounding system impedance, the voltage rise of the ground grid must be measured with respect to remote ground.
The effective way to determine ground grid voltage rise is to perform GPR ‘traverse’. This enables ground surface voltages to be determined and also the maximum GPR of the grounding system under test. The simplest method is to record the voltage between the grounding system and the ground at regular intervals using the tuned voltmeter. As the distance increases the rate of increase in GPR will decrease until the readings are relatively constant (see Figure 28.8 below). This indicates that “remote” ground has been reached.

GPR Graph – Measured
Current splits
The current injection method determines the effect of additional grounding paths such as cable screens and overhead ground wires. Flexible current transformer (CT) and a tuned voltmeter are used to measure the off-frequency current in these conductors. Only the test current will be measured as the tuned voltmeter blocks out any power frequency signals. This means that the CT can be put directly around three phase or single phase cables to measure only the 52 Hz test current in the cable screen.
The measured currents can be scaled up to the real fault situation. This gives an indication of the likely current that will flow in these additional grounding paths during a fault.
Test current can be detected in almost any conductor such as buried services (water pipes etc), overhead ground wires, cable screens, telecommunications circuits, gas pipelines, and LV neutrals. Testing is only limited by what the CT loop can fit around.
Grounding system software
Modern grounding system software such as CDEGSTM allows comprehensive grounding models to be created based on grounding system dimensions and soil characteristics. To produce a realistic understanding of the grounding system the results of testing can be combined with
computer modeling.
The model can then be used to investigate changes to the grounding system and identify any possible hazards (such as touch and step voltages, GPR issues etc).
28.7 Maintenance of grounding system
A properly scheduled and executed maintenance plan is necessary to maintain a grounding system in proper order. This is essential because the efficacy of the system can be affected over a period of time due to corrosion of metallic electrodes and connections. Periodic measurement of the ground electrode resistance and recording them for comparison and analysis later is a must. In the case of any problems repairs or soil treatment must be taken up to bring the ground electrode system resistance back to permissible values.
28.7.1 Earth electrode subsystem
Proper maintenance of the earth electrode subsystem requires the following inspection and testing activities be performed at regular intervals.
Visual and mechanical inspection: The earth electrode subsystem should be visually inspected every two months and mechanically inspected every 12 months per International Electrical Testing Association’s (NETA) guidelines.
- Inspect all accessible portions of the system. Particularly look for loose connections, corrosion, and physical damage.
- Check the general overall condition of grounds as excellent, good, or poor. Perform resistance measurements and record the location of those that measure greater than one milliohm.
- File the inspection report. Major deficiencies should be the subject of a major discrepancy report. After major deficiencies are corrected, the facility should be re-inspected.
- Note any undocumented changes or modifications to system. Update drawings as needed and correct minor deficiencies (e.g., clean surfaces, retighten or replace connectors and fasteners, reapply protective coatings, etc.).
- Generally inspect facility site for changes (in vegetation, roads, parking areas, excavation, drainage, etc.) These causes future earth resistance variations and note such changes.
Electrical testing: Electrical testing of the earth electrode subsystem should be conducted every 24 months per NETA guidelines.
Measure the resistance to earth of the earth electrode subsystem using the fall of potential method. Test directly in a ground well if available. If not, connect to a signal ground cable, the power system grounding conductor, a lightning down conductor, or a structural grounding connection. Measure stray current in grounding conductor between service disconnecting means and earth electrode subsystem
28.7.2 Fault protection subsystem
Proper maintenance of the fault protection subsystem requires the following inspection and testing activities be performed at regular intervals.
Visual and mechanical inspection: The fault protection subsystem should be visually inspected every two months and mechanically inspected every 12 months per NETA guidelines.
- Inspect all electrical/electronic equipment for safety grounding conductors (green wire). Check to see that sizes conform to all designated requirements.
- Spot check all green wire connections to see that they are tight and free of corrosion
- Check inside equipment, switch boxes, and distribution panels to see that the white wire (neutral) is not grounded at these locations.
- Check the grounding connection at the first service disconnects to make sure it is tight and free of corrosion.
- Generally check the electrical supporting structures for looseness in joints or bonds and evidence of corrosion.
Electrical testing: Electrical testing of the fault protection subsystem should be conducted every 24 months per NETA guidelines.
- With neutral disconnected at first service disconnect, the resistance to ground should be at least one megohm.
- Perform spot check resistance measurements on power receptacles and stray current measurements on safety ground to insure that the ground terminals on the receptacles are properly grounded to the facility ground system and no currents are flowing on grounding conductor.
- Measure for stray currents at obvious locations
28.7.3 Lightning protection subsystem
Proper maintenance of the lightning protection subsystem requires the following inspection and testing activities be performed at regular intervals.
Visual and mechanical inspection: The lightning protection subsystem should be visually inspected every two months and mechanically inspected every 12 months per NETA guidelines.
- Verify that all facility components and antennas are within the cone of protection.
- Check for evidence of burning and/or pitting, as well as melting of air terminals.
- Check for burned fasteners.
- Check for broken or melted down conductors or severely damaged as well as distorted roof conductors, down conductors, and bonding jumpers.
- Look for signs of arcing or flashover indicating a need for bonding jumpers or spark gaps.
- Check for corroded or loose connectors and fasteners.
- Verify that copper-to-aluminum contact does not occur except through Underwriters Laboratories (UL) approved bimetallic connectors.
- Verify that all guards for down conductors are in place and without severe mechanical damage.
- Verify that all guards are bonded to down conductors (at both ends of guard).
28.7.4 Signal reference subsystems
Proper maintenance of the signal reference subsystems requires the following inspection and testing activities be performed at regular intervals.
Visual and mechanical inspection: The signal reference subsystem should be visually inspected every two months and mechanically inspected every 12 months per NETA guidelines.
- Apply corrective measures. Inspect connections to equipment signal ground terminals and equipotential plane for looseness and corrosion.
- Check to see if any new equipment has been added or relocated since the last inspection. If so, check interconnecting cables for conformance with the requirements.
- Ensure that labels and protective covers are in place and free of serious damage.
- Inspect equipment grounding cables for correct sizes, physical damage, and properly bonded end connections.
Electrical testing: Electrical testing of the fault protection subsystem should be conducted every 24 months per NETA guidelines.
- Perform resistance tests of a sample of bonds
- Perform point-to-point resistance measurements at select locations comprising approximately 25 percent of available locations.
- Perform stray current measurements and differential noise voltage measurements.
28.8 Grounding for safety during maintenance
After isolating the equipment or section required to be maintained, it is necessary to connect it to earth to ensure safety of personnel. Where, earth switches are available (as is the case with outdoor HV switchyards and GIS substations), they can be used for this purpose. In other cases, approved types of portable earth clamps must be used. Whether switch or clamp, they short circuit all three phases and connect them to earth at the point of work. This serves two purposes:
- The part where work is carried out is clamped to the earth potential. This will also minimize any voltages that can be induced because of stray magnetic fields
- If there is any inadvertent re-energization when work is being carried out, it creates a three-phase metallic short circuit and will cause the circuit protective devices to operate
In the case of indoor switchgear panels, such earthing is normally carried out at the outgoing terminals of the feeding cubicle at the time of rendering the circuit dead. However in certain cases, the work may be carried out in some other place. In that case, a portable earth clamp must be used close to the point of work, in such a way that it is between the supply side and the point of work. The correct method of placing the clamp is to firstly connect the earth lead of the clamp, followed by the line leads one by one. This operation may be carried out by firstly lightly touching the line clamp to each phase at the point of work, taking due precautions to avoid being exposed to any arc in case the point of work is still live.
Where induced voltages may be present, earth clamps should be used at two points to ensure that a circulating current is set up and the voltage is effectively controlled. The current rating of the clamp conductor or switch must be adequate to carry the induced current safely with minimum voltage drop. Otherwise overheating may occur, exposing working personnel to temperature hazards.
29
Supervisory Control and Data Acquisition (SCADA)
In this chapter we will learn the difference between SCADA and process control. We will discuss the types of controls employed in SCADA systems. Distributed control systems (DCS), programmable logic controllers (PLCs), components of SCADA, maintenance and troubleshooting of SCADA are covered in detail.
Learning objectives
- Types of controls
- SCADA components
- DCS,PLC, Smart instrument
- Maintenance and troubleshooting
- The RTU and component modules
- Operations and maintenance documentation
- The maintenance unit system – A case study
29.1 Introduction
A SCADA (or Supervisory Control and Data Acquisition) System means a system consisting of a number of Remote Terminal Units (or RTUs) collecting field data connected back to a master station via a communications system. The master station displays the acquired data and also allows the operator to perform remote control tasks.
The accurate and timely data (normally real-time) allows for optimization of the operation of the plant and process. A further benefit is more efficient, reliable and most importantly, safer operations. This all results in a lower cost of operation compared to earlier non-automated systems.
There is a fair degree of confusion between the definition of SCADA systems and process control system. SCADA has the connotation of remote or distant operation. The inevitable question is how far “remote” is – typically this means over a distance such that the distance between the controlling location and the controlled location is such that direct wire control is impractical (i.e. a communication link is a critical component of the system).
29.1.1 General control
Control consists of monitoring the state of a critical parameter, detecting when it varies from the desired state, and taking action to restore it. Control can be discrete or analog, manual or automatic, and periodic or continuous. Some terms that are commonly used in describing control systems are defined below.
The process variable is the parameter that is to be controlled. To be controlled, the process variable must be capable of being measured and that measurement converted into a signal that can be acted on by the controller.
Examples of process variables are
- the temperature in a given space,
- the pressure produced by a cooling water pumping system,
Devices that measure process variables are transducers or sensors. In many cases, the process variable sensor consists of a direct measurement device, called an element and a separate signal processor called a transmitter. An example of this would be temperature measurement using a resistive temperature detector, as the element and a temperature transmitter, which converts the varying resistance value of the detector into a current or voltage proportional to the temperature.
The set point is the desired value of the process variable, normally preset into the control system by an operator, or derived as an output of another control calculation. The error signal is the difference between the process variable and the set point, and is the basis for control action. The controller is the device that processes the error signal, determines the required control action, and provides a control output to the process.
The control output usually must act on the system through another device to effect the desired control action, such as varying the position of a valve, the speed of a motor, or the current through a heating element. The device that converts the control output into control action is the actuator.
29.1.2 Discrete control
Discrete control deals with systems in which each element can only exist in certain defined states. An example of discrete control would be starting an exhaust fan when the temperature in a space exceeds a preset value and stopping the fan when the temperature falls below a lower preset value. The temperature (process variable) is either within the acceptable range, or outside of it. The fan control relay (actuator) is either on or off. This type of control is implemented with logic diagrams and circuits. In discrete control, even though some of the parameters actually have a continuous range of values, the only information used by the control system is whether their value is greater than, less than, or equal to some desired value. The control action is typically produced by control relays, which open or close contacts in the control circuits of motors, valve actuators, or
other devices.
29.1.3 Analog control
Analog control deals with systems in which variables can have a continuous range of values. Basic analog control consists of the process of measuring the actual output of a system, comparing it to the desired value of that output, and taking control action based on the difference to cause the output to return to the desired value. This process can be as simple as the driver of an automobile comparing the speedometer reading (process variable) to the speed limit (set point) and adjusting the position of the accelerator pedal (control action) to speed up or slow down the vehicle accordingly. In most systems we are concerned with, this type of control action is performed automatically by electronic processors, which receive signals from sensors, process them, and provide signals to pumps, valves, motors, or other devices to effect control action.
29.1.4 Control loops
The complete control scheme required to control a single process variable or a group of related process variables is called a control loop. The control loop includes the relevant part of the process, the process variable sensor and associated transmitter(s), the input signals, the controller, the control output signal, and the actuator. Once defined, the control loop serves as the basis for both labeling of devices and documentation of wiring and control strategy. The process of adjusting the gain, reset, and rate parameters to obtain effective and stable response of the system to changes in the set point or external disturbances is called loop tuning, and is an essential aspect of control system startup and commissioning.
29.2 SCADA components
A successful SCADA installation depends on utilizing proven and reliable technology, with adequate and comprehensive training of all personnel in the operation of the system.
There is a history of unsuccessful SCADA systems – contributing factors to these systems including inadequate integration of the various components of the system, unnecessary complexity in the system, unreliable hardware and unproven software. Today hardware reliability is less of a problem; but the increasing software complexity is producing new challenges. It should be noted in passing that many operators judge a SCADA system not only by the smooth performance of the RTUs, communication links and the master station (all falling under the umbrella of SCADA system) but also the field devices (both transducers and control devices). The field devices however fall outside the scope of SCADA in this manual and will not be discussed further. A diagram of a typical SCADA system is given below in Figure 29.1.
On a more complex SCADA system there are essentially five levels or hierarchies:
- Field level instrumentation and control devices
- Marshalling terminals and RTUs
- Communications system
- The master station(s)
- The commercial data processing department computer system
The RTU provides an interface to the field analog and digital signals situated at each remote site.

Diagram of a typical SCADA system
The communications system provides the pathway for communications between the master station and the remote sites. This communication system can be radio, telephone line, microwave and possibly even satellite. Specific protocols and error detection philosophies are used for efficient and optimum transfer of data.
The master station (and sub masters) gather data from the various RTUs and generally provide an operator interface for display of information and control of the remote sites. In large telemetry systems, sub master sites gather information from remote sites and act as a relay back to the control master station.
SCADA technology has existed since the early sixties and there are now two other competing approaches possible – Distributed Control System (DCS) and Programmable Logic Controller (PLC). In addition there has been a growing trend to use smart instruments as a key component in all these systems. Of course, in the real world, the designer will mix and match the four approaches to produce an effective system matching his/her application (see Figure 29.2).

SCADA system
29.2.1 Distributed control system (DCS)
In a DCS, the data acquisition and control functions are performed by a number of distributed microprocessor-based units situated near to the devices being controlled or the instrument from which data is being gathered. DCS systems have evolved into systems providing very sophisticated analog (e.g. loop) control capability. A closely integrated set of operator interfaces (or man machine interfaces) are provided to allow for easy system configurations and operator control. The data highway is normally capable of fairly high speeds (typically 1 MBits/sec up to 10 MBits/sec) (see Figure 29.3).

Distributed Control System (DCS)
29.2.2 Programmable logic controller (PLC)
Since the late 1970s, PLCs have replaced hardwired relays with a combination of ladder logic software and solid state electronic input and output modules. They are often used in the implementation of a SCADA RTU as they offer a standard hardware solution which is very economically priced (see Figure 29.4).

Programmable Logic Controller (PLC) System
Another device which should be mentioned for completeness is the smart instrument which both PLCs and DCS systems can interface to.
29.2.3 Smart instrument
Although this term is sometimes misused, it typically means an intelligent (microprocessor based) digital measuring sensor (such as a flow meter) with digital data communications provided to some diagnostic panel or computer based system (see Figure 29.5).

Typical example of a smart instrument
This chapter will henceforth consider DCS, PLC and smart instruments as variations or components of the basic SCADA concept.
29.3 Maintenance and troubleshooting
A comprehensive maintenance program is critical to attaining long-term reliable performance of SCADA systems. Periodic device calibration, preventive maintenance, and testing allow potential problems to be identified before they can cause mission failure. Prompt corrective maintenance assures reliability by minimizing downtime of redundant components. Whether the maintenance tasks are to be undertaken internally by your company or outsourced to a maintenance contractor, it is vital that there is a comprehensive and planned approach to maintenance. An overall diagram for the entire system is as follows:

Overall system
Preventive maintenance
The SCADA system should be part of the overall preventive maintenance (PM) program for
the facility.
Preventive maintenance schedules for SCADA components and subsystems should be coordinated with those for the mechanical/electrical systems they serve to minimize overall scheduled downtime. The following are a list of key ideas and requirements when setting up a maintenance program.
- Produce a complete and thorough inventory of every piece of equipment in the telemetry system. This should include all single items of equipment. It should be the responsibility of the maintenance personnel to keep this current on a computer database.
- Define goals for system and equipment item working availability. Depending on the size and quality of the system:
- System availability of between 99.5% and 99.9% over 12 months.
- Individual equipment item availability of between 95% and 98% over 12 months.
- Set up a direct line of communications from the maintenance personnel to the company representative in charge of the telemetry system. All problems and potential problems should be directly and immediately relayed to that person.
- Maintenance activities should be clearly defined in terms of daily, weekly, monthly and annual activities. These should include:
Daily
- Repair of any immediate system faults.
- A check from the central site computer monitoring facilities that there are no system problems.
- Continued repair of faulty equipment items.
Weekly
- Produce a short weekly report of the system performance and problems encountered.
- Perform functional checks of each piece of equipment in the system to ensure it is operating.
Monthly
- Visit each RTU and master site and carry out a thorough visual check of each equipment item. Then give the site a functional check.
- Clean each site of dust and vermin.
- Carry out a number of telemetry operations in conjunction with the central and master sites.
Annual
- Carry out a complete and thorough audit of the entire system.
- Test and measure the main operating parameters of every piece of equipment. This should include voltages, currents, frequencies, inputs, outputs, levels, noise, etc.
- A comprehensive report of the status of the equipment should be produced at the end of the audit.
- Every RTU and master site should have a separate maintenance logbook, which should be filled in every time a maintenance person visits the site.
- Monthly and annual meetings should be carried out to discuss maintenance problems and establish future objectives.
- A complete and up-to-date inventory of spare parts should be kept so that stocks can be replenished when they get low.
- A complete and up-to-date database of radio frequency licenses should be kept so that they can be paid for on an annual basis.
- If a contractor is carrying out the maintenance, always ensure that they have sufficient personnel to carry out the work (in particular during annual leave periods).
- Make sure all changes to the system are fully documented and drawings are updated.
A summarized table is presented here for easy reference.
Recommended maintenance activities
| Activity | Frequency |
| Pneumatic Systems/Components | |
| Check Regulators and Filters | Monthly |
| Inspect Tubing and Piping | Monthly |
| Actuate Pressure Switches | 6 Months |
| Actuate (Stroke) Valves and Actuators | 6 Months |
| Calibrate Switches and Sensors | Yearly |
| Calibrate Pressure Gauges | Yearly |
| Calibrate Thermometers | Yearly |
| Electrical/Electronic Systems | |
| Lamp Test/Verify Indicators | Monthly |
| Inspect Enclosures for Dirt, Water, Heat | Monthly |
| Actuate (Stroke) Valves and Actuators | 6 Months |
| Actuate Switches | 6 Months |
| Run PLC Diagnostics | 6 Months |
| Calibrate Sensors and Transmitters | Yearly |
| Calibrate Meters | Yearly |
| Calibrate Actuators | Yearly |
| Test Batteries | 6 Months |
| Test Automatic control Sequences | Yearly |
| Verify Alarms | Yearly |
| Computer Systems | |
| Software Maintenance and Patching | 2 Months |
| Anti-virus Definition Updates | Monthly |
| Inspect Wire, Cable and Connections | Monthly |
| Disk Space and Memory management | Monthly |
- Many components of SCADA systems, such as dead-bus relays, are not required to function under normal system operating modes. For this reason the system should be tested periodically under actual or simulated contingency conditions. These tests should approach as closely as possible the actual off normal conditions in which the system must operate. For example, SCADA for standby generator plants should be tested by interrupting the utility source as far upstream of the normal service as possible.
- The SCADA software maintenance should include timely updates of any new versions from the supplier and testing to verify proper installation on the SCADA computer. In addition, software antivirus updates should be maintained. This should be performed any time after the computer is connected to the Internet. Normal operation requires that the SCADA computer not be connected to the Internet.
Concurrent maintenance
Concurrent maintenance is defined as testing, troubleshooting, repair or replacement of a component or subsystem while redundant component(s) or subsystem(s) are serving the load. The ability to perform concurrent maintenance is critical to attaining the specified reliability/availability criteria for C4ISR facilities and must be designed into the SCADA system. Where SCADA components are associated with equipment that has redundancy and therefore are not themselves redundant, their maintenance should be scheduled to occur during maintenance of the associated equipment. SCADA components and controllers that are redundant must be capable of being taken out of service, repaired or replaced and tested without interfering with the operation of the redundant component.
29.3.1 The RTU and component modules
It is important to ensure that components are not removed on line whilst the system is powered up unless the manufacturer specifically indicates that this is permissible. Such an action can result in damage to components and modules. Ensure that the antenna system is not disconnected from the system unless a dummy load has been installed, otherwise the radio power amplifier may be damaged.
A typical procedure to follow when reviewing the operation of the telemetry system for faults (either for intermittent or outright failure) is:
- Confirm that the power supply module is healthy. Check the main fuse or circuit breaker of the equipment rack or unit if no power is evident.
- If the power supply is not operating, check that there is power to the power supply module. If there is power to the module then replace the power supply module.
- Check central processing (CPU) module that the run or healthy light is on. Switch the CPU module to run mode if not running.
- Check earthing connections for low resistance to earth or whether some other drive hardware (such as a variable speed drive) has been added to the system.
- If CPU module will not run, check the configuration program to see if this is faulty. Reload the program if indications show any corruptions. Check that the configuration of the system matches that of the hardware. Load up a simpler program that you know works, if the program is possibly defective. Back up defective program onto disk (for future analysis) and reset the memory.
- Cycle power to the RTU before the new program is loaded.
- Replace the CPU and retry the test.
- Check that the modem module is operating. Confirm that the modem is operational and that it is transmitting and receiving data by examining the transmit (TX) and receive (RX) lights on the front panel.
- If the modem is not operational, replace the modem module (or desktop unit).
- If the modem module is not operating correctly, perform the local and remote loopback tests as described in the modem section.
- Check each analog and digital input/output module for status such as healthy or run.
- Check for possible heating problems in the system cabinet.
- This could be due to failure of an air-conditioning or fan unit (if installed) or excessive ambient temperature.
- If a module indicates no power at all; check the fuse for that module.
- Replace each module if the indications are not healthy.
Check each individual module as follows:
Analog input modules
- Check that there is current or voltage being injected into the signal inputs.
- Check the fuse is installed.
- Check the scale and span and compare with the appropriate register tables for accuracy.
- Adjust scale and span either via software or via pots on the card.
Digital input module
- Check that there is current or voltage at the signal input to the module.
- Check the fuse for each input.
- Check earthing connections.
Interface from RTU to PLC (RS-232/RS-485)
- Check for the transmit/receive/run lights on the interface unit.
- Check interface data communications link.
- Check that the radio unit is operating (if used). The on light should be on and no fault lights should be on.
- If the on light is not on, check that there is DC power to the radio. If there is power, check that the fuse or circuit breaker is healthy.
- Check that all coaxial connectors are secured properly.
- Check that the PTT (transmit) light on the radio comes on when the telemetry unit feeds data into it for transmitting. Check that there is sufficient audio level into the transmitter.
- Check that the mute (receive) light on the radio comes on when the radio receives RF data. Check that there is sufficient audio level into the telemetry unit from the receiver.
- Check that the VSWR into the antenna is 1.5 or less.
- Check that the RF output power from the transmitter is as specified.
- Check that the antenna is aligned in the correct direction and with correct polarization.
- If the radio is still not working correctly, a radio test set will be required to check transmitter deviation, RF distortion, audio distortion, receiver sensitivity at 12 dB SINAD, transmitter and receiver frequency errors, transmitter/receiver isolation and transmitter spurious outputs.
- If a landline is to be used, then first ensure that the telemetry and modem equipment is operational. Then if the line is a:
Privately owned cable
- Check for end to end connectivity
- Measure noise level on line
- Check for crossed pairs
- Check MDF and IDF connections
- Check earthing
Switched telephone line
- Listen for dial tone
- Connect up a standard telephone and make a normal telephone call
- Listen for noise levels
- Call out the telephone company
Analog or digital data links
- Check the run, connect, transmit and receive lights on the modem
- Check the operations manual and the communications software
- Call out the telephone company
Many manufacturers provide a test box to test the communications between the RTU and Master Stations; and also to simulate a master station or RTU in the system.
The three typical configurations are indicated below in Figure 29.7.

SCADA test box operating mode
The typical functions provided on a test box are:
- Message switches—the simulated messages that the user wants to send to the RTU or Master Station are input here.
- Message Indicators—Display of transmit and receiver data.
- Mode of Operation—the user selects one of three modes of operation. Test Box in eavesdropping mode between RTU and Master Station. Test Box to RTU, Test Box to Master Station. An additional self test mode is often provided.
There are other features provided such as continuous transmissions of preset messages. Often the test box is interfaced to a PC for easier display and control of actions.
29.3.2 The master sites
The master sites will generally consist of a more complete telemetry unit and higher quality radio equipment. The same troubleshooting techniques can be applied to the master site as are used at the RTUs. Additional equipment would include links to other master sites, to the central site and computer control facilities.
The additional checks that will be appropriate include:
- Check that the link to the central site is operating correctly.
- If it is a radio link, carry out the check as discussed in the last section.
- If it is a microwave link, check the transmit and receive lights are on.
- Check that the BER alarm light is not on.
- Check transmit power.
- Check receiver sensitivity.
- Check antenna alignment.
- Check connectors are secure and the cable or waveguide has not been damaged.
- Check individual multiplex cards for alarms and power fails.
- Check input/output levels from multiplex cards.
- Check for clean (noise free) healthy power supply to microwave equipment.
- Check link fade margin.
- As a last resort, carry out BER tests on each channel.
- If there is a master site computer, check that it can carry out all its required functions, i.e. monitoring of radio and RTU performance, status and alarms, etc.
29.3.3 The central site
The areas in which to troubleshoot problems here are quite varied as the master station consists of:
- The operator stations
- The software for the system
- The communications network for the operator stations
29.3.4 The operator station and software
There is not much that can be done here if a system fails or has intermittent problems except to systematically replace each connected unit to identify the faulty module.
This would typically involve replacing the following units in turn:
- Operator terminal (normally a personal computer)
- Local area network card(s)
- Bridge unit to radio, microwave or landline system
- Printer connected to operator terminal
There are however a few problems which can be examined:
Operator terminal locks up intermittently
- Check the power supply to the system for possible electrical spikes or transients. This can be done with power analysis equipment (e.g. the dranetz) or by putting the entire system onto a battery supply.
- Check for any new electrical drives or pieces of equipment, which have recently been added to the system (and which may add harmonics to the system).
- Check the earthing cable connections that the impedance to earth is still to specifications (typically less than 1 ohm).
- Do a software check on the hard disk of the operator terminal for possible corruption of software or failure of the disk. Backup the system, reformat the hard disk and reinstall the software on the disk.
- Replace the motherboard on the operator terminal (this probably indicates that the operator terminal should be replaced with another system).
Throughput of the operator station and associated system drops off dramatically
- This manifests itself in slow updates of data on the operator terminal.
- Check the system for errors being introduced on the data communications lines by electrical noise or earthing problems. The data communications system could be sending multiple messages due to errors introduced by electrical noise.
- Check the local area network for potential overload due to excessive traffic. Reduce the traffic by reducing the amount of data being transferred or split the systems up into separate networks (using bridges).
- Check the radio, microwave, landline, and antenna systems for possible introduction of noise and error problems.
Operations and maintenance documentation
The design agency should perform an O&M analysis to determine the O&M data required to support maintenance of the SCADA system by the using government agency. This analysis should be coordinated with the using government agency to determine maintenance parameters and O&M data that are available to the using government agency. Typical O&M data requirements include the following items:
- System documentation.
- Minimum spare parts list.
- Recommended spare parts list.
- Recommended onsite test equipment.
- Recommended O&M training.
- Recommended O&M to be performed by contract.
Spare parts stocking
An adequate on-site stock of spare parts is essential to obtaining high availability of SCADA systems. Reliability calculations demonstrating compliance with “six nines” criteria typically use repair times based on “replace with spare” which are shorter than those for “repair failed component”. If on-site stocks are inadequate, actual availabilities will be significantly less than these calculated values.
Minimum recommended stocking levels include the following. These quantities may need to be increased for components which are used in large numbers in the facility:
- Manufacturer’s recommended spare parts list.
- One each of all line replaceable boards or modules.
- Six each power and control fuses used in the system.
- Tools required to terminate coaxial on fibre optic cables.
Specifications should also require that the following be furnished with each system:
- Laptop computer loaded with software required to access controllers.
- Licenses for all software installed on the system.
- Permission to modify program code.
- Spare cables for connecting computer to controllers.
29.4 The maintenance unit system – A case study
In industry today there is an increasing tendency for companies to reduce permanent staff to cover only the core business of the company and to contract out peripheral activities to specialist maintenance companies.
There are facets to be considered in taking such a decision and one of these is the question of how to adjust the current value of a maintenance contract where the amount of equipment varies from time-to-time. The following case study is drawn from experience with a large iron ore mining company which took the decision to out-source communications maintenance.
To begin with there was a very wide range of equipment to be maintained. There were several hundred mobile radios installed in mining equipment, locomotives, railroad maintenance machines, re-claimer excavators, ordinary vehicles, and offices. There were many isolated radio repeater sites with a combination of wind and diesel generating plants, as well as radio, multiplex equipment, telemetry systems, batteries, and antenna systems. In addition, there were numerous other items of equipment (much of it not related to the communications system) that were added to the contract from time-to-time, as an ongoing service to the mining company.
The starting point in the establishment of the maintenance unit (MU) system was the setting up of a maintenance program based on the system of ‘A’, ‘B’ and ‘C’ levels of service which is widely used for vehicle maintenance. In this system, an ‘A’ service is a simple visual inspection and performance check which is performed weekly or monthly; a bit like tires, oil and water for a vehicle. A ‘B service is less frequent and involves a detailed inspection, several measured performance checks and perhaps the generation of some form of written report. A ‘C’ service would take place perhaps annually and involved a major inspection, particularly of mechanical components and a detailed performance check with a printed report which made recommendations to the company for the future service life of the equipment.
The next stage was the establishment of a complete list of all equipment under maintenance and the estimated time required to do the maintenance, and by correlating this data it was possible to come to a man-hours total for the task. To this, allowances for emergency fault clearance and supervision were added and from this total the number of technicians required to do the work was established.
The next step was to find a total cost and this involved the costs of wages, allowances, supervision, air fares, vehicle costs, housing and associated expenses and a profit margin for the contractor.
At this point, mobile radios were designated as the sort of lowest common denominator in the system and they were given a value of 1 MU. Then MU values were assigned to all other types of equipment under maintenance and these ranged from perhaps 5 MU for a radio link terminal to 50 MU for a diesel power plant located 200 km from the depot. One of the merits of the system was that it was possible to load the MU value of a piece of equipment in relation to the complexity, reliability and difficulty of access so that traveling time was taken into account.
From the above it was possible to total the number of MUs and to relate this to the total cost and so a unit value for the MU was obtained.
When the contractor was given additional equipment to look after this was tallied in a monthly report along with the purchase order number or delivery docket, etc and when equipment was written off or removed from service, this was included with the appropriate advice reference. In this way, the company had a monthly record of all equipment under maintenance with additions and withdrawals highlighted.
During contract negotiations, a formula for the variation in the value of the MU was developed and this took into account factors such as award variations, fuel prices, and CPI adjustments.
The end result was a monthly total of MUs, which was multiplied by an up-to-date cost per MU to produce a fully substantiated invoice cost.
The above system operated satisfactorily for several years. It was periodically reviewed by auditors on both sides to ensure that the MU cost truly reflected the contractors’ costs and served both parties well. It may serve as a model for other similar maintenance agreements.
30
Safe Operation and Maintenance of Electrical Equipment
Operating or maintenance of electrical equipment and installations requires extreme care. Proper documented procedures must be in place to prevent any accidents. At the same time, appropriate technical precautions must also be adopted while repairing or maintaining electrical installations. Safety appliances and personal protective equipment (PPE) play a major role in ensuring safety and must receive proper upkeep. Operating and maintenance personnel must receive appropriate training including knowledge of first-aid to victims of electrical accidents.
Learning objectives
- Key safety issues in O&M of electrical installations
- Isolation and earthing of equipment
- Use of warning signs for operation and maintenance
- Safety while working in outdoor switchyards and overhead lines
- Work on underground cable systems
- Use and upkeep of safety appliances in substations and other electrical premises
- Gas safety and ventilation
- First-aid for burns and electric shock
30.1 Introduction
In the previous chapter, we learned about the requirements to be incorporated in the design and planning stage of electrical equipment and installations. Even a well-designed installation requires proper safety measures to be taken during its operation and maintenance. Each equipment and installation has certain specific requirements for proper operation. Knowledge about the equipment and safety precautions required during its operation and maintenance play a major role in preventing accidents. The steps to be followed in operation and maintenance must be documented in the form of procedures or guidelines and should be disseminated to the personnel responsible for these activities.
We will discuss the general requirements for the safety in operation and maintenance of different types of installations in this chapter. We will also discuss safety appliances and their upkeep. Those who operate or maintain electrical installations must have adequate knowledge of first-aid to be administered to victims of accidents and necessary kits must be provided in each installation to facilitate this.
A few tips on safety are given below and should form the basis of any safety measures being implemented in the workplace:
- Inadequate (undersized) wiring is dangerous
- Exposed electrical parts are dangerous if they are accessible
- Wires with bad insulation can give you a shock
- Electrical equipments that are not grounded or double insulated are dangerous
- Overloaded circuits are dangerous
- Damaged power tools and equipment are electrical hazards
- Using the wrong PPE (Personal Protective Equipment) is dangerous
- Using the wrong tool is dangerous
- Ladders that conduct electricity are dangerous
- Electrical hazards can be made worse if the worker, location, or equipment is wet
Furthermore, the following situations indicate that unsafe or dangerous conditions may be developing or are present in an electrical installation:
- Tripped circuit breakers and blown fuses show that too much current is flowing in a circuit. This condition could be due to several factors, such as malfunctioning equipment or a short between conductors. One needs to determine the cause in order to control the hazard
- An electrical tool, appliance, wire, extension cord or connection that feels warm may indicate too much current in the circuit or equipment. One needs to evaluate the situation to determine the risk
- A burning odor may indicate overheated insulation. Worn, frayed, or damaged insulation around any wire or other conductor is an electrical hazard because the conductors could be exposed. Contact with an exposed wire could cause a shock
- Damaged insulation could cause a short, leading to arcing or a fire. Inspect all insulation for scrapes and breaks. One needs to evaluate the seriousness of any damage one finds in order to decide how to deal with the hazard.
- An RCD (also called earth leakage circuit breaker) that trips indicates a current leakage from the circuit
30.2 Key safety factors in operation and maintenance of electrical installations
In this section, we will take a quick look at the key factors, which will ensure safety in the operation and maintenance of electrical installations.
Operator safety
The following are the requirements to be fulfilled to enable safe operation of electrical equipment/systems.
Clear documentation and work instructions
The foremost factor in ensuring safety of operating personnel is to produce a clear set of documentation about the installation. It should contain the schematic diagrams, floor plans, wiring diagrams, cable schedules and vendor literature of all equipment forming part of the installation. Apart from the above, clearly enunciated operating and safety instructions must be available for each operational task required to be carried out by the operators. Particular attention should be paid by the operating personnel to the procedures for the isolation and earthing of various live equipment, to ensure safe maintenance work.
Adequate training of operators
No amount of documentation can be a substitute for a knowledgeable operator. All operators must be trained in the equipment and installations intended to be operated on by them.
They must also be trained in safety procedures, basic theory and should acquire familiarity with all available documentation. They should be trained in the procedures expected of them in case of accidents involving other personnel working with them.
Clear inscriptions on equipment
There must be clear inscriptions on the equipment and components, which match the identifiers used in the diagrams, so that no errors are made by the operators. Inscriptions such as source points, feeder numbers, loads supplied etc. must also be inscribed to permit cross verification. For example, the incoming section of switchgear must indicate the point of power feed (substation/feeder number) with matching inscriptions at the sending end feeder.
Remote operation facility
Most accidents involving operators occur when operations are performed from local controls near energized equipment. For example, arc fault in a circuit breaker panel during closing will cause injuries to the person who is carrying out the operation. In an outdoor switchyard, such faults may expose the operators to touch/step voltages. Having the means to carry out operations from a remote panel/location eliminates these hazards.
Visual check
Operating personnel must be trained in visual verification prior to any operation. They should be able to identify that they are operating the correct equipment. They should identify that particular equipment has been made dead and isolated. This is particularly relevant while carrying out operations in outdoor switchyards from a remote panel. The final step, such as earthing of a bus section or a feeder, must never be made without visual verification. In enclosed equipment, visual verification may be performed through other means. For example, an operator can verify whether a transformer is switched off by the absence of the ‘hum’ that it produces when it is live. A voltmeter or indicator may be used for verifying that a bus section is dead, in addition to the status flags of the switches in the incoming circuits. In fact, a ‘back feed’ from an instrument transformer can only be detected with such a check.
Utilizing available interlocks
Any well-designed equipment is likely to have one or more safety interlocks. These will be mechanical or key interlocks supplemented by electrical interlocks. In some cases, only electrical interlocks may be provided due to operational necessity. A typical interlock in an LV switch is the door interlock preventing the opening of the door when the switch is on. Another is the safety shutter which prevents accidental access to bus bar terminals and cable terminals from the breaker compartment. The shutters open automatically when the breaker is inserted. Figure 30.1 shows such an arrangement. Operators must be instructed never to override these safety interlocks. If an interlock must be defeated because of an equipment malfunction, it should be done after complete verification and with proper authorization and must never be done in a hurry. It should be kept in mind that interlocks are meant for preventing accidents due to critical operational errors.

Interlocked shutter arrangement in a switchgear cubicle
Safety appliances
Operators must be trained to use required safety/personal protective equipment without exception. Their use must be mandated by the applicable safety and operational procedures. They must be maintained in good condition with periodic testing where called for. We will discuss this in a later section in detail.
Safety of maintenance personnel
It is necessary to adopt the following basic rules to ensure safety during maintenance of electrical installations. Many of these key issues will be elaborated on later in this chapter.
De-energization and isolation
Maintenance work should be carried out on equipment only after it has been made dead and isolated from all possible sources. We will discuss these aspects in detail later in this chapter. Work on live equipment must be restricted to special cases and only when permitted by relevant operating procedures.
Earthing at the point of work
Any equipment which has been isolated must also be earthed. Earthing is the best means of ensuring the safety of personnel. No work should be performed on equipment unless it is visibly earthed. In case earthing has been applied at a remote point, a portable earth clamp should be applied close to the work spot. Checking by voltage indictor prior to earthing is necessary to avoid inadvertent earthing of live conductors, thereby creating a short circuit fault.
Prevent accidental re-energization
The part of an installation which has been isolated for maintenance work should not be energized until the work is complete. Accidental re-energization must be avoided by proper operating procedures, interlocks and warning notices posted on the supply circuits/their remote switches cautioning against closing.
Marking work boundary
The working area must be clearly marked out by removable boundary markers to avoid contact with energized equipment in the vicinity. A barrier arrangement may typically look like the one illustrated in Figure 30.2.

Examples of a barrier in front of a breaker cubicle
Live work
Working on live equipments must be restricted to specific situations. One of the common reasons for live work in supplier’s installations is to minimize the disruption of supply to a large number of consumers. Examples in industrial systems are on-line washing of insulators in HV outdoor substations and LV maintenance work such as lamp/fuse changes and testing work using alternate power supplies. Such work should be carried out only where specifically permitted by applicable rules. Appropriate precautions should be taken against direct contact. Adjacent exposed live parts should be properly shrouded or temporary barriers installed. Tools used for live work must be appropriately insulated to prevent arc faults due to accidental short circuits.
30.3 Isolation during maintenance of electrical installations
We have covered the importance of isolation in the previous chapters as well as the distinction between devices used for isolation and functional switching. Isolation of equipment or components is necessary in all cases before any repair or maintenance work can be taken up safely (the exception being, of course, work on live equipment). In many systems, there could be more than one supply source. Examples of these include duplicate feeders to a switchboard, a standby generator, a sectionalizing switch connecting to another live section and so on. Transformers and potential transformers whose primaries are fed from a switchboard should also be considered as sources for the purpose of isolation of the switchboard. This is because there is a danger of voltage feedback from the secondary side, if the secondary terminals of the transformer can inadvertently become live. As a matter of adequate caution, the possibility of an accidental feed of this nature from the secondary side must be prevented by using suitable interlocks.
We will explain this by using an example: In some designs, the auxiliary supply to a main switchboard is obtained by using a control transformer. In the case of double-ended substations, two such transformers may be provided for redundancy of auxiliary supply. The auxiliary supply obtained from both these transformers may be interconnected using switches to provide redundancy. In such a scheme, an inadvertent paralleling of both control transformers can cause a back feed. Though the main power section may be isolated from the incoming feeder side, the back feed from the auxiliary power scheme will cause a voltage of normal magnitude to appear on the power bus.
One way of preventing this from happening is to have an interlock on the auxiliary supply bus to avoid simultaneous closing of the secondary-side switches of both transformers: better still, provide a single changeover type of switch. In case the scheme uses contactors for achieving automatic restoration of auxiliary power, the contactors should then be electrically and mechanically interlocked to prevent simultaneous closure.
An important requirement of isolation is positive, visible separation of contacts. (For this reason, contactors, fixed circuit breakers and semiconductor switches cannot be considered as isolation devices). This feature distinguishes a device for use in isolation from one used for functional switching. Isolation should preferably be performed through a manual operation or if an electrical operation is a must, then by manual command. Knife switches, circuit breakers mounted on a withdrawable trolley, fuse-links removable through a tool etc. can all be considered as providing proper isolation.
One more aspect of isolation is that many equipments use control and other utility power supplies apart from the main power. This is especially true of high voltage equipment. An electrically operated HV outdoor isolator will have an LV power supply for feeding to the operating motor. Apart from this, AC or DC control supply and signaling system supply may also be available in the isolator mechanism. For safe working, the main HV power to the isolator must be off as well as the LV and DC control supply. Usually such isolation will have to be carried out by removal of LV fuse links at the operating cabinet mounted near the isolator.
Another point to be noted is that, as well as the equipment needing to be isolated before starting work, it should also continue to remain isolated until the work on it is completed and it is ready to be put back into service. Therefore, suitable measures must be in place to prevent accidental re-energization. We have discussed integrating this requirement in the equipment design itself by using mechanical interlocks, padlocking of operating handles or other safety features. In addition to these, warning signboards may be displayed at all points from where re-energization is possible.
Special care is required when working in a substation panel board line up. Since cable chambers are located at the back of the panel, it is possible to open an incorrect panel’s back cover, resulting in a dangerous situation. Refer to Figure 30.3:

Danger of Rear compartment access
The following well thought-out design features are useful:
- A compartment number and label on both front and rear side of the panel
- The labels should not be on a removable cover but on a fixed part of the panel
- Earth switches operated from the front, which short and earth the rear terminals (when you open the rear chamber, the earth switch position will be visible. If it is not ON, do not proceed)
- A key opened rear access door to the cable compartment with an additional internal touch proof bolted barrier having a large mesh screen gives the worker a view before he can actually start work
In addition, work procedures should ensure the following:
- Voltage test to check that the part to be worked on is dead
- Providing barriers at the panel to be worked upon (as in figure 4.1)
- Danger plates on adjacent live panels (so that maintenance personnel do not open them by mistake: refer to the figure 4.2 where removable labels are provided on the rear of 5 panels on each side of the one to be worked)
30.4 Visual checks for safety
One of the best ways to ensure safe working conditions, particularly applicable for outdoor substations, is a visual check of conditions prior to undertaking the work. Even though isolator and breaker operations may have been carried out from a remote control panel, safety earthing is always done by local earth switches (generally manually operated knife-blade type switches mounted on one of the isolators). Earthing switches have mechanical and electrical interlocking with the main switches on which they are mounted. In addition, magnetic solenoid type interlocking arrangements with other breaker/isolator status switches are also usually provided to ensure that earth switches are not inadvertently operated when the points to be earthed are live. However, in the case of large substations such interlocks involve complex circuits and are prone to mal-operation. Therefore, the status of various breakers and isolators which can cause the point of maintenance to be inadvertently energized (including PT isolators) should be checked visually before closing the earth blades. Similarly, switching on a circuit after work is over is preceded by switching off the earth switch (or removal of other temporary earth links). Here again a visual check is preferable to ensure that no earth switch/link is inadvertently connecting the point to be energized with earth. In the case of power feed from a remote facility, appropriate fool-proof procedures must be established for communication between remote and local facilities to coordinate switching actions for energization and re-energization.
Similar precautions should be taken where possible, while operating indoor equipment and panels. The status indicators of breakers/switches should be visually verified. All equipment on withdrawable carriages (such as circuit breakers) must be in a fully drawn-out position. As a further check, it should be verified that voltmeters connected to the point of work do not show voltage in any of the phases (such voltmeters are normally connected in incoming circuits and in bus sections). In case of a particular circuit which is being isolated, the ammeter in the circuit should show absence of a current flow. Finally, a voltage tester of approved type and voltage rating appropriate to the circuit, must be used to verify the absence of voltage. While using such a test device, its integrity must be verified using a live circuit just prior to and after the test. Such verification may not be feasible in the case of cable repairs nor is it possible to perform a voltage test. Special precautions are necessary in such cases and will be discussed in a later section.
30.5 Monitoring hot spots to improve safety
Hot Spots
Hot spots are points in electrical machinery whose temperature varies significantly from others situated adjacent to it. Hot spots usually develop in electrical machinery due to faulty design with inadequate conductor section or as a result of an abnormal situation such as faulty connections.
No electrical system is 100% efficient. Current flowing through an electrical system will generate a small amount of heat because of electrical resistance. With time, the components and contact surfaces of the electrical system will begin to deteriorate. With this deterioration comes increased resistance, and with resistance, increased heat. This course will continue until eventual failure. Fluctuating and high loads, vibration, metal fatigue, age and specific operational environments such as extreme ambient temperatures, wind, chemicals or dirt in the atmosphere will increase the speed of degradation and the number of faults in electrical systems.
Universally, the electric industry understands that temperature is an excellent indicator of the operating condition and subsequently, the reliability and longevity of an electrical component. It is well understood that the life of electrical components and materials is drastically reduced as temperatures are increased.
The defect will normally alter the thermal signature of the surface due to the change in the amount of heat generated and the heat transfer properties of the component. To determine an adverse operating temperature of a component it is necessary to first determine a baseline. For electrical systems the baseline is established when the system is operating under normal load and operating conditions.
Infrared thermography (IR/T) as a condition monitoring technique is used to remotely gather thermal information for monitoring the condition of virtually all of the electrical components on an entire system and from generation to end user.
All equipment when operating under regular conditions has a normal operating thermal signature, which is typical of the specific component being inspected. Infrared thermography presents this normal signature or baseline to us.
Once the baseline is established, IR/T will reveal the thermal variances deviating from the norm. This localized thermal deviation can either be caused by an overheated condition or absence of heat. The information is reviewed and decisions are made for repair or to plot the temperature change over time, and repair the component at a more opportune time. The information can be stored and fully analyzed at a later date providing complete computer aided predictive maintenance capabilities and trending.
Infrared Thermography is currently experiencing rapid growth as more and more electric utilities and industrial sectors are embracing the technology. The reason for this growth is because the maintenance personnel understand the benefits of this non-contact, nondestructive method. The main benefit of this method is the ability to locate deteriorating components prior to catastrophic failure. Thermography provides another set of eyes allowing a whole new level of diagnostic aid and problem solving.
Once a clear understanding is obtained on what the normal thermal signature is for the many electrical apparatuses and components, the thermography technician will be able to quickly identify a thermal anomaly. On larger more critical components such as transformers, circuit breakers, capacitors etc., the baseline images and data will be stored and compared to new data collected from each inspection interval. It is the job of the thermographer to identify, record, analyze and diagnose indications of abnormal heat transfer in the electrical equipment or components.
It is important that the data collected is accurate, repeatable and is properly analyzed. This depends on many variables, the main one being the thermographer’s level of understanding of infrared instrumentation, background theories and the level of field experience.


30.6 Earthing for safety during maintenance
After isolating the equipment or section required to be maintained, it is necessary to connect it to earth to ensure safety of personnel. Where earth switches are available (as is the case with outdoor HV switchyards and GIS substations), they can be used for this purpose. In other cases, approved types of portable earth clamps must be used. Whether switch or clamp, they short circuit all three phases and connect them to earth at the point of work. This serves two purposes:
- The part where work is carried out is clamped to the earth potential. This will also minimize any voltages that can be induced because of stray magnetic fields
- If there is any inadvertent re-energization when work is being carried out, it creates a three-phase metallic short circuit and will cause the circuit protective devices to operate
In the case of indoor switchgear panels, such earthing is normally carried out at the outgoing terminals of the feeding cubicle at the time of rendering the circuit dead. However in certain cases, the work may be carried out in some other place. In that case, a portable earth clamp must be used close to the point of work, in such a way that it is between the supply side and the point of work. The correct method of placing the clamp is to firstly connect the earth lead of the clamp, followed by the line leads one by one. This operation may be carried out by firstly lightly touching the line clamp to each phase at the point of work, taking due precautions to avoid being exposed to any arc in case the point of work is still live.
Where induced voltages may be present, earth clamps should be used at two points to ensure that a circulating current is set up and the voltage is effectively controlled. The current rating of the clamp conductor or switch must be adequate to carry the induced current safely with minimum voltage drop. Otherwise overheating may occur exposing working personnel to temperature hazards.
30.7 Need for periodic inspection and maintenance
The objective of periodic inspection and maintenance is to determine whether an installation is in a satisfactory condition for continued service. Periodic inspection should comprise of a careful scrutiny of the installation without dismantling or with partial dismantling, as per the scope decided by a competent person based on the availability of records and the condition of the installation. Inspection will generally be along the lines followed for initial verification. The following aspects need to be specially examined:
i. Safety of persons/livestock against electrical hazards.
ii. Protection against damage that can arise from a defect in the installation.
iii. Confirmation that the installation has no defects which threaten safety.
iv. Identification of any defects/non-compliance with regulations in the installation which may give rise to danger.
v. To ensure protection of property from fire and heat.
No fixed periodicity is recommended in most regulations. In the case of an installation which is under effective supervision in normal use, periodic inspection may not be necessary: instead a scheme of continuous monitoring and maintenance by skilled persons with appropriate documentation would be adequate. In other cases, a suitable periodicity can be determined based upon the type of installation, its use and operation, as well as the type and frequency of maintenance.
The person carrying out the work shall give a Periodic Inspection report together with the schedule of inspection and the schedule of tests to the person ordering the inspection. The record of defects/damage/non-compliance with regulations, etc. should be included in this report. The person carrying out the inspection will record the recommendation regarding the next appropriate date
of inspection.
Circumstances which require a periodic inspection and test:
- Test and inspection is due
- Insurance
- Mortgage
- Licensing reasons
- Change of use
- Change of ownership
- After additions and alterations
- After damage
- Change of loading
- To assess compliance with current regulations
General areas of inspection
- Safety
- Wear and tear
- Corrosion
- Damage
- Overloading
- Age
- External influence
- Suitability
- Effectiveness
Safety measures for inspection
- Inspection should be carried out with supply disconnected, as it may be necessary to gain access to the wiring enclosure etc. and therefore, with large installations, it will probably need considerable liaison with clients to arrange convenient times for interruption of supplies to various parts of installations.
- While testing protective conductors, these must not be disconnected unless the supply is isolated. This is important for main equipotential bonding conductors which need to be disconnected to measure Z.
Follow up measures
The defects revealed by periodic inspection reports should be attended to without delay in order to avoid unsafe situations. Apart from defect resolution, the following actions are also needed:
- A planned schedule of preventive maintenance should be drawn up based on manufacturer’s recommendation/code of practices and implemented rigorously. This will avoid too many defects from showing up during inspection.
- Measures for condition-based preventive maintenance may be adopted to attend to incipient problems and resolving the defects in early stages. Examples: Monitoring of oil parameters (online dissolved gas monitoring) in large transformers, hot-spot detection in indoor switchgear using infrared detectors, incipient arc fault detection through photoelectric sensors, etc.
While planned preventive maintenance is done according to a fixed schedule using a recommended list of maintenance works, condition-based maintenance is pro-active and relies on early warnings of problems. While this practice is well established in specific segments of mechanical machinery (such as vibration signature analysis in high speed machines), applications in the electrical field are gradually becoming popular. The main benefit is need-based maintenance and preventing major unforeseen failures, both of which have major cost implications.
30.8 Emergency and first-aid training
Accidents may happen even in the most well-designed and maintained installations. The training of personnel involved in operation and maintenance must include imparting knowledge about basic safety requirements as well as first aid measures required in case of accidents. When an operation requires a person to accompany another, the accompanying person must be trained in reacting to any accident which may involve the person carrying out the actual work. This may include calling for assistance from the designated agencies. It is the practice in many installations to display in bold letters a few important telephone numbers to be contacted in case of fire or electrical emergencies. All personnel must receive basic training in treating victims of electric shock/burns. Knowledge of artificial respiration/resuscitation is helpful to treat persons exposed to electric shock. Shock charts must be displayed for ready reference in areas housing electrical equipment, outlining the steps to be taken in the event of electric shock. Where mandated, first aid kits must be provided for immediate treatment to victims of injuries/burns.
31
Portable Electric Tools and Equipment
In this chapter we will cover different types of portable hand and power tools, their maintenance and detail description on electrical power tools, maintenance and protection.
Learning objectives
- Portable hand and power tools
- Safety devices for power tools
- Portable electric tools
- Ground-type plugs and receptacles
- Double insulated portable electric tools
- Electrical cords-heavy duty cords
- Safety precautions
- Employee training
31.1 Introduction
Dependable performance and long service life of power tools is becoming more important as the need for mechanization and the use of power tools increase. A plant’s entire inventory of portable tools can be kept in top operating condition for maximum production quality and cost efficiency with planned routine and periodic inspection.
There are many and varied types of portable power tools and many and varied causes of power tool failure. Therefore, the procedures for their maintenance can be general recommendations only. Variations exist and depend on the type of tool and the particular conditions of its use. It is strongly recommended that the information on proper use and maintenance given in the tool manufacturer’s use and care manual, supplied with each tool, be carefully followed.
Periodic electrical testing will uncover many operating defects, and their immediate correction will ensure safe operation and prevent breakdown and more costly repairs. This testing and the related maintenance should be systematic. Visual inspection is recommended before and after each use: when the tool is issued and again when it is returned to the tool crib.
- Tools are such a common part of our lives that it is difficult to remember that they may pose hazards.
- Serious accidents often occur before steps are taken to identify and avoid or eliminate tool-related hazards.
- Workers must learn to recognize the hazards associated with the different types of tools and take the safety precautions necessary to prevent those hazards.
31.2 Portable hand and power tools
The following are the different kind of portable tools:
- Hand tools
- Electric tools
- Portable abrasive wheel tools
- Pneumatic tools
- Powder-actuated tools
- Hydraulic power tools
The tools that are powered manually are called Hand tools. These tools include anything from axes to wrenches. The greatest hazards posed by hand tools result from misuse and improper maintenance.
The following are some of the examples:
- The wrench might slip if the jaws of a wrench are sprung.
- Cracked, splintered or loose contacts of the wooden handle on a tool (for example hammer or an axe) may cause damage to the user or other employees.
- If a chisel is used as a screwdriver, the tip of the chisel may break and fly off, hitting the user or other employees.
- Cracked saw blades must be removed from service.
- If impact tools such as chisels, wedges, or drift pins have mushroomed heads, the heads might shatter on impact, sending sharp fragments flying towards the user or other employees.
- Proper care must be taken when using tools like saw blades, knives, or other tools, they should be kept away from the aisle areas and away from other employees working in close proximity.
- Iron or steel hand tools may produce sparks that can be an ignition source around flammable substances. Where this hazard exists, spark-resistant tools made of non-ferrous materials should be used where flammable gases, highly volatile liquids, and other explosive substances are stored or used.
- Wrenches must not be used when jaws are sprung to the point that slippage occurs.
- Impact tools such as drift pins, wedges, and chisels must be kept free of mushroomed heads. The wooden handles of tools must not be splintered.
The types of power tools are determined by their power source: electric, pneumatic, liquid fuel, hydraulic, and powder-actuated Power tools. Power tools are extremely hazardous when they are used improperly. They must be fitted with guards and safety switches.
To prevent hazards associated with the use of power tools, workers should observe the following general precautions:
- Never carry a tool by the cord or hose.
- Keep cords and hoses away from heat, oil, and sharp edges.
- Never yank the cord or the hose to disconnect it from the receptacle.
- Secure work with clamps or a vise, freeing both hands to operate the tool.
- Keep all people not involved with the work at a safe distance from the work area.
- Disconnect tools when not using them, before servicing and cleaning them, and when changing accessories such as blades, bits, and cutters.
- Follow instructions in the user’s manual for lubricating and changing accessories.
- Maintain tools with care; keep them sharp and clean for best performance.
- Avoid accidental starting. Do not hold fingers on the switch button while carrying a plugged-in tool.
- Wear proper apparel for the task. Loose clothing, ties, or jewelry can become caught in moving parts.
- Be sure to keep good footing and maintain good balance when operating power tools.
- Remove all damaged portable electric tools from use and tag them: “Do Not Use.”
31.2.1 Safety devices for power tools
There are two different kinds of safety devices that are used with portable power tools.
- Guards
- Safety Switches
Guards: Power tools which have exposed moving parts are to be safeguarded. Belts, gears, shafts, pulleys, sprockets, spindles, drums, flywheels, chains, or other reciprocating, rotating, or moving parts of equipment must be guarded.
Machine guards protect operator and others from the following damages;
- Point of operation.
- In-running nip points.
- Rotating parts.
- Flying chips and sparks.
Safety Switches: Hand- held power tools like – drills, tappers; fastener drivers; horizontal, vertical, and angle grinders with wheels more than 2 inches (5.08 centimeters) in diameter; disc sanders with discs greater than 2 inches (5.08 centimeters); belt sanders; reciprocating saws; saber saws, scroll saws, and jigsaws with blade shanks greater than 1/4-inch (0.63 centimeters) wide; and other similar tools-must be equipped with a constant-pressure switch or control.
The following hand-held power tools must be equipped with either a positive “on-off” control switch, a constant pressure switch, or a “lock-on” control: disc sanders with discs 2 inches (5.08 centimeters) or less in diameter; grinders with wheels 2 inches (5.08 centimeters) or less in diameter; platen sanders, routers, planers, laminate trimmers, nibblers, shears, and scroll saws; and jigsaws, saber and scroll saws with blade shanks a nominal 1/4-inch (6.35 millimeters) or less in diameter. It is recommended that the constant-pressure control switch be regarded as the preferred device.
31.3 Portable electric tools
Tools which are operated by means of electric power are called electric tools and can be comfortably handled, e.g. drills, saws, grinding wheels.
Major hazards associated with electric-powered tools are electrical shocks, which can lead to injuries such as heart failure and burns. To protect the user from shock and burns, electric tools must have a three-wire cord with a ground and be plugged into a grounded receptacle, be double insulated, or be powered by a low-voltage isolation transformer. Three-wire cords contain two current-carrying conductors and a grounding conductor. Any time an adapter is used to accommodate a two-hole receptacle, the adapter wire must be attached to a known ground. The third prong must never be removed from the plug.
Double-insulated tools are available that provide protection against electrical shock without third-wire grounding. On double-insulated tools, an internal layer of protective insulation completely isolates the external housing of the tool.
The following are the principles to be followed when using electric tools:
- The non-current carrying metal parts of portable electric tools such as drills, saws, and grinders shall be effectively grounded when connected to a power source unless:
- The tool is an approved double-insulated type, or
- The tool is connected to the power supply by means of an isolating transformer or other isolated power supply.
- All powered tools shall be examined prior to use to insure general serviceability and the presence of all applicable safety devices.
- Powered tools shall be used only within their design and shall be operated in accordance with the instructions of the manufacturer.
- All tools shall be kept in good repair and shall be disconnected from the power source while repairs or adjustments are being made.
- Electrical tools shall not be used where there is hazard of flammable vapors, gases, or dusts.
- Ground fault circuit interrupters or assured grounding inspection programs shall be used with portable electric tools.
31.4 Ground-type plugs and receptacles
Portable electric power tools require that the electric cord of each tool have a distinctively marked ground wire in addition to the conductors for supplying power to the tool. The end of the ground wire within the tool must be connected to the metal housing of the tool. The other end must be connected to a positive ground. For this ground connection, specifically designed ground-type plugs and receptacles, which automatically make this connection when the plug is inserted into the receptacle, must be used. These grounded-type receptacles must be installed for all power outlets. When installed, they must be used with the grounded- type plugs to ground portable tools and equipment. If the grounded-type plugs and receptacles have not been installed in the spaces where a portable tool is to be used, other types of plugs and receptacles may be used only if a separate ground wire is connected between the tool housing and a positive ground.
Power plugs
Power plugs are male electrical connectors that fit into female electrical sockets. They have contacts that are pins or blades that connect mechanically and electrically to holes or slots in the socket. Plugs usually have a live or hot contact, a neutral contact, and an optional earth or Ground contact. Many plugs make no distinction between the live and neutral contacts, and in some cases they have two live contacts. The contacts may be steel or brass, and may be zinc, tin or nickel plated.
Power receptacles
Power receptacles (power socket or power outlets) are female electrical connectors that have slots or holes which accept the pins or blades of power plugs inserted into them and deliver electricity to the plugs. Sockets are usually designed to reject any plug which is not built to the same electrical standard. Some sockets have a pin that connects to a hole on the plug, for a ground contact.
Household electrical receptacles use single-phase electrical power in which a single conductor brings alternating current into a house and a neutral returns it to the power supply. Most household receptacles also include an earth contact, which only carries electrical current if it is connected to equipment that has developed an insulation fault.
The following are the different types of receptacles used:
- 120- volt duplex receptacles
- GFCI receptacle
- 240 volt receptacles
- 240-120-volt electrical receptacles
- Grounded duplex receptacles consist of an upper and lower outlet, each with three slots (refer figure 31.1).
- The larger (neutral) slot accepts the wide prong of a three-pronged plug; the smaller (hot) slot is for the narrow prong, and the U-shaped grounding slot is for the grounding prong.
- Both amperage and voltage are clearly stamped on the front.
- Many receptacles include push-in terminals in back; facilitating so-called “back wiring” (note that this wiring method is illegal in some areas). Duplex receptacles come in several colors.

120- Volt duplex receptacles
GFCI receptacle
- A special type of receptacle called a GFCI (or GFI), short for ground-fault circuit interrupter, are required in kitchens, bathrooms, and other exposed, damp areas of a home to protect from the serious shock that can occur where electricity and water meet.
- Identified by the reset and test buttons located on its face, a 120-volt GFCI receptacle takes the place of a standard duplex receptacle and monitors electric current (refer figure 31.2).
- Whenever the amounts of incoming and outgoing current are not equal, such as during a ground fault or current leakage, the GFCI will sense even a tiny short and will shut down itself and, in some cases, other receptacles on the same circuit.
- Just push the reset button to reset the receptacles. Push the test button periodically to ensure that the device is working.

GFCI receptacle
240 volt receptacles
- This 3-pole receptacle has two hot slots and a third grounding slot; its configuration matches a specific plug and amperage and is not interchangeable with other plugs (refer figure 31.3).
- The design prevents the user for example, plugging a 31-amp table saw into a 20-amp circuit.
- Both surface-mounted and recessed (flush-mounted) models are available.
- Industrial-grade versions include a locking device that holds the plug in the slots
- A safety measure for stationary power tools and other heavy equipment.

240 volt receptacles
240-120-volt electrical receptacles
- These outlets provide both 240- and 120-volt power and have four poles: two hot, one neutral, and one grounding slot.
- As with the 240-volt receptacle, each slot pattern is designed for a specific plug and amperage (refer figure 31.4).
- Both surface-mounted and recessed models are available.

240-120-volt electrical receptacles
31.5 Double insulated portable electric tools
Double insulated tools are constructed throughout with two separate layers of electrical insulation or one double thickness of insulation between user and the tool’s electrical system. Tools built with this insulation system are not intended to be grounded. As a result, the tool is equipped with a two prong plug which permits the user to use extension cords without concern for maintaining a ground connection. The insulation system is for added protection against injury resulting from a possible electrical insulation failure within the tool. Figures 31.5 and 31.6 shows typical double insulated tools.
Household electrical receptacles use single-phase electrical power in which a single conductor brings alternating current into a house and a neutral returns it to the power supply. Most household receptacles also include an earth contact, which only carries electrical current if it is connected to equipment that has developed an insulation fault.

Double insulated portable tool

Double insulated portable tool
31.6 Electrical cords
An electric cord is a length of a conductive medium, usually copper, surrounded by an insulating jacket and further contained in a plastic or metal cord (refer figure 31.7). Electric cords are used to transfer AC (alternating current) power from a plug to an electrical device. When an electric cord is molded to two connectors (in order to connect a device to a socket), it is known as an electrical cord set or power cord.
Electric cords vary based on the voltage and frequencies they are designed to handle, the shape of their connectors, the thickness and composition of their insulation, and their length.
Electric cords may be listed by UL (Underwriters Laboratories) or CSA (the Canadian Standards Association), indicating that they have been tested for safety. If they are to be used in the European Union, they are required to be tested and bear the CE mark, a unique marking that looks like a C and E combined.

Electrical cords
Power cords and extension cords are detachable means of supplying electricity from a main power source to electrical equipment or appliances. The electrical energy is in the form of alternating current (AC). A power cord set consists of a flexible cord with plug attachments at each end, one male and one female. The power cord is comprised of a conducting medium, typically copper, the insulation surrounding the medium and an outer jacket to protect and insulate the wire (refer figures 31.8, 31.9 and 31.20). Power supply cords, which are permanently affixed to electrical equipment and power cord sets are utilized anywhere that electrical equipment and appliances are in use, including industrial, office and domestic settings. Extension cords, one type of cord set, are used for electrical power tools, lighting and various other private uses.

Power Cords and Power Cord Manufacturers
(Image Courtesy High Tech Connections)

Power Cords and Power Cord Manufacturers
(Image Courtesy Quail Electronics, Inc.)

Power Cords and Power Cord Manufacturers
(Image Courtesy Kord King)
31.6.1 Heavy duty cords
Heavy duty cords are specially designed for rough, heavy-usage environments in industrial or commercial applications. The head is constructed with large flats having deeply contoured ridges that afford a non-slip grip, and a heavy molded strain relief shroud protects the cord/plug union, as shown in figures 31.11 and 31.12.
These are desirable for portable tools used for industrial applications and a must for building sites and damp and wet locations such as dairies, commercial laundries etc. Can be used in hazardous areas providing the conductor is not less than 1.5mm2.
Heavy duty grounded extension cords have two layers of insulation, with reinforcement between the layers. They are less susceptible to damage than household type cords. To check if the cord is heavy duty, check its shape. Most flat cords are not heavy duty. Heavy duty cords will have a marking on the insulation such as: “S”, “SJ”, and “SJO”.
The following are the safety measurements taken while using electric cords:
- Use only approved extension cords that have the proper wire size for the length of cord and power requirements of the electric tool that being used. This will prevent the cord from overheating.
- For outdoor work, use outdoor extension cords marked “W-A” or “W”.
- Do not use light-duty power cords
- Do not use any tool with a damaged or exposed cord or exposed wiring.
- Check cords regularly for fraying, insulation damage, and crushing or cutting.
- If a power cord feels more than comfortably warm, remove it from service and have it checked by an electrician or other qualified person.
- Do not lay electrical cords over sharp edges or through doorways or holes in walls.
- Protect cords from damage by vehicles, being walked on, and so on. Cords should be put in conduits, placed under a cord cover or protected by placing planks on each side of them.
- Do not lift, lower, or carry tools by their cords.
- When unplugging a tool, pull the plug, not the cord. Pulling the cord causes wear and may adversely affect the wiring to the plug.
- Do not plug several power cords into one outlet by using single-to-multiple outlet adapters or converters (cube taps).
- Eliminate octopus connections: if more than one receptacle plug is needed, use a power bar or power distribution strip that has an integral power cord and a built-in over-current protection.
- Do not connect or splice extension cords together to make a longer connection: the resulting extension cord may not be able to provide sufficient current or power safely.
- Do not tie power cords in knots. Knots can cause short circuits and shocks. Loop the cords or use a twist lock plug.
- Do not break off the third prong (ground prong) on a plug: replace broken three-prong plugs and make sure the third prong is properly grounded.
- Do not use extension cords as permanent wiring: use extension cords only as a temporary (for example 31 days) power supply to an area that does not have a power outlet.

The most popular coagulation cord is the 26-2015 which is 8 ft. long and constructed of a supple lightweight material

This cord is 8 ft. long, uses heavy duty cordage, and has the same connectors as the 26-2015 cord
31.7 Safety precautions
The following are some general safety precautions to be taken while working with various types of tools
- Always keep work area clean as cluttered areas and benches invite injuries.
- Don’t expose power tools to rain. Don’t use power tools in damp or wet locations. Keep work area well lit.
- Prevent body contact with grounded surfaces; for example, pipes, radiators, ranges, and refrigerator enclosures as this will protect against electric shocks.
- All visitors should be kept away from work area. Do not let visitors contact tool or extension cord especially children should be kept away.
- When not in use, tools should be stored in dry, and high or locked-up place — out of reach of children.
- Do not force a tool as It will do the job better and safer at the rate for which it was intended.
- Don’t force small tool or attachment to do the job of a heavy duty tool. Don’t use tool for purpose not intended; for example, don’t use circular saw for cutting tree limbs or logs.
- Do not wear loose clothing or jewelry. They can be caught in moving parts. Rubber gloves and non-skid footwear are recommended when working outdoors.
- Wear protective hair covering to contain long hair. Also use face or dust mask if operation is dusty, if required use safety glasses.
- Never carry tool by cord or yank it to disconnect from receptacle. Keep cord from heat, oil, and sharp edges.
- Use clamps or a vise to hold work. It’s safer than using your hand and it frees both hands to operate tool.
- Keep proper footing and balance at all times. Do not ever overreach any unsafe tool.
- For better and safe performance always keep tools sharp and clean.
- For changing accessories and for lubricating always follow the given instruction
- Tool cords must be inspected periodically and have to be repaired immediately if damaged. Inspect extension cords periodically and replace if damaged.
- Keep handles dry, clean, and free from oil and grease.
- Disconnect or lock off tools when not in use, before servicing, and when changing accessories, such as blades, bits, cutters.
- One should have the habit of checking to see that keys and adjusting wrenches are removed from tool before turning it on.
- Don’t carry plugged-in tool with finger on the switch. Be sure the switch is off when plugging in. Always avoid unintentional starting.
- When tool is used outdoors, use only extension cords intended for use outdoors and so marked.
- Check damaged parts. Before further use of the tool, a guard or other part that is damaged should be carefully checked to determine that it will operate properly and perform its intended function. Check for alignment of moving parts, binding of moving parts, breakage of parts, mounting, and any other conditions that may affect its operation. A guard or other part that is defective should be properly repaired or replaced by an authorized service center unless otherwise indicated elsewhere in this instruction manual. Have defective switches replaced by authorized service center. Do not use tool if switch does not turn it on and off.
- Do not operate portable electric tools near flammable liquids or in gaseous or explosive atmospheres. Motors in these tools normally spark, and the sparks might ignite fumes.
31.8 Employee training
Employee training in the proper care and use of portable power tools is an important part of preventive maintenance. Employees should be given instructions in selecting the proper tool for the job and the limitations of the tool. Using an underpowered tool for the work load can cause overloading. Employees should be trained to recognize obvious defects such as cut, frayed, spliced, or broken cords; cracked or broken attachment plugs; and missing or deformed grounding prongs. Such defects should be reported immediately. Employees should be instructed to report all shocks immediately, no matter how minor, and to cease using the tool. Tools that cause shocks should be examined and repaired before further use.
Periodic inspection of crucial wear points: Brushes and commutators should be inspected periodically. This is easily accomplished by removal of brush-holder plugs or inspection plates, depending on the construction of the tool. Brushes worn down to 50 percent of their original size should be replaced. When a brush is replaced, always be sure to use the manufacturer’s original equipment.
Excessive dirt accumulation: All universal motors are fan ventilated to prevent excessive heat. Even though many tools have filters and deflectors to prevent destructive material from damaging the motor, a small amount of it will pass through. Excessive buildup affects the brush operation and reduces the air volume necessary to cool the motor. When necessary, a tool used in a normal environment should be blown out with low-pressure, dry-compressed air. More frequent specialized maintenance should be considered if the atmosphere is heavy in abrasives or conducting dusts.
Insufficient or improper lubrication: Lubricant inspection is recommended at frequent intervals to ensure sufficient lubrication to prevent wear to mechanical parts. Dirty lubricants should be removed and replaced. Because lubricant varies from tool to tool, it is recommended that proper lubricant be obtained from the manufacturer or the manufacturer’s distribution outlet.
Manufacturers carefully match lubricants to be compatible with speeds, heat, seals, bearings, and pressure to ensure long gear and mechanism life. Substitutions can damage the tool and invalidate the warranty.
The wrong amount of lubricant can cause serious problems. Too little means that surfaces are not adequately covered and excess wear will result. Too much lubricant can cause excess pressure in the gear case and eventually ruin seals.
Cord and attachment plug care: The cord of an electric power tool is its lifeline. It should be kept free of oil, grease, and other material that might ruin the rubber cover. Tangling knots or dragging across sharp surfaces should be avoided. The cord should not be used as a towline to carry or drag the tool.
All power tools, unless they are double insulated and so marked, are required to be grounded through an additional grounding conductor in the cord and the grounding prong of the attachment plug. The integrity of this grounding circuit is necessary for the protection of life and should be inspected visually before each use. Experience has shown that the grounding prongs of attachment caps are frequently cut off for use in ungrounded receptacles. This practice should not be permitted.
If a cord is cut, broken, spliced, or frayed, the attachment plug is damaged, or the grounding prong is removed, it should be immediately withdrawn from service until it can be repaired. Cords can be replaced in their entirety, or a damaged cord can be repaired by cutting out the damaged portion and applying a plug and connector to rejoin the two sections. Replacement cords should be of the same type and conductor size and suitable for use.
To avoid accidents, the green insulated conductor is to be used only for connecting the frame of the tool to the equipment-grounding terminal of the attachment plug meeting the conditions of NFPA 70, National Electrical Code, Section 400.24. It should not be used for any other purpose.
Extension cords: Before an extension cord is placed into service, the plug and connector should be checked for proper polarity, and the grounding conductor should be tested for continuity and integrity. Extension cords of the proper conductor size should be used to avoid excessive voltage drop, which can result in poor operation and possible damage to the tool. Table 31.1 lists the recommended sizes of extension cords.
Recommended Extension Cord Sizes for Portable Electric Tools

Note:
(1)Size is based on current equi8valent to 150% of full load of tool and a loss in voltage of not over 5v.
(2)If voltage is already low at the source (outlet), voltage should be increased to standard or a large cord than listed should be used to minimize the total voltage drop.
Major overhauls: Major overhauls and repairs should be performed by the manufacturer. Large companies that use power tools and that prefer to do their own repairs and overhaul should obtain the necessary parts, schematics, connection diagrams, lubricant charts, and other technical information from the manufacturer.
Leakage current testing: Portable and cord-connected equipment should be tested periodically for the amount of leakage current present to help ensure against shock hazards.
Below figures shows the safety precautions while using electric tools.

Added Safety while using electric power tools

Use with electric yard tools

Keep cords out of your way while on a ladder to make work safe and easy.

The 5 Finger Utility Clip provides worker obstruction free range of motion .More importantly, the 5 Finger Utility Clip DOES NOT affect the operation of the Safety Harness at the critical time of deployment – it breaks away freeing the Safety Harness to do its job!
32
Maintenance Reports
In this chapter will learn about types of reports used for transformer testing, UPS inspection, batteries inspection, circuit breaker testing, Overload relay testing.
Learning objectives
- Transformer Test Report
- Uninterruptable Power Supply (UPS) Inspection Checklist
- Batteries Inspection Checklist
- Circuit Breaker (Oil) Test Report
- Overload Relay Test Report
32.1 Transformer test report
Transformer test report


32.2 UPS inspection checklist
Uninterruptible power supply (UPS) inspection checklist

32.3 Batteries inspection checklist
Batteries inspection checklist

32.4 Circuit breaker (oil) test report
Oil circuit breaker test report

32.5 Overcurrent relay test report
Overcurrent relay test report

APPENDIX
Practical exercises
1. Please refer to Figure A.1 and fill in the following details:

Single line diagram
Total number of 200 Amp outgoing feeders is: ________________
Rating of the transformer used to step down 13.8 kV to 480 V in kVA: ___________
Current rating of the bus coupler breaker is: ____________
2. Please refer to Figure A.2 and fill in the following details:

Single line diagram
Total number of 4.16 kV circuit breakers shown in the drawing are:________________
Number of step up transformers shown in the drawing are: ___________
Voltage on the delta side of the step-down transformer is: ____________
3. Please refer to Figure A.3 shown below and fill up the device names in the blanks.

Single line diagram
4. Please refer to Figure A.3 sheet 1. The power circuit for 3-phase motor M1 uses a star-delta starter through contactors K99 and K97. Which is the reference no. of the coil with timer for the star-delta change-over? Which is the reference number of the indication lamp for ‘MAIN MOTOR ON’? How many NO and NC contacts been utilized for K99?

5. Please refer to sheet no.5 of Figure A.3. Coil no.s K55, K57 and K59 have interlocks with which pressure switches and which sheet gives the interlock details of NC contacts of these coils?

6. Refer to Figure A.4 to answer the following questions.

Logic diagram for solenoid valve circuit
The number of ‘OR’ gates used is: ________
The number of ‘AND’ gates used is: ________
The number of ‘NOT” gates used is: ________
Under what conditions does logic gate ‘1’ get energized?
If the input signal from safety interlock circuit is high, will the output be sent by gate ‘2’ for valve opening?
Under how many conditions does the valve get energized and which are those conditions?
7. Please refer to Figure A.5 to answer the following questions:
The number of ‘OR’ gates used is: ________
The number of ‘AND’ gates used is: ________
The number of ‘NOT” gates used is: ________
Under what conditions is the ‘Start’ signal sent to the field?
The ‘Pump fail’ signal is utilized for resetting which signals and why?
Under what conditions is the ‘Pump Ready’ signal displayed?

Logic diagram for pump start/stop and indication circuit
8. Refer to Figure A.6. What do the following Cable Tag nos represent?
LT – r1
SQ1 – q3 – QPL

Abbreviations used for cable numbering procedure
9. Refer to Figure A.7. What are the approximate sizes and lengths of the new cable trays to be installed as per the site plan shown?


Site plan for cable tray installation
10. Refer to Figure A.8. What is the number of the proposed pull boxes and existing pull boxes shown in the drawing?

Pull box layout and cross sectional detail for outdoor illumination and other electrical services
11. Refer to Figure A.9. What is the cable name and the function texts for the different cores of the cable shown in the diagram?

Example of interconnection diagram (1)
12. Refer to Figure A.10. What is the terminal strip no. and the terminal numbers connecting the cable from Tachometer to the Generator G1?

Example of a terminal diagram
Answers/suggested solutions to practical exercises
Answers –
1. Please refer to Figure A.1.
Number of 200 A outgoing feeders: 3 nos
Rating of step down transformer : 1000 kVA
Current rating of bus coupler breaker: 1200 A
2. Please refer to Figure A.2.
Total no. of 4.16 kV switchgear is: 10
5 in the generating station, 4 in the step down substation and 1 in the load center substation.
No. of step up transformers: 2 x 4.16/34.5 kV
Voltage on delta side of step down transformers: 34.5kv and 4.16kV respectively.
3.
| Relay No. | Function |
| 50 | Instantaneous Overcurrent |
| 51N | AC time overcurrent (Neutral) |
| 86 | Lockout Relay |
| 87 | Differential protective relay |
4. Please refer to Figure 3.3 (Chapter 3 of manual, sheets 1 to 8)K97 and K99 refer to sheet 8 for details of the contactor coil for timer. Delta- wye timer contactor coil reference no. is K98.
Indication lamp no. for ‘MAIN MOTOR ON’ is H96 (refer sheet 8).
No. of NO contacts for K99 is 3.
No. of NC contacts for K99 is 2.
5.
| Contactor coil no. | Pressure switch tag no. |
| K 55 | S 55, S 56 |
| K 57 | S 57, S 58 |
| K 59 | S 59, S 60 |
6.
i. No. of ‘OR’ gates: 1
ii. No. of ‘AND’ gates: 2
iii. No. of ‘NOT’ gates: 2
Gate 1 is an ‘AND’ gate and will get energized only when each of the following conditions is met:
– Limit switch signal from field for valve open is active.
– Signal from safety interlock circuit is not active.
– Selector switch is in ‘AUTO’ position.
Gate 2 is an ‘OR’ gate and it gives a high output either if the input from the Gate 1 is high or the selector switch is in ‘OPEN’ position. If the input signal from safety interlock is ‘high’, then the output of Gate 1 will be low and the valve will not get energized in the ‘Auto’ mode. However, a manual bypass to the interlock circuit is provided through ‘Gate2’ which can give a high output if the selector switch is in ‘OPEN’ position.
The two conditions are:
i. In automatic mode when each of the following is true:
– Limit switch for valve open position is active
– Signal from safety interlock is not active
– Selector switch is in ‘AUTO’ position
ii. In manual mode
– Selector switch is in ‘OPEN’ position
7.
i. No. of ‘OR’ gates: 5
ii. No. of ‘AND’ gates: 5
iii. No. of ‘NOT’ gates: 2
‘Start’ signal is sent to the field under the following conditions:
– Start permissive circuit is active
AND
– Start PB is activated OR Auto Start is activated
‘Pump fail’ signal is used to reset the ‘START’ signal going to the field and the Auto Start mode so that the pump cannot be started through ‘Auto start’ once ‘pump fail’ signal has been received.
‘Pump ready’ signal is displayed under the following conditions:
When each of the following signals is not activated (is low):
– Process trip
– Auto stop
– Pump fail
– Stop PB (manual)
AND start permissive signal is high.
8. LT-r1: Cable run for outside lighting; cable purpose- power cable
(lighting cable serial no. 1)
SQ1 – q3- QPL: Cable run starting from 480 V switchgear (cable serial 3) to Oil Transfer Pump (Lube); cable purpose: power circuit
9. Please refer to attached drawing with the highlighted sections of new cable trays. The approx. length of cable trays to be calculated with the help of the scale given, i.e. 1 inch = 30 ft.

New cable trays and fittings as per the notes section provided in the drawing:
(5) – 24” cable tray
(6) – 30” X 24” horizontal tee fitting
(7) – 30” cable tray
(8) – 30” X 30” horizontal tee fitting
10. No. of proposed pull boxes shown in the diagram is 1.
No. of existing pull boxes shown in the diagram is 3.
11. Cable name is W2 (3 core)
| Conductor | Used for |
| sw | valve forward |
| bl | 24V DC |
| PE | Valve forwards |
12.
Terminal strip no.: X1
Terminal strip nos 3 and 4 are used for terminating the cable from tachometer to generator G1.


Professional Certificate of Competency in Advanced TCP/IP-Based Industrial Networking
Designed for engineers and technicians who need practical knowledge in…Read more
Professional Certificate of Competency in Allen Bradley Controllogix / Logix5000 PLC Platforms
Designed for engineers and technicians who need practical knowledge in…Read more
Professional Certificate of Competency in Arc Flash Protection
Designed for engineers and technicians who work in the electrical…Read more
Professional Certificate of Competency in Chemical Engineering and Plant Design
Designed for engineers and technicians who need practical knowledge in…Read more
Professional Certificate of Competency in Circuit Breakers, Switchgear and Power Transformers
Designed for engineers and technicians who need practical knowledge regarding…Read more
Professional Certificate of Competency in Control Valve Sizing, Selection and Maintenance
Designed for engineers and technicians who need a solid understanding…Read more
Professional Certificate of Competency in Electrical Power System Fundamentals for Non Electrical Engineers
Designed for engineers and technicians who need to understand the…Read more
Professional Certificate of Competency in Electrical Power System Protection
Designed for engineers and technicians who need practical skills and…Read more")
Professional Certificate of Competency in Electrical Wiring Standards: AS/NZS 3000:2018 (Australia and New Zealand Only)
This professional development course is designed for engineers and technicians…Read more
Professional Certificate of Competency in Fundamental E & I Engineering for Oil and Gas Facilities
Designed for engineers and technicians who need to update their…Read more
Professional Certificate of Competency in Gas Turbine Engineering
Designed for engineers and technicians who need practical skills in…Read more
Professional Certificate of Competency in Hazardous Areas and Intrinsic Safety For Engineers and Technicians
Designed for engineers and technicians who need to understand the…Read more")
Professional Certificate of Competency in Heating, Ventilation and Air-Conditioning (HVAC)
Designed for engineers and technicians from a wide range of…Read more
Professional Certificate of Competency in IEC 61850 Based Substation Automation
Designed for engineers and technicians who need to understand the…Read more
Professional Certificate of Competency in Industrial Data Communications
Designed for engineers and technicians who need to understand how…Read more
Professional Certificate of Competency in Instrumentation, Automation and Process Control
Designed for engineers and technicians who need to gain practical…Read more
Professional Certificate of Competency in Machine Learning and Artificial Intelligence
This professional development course is designed for engineers and technicians…Read more
Professional Certificate of Competency in Mechanical Engineering
This professional development course is designed for engineers and technicians…Read more
Professional Certificate of Competency in Onshore and Offshore Pipeline Systems
Designed for engineers and technicians who need to gain an…Read more
Professional Certificate of Competency in Power Distribution
designed for engineers and technicians who need to gain a…Read more
Professional Certificate of Competency in Practical Machine Learning Using Python for Engineers and Technicians
Designed to use Python Programming to work with machine learning…Read more
Professional Certificate of Competency in Practical Python for Engineers and Technicians
Designed for engineers and technicians who need to understand the…Read more & SCADA Systems")
Professional Certificate of Competency in Programmable Logic Controllers (PLCs) & SCADA Systems
Designed for engineers and technicians who need to get practical…Read more
Professional Certificate of Competency in Project Management for Engineers & Technicians
This professional development course is designed for engineers and technicians…Read more
Professional Certificate of Competency in Safety Instrumentation Systems for Process Industries
Professional development course designed for engineers and technicians who want…Read more
Professional Certificate of Competency in Sewage and Effluent Treatment Technologies
Designed for engineers and technicians who need practical skills and…Read more
Professional Certificate of Competency in Structural Design for Non Structural Engineers
Professional development course designed for engineers and technicians who need…Read more")
Professional Certificate of Competency in Substation Design (Main Equipment)
Professional development course is designed for engineers and technicians who…Read more")
Professional Certificate of Competency in Substation Design (Control, Protection and Facility Planning)
Designed for engineers and technicians who need to gain practical…Read more
Professional Certificate of Competency in the Fundamentals of Process Plant Layout & Piping Design
Professional development course is designed for engineers and technicians who…Read more
Professional Certificate of Competency in Practical Mechanical Sealing
This professional development course is designed for engineers and technicians…Read more
Professional Certificate of Competency in Road Construction
This professional development course is designed for engineers and technicians…Read more
Professional Certificate of Competency in Specification and Technical Writing
Master the art of writing clear, accurate, and professional technical…Read more
Professional Certificate of Competency in Hydraulics and Pneumatics
Overview of all aspects related to the construction, design, operation,…Read more
Professional Certificate of Competency in Big Data and Analytics in Electricity Grids
This course explores the use of big data & data…Read more
Professional Certificate of Competency in Renewable Energy Systems
This course covers various renewable energy systems that are popular…Read more
Professional Certificate of Competency in Smart Grids
A smart grid is an electricity network that uses digital…Read more
Professional Certificate of Competency in Hydrogen Energy – Production, Delivery, Storage and Use
Hydrogen energy short course designed for engineers and professionals interested…Read more")
Professional Certificate of Competency in Building Information Modelling (BIM)
This professional development course is covering practical aspects of using…Read more
Professional Certificate of Competency in Industrial Internet of Things
Internet of Things (IoT) is the most sort after technology…Read more