")
52896WA Advanced Diploma of Civil and Structural Engineering (Materials Testing)
Investigation of the properties of construction materials, the principles which…Read more")
Graduate Diploma of Engineering (Safety, Risk and Reliability)
The Graduate Diploma of Engineering (Safety, Risk and Reliability) program…Read more
Professional Certificate of Competency in Fundamentals of Electric Vehicles
Learn the fundamentals of building an electric vehicle, the components…Read more
Professional Certificate of Competency in 5G Technology and Services Overview
Learn 5G network applications and uses, network overview and new…Read more
Professional Certificate of Competency in Clean Fuel Technology - Ultra Low Sulphur Fuels
Learn the fundamentals of Clean Fuel Technology - Ultra Low…Read more
Professional Certificate of Competency in Battery Energy Storage and Applications
Through a scientific and practical approach, the Battery Energy Storage…Read more
52910WA Graduate Certificate in Hydrogen Engineering and Management
Hydrogen has become a significant player in energy production and…Read more
Professional Certificate of Competency in Hydrogen Powered Vehicles
This course is designed for engineers and professionals who are…Read more
Best Practice in Process, Electrical and Instrumentation Drawings and Documentation
THIS BOOK WAS DEVELOPED BY IDC TECHNOLOGIES
WHO ARE WE?
IDC Technologies is internationally acknowledged as the premier provider of practical, technical training for engineers and technicians.
We specialize in the fields of electrical systems, industrial data communications, telecommunications, automation and control, mechanical engineering, chemical and civil engineering, and are continually adding to our portfolio of over 60 different workshops. Our instructors are highly respected in their fields of expertise and in the last ten years have trained over 200,000 engineers, scientists and technicians.
With offices conveniently located worldwide, IDC Technologies has an enthusiastic team of professional engineers, technicians and support staff who are committed to providing the highest level of training and consultancy.
TECHNICAL WORKSHOPS
TRAINING THAT WORKS
We deliver engineering and technology training that will maximize your business goals. In today’s competitive environment, you require training that will help you and your organization to achieve its goals and produce a large return on investment. With our ‘training that works’ objective you and your organization will:
- Get job-related skills that you need to achieve your business goals
- Improve the operation and design of your equipment and plant
- Improve your troubleshooting abilities
- Sharpen your competitive edge
- Boost morale and retain valuable staff
- Save time and money
EXPERT INSTRUCTORS
We search the world for good quality instructors who have three outstanding attributes:
- Expert knowledge and experience – of the course topic
- Superb training abilities – to ensure the know-how is transferred effectively and quickly to you in a practical, hands-on way
- Listening skills – they listen carefully to the needs of the participants and want to ensure that you benefit from the experience.
Each and every instructor is evaluated by the delegates and we assess the presentation after every class to ensure that the instructor stays on track in presenting outstanding courses.
HANDS-ON APPROACH TO TRAINING
All IDC Technologies workshops include practical, hands-on sessions where the delegates are given the opportunity to apply in practice the theory they have learnt.
REFERENCE MATERIALS
A fully illustrated workshop book with hundreds of pages of tables, charts, figures and handy hints, plus considerable reference material is provided FREE of charge to each delegate.
ACCREDITATION AND CONTINUING EDUCATION
Satisfactory completion of all IDC workshops satisfies the requirements of the International Association for Continuing Education and Training for the award of 1.4 Continuing Education Units.
IDC workshops also satisfy criteria for Continuing Professional Development according to the requirements of the Institution of Electrical Engineers and Institution of Measurement and Control in the UK, Institution of Engineers in Australia, Institution of Engineers New Zealand, and others.
CERTIFICATE OF ATTENDANCE
Each delegate receives a Certificate of Attendance documenting their experience.
100% MONEY BACK GUARANTEE
IDC Technologies’ engineers have put considerable time and experience into ensuring that you gain maximum value from each workshop. If by lunchtime on the first day you decide that the workshop is not appropriate for your requirements, please let us know so that we can arrange a 100% refund of your fee.
ONSITE WORKSHOPS
All IDC Technologies Training Workshops are available on an on-site basis, presented at the venue of your choice, saving delegates travel time and expenses, thus providing your company with even greater savings.
OFFICE LOCATIONS
AUSTRALIA • CANADA • INDIA • IRELAND • MALAYSIA • NEW ZEALAND • POLAND • SINGAPORE • SOUTH AFRICA • UNITED KINGDOM • UNITED STATES
idc@idc-online.com www.idc-online.com
Visit our website for FREE Pocket Guides
IDC Technologies produce a set of 6 Pocket Guides used by thousands of engineers and technicians worldwide.
Vol. 1 – ELECTRONICS
Vol. 2 – ELECTRICAL
Vol. 3 – COMMUNICATIONS
Vol. 4 – INSTRUMENTATION
Vol. 5 – FORMULAE & CONVERSIONS
Vol. 6 – INDUSTRIAL AUTOMATION
To download a FREE copy of these internationally best selling pocket guides go to: www.idc-online.com/downloads/
On-Site Training

All IDC Technologies Training Workshops are available on an on-site basis, presented at the venue of your choice, saving delegates travel time and expenses, thus providing your company with even greater savings.
For more information or a FREE detailed proposal contact Kevin Baker by e-mailing:
training@idc-online.com
IDC TECHNOLOGIES
Worldwide Offices
AUSTRALIA
Telephone: 1300 138 522 • Facsimile: 1300 138 533
West Coast Office
1031 Wellington Street, West Perth, WA 6005
PO Box 1093, West Perth, WA 6872
East Coast Office
PO Box 1750, North Sydney, NSW 2059
CANADA
Toll Free Telephone: 1800 324 4244 • Toll Free Facsimile: 1800 434 4045
Suite 402, 814 Richards Street, Vancouver, NC V6B 3A7
INDIA
Telephone : +91 444 208 9353
35 4th Street, Kumaran Colony, Vadapalani, Chennai 600026
IRELAND
Telephone : +353 1 473 3190 • Facsimile: +353 1 473 3191
Caoran, Baile na hAbhann, Co. Galway
MALAYSIA
Telephone: +60 3 5192 3800 • Facsimile: +60 3 5192 3801
26 Jalan Kota Raja E27/E, Hicom Town Center
Seksyen 27, 40400 Shah Alam, Selangor
NEW ZEALAND
Telephone: +64 9 263 4759 • Facsimile: +64 9 262 2304
Parkview Towers, 28 Davies Avenue, Manukau City
PO Box 76-142, Manukau City
POLAND
Telephone: +48 12 6304 746 • Facsimile: +48 12 6304 750
ul. Krakowska 50, 30-083 Balice, Krakow
SINGAPORE
Telephone: +65 6224 6298 • Facsimile: + 65 6224 7922
100 Eu Tong Sen Street, #04-11 Pearl’s Centre, Singapore 059812
SOUTH AFRICA
Telephone: +27 87 751 4294 or +27 79 629 5706 • Facsimile: +27 11 312 2150
68 Pretorius Street, President Park, Midrand
PO Box 389, Halfway House 1685
UNITED KINGDOM
Telephone: +44 20 8335 4014 • Facsimile: +44 20 8335 4120
Suite 18, Fitzroy House, Lynwood Drive, Worcester Park, Surrey KT4 7AT
UNITED STATES
Toll Free Telephone: 1800 324 4244 • Toll Free Facsimile: 1800 434 4045
5715 Will Clayton #6175, Humble, TX 77338, USA
Website: www.idc-online.com
Email: idc@idc-online.com

Presents
Best Practice in
Process, Electrical and Instrumentation Drawings and Documentation
Terry Borgeest CPEng, MBA, Grad. Dip Bus. Mgmt., Dip Elect. Eng.
Revision 7.1
Website: www.idc-online.com
E-mail: idc@idc-online.com
IDC Technologies Pty Ltd
PO Box 1093, West Perth, Western Australia 6872
Offices in Australia, New Zealand, Singapore, United Kingdom, Ireland, Malaysia, Poland, United States of America, Canada, South Africa and India
Copyright © IDC Technologies 2011. All rights reserved.
First published 2004
All rights to this publication, associated software and workshop are reserved. No part of this publication may be reproduced, stored in a retrieval system or transmitted in any form or by any means electronic, mechanical, photocopying, recording or otherwise without the prior written permission of the publisher. All enquiries should be made to the publisher at the address above.
Disclaimer
Whilst all reasonable care has been taken to ensure that the descriptions, opinions, programs, listings, software and diagrams are accurate and workable, IDC Technologies do not accept any legal responsibility or liability to any person, organization or other entity for any direct loss, consequential loss or damage, however caused, that may be suffered as a result of the use of this publication or the associated workshop and software.
In case of any uncertainty, we recommend that you contact IDC Technologies for clarification or assistance.
Trademarks
All logos and trademarks belong to, and are copyrighted to, their companies respectively.
Acknowledgements
IDC Technologies expresses its sincere thanks to all those engineers and technicians on our training workshops who freely made available their expertise in preparing this manual.
Contents
1 Overview 1
1.1 Introduction 1
1.2 An overview of the contents of the manual 1
1.3 What are the standards and why are they necessary? 7
1.4 Drawing office operation standards 10
1.5 General drawing standards 16
2 Symbols and Numbering 21
2.1 Overview 21
2.2 Reference to standards 21
2.3 Process drawings and diagrams 22
2.4 Instrumentation drawings and diagrams 25
2.5 Electrical drawings and diagrams 36
3 Process Diagrams 41
3.1 Process diagrams 41
4 Instrumentation Documentation 65
4.1 Instrumentation documentation 65
5 Electrical Documentation 95
5.1 Introduction 95
5.2 Other electrical documents 106
5.3 Standardization of symbols 107
6 Pneumatics and Hydraulics 127
6.1 General drawing layout 127
6.2 Symbols 128
6.3 Rotary devices 135
6.4 Air preparation circuits 139
6.5 Two pressure system 143
6.6 Ladder diagramming 148
6.7 Ladder logic 152
6.8 Limit-switch solenoid-valve switching 156
7 Vendor 161
7.1 Introduction 161
7.2 Sample documentation specification for technical documents 162
7.3 The engineers documents 163
7.4 Submission of final documents 165
7.5 Electronic requirements 166
7.6 Sample documentation specification for compiling manuals 166
7.7 Training 172
8 Practical Exercises 173
1
Overview
1.1 Introduction
The objective of this course is to familiarize the participants with the various standards that apply to the production of plant drawings, diagrams and documentation. The topics contained in the course are of interest and relevance to all users of documentation whether they are designers of electrical installations, erection engineers or personnel responsible for operation and maintenance of the installations
Although many organizations have developed, over time, a range of “in-house” standards they all have a level of traceability to a set of international standards in order to facilitate clear communication of the requirements and operation of a particular plant design.
In this manual we will make direct reference to a range of commonly used standards which are either recognized internationally or are national standards with traceability to an international standard.
1.2 An overview of the contents of the manual
This manual commences with a broad overview of the role of a range of standards and their associated organizations and using these standards builds progressively a complete project documentation dossier of drawings, diagrams, lists, schedules etc. covering the Process, Instrumentation, Electrical and Electro-Pneumatic / Hydraulic needs of a plant. The manual concludes with a short section covering vendor interaction as all projects require, to a greater or lesser degree a level of documentation from equipment vendors.
It should be recognized that this dossier is by no means complete in the sense that specific projects will often require additional special documents but often these can be adapted from one of the templates contained in this manual.
1.3 What are standards and why are they necessary?
Standards are documented agreements containing technical specifications or other precise criteria to be used consistently as rules, guidelines, or definitions of characteristics, to ensure that materials, products, processes and services are fit for their purpose.
For example, the format of the credit cards, phone cards, and “smart” cards that have become commonplace is derived from an ISO International Standard. Adhering to the standard, which defines such features as an optimal thickness (0.76 mm), means that the cards can be used worldwide.
International Standards thus contribute to making life simpler, and to increasing the reliability and effectiveness of the goods and services, we use.
Standards for documentation, equipment, appliances, and devices of an installation are necessary for the following reasons.
- To ensure a uniform and consistent approach to the production of documentation ensuring that the documentation is universally understandable and usable
- Conformity of documentation throughout the plant reduces the frustration by technical staff of having to try and understand the designers approach.
- To ensure that all vendors know what is required from them to ensure that their documentation is in line with the clients.
1.3.1 So who sets the standards?
ISO – International Standards Organization
What is ISO?
The International Organization for Standardization (ISO) is a worldwide federation of national standards bodies from more than 140 countries, one from each country.
ISO is a non-governmental organization established in 1947. The mission of ISO is to promote the development of standardization and related activities in the world with a view to facilitating the international exchange of goods and services, and to developing cooperation in the spheres of intellectual, scientific, technological and economic activity.
ISO’s work results in international agreements, which are published as International Standards.
Many people will have noticed a seeming lack of correspondence between the official title when used in full, International Organization for Standardization, and the short form, ISO. Shouldn’t the acronym be “IOS”? Yes, if it were an acronym – which it is not.
In fact, “ISO” is a word, derived from the Greek isos, meaning “equal”, which is the root of the prefix “iso-” that occurs in a host of terms, such as “isometric” (of equal measure or dimensions) and “isonomy” (equality of laws, or of people before the law).
From “equal” to “standard”, the line of thinking that led to the choice of “ISO” as the name of the organization is easy to follow. In addition, the name ISO is used around the world to denote the organization, thus avoiding the plethora of acronyms resulting from the translation of “International Organization for Standardization” into the different national languages of members, e.g. IOS in English, OIN in French (from Organization internationale de Normalization). Whatever the country, the short form of the Organization’s name is always ISO.
How it all started
International standardization began in the electrotechnical field: the International Electrotechnical Commission (IEC) was created in 1906. Pioneering work in other fields was carried out by the International Federation of the National Standardizing Associations (ISA), which was set up in 1926. The emphasis within ISA was laid heavily on mechanical engineering.
ISA’s activities ceased in 1942, because of the Second World War. Following a meeting in London in 1946, delegates from 25 countries decided to create a new international organization “the object of which would be to facilitate the international coordination and unification of industrial standards”. The new organization, ISO, began to function officially on 23 February 1947.
The first ISO standard was published in 1951 with the title, “Standard reference temperature for industrial length measurement”.
SI – System International
The creation of the decimal Metric System at the time of the French Revolution and the subsequent deposition of two standards representing the meter and the kilogram, on 22 June 1799, in the Archives de la République in Paris can be seen as the first step in the development of the present International System of Units.
IEC – International Electrotechnical Commission
Mission
The International Electrotechnical Commission (IEC) is the leading global organization that prepares and publishes international standards for all electrical, electronic and related technologies. These serve as a basis for national standardization and as references when drafting international tenders and contracts.
Through its member, the IEC promotes international cooperation on all questions of electrotechnical standardization and related matters, such as the assessment of conformity to standards, in the fields of electricity, electronics and related technologies.
The IEC charter embraces all electrotechnologies including electronics, magnetics and electromagnetics, electroacoustics, multimedia, telecommunication, and energy production and distribution, as well as associated general disciplines such as terminology and symbols, electromagnetic compatibility, measurement and performance, dependability, design and development, safety and the environment.
Objectives
The Commission’s objectives are to:
- Meet the requirements of the global market efficiently
- Ensure primacy and maximum world-wide use of its standards and conformity assessment schemes
- Assess and improve the quality of products and services covered by its standards
- Establish the conditions for the interoperability of complex systems
- Increase the efficiency of industrial processes
- Contribute to the improvement of human health and safety
- Contribute to the protection of the environment.
Standards
IEC’s international standards facilitate world trade by removing technical barriers to trade, leading to new markets and economic growth. Put simply, a component or system manufactured to IEC standards and manufactured in country A can be sold and used in countries B through to Z.
IEC’s standards are vital since they also represent the core of the World Trade Organization’s Agreement on Technical Barriers to Trade (TBT), whose 100-plus central government members explicitly recognize that international standards play a critical role in improving industrial efficiency and developing world trade. The number of standardization bodies which have accepted the Code of Good Practice for the Preparation, Adoption and Application of Standards presented in Annex 3 to the WTO’s TBT Agreement underlines the global importance and reach of this accord.
IEC standards provide industry and users with the framework for economies of design, greater product and service quality, more inter-operability, and better production and delivery efficiency.
At the same time, IEC’s standards also encourage an improved quality of life by contributing to safety, human health and the protection of the environment.
Conformity assessment
The IEC’s multilateral conformity assessment schemes, based on its international standards, are truly global in concept and practice, reducing trade barriers caused by different certification criteria in various countries and helping industry to open up new markets. Removing the significant delays and costs of multiple testing and approval allows industry to be faster and cheaper to market with its products.
As technology becomes more complex, users and consumers are becoming more aware of their dependence on products whose design and construction they may not understand. In this situation, reassurance is needed that the product is reliable and will meet expectations in terms of performance, safety, durability and other criteria.
How can the industrial user and the final consumer be sure that the product they buy conforms to the criteria of an IEC standard? The IEC’s conformity assessment and product certification schemes exist to provide just this reassurance, and the regulatory nature of some products now also sees recognition of the CA schemes amongst some government regulators.
On 15 September 1904, delegates to the International Electrical Congress, being held in St. Louis, USA, adopted a report that included the following words: “…steps should be taken to secure the co-operation of the technical societies of the world, by the appointment of a representative Commission to consider the question of the standardization of the nomenclature and ratings of electrical apparatus and machinery.”
As a result, the IEC was officially founded in June 1906, in London, England, where its Central Office was set up.
By 1914, the IEC had formed four technical committees to deal with Nomenclature, Symbols, Rating of Electrical Machinery, and Prime Movers. The Commission had also issued a first list of terms and definitions covering electrical machinery and apparatus, a list of international letter symbols for quantities and signs for names of units, an international standard for resistance for copper, a list of definitions in connection with hydraulic turbines, and a number of definitions and recommendations relating to rotating machines and transformers.
The First World War interrupted IEC work, which resumed in 1919 and by 1923 the number of technical committees had increased to 10. IEC Council decided to create the Committee of Action “to assist in giving effect to the decisions of the Council, to second the efforts of the Central Office and to co-ordinate the work of the National Committees and of the Advisory Committees.”
In 1930, the IEC established the following electrical units:
- Hertz, for the unit of frequency
- Oersted for the unit of magnetic field strength
- Gauss for the unit of magnetic flux density
- Maxwell of the unit of magnetic flux
- Gilbert for the unit of magnetomotive force
- Var for designating the unit of reactive power
- Weber for the practical unit of magnetic flux
It was decided to extend the existing series of practical units into a comprehensive system of physical units, which became the “Giorgi system”, named after Giovanni Giorgi (1871-1950) – an Italian scientist and engineer. This system has been elaborated further and is now commonly known as the “Système international”, or SI for short.
Between the First and the Second World Wars, a number of new international organizations came into being and the IEC recognized the need for co-operation to avoid overlapping efforts. In some cases, joint technical committees were formed, such as the International Special Committee on Radio Interference (CISPR).
In 1938 the IEC produced the first edition of the International Eletrotechnical Vocabulary (IEV). The unification of electrotechnical terminology was one of the principal tasks allocated to the IEC by the St. Louis congress. In the early days, the Nomenclature Committee was engaged in pioneer work, as no comparable international technical vocabulary had yet been published and few national electrotechnical vocabularies existed. With its 2000 terms in French, English German, Italian, Spanish and Esperanto, and its definitions in French and English, the IEV could rightly be considered as an outstanding achievement. It aroused wide interest among international technical organizations outside the electrotechnical field.
In September 1939, the IEC’s activity came to a standstill because of the Second World War and did not resume for another six years.
In 1948, the IEC Central Office moved from London to Geneva, Switzerland. Subsequently, the IEC expanded its efforts in the light current field, which had constituted only a small part of the activity of the Commission before 1939. Standards covering measurements, safety requirements and the testing and specification of components for radio receivers and televisions began to appear. At the same time, work on electroacoustics started, while CISPR developed standards on permissible limits for various frequency ranges used for radio broadcasting and measurement methods for interference.
From 1948 to 1980, the number of technical committees grew from 34 to 80 and began to include such new technologies as capacitors and resistors, semiconductor devices, electrical equipment in medical practice and maritime navigation and radio communication systems and equipment.
ISA – Instrument Society of America
History of ISA – the instrumentation, systems, and automation society
Industrial instruments, which became widely used during World War II, continued to play an ever-greater role in the expansion of technology after the war. Individuals like Rimbach and others involved in industry saw a need for the sharing of information about instruments on a national basis, as well as for standards and uniformity. The Instrument Society of America addressed that need with more than 39,000 members from more than 110 countries.
Recognizing ISA’s international reach and the fact that its technical scope had grown beyond instruments, in the fall of 2000, the ISA Council of Society Delegates approved a legal name change to ISA–The Instrumentation, Systems, and Automation Society.
The founders’ mission
The object of the Society shall be to advance the arts and sciences connected with the theory, design, manufacture, and use of instruments in the various sciences and technologies.
Today’s mission
The mission of ISA as the global society for instrumentation, systems, and automation is to:
- Maximize the effectiveness of ISA members and other practitioners and organizations worldwide to advance and apply the science, technology, and allied arts of instrumentation, systems, and automation in all industries and applications
- Identify and promote emerging technologies and applications
- Develop and deliver a wide variety of high-value information products and services to the global community
ASME – American Society of Mechanical Engineers
As with many other standards, the dominance of a particular institution or society, and the broad international acceptance of its publications often lead to a de facto recognition of certain publications as an international standard. As with ISA above ASME produces a wide range of standards relevant to best drawing practices and these publications (ASA’s) are referenced later in this manual.
1.4 Drawing office operating standards
1.4.1 Drawing office operating manual
Introduction
In any given plant therefore the drawing office must establish what standards it is going to employ and what processes it will utilize to control the quality, workflow and ultimately the archiving of its output. As many drawing offices may use contract staff to undertake significant projects it is important that a clear and uniform set of rules be documented to cover all activities. The Drawing Office operating manual satisfies this need and a typical manual should address the following elements.
1.4.2 Drawing office organizational structure
Structure
The drawing office is a subset of the design office and as such the overall authority resides with the Resident Engineer or the Project Manager. His requirements and decisions are passed to the drawing office staff via the Chief Draughtsman and/or discipline specific Engineers.
1.4.3 Office discipline
Administration personnel involved
Time keeping and office discipline is the responsibility of the Chief Draughtsman.
Time keeping
Time books showing a log of all hours need to be maintained by the Chief Draughtsman. All staff shall submit a weekly timesheet to the Chief Draughtsman for approval before it is passed to accounts for payment and/or client billing purposes.
Workmanship
Quality and quantity of the work produced by the drawing office shall be monitored by the Chief Draughtsman.
Problem resolution
Should any contentious points arise concerning either discipline or personal problems which cannot be solved between the relevant personnel they may be brought to the attention of the Chief Draughtsman and ultimately the Resident Engineer.
1.4.4 Methods of work initiation, control and reporting
Work request
No work should commence without a work request carrying the requisite information and signatures.
The following information should be completed before commencement of work:
- Name of person requesting work – print in block capitals
- Name and signature of engineer authorizing work
- Respective cost code
- Date completed work required by (“ASAP” is not acceptable)
- Title of plant or work area
- Comprehensive work description or title
- Indicate on the work request information supplied, drawings required
- Comments – i.e. similar to equipment number 6001, contact name and extension number, refer to supplier for information, etc
- Date received by drawing office
- Chief Draughtsman signature
- Draughtsman’s name to whom work is allocated
Should the work request refer to an existing structure, i.e. in the case of an extension or require a new structure based on a previous job, it is imperative that site investigations be carried out before work is commenced as modifications may have been made on site.
On completion of the job the original work request should be filed with the project documentation package and kept as a permanent record.
Program progress reports
The Chief Draughtsman is responsible for scheduling and allocating work in an endeavor to meet the Project time schedule consistent with available manpower.
1.4.5 Draughting procedures
General introduction
The function of the Design Office is to provide and communicate information to the end user in drawing form. Clear, easy to read and understandable drawings that transmit the necessary information are therefore the prime objectives.
The intent of the following section is to provide uniform information and typical details that serve as a guide and help in our work.
When making a Drawing
- Always keep in mind: Who will use the drawing and for what? What information does he need?
- Always practice functional draughting
Standards and specifications
Functional draughting is not a set of hard and fast rules. They are principles that are to be followed in making drawings. Particulars and their application in specific cases will be left to the draughtsman’s judgment and good sense backed by their experience and knowledge of a given project’s requirements.
Plan your drawing
A drawing must be simple yet clear and sufficient. A drawing should not just grow, it must be planned. Think through the drawing before you lay it out. Have a clear idea what has to be communicated and then decide on the best way to communicate the idea. A good clear drawing should be produced from left to right and from top to bottom and not be just a random distribution of details and views fitted in wherever there happens to be space for them.
Avoid artistry
A drawing is not a picture; it is a diagrammatic representation of the object. Any unnecessary line is a waste of time: Eliminate unnecessary elaboration that adds nothing to the message. Shading, etc. falls into this category with few exceptions.
Repetition of typical details
Once a typical detail has been identified -stop. If ten off are required -draw the one detail only and indicate by a note or instruction that there are ten off required. If this typical detail is required on other drawings for the project then all that is needed is a reference to the original key drawing with the typical detail – do not redraw the detail.
It is important to establish the existence of an obvious pattern. Once sufficient draughting is done to establish this pattern clearly, stop delineating and give a note or instruction.
Eliminate unnecessary views
Always question the necessity of a projected view. A description, a note or a reference may be all that is required. Guard against re-drawing an entire item in another projection just for the sake of showing a minor divergent detail, or a secondary view which does not show anything but a diameter or a thickness.
Drawing sheets
Pretty much all of us live in a metric world. All drawings should be scaled to standard metric size sheets (in CAD software) or prepared on standard metric plastic drawing sheets.
All sheets should use pre-configured templates with title blocks, borders, etc. (for CAD software) or pre-printed equivalents when using plastic drawing sheets.
Scales
Where possible a constant set of scales shall be used on one set of drawings. This can help considerably in checking out obstructions between disciplines by a simple overlay. In addition, the eye becomes accustomed to viewing the drawing in perspective.
Avoid using “odd” scales, e.g. 1:25, 1:30, 1:175, etc. as in future someone else may work on these drawings. Try to use only common scales e.g. 1:200, 1:100’ 1:50, 1:20, 1:10, 1:5.
Drawing implements
For hard drawings, plastic leads or ink may be used. For CAD based drawings layering should be used with all detail in black.
Lettering
Lettering sizes and styles for different sheets sizes should be defined.
Titles of drawings
In general the drawing title will be presented in a three-sequence format after the initial box-designating client name:
- Facility of Plant Area
- General Description of Work
- Details or Specifics (as required), e.g.
1.4.6 General information on drawings
Cross-reference and information traceability
It is of utmost importance that the information shown on a drawing be cross-referenced such that the source is fully traceable and other project drawings that are directly affected by this information are identified. It is therefore critical that each drawing used as a source of information in the preparation of your current drawing be noted as a reference drawing in the current drawing reference block provided.
Key plans
There are three main cases where the use of a key plan is necessary:
- Where a layout drawing is part of a larger area consisting of a number of drawings then a key plan is required to show this area covered in each drawing
- Shaded area represents are covered on that drawing
- Where a plan has been produced on one drawing and some or all of the sections on other drawings
- Section Lines or Arrows are to be used i.e. A-A and 8-8 show where section has been taken through on other drawing
- Location purposes also require a key plan
First angle / Third angle projections
Projection is a means to represent a three dimensional attribute of an object on one or more planes. A company standard convention should be defined such that all projection drawings are either 1st Angle (European) or 3rd Angle (American). The projection type must always be shown on the drawing.
Information systems
The location and utilizing of existing information is critical in the production of drawings. Do not re-invent the wheel.
Catalogued reference system
A comprehensive catalogued reference system should be maintained in the Drawing Office Filing Section. This system references and correlates all drawings to projects, types of plant, structures, buildings and related manufacturer’s items. This system should be available to all personnel.
The reference system may consist of:
- Catalogued index
- Microfile System
Manufacturer’s information
Manufacturers provide a vast source of catalogued information which is readily available on request. A good library is an invaluable resource in ensuring that the draughtsmen utilize readily available materials rather than custom manufactured items in so far as possible. Maintaining this library and keeping it up to date with a formalized system of review is an inherent part of the overall operation of a drawing office.
Alternative source of information
If having exhausted the Drawing Registers, catalogues, etc, the draughtsman still lacks information ASK. There is often available (to all draughtsmen) a senior person with specialized knowledge and many years experience and this should be utilized to the full.
Information – responsibility and accuracy
The Engineer is responsible for the aesthetic, schematic and detailed design of any plant, equipment or structure. He will be involved in the conceptual layout of any given scheme to ensure suitability for duty, safety of operation and code compliance. He must also sign the Approval Drawing.
The Chief Draughtsman and Draughtsman are responsible for the accurate representation of all information on the drawings.
Drawing distribution procedures
A formalized system of drawing approvals must be implemented in any drawing office to define the stage / status of a drawing – the following gives some suggestions as to how this process can be accommodated.
1.4.7 Issued for approval
Approval drawings are required mainly for layouts but may be used for any drawing where specific items are required to be drawn to the Engineer’s attention. An approval drawing need not be complete or fully dimensioned, but must clearly define the concept.
The approval drawing is a scheme, which requires approval from the Engineer. These drawings are not to be issued for Tender, Construction or to any Consultant or Contractor to use as final drawings.
After approval of a drawing with all appropriate signatures the drawings need not be re-issued for final approval unless specifically requested on the approval form.
To summarize
- Approval drawings are for internal use only, i.e. between Client/Design Department
- No construction may be carried out using an approval drawing
- Where approval of any drawing is required, it must be issued to the responsible Engineer or Manager
- If a second or third approval is required, the drawing must state this.
- Drawing numbers refer to a single drawing or document. Two or more drawings cannot have the same number
- A duplicate drawing can be issued and stamped accordingly
- Where approval has been sought, the final drawing must indicate this.
- An approval drawing which has been approved need not be re-submitted
1.4.8 Issued for final approval
On completion of final drawings and prior to issue, a print shall be made and this shall be handed over to the Project Engineer for his signature and to record that final drawings have been issued to his approval, all previous comments having been acted on to his satisfaction. This shall not be used for further modifications.
1.4.9 Issued for information only
There are a number of situations where a drawing may be issued for information only, i.e. these drawings may be worked to for manufacture or construction.
- Drawings may be issued to a Civil Contractor for planning his construction program
- Drawings may be issued to a supplier to assist in determining type of merchandise best suited to our requirements
- Drawings may be issued to a Quantity Surveyor for preparation of Bill of Quantities
- Drawings may be issued inter-departmental to expedite work. In each of the above cases the Drawings must be clearly stamped: for information only not to be worked to
1.4.10 Issued for tender
- Drawings shall be as complete as possible before issuing for tender purposes. The more: information given at this stage the more accurate the quote and the less likely future claim for extras
- Where possible send out detail drawings at tender stage
- Whenever possible have drawings checked before going out on tender
- Tender closing date must be realistic.
- An extension to the tender closing date may be given at the discretion of the Resident Engineer on request by one or more of the Tenderers. However, should this occur tenderers must be notified of the new date.
- Manufacture/Fabrication time allowed on Tender should tie in with program requirements but again be realistic towards the Supplier.
- Tender documents shall carry a reference to all drawings, specifications etc., which form part of the Tender.
1.4.11 Issued for manufacture or construction
- Any variations between drawings at tender stage and construction issue shall be highlighted by way of a revision on the drawing.
- In conjunction with issuing the drawing for construction to the fabricator issues shall also be made to client, i.e. Plant etc., and to a Quantity Surveyor should he be involved.
1.4.12 As built
- Represents the final revision to all drawings reflecting actual changes made during the construction and commissioning of the plant.
- Will form part of the Plant Operating and Maintenance documentation and must be archived on completion of the project.
Checking procedures
Checking procedures fall directly under the control of the Chief Draughtsman.
The Checking activity is the “last line of defense” in the system to ensure that a drawing represents as closely as possible the functional requirements of the job. As such, the checker needs to critically analyze and question any proposal put forward.
The Checker has the right and may challenge, without prejudice, any idea, concept or formulation that has been committed to paper.
The Checker shall not subscribe to any suggestion until the Checker is totally convinced of its usefulness and fitness for purpose.
No drawing shall be issued for manufacture unless it is authorized by a Checker.
1.4.13 Analysis
The checking procedure entails a methodical step-by-step study of all phases of the design of a given item in relation to the function it performs. The philosophy underlying this approach is not concerned with appraisal of any given part per se. Rather the appraisal focuses on the function, which the part, or the larger assembly containing the part, performs. This approach is designed to lead the analyst away from a traditional perspective which views a part as having certain accepted characteristics and configurations. Indeed, it encourages the analyst to adopt a broader point of view and to consider whether the part will perform the required function as efficiently and as inexpensively as possible.
1.4.14 The checklist
It is useful to develop a checklist to systemize the checking activity. The following is a general checklist, which should be supplemented by more specific items from the checkers.
Determine the function of the item then establish:
- Can the item be eliminated?
- If the item is not standard can a standard item be used?
- If it is a standard item, does it completely satisfy the application or is it a misfit?
- Does the item have greater capacity than required?
- Can the mass be reduced?
- Is there an off-the-shelf item that could be substituted?
- Are closer tolerances specified than are necessary? (h) Is unnecessary fine finishes specified?
- Are unnecessarily fine finishes specified? (j) Is “Commercial quality” specified?
- Can the item be easily and cheaply transported? (I) Can cost of packaging be reduced?
- Are suppliers being asked for suggestions to reduce cost?
- A very important question is “What does it cost to perform the function done by this part?” or “Is the importance of the function to be performed commensurate with the cost of performing it?”
1.4.15 Dimensional accuracy
This is of crucial importance. Dimensions must be checked on a local and overall basis. Particular attention must be given to mating parts, e.g. base plates, foundations, etc.
The orientation of each element must be checked in relation to the total unit. In this respect, an orientation diagram must be included on the drawing showing the relevant position of the item in question.
1.4.16 Checking procedures
- All drawings produced need to be checked before issue for tender
- Except under special circumstances, drawings should be checked in a different department than the section producing them.
A suggested color code for checking
- Red – Incorrect
- Yellow – Correct
- Green – To be used by draughtsman when correcting errors. Green through red indicating alteration has been done
- Should there be revisions to a drawing once it has been signed off as checked then it should be returned for a further check
- Where there is a point of contention between Checker and the originating Draughtsman, the Chief Draughtsman should be consulted
1.4.17 Printing and filing
Printing and filing activities need to be defined in a drawing office to ensure the highest level of efficiency together with the best utilization of available printing equipment.
Printing of all drawings
Printing requirements normally fall into three categories:
- Printing for developing of working drawings
- Printing for issuing internally
- Printing for issuing externally
- All Prints should be officially requested. This may take the form of an Issue Slip, or a Print Request Slip.
- Where a job is deemed to be urgent then the Chief Draughtsman must prioritize.
- All other printing shall be done on a “First come First served” basis
Registering of drawings
- All drawings must be registered in the Master Drawing Register.
- Vendor’s drawings on arrival in Drawing Office shall be registered with all the relevant information, i.e. request for Drawing Office Number to be given to drawing, registering in Drawing Register, filing and returning of copies to interested parties
Filing of all drawings
- All completed drawings shall be filed in the appropriate place in the Filing Section – this may be a dedicated location on a server hard disk or a physical location for hard copies.
- A Draughtsman should only have in his possession the drawing relevant to the job he is currently working on. All other drawings in his possession should be in the form of prints or microfilm prints and marked accordingly as copies.
Records of all expenses on office supplies
It is the responsibility of the Chief Draughtsman to keep accurate records of all stationery ordered.
Issuing and dispatching of drawings
All drawings issued through the Drawing Office / Printing Section must be formally requested. This may be done by way of an official issue slip or drawings being for tender or construction. All drawings issued should be accompanied by a document transmittal form which should be signed and returned and filed by the originator for record purposes.
Binding of documents
Where required the parties responsible for printing the documents may be called upon to make up a package of documents required for tender purposes. Again, explicit instructions shall be given as to the number required and the content therein.
1.5 General drawing standards
1.5.1 Introduction
Although we acknowledge that a large number of mature organizations have adapted a range of standards to suit their particular needs it is appropriate in this manual to provide recommendations with direct traceability to an international set of rules. The following recommendations are therefore taken from AS 1100.101-1992 Technical Drawing – General Principles – the Australian Standard for Technical Drawing.
This standard is in agreement with the following International Standards.
| ISO 128 | Technical Drawings – General Principles of Presentation |
| ISO 129 | Technical Drawings – Dimensioning |
| ISO 406 | Technical Drawings – Tolerancing of linear and angular dimensions |
| ISO 1101 | Technical Drawings – Geometrical Tolerancing |
| ISO 1660 | Technical Drawings – Profile Dimensioning |
| ISO 3040 | Technical Drawings – Cone Dimensioning |
| ISO 3098/1 | Technical Drawings – Lettering |
| ISO 5455 | Technical Drawings – Scales |
| ISO 5459 | Technical Drawings – Datum Systems for Geometric Tolerancing |
| ISO 6410 | Technical Drawings – Representation of Threaded Parts |
1.5.2 Size of drawing sheets
Preferred sizes
The preferred size of drawing sheets is taken from the ISO-A series which is listed in the table below.
| Designation | Trimmed size (mm) | Width of border (mm) |
| A0 | 841 × 1189 | 20 |
| A1 | 594 × 841 | 20 |
| A2 | 420 × 594 | 15 |
| A3 | 297 × 420 | 15 |
| A4 | 210 × 297 | 15 |
Non-preferred sizes and roll drawings
Under certain circumstances the use of other drawing sheet sizes may be necessary and the ISO-B series sheets may be used. Roll drawings when required should have standard widths of either 860mm or 610mm.
1.5.3 Thickness of format lines
Recommended line thicknesses in mm for format lines are per the table below.
| Feature | A0 Sheet | A1 Sheet | A2, 3, 4 Sheet |
| Border Lines | 1.4 mm | 1.0 mm | 0.7 mm |
| Title Block Lines | 1.0 mm | 0.7 mm | 0.5 mm |
| Grid Lines | 0.7 mm | 0.5 mm | 0.35 mm |
| Fold Lines | 0.25 mm | 0.25 mm | 0.25 mm |
| Other Format Lines | 0.35 mm | 0.25 mm | 0.18 mm |
1.5.4 Thickness of drawing lines
The thickness of drawing lines is covered in detail in the standards and is based on line group types which may be 1.0, 0.7 & 0.5 mm (line group 1.0 mm typically used on A0 sheet sizes) through to 0.35, 0.25 & 0.18 mm (line group 0.35 mm which may be more appropriate for A4 sheets). The standard specifically states that the minimum line thickness on a drawing after reproduction (including reduction) should not be less than 0.18 mm.
1.5.5 Text types and character heights
The following text types are provided for in the drawing standards.
- Upright Gothic
- Sloping Gothic
- ISO 3098/1 Type B Upright
- ISO 3098/1 Type B Sloping
- Microfont
The height of the characters should be one of the following (in mm) with minimum character line thickness not less than 10% of the height
- 2.5 mm
- 3.5 mm
- 5 mm
- 7 mm
- 10 mm
- 14 mm
- 20 mm
The height of the characters should not be less than 1.7 mm on a reduced drawing reproduction.
1.5.6 Ratio of text size to corresponding line thickness
The ration of line thickness to text size is generally 1:10 and one of the following sets of standard text sizes and corresponding line thickness’ is often used. Note that although Set 2 does not strictly meet the Australian Drawing Standard it is often referenced in other standards – the attached tables reference to the South Africa standard (SABS 0111 1990).

1.5.7 Title block
Title block layouts are normally laid out as standard templates with unique logos pertaining to the individual company. The standards cover a variety of designs with dimensions for different sheet sizes but specific layout is not dictated. As a general rule however the title block should be located in the bottom right hand corner of the drawing sheet or when this restricts the drawing layout the top right hand corner may be used.
As a minimum however the Title block contains the following:-
- Name of firm, organization or department
- Title or name of drawing
- Drawing number
- Signatures or initials and dates
- Additional information such as scale, method of projection, native sheet size etc.
- Provision to show revision level and drawing status.
Other information of relevance may include:
- A space may be added to the top or added to the left hand side of the company title block, in which space the Contractor’s details and title block may be added
- A further space may be added in the same area for the Contractor’s drawing number
- The Contractor shall indicate the persons responsible for producing the drawing, the title, scale, project name, date, revision etc. in the spaces provided for in the company title block
1.5.8 Reference drawings
- Where applicable, all reference drawings shall be noted in an appropriate place, on all drawings
- Smaller series drawings (A4 and A3) may bear reference drawing numbers as a note, in an appropriate position, on the drawing
- Where a drawing is of sufficient complexity and size that warrants being split over several pages, continuation lines shall be conveyed by means of either of the under mentioned symbols. Note that the direction of the arrow shall indicate the direction of information flow.

1.5.9 Recommended sheet sizes versus drawing types
As stated previously many companies have established in-house standards regarding a variety of drawing areas not covered by ISO standards. A typical recommendation of drawing sheet size versus drawing type is as per below. Bear in mind the reduction of drawing size when reproducing large drawings must not allow the line thicknesses or character heights to fall below the values stated in the standards for legibility. Reductions of more than 2 drawing sizes will in nearly all cases make portion of a drawing illegible.
| Documentation type | Drawing size |
| Process Drawings | |
| Piping & Instrumentation Diagrams | A1 |
| Process Flow Diagrams | A1 |
| Metering & Instrumentation | |
| Instrument Schedules | A4 |
| Instrument Data Sheets | A4 |
| Instrument Hookup Diagrams | A4 |
| Loop Drawings | A4 |
| Panel Wiring Diagrams | A1/A4 |
| Cable Schedules | A1/A4 |
| Cable Block Diagrams | A1 |
| Cable Interconnection Diagrams | A1 |
| Software Documentation | |
| Plant I/O Schedules | A4 |
| Flow Charts | A4 |
| Software Listings | A4 |
| Electrical Documentation | |
| Single Line Diagrams | A1/A4 |
| Electrical Schematic & Wiring Diagrams | A1 |
| Cable Schedules | A1/A4 |
| Cable Block Diagrams | A1 |
| Cable Interconnection Diagrams | A1 |
2
Symbols and numbering
2.1 Overview
The use of a consistent set of symbols to identify major plant components, instruments and electrical equipment is fundamental to the purpose of clearly communicating the functionality of a particular plant diagram. Additionally each item needs to have some form of unique identification in the physical plant and a numbering system likewise needs to employ a standard methodology that is easily understood.
The purpose of this section of the manual is to give the reader an overview of some typical standards which are recognized globally such that the adoption of these would provide the foundation for generating drawings, diagrams, lists and schedules which can be readily understood by parties outside the immediate company.
It should be highlighted at this stage that the examples contained in this manual are no substitute for a drawing office having a full set of standards as the examples contained herein represent only a portion of the detail covered in full in the referenced standards.
2.2 Reference to standards
The following standards have been used in compiling this topic and represent either standards which are directly traceable to an ISO set or are considered de facto international standards by virtue of their use globally and their acknowledged expertise in a specific area.
Process drawings and diagrams
- American Society of Mechanical Engineers (ASME)
- ASA Y32.11 Graphical Symbols for Process Flow Diagrams
- ASA Z32.2.3 Graphical Symbols for Pipe Fittings, Valves & Piping
Instrumentation drawings and diagrams
- Instrument Society of America (ISA) (now known as The Instrumentation Systems and Automation Society)
- ISA–S5.1–1984(R1992) Instrumentation Symbols and Identification
- ISA-S5.3-1983 Graphic Symbols for DCS/Shared Displays
- ISA-S5.4-1989 Instrument Loop Diagrams
- ISA-S5.5-1985 Graphic Symbols for Process Displays
Electrical drawings and diagrams
- International Electrotechnical Commission (IEC)
- IEC Publication 27 Letter Symbols to be used in Electrical Technology
- IEC Publication 50 International Electrotechnical Vocabulary
- IEC Publication 617 Graphical Symbols for Diagrams
.
2.3 Process drawings and diagrams
2.3.1 Plant equipment numbering
Plant area numbering
Plant area numbering is a useful tool in large plants with complex processes in that it readily enables all personal to identify equipment with a particular section of plant. Plant Area numbering schemes normally use either a 3 digit or 4 digit numeric system in the form XXX where a plant areas may be 100, 200, 300 etc and identify discrete plant sections (e.g. Furnace Area, Waste Heat Boiler Area, Converter Area etc). Plant Area numbers are then used as the preliminary number in identifying all physical plant equipment and instrumentation tags.
Plant equipment numbering
All physical plant equipment must be given an equipment number. The equipment number will normally take the form of either 1, 2 or 3 alpha characters followed by either 3 or 4 numeric characters. The alpha characters may be site specific but are normally tied to a specific company standard and identify the functional component (e.g. P or PMP for pump, V for vessel etc). The numeric characters are unique for each device of a particular type – i.e. P100 and P101 may identify 2 pumps. When used in combination with a Plant Area number the full equipment number may appear as XXXP100 and XXXP101 (e.g. 100P100 and 100P101).
Line numbering
All process lines are similarly given line numbers normally in the form of a series of alpha and numeric characters which identify the following line elements:-
- Plant Area Number (e.g. 100)
- Service (e.g. LP for low pressure steam)
- Sequence Number ( a unique number e.g. 001)
- Pipe Size (Nominal) ( e.g. 100 for 100 mm NB)
- Line Material ( e.g. CS for carbon steel)
The resulting line number would appear as 100-LP-001-100-CS. The sequence number changes each time there is a break in the integrity of the pipe – either a flanged joint or any other form of change in the pipe.
2.3.2 Plant equipment symbols
Plant equipment symbols are used in conjunction with plant equipment numbers to identify discrete items of plant and show their interconnection to the rest of the process. Symbols shown in the table below represent some established ASME standards. Note that ISA also produces a wide variety of symbols for hand valves as well as control valves. Many software vendors provide symbol libraries for popular CAD software which contain literally thousands of symbols.


2.4 Instrumentation drawings and diagrams
2.4.1 Instrument numbering (tagging)
Instrument Tag Nos.
As with Equipment numbers all instruments (including virtual instruments that exist in a DCS, PLC or other shared system) are given unique identifiers called tag numbers. The ISA tagging system is virtually universally adopted in terms of the basic construction of a tag number. The ISA system comprises a group of alpha characters which describe both the variable being measured (or controlled) together with the broad characteristics of the instrument itself. The first alpha character in the tag always identifies the physical variable with which the instrument is associated (e.g. Pressure, Temperature, Flow etc). Subsequent alpha characters identify the function of the instrument and may be comprise more than one additionally character. Hence FIC would refer to a Flow Indicating Controller, PAHL would refer to an alarm device on pressure with both High and Low alarm settings. Once the basic alpha tag characters are established a group of numeric characters are added to identify the loop number. These may be 3 or 4 or more numerals but all devices interconnected on the same loop must have the same loop number – the individual instruments are therefore differentiated by their alpha character functionality. As with the equipment numbering system large plants employing an Area numbering scheme may add the plant area number in front of the tag to create the full tag number. As an example tag number 100PT001 and 100PIC001 are respectively a pressure transmitter and a pressure indicating controller in plant area 100 on loop number 001. The table below lists the ISA alpha character system.


2.4.2 Instrument symbols
Bubbles
The ISA standard employs a simple system to identify instruments on process drawings by using “bubbles” – the terminology originating from the fact that the original symbol set used circles exclusively. The symbol set has now been expanded to account for the emergence of shared systems such as DCSs, PLCs and host software systems which all have multiple levels of functionality within one box. The system endeavors to identify the location of the instrument function (field, control room, auxiliary panel etc) and when used in conjunction with the instrument tag gives the reader of a diagram a clearer understanding of the overall control loop and strategy. The ISA bubble symbol set is shown in the attached table.


Primary and final elements
The ISA standard recognizes that many primary and final elements cannot be fully described by a bubble and tag number alone and therefore caters to the use of a wide variety of symbols to show the technology associated with a primary or final element. An example of these symbols is shown in the tables below.


Extended functionality
The ISA standard further recognizes that certain instruments may have a complex or unique functionality that cannot be full described by a tag number and bubble and to this end it allows for the inclusion of a small box/boxes outside the bubble with a symbol to identify the specific detail of the instrument. A representative table of ISA functionality legends appears below.

The SAMA system
The Scientific Apparatus and Manufacturers Association further expands on the ISA extended functionality system by using a range of blocks linked together to describe the functionality within a control loop. Although seldom employed these days it provides a useful tool for identifying control and measurement functions within complex loops. A table of SAMA functions and an example of the scheme are shown below.

Example of a SAMA Scheme for describing the control strategy of a 3-element boiler drum level control system.

2.4.3 Instrument interconnections
The ISA standard also provides for the interconnection of bubbles to show, on process drawings, the media by which they communicate – be it pneumatic, electrical, non-contact etc. The table below lists how the bubbles are interconnected.


2.5 Electrical drawings and diagrams
2.5.1 Electrical equipment numbering
Component numbering
Components of an electrical circuit are numbered by means of a single alpha character combined with a sequential digit each time a component of a new type is used. The standards for the alpha character may vary from company to company and it is normal to draw a legend sheet to explain the use on a particular set of drawings. The attached table broadly coincides with the recommendations of the IEC Publication 27 standard for letter designations.
| Letter Code | Type | Examples |
| A | Assemblies, subassemblies | Amplifier with transistors, magnetic amp, laser |
| B | Transducers, from mechanical to electrical and vice versa. | Thermo electric sensor, transducer, loudspeaker |
| C | Capacitors | |
| D | Delay / storage devices | Bi-stable, mono-stable, register |
| E | Miscellaneous | Lighting and heating devices |
| F | Protective devices | Fuse, arrestor |
| G | Generators, supplies | Battery, supply device |
| H | Signaling devices | Optical and acoustic indicators |
| J | ||
| K | Relays, Contactors | |
| L | Inductors | Induction coil, line trap |
| M | Motors | |
| N | Amplifier, regulator | |
| P | Measuring / Test equipment | Indicating, recording devices |
| Q | Mechanical switching devices | Circuit breaker/ isolator |
| R | Resistors | Potentiometer, rheostat, shunt, |
| S | Switches, selectors | Pushbutton, limit, selector |
| T | Transformers | Voltage, current transformer |
| U | Modulators, changers | |
| V | Tubes, semiconductors | Diode, transistor, |
| W | Transmission paths, waveguides, aerials | Jumper wire, cable, busbar, dipole |
| X | Terminals, plugs, sockets | Socket, test-jack |
| Y | Electrically operated mechanical devices | Brake, clutch |
| Z | Terminations, hybrid transformers, filters, equalizers |
2.5.2 Single line symbols
IEC Publication 617 provides an extensive range of symbols which are used in electrical circuits. These are normally employed in both single line and electrical schematics but differ from those symbols employed in ladder logic schematics. Typical examples of the IEC symbol set are shown below.

2.5.3 Wire numbering system
Although there is no set standard for wire numbering of electrical circuits the generally accepted rules are to use a numeric system with 3 (or more) digits in which the number increments each time there is a break in the circuit (i.e. terminal, fuse etc).
The reader should be aware that there are individual country standards (e.g. AS3000 – Australian Wiring Rules) that govern the use of certain letters (e.g. L, A, N, E) in wire numbering systems involving potentially lethal voltages.
3
Process diagrams
3.1 Process diagrams
All projects have to start somewhere and defining the process is the best place to start. The process is an idea or concept that is developed to a certain level in order to determine the feasibility of the project. Feasibility study is the name given to small design project that is conducted to determine the scope and cost of implementing the project from concept to operation. In this section we will look at the development process from concept to the “Approved for Design (AFD)” Process & Instrumentation Diagram.
The reality is that, for whatever reason, few companies follow the guidelines for compiling process diagrams; as a result, in this section our aim is create a better understanding of the role and function of process diagrams. While we will look at the format and content of the documents covered in this section, we will spend time interpreting real world examples in order to gain a deeper understanding of why the guidelines are made. You will also understand at the end of this section why it is the company’s responsibility to set, maintain and issue standards to suppliers and sub-contractors.
To keep things simple we will start by designing an imaginary coffee bottling plant to produce bottled coffee for distribution. We start by creating a basic flow diagram that illustrates the objective for our proposed plant; this diagram is called a Process Block Diagram.
3.1.1 Process block diagram
The block diagram is where it all starts, here we look at the basic components and determine our requirements, and this is a diagram of the concept, giving a very broad view of the process.
In our example below we have listed all our ingredients and shown that milk, sugar and black coffee make up different permutations of the final product. This diagram is only concerned with the fact that milk is a requirement; the supply, storage and transfer requirements are beyond the scope of the block diagram. With this philosophy diagram complete we now need to determine the technical requirements, we do this by simultaneously developing two documents; these documents are the ‘Process Flow Diagram’ and the ‘Process Description Manual’.

3.1.2 Process flow diagram or piping flow diagram
The PFD is where we start to define the process by adding equipment and the piping that joins the various items of equipment together. The idea behind the PFD is to show the entire process (the big picture) on as few drawing sheets as possible, as this document is used to develop the process plant and therefore the process engineer wants to see as much of the process as possible. Attention to small detail, such as flanges, nozzles, reducers, instrumentation etc is not shown on the PFD. This document is used to determine tank sizes, pipe sizes.
For those familiar with Mimic panels and SCADA flow screens you will notice that these resemble the PFD more than the P&ID with the addition of the instruments, but not the instrument function.
Mass balance
In its most simple form, what goes in must come out. The totals at the end of the process must equal the totals input into the system.
Mass balance example
Continuing with our bottled coffee plant, if we design our system to produce one thousand 1-litre bottles of black coffee per batch then all we would need is a 1000L water tank and a 1000L autoclave.
Assuming all our ingredients are in liquid form, to make coffee with milk and sugar we use the following recipe:
- 10 liters coffee concentrate
- 20 liters syrup
- 100 liters milk
- 1000 liters water
From this you can see that using our original 1000 liter design, we would have an overflow of 130 liters per batch. In addition, if we filled the 1000 liter autoclave with water first, then there would be no room for the other ingredients and we would end up bottling water. This is a very simple example, but should be sufficient to give an idea as to the function of the PFD.
3.1.3 Process description
The process description details the function / purpose of each item of equipment in the plant. This is developed at the same time that the Process Flow Diagram is being developed and should assist the process engineer to determine the plant requirements.
This description should contain the following information:
Installation operation – The installation produces bottled coffee
Operating principles – Each part of the process is described
Water supply – Filtered water at ambient temperature is supplied to the water holding tank, the capacity of the tank should be sufficient for all recipes
Coffee supply – Due to the viscosity of the coffee syrup, the syrup is fed from a pressurized vessel to the autoclave, this line should be cleaned frequently with warm water. There will be batches of caffeinated and decaffeinated coffee, the coffee tanks and pipelines must be thoroughly cleaned between batches
Milk supply – There will be an option for low fat or full cream milk, the milk supply should be sufficient for three days operation and should be kept as close to freezing as possible to ensure longevity of the milk
Sugar supply – Sugar will be supplied in a syrup form, we will offer the coffee with no sugar, 1 teaspoon (5 ml of syrup) or two teaspoons (10 ml of syrup). Syrup lines must be cleaned on a regular basis
Circuit draining/make-up – How to start-up or shutdown the facility, cleaning and flushing
Liquid characteristics – A detailed description on analysis of each liquid type in the system. Includes specific gravity, viscosity, temperature, pressure, composition etc
Specific operating conditions linked to the process – The installation operates 24 hours a day 365 days a year. As the installation deals with foodstuffs, all piping and vessels are to me manufactured from stainless steel
Specific maintenance conditions linked to the process – Hygiene levels to be observed.
Specific safety conditions linked to the process – Hygiene, contamination of product
Performance requirements – The amount of product the plant must be able to produce in a given time frame
We see from the process description that we need to pressurize the vessels; we are dealing with syrups so we need to clean the lines with warm water, we have an autoclave that requires heating and cooling, the milk requires refrigeration. Our PFD now starts to look something like the figure shown below.

From the above we can see that, as we develop the PFD and process description, questions get asked of the process and it is the resolution of these questions that leads to the final design.
From the PFD in figure 3.3 we would ask:
- Do we connect the boiler to municipal water or use a buffer tank?
- Do we need dematerialized water for the boiler, in which case we would need a water treatment plant
- What would be the lowest temperature on the plant, do we need to put steam tracing on the syrup lines?
Once we have asked and answered all the relevant questions, our PFD, mass balance and process description should all be complete, we are now ready to start with the design of the P&ID.
The following figure shows the Process Flow Diagram for a chlorine scrubber plant, complete with mass balance, note what is and is not shown on the PFD.
PFD shows:
- Numbers on the pipelines that correspond to the mass balance table
- Equipment reference numbers and descriptions that will correspond to the process description
- The composition and data relating to each item in the system
PFD does not show:
- Pipe numbers, sizes or valves
- Instrumentation of any kind
- Flange sizes or numbers
The process engineer develops the Process Flow Diagram; he uses this as a tool to develop his equipment criteria in order to establish equipment requirements, in our above example he would as the following questions:
- What is the optimum temperature at which all the ingredients will combine?
- For how long must the ingredients be stirred in the autoclave?
- How long will it take the autoclave to heat the ingredients to the required temperature (heat transfer)?
The process engineer must know the composition of the ingredients as changes to the composition will affect the taste / strength of the final product.
Note: The above shows the importance of understanding the process engineer’s role, however, what no design document can tell us, is the budgetary constraints that were placed on the process engineer during the design phase of the project.
Situation 1: In the coffee plant example, let’s assume our engineer called for the syrup vessel to be steam traced, this was vetoed due to budgetary constraints, now two years after construction you are sitting in the middle of winter with a solid lump of glucose.
Situation 2: The plant buyer sources a cheaper batch of coffee, it comes out looking like tea and tasting like milk. You adjust the amount of coffee per batch to make up for the lack of strength.
Question 1: Did you reduce the amount of water proportionally per batch, or do you now flush away a couple of liters of profit per batch?
Question 2: Has anyone revised the mass balance? Has anyone shown the buyer the new mass balance that proves that his cheaper coffee is actually more expensive?
Better still, did the buyer familiarize himself with the product properties before starting his search for a cheaper product?

3.1.4 Piping and instrumentation diagram (P&ID)
The Piping & Instrumentation Diagram, which may also be referred to as the Process & Instrumentation Diagram, gives a graphical representation of the process including hardware (Piping, Equipment) and software (Control systems); this information is used for the design construction and operation of the facility.
Other synonyms for the P&ID are:
- MFD – Mechanical Flow Diagram: Used where materials handling is predominant
- EFD – Engineering Flow Diagram
- UFD – Utility Flow Diagram
The PFD defines “The flow of the process” The PFD covers batching, quantities, output, and composition.
The P&ID also provides important information needed by the constructor and manufacturer to develop the other construction input documents (the isometric drawings, or orthographic physical layout drawings, etc.). The P&ID provides direct input to the field for the physical design and installation of field-run piping. For clarity, it is usual to use the same general layout of flow paths on the P&ID as used in the flow diagram.
The P&ID ties together the system description, the flow diagram, the electrical control schematic, and the control logic diagram. It accomplishes this by showing ALL of the piping, equipment, principal instruments, instrument loops, and control interlocks. The P&ID contains a minimum amount if text in the form of notes (the system description minimizes the need for text on the P&ID). The first P&ID in the set for the job should contain a legend defining all symbols used; if some symbols are defined elsewhere, it may be appropriate only to reference their source. The P&ID is also used by the start-up organizations for preparing flushing, testing, and blow-out procedures for the piping system and by the plant operators to operate the system. The correctness and completeness of the P&ID drawings are critical to the success of a plant start-up program.
There are several other facts concerning P&IDs that are important. First, regardless of how sophisticated the Design P&ID may be, there is a wealth of information that exists, and is needed by the typical operating plant, that does not exist during the initial design phase of the facility; and this information continues to grow throughout the plant’s operating life.
Because many plants serve 20 years or more, maintenance personnel need effective tools for corrective (repair) and preventive maintenance. During corrective maintenance, Intelligent P&IDs can assist the operator in finding information needed foe personnel assignment and location of spare parts. Engineering documents assist maintenance personnel by defining what is broken and determining how to replace it. The P&ID is the index to this data, providing quick access to the information and a tool to update and track that information after changes are made.
The operation phase concerns issues of safety as well as the process itself. The operator needs to keep a history of the processes, as well as the updates and changes to the plant data model. Intelligent P&IDs facilitate compliance with legislation such as OSHA and ISO, requiring that the P&ID and instrument data sheets are kept up-to-date and accessible.
Also, in today’s marketplace, the majority of projects are existing plants; either through re-work, upgrade, modernization program etc.
P&IDs for these facilities that are either purely paper-based, or only based on generic (dumb graphics) CAD systems, most likely AutoCAD or MicroStation.
Additionally, there exists a massive amount of legacy data in these plants, concerning all phases of the plant operations environment. Capturing this information and linking it to the existing P&ID, or even better, linking it to newly created Intelligent Design P&IDs, would provide an extremely valuable tool to the typical plant operator.
The typical plant operations environment uses the P&ID as the principal document to locate information about the facility, whether this is physical data about an object, or information, such as financial, regulatory compliance, safety, HAZOP information, etc.
The P&ID defines “The control of the flow of the process” Where the PFD is the main circuit, the P&ID is the control circuit.
Once thoroughly conversant with the PFD & Process description, the engineers from the relevant disciplines (piping, electrical & control systems) attend a number of HAZOP sessions to develop the P&ID.
HAZOP
Hazard operability studies have a full set of rules and procedures, which are beyond the scope of this course. In its most basic form, the HAZOP looks at each item of equipment in the process and by applying a given set of rules to each item determines suitability and possible problems. It is the resolution of these problems that leads to the development of the P&ID.

Returning to our coffee bottling plant as shown in figure 3.4, we see that if the holding tank runs dry while we are trying to fill the autoclave, the system will come to a standstill. We can resolve this problem by installing a level low switch on the holding tank; the level switch can then give an alarm when the tank level drops below a predetermined point.
Comparing figure 3.4 above to the PFD in figure 3.2, two things become immediately apparent:
- The level of detail in the P&ID is far greater than that of the PFD, focus has moved from the operation as a whole and now focuses, in great detail, on the operation of each piece of equipment.
- Showing this level of detail takes a great deal of space and includes far more lines on the drawing, for this reason rules are laid down detailing the amount of equipment to be shown per P&ID.
3.1.5 P&ID standards
Before development of the P&ID can begin a thorough set of standards is required, these standards must define the format of each component of the P&ID. We look first at what should be shown on the P&ID and then we will discuss each item in greater depth.
| Mechanical Equipment All valves associated with the Process piping Instruments significant to the Process piping, including: Process pipes Vents and drains Special fittings Sampling lines Permanent start-up and Finishing lines |
Plant computer inputs Vendor and contractor Interfaces Identification of components And subsystem by others With reference to a vendor Drawing for details if details Are not shown on the P&ID Intended physical sequence of Equipment, branch lines, Reducers, and so on |
| Specific information as Applicable to the job Instrument designations Equipment names and numbers Pipeline identifications Valve identification All size transitions in line: Reducers and increases, Swages, and so on Direction of flow Interfaces for class changes Seismic category Quality level Interconnection references Annunciation inputs. |
May be on P&ID if necessary (but, not normally): Instrument roots valves Equipment rating or capacity Control relays Manual switches Indicating lights Primary instrument tubing And valves Pressure, temperature, and Flow data Vendor package piping which has not interface with engineering or construction Elbows, tees and similar standard fittings Extensive explanatory notes |
Mechanical equipment
Mechanical equipment is shown in an outline form and indicates all associated equipment that is pertinent to the function of the equipment. For a vessel this would include any; trays, spray nozzles, demisters, packed sections etc.

Equipment numbering
Equipment numbering varies from installation to installation. The equipment numbering system for a particular plant should be defined in the relevant equipment numbering specification.
Presentation on the P&ID
There are 3 common formats for presentation. Again, the accepted format should be defined in a standard – either a company, national or international standard.

Valves
Valves fall into two main categories, control valves and hand valves. The control systems engineer specifies the control valve, while the hand valve is usually selected by the piping discipline.
Hand valves
Hand valves are denoted using the relevant symbol; a clear symbol is used to represent a normally open valve while an opaque symbol is used for normally closed valves. A solitary valve symbol is assumed to be a hand valve, as a control valve would show the control configuration and may be accompanied by an instrument “bubble”.

Again, the manner in which the hand valve is displayed is dependant on the standard used by the originator of the P&ID.
Control valves
Control valves use the same basic valve type symbol as the hand valve, the following differences differentiate hand valve from control valves.
- Control valves do not use clear and opaque symbols to show standard positions
- Control valves show a failure position in the event of a power loss, these positions are Fail open (FO) , Fail Closed (FC) or Fail Indeterminate (FI) used when the valve will remain at the same position it was when the power was lost
- Control valves display the type of control i.e. actuator, diaphragm, solenoid etc
- Control valves should appear in the instrument list
Examples:

The example in figure 3.5 shows a globe control valve with a pneumatic diaphragm actuator and an electro-pneumatic positioner together with a temperature element (TE) in a thermowell (TW) connected to a temperature transmitter (TT). This level of detail is not normally required on a P&ID and is often simplified to that shown in figure 3.6

Piping
Piping is shown on the P&ID using major & minor pipelines, these pipelines are drawn in different thicknesses, usually with major process lines depicting product lines and minor lines for utilities.
Pipe numbering
Pipe numbers as assigned to each process line in a P&ID (as discussed in Chapter 2) will change every time a component of the pipe number changes or when there is a change or split in the pipe run. As previously discussed pipe numbers are made up of a variety of numbers or codes that are grouped together to form a unique number. These are typically:
- Unit or area number
- Service
- Sequence number
- Pipe size
- Line class or line material
Example
figure 3.7 below shows how a pipe reducer causes the pipe number to change; the format for this number is Area- Service- Sequence No. – Pipe size – Line material.

Nozzles & Flanges
Nozzles and flanges need to be accurately portrayed on the P&ID, as this information will be carried over to the design of the physical tank.
Equipment & instrument numbering systems
In order to be able to develop the PFD & P&ID into meaningful documents we need compile them according to specific standards and numbering systems. This information has already been covered in some detail in Chapter 2.
A completed P&ID may therefore appear as the example below which has been derived from the PFD for a gas scrubber shown previously.

3.1.6 Standardization of symbols
Regardless of the drawing standards adopted by a company a consistent use of symbol sets throughout a project is essential for both clarity (of the function of the piece of equipment) as well as efficiency in the production of a large number of drawings. Symbol libraries for CAD software are readily available from many software companies based on a wide range of drawing standards (ISO, ISA, ASME etc) and may also form the basis for “hand drawn” document sets. The inclusion of a Drawing Legend in a document package is of great assistance to an outside reader of any schematic diagram. The following pages show some typical symbol sets for a CAD software package.


4
Instrumentation documentation
4.1 Instrumentation documentation
Our instrumentation documentation consists of drawings, diagrams and schedules. The documentation is used by various people for different purposes, in this section we will look at each document type, why it was created and who is the intended recipient. Of all the disciplines in a project, instrumentation is the most interlinked and therefore the most difficult to control. On completion of this section you should understand the importance and relevance of each document and be in a position to decide what to discard and what to keep.
The best way to understand the purpose and function of each document is to look at the complete project flow from design through to commissioning.
- Design
- Design criteria, standards, specifications, vendor lists
- Construction
- Quantity surveying, disputes, installation contractor, price per meter, per installation
- Operations
- Maintenance commissioning
4.1.1 Instrument list
This is a list of all the instruments on the plant, in the ‘List’ format. All the instruments of the same type (tag) are listed together; for example all the pressure transmitters ‘PT’ are grouped together.
Loop List: The same information as the instrument list but ordered by loop number instead of tag number. This sort order will group all elements of the same loop number together.
The instrument index also lists all the associated documentation such as loop drawing number, data sheets, installation details and P&ID.
Function: Gives a list of all the instrumentation on the plant and may include ‘virtual’ instruments such as controllers in a DCS or PLC.
Tag No: The instrument tag number as defined by the specification.
Description: Description of the instrument as denoted by the tag number
Service Description: A description of the process related parameter
Functional Description: The role of the device
Manufacturer: self explanatory
Model: self explanatory

Instrument list

Loop list
4.1.2 I/O lists
Name: I/O list or Input/Output list
Function: the I/O list gives an accurate count of all the analog and digital inputs and outputs on the plant or project. This information is used to size the DCS/PLC hardware that will be used to control the plant.
Used by – the instrument engineer to establish/define a specification for the control system. Depending on the format, this can also be a useful tool for the PLC programmer. Many companies base quotations on the number of IOs.
Example:

I/O list

I/O loading

I/O loading summary
4.1.3 Data sheet – spec sheet
Name: Data sheet or Specification sheet.
Function: The data sheet contains all the process, mechanical and electrical data relevant to a specific instrument; this can be expanded to a group of instruments with the addition of a tag list. The compilation of the data sheet is a group effort that includes Process, Instrumentation and Piping. Pre-printed sheets or standard templates are available through ISA covering most instrument types.
Used by: the instrument engineer to select the most appropriate instrument to meet the requirements stipulated by the datasheet. This should also be available to the maintenance department throughout the lifecycle of the plant for use when calibrating or selecting a suitable replacement.
Data sheet – spec sheet
4.1.4 Trip alarm schedule
Name: Trip (and) Alarm schedule
Function: Lists the set points, alarm points and trip points of the field instrumentation connected to the process.
Used by: DCS/PLC programmer for programming the alarm or trip at a set process value.
4.1.5 Cable list/schedule
Name: Cable list or Cable schedule.
Function: Lists each cable on the plant, giving its size, length, source and destination.
Used by: The site contractor for the installation of cables uses this document; each cable list generally has a column indicating estimated and actual installed lengths. This could be used by the Purchase department, although this depends on the size of the project and the lead-time of the cable manufacturer. Quantity surveyors use the document to check estimated length vs. installed length for payment to the sub-contractor.

Cable list/schedule
4.1.6 Erection material take-off/Bill of materials
Some of the more modern design software packages enable the user to extract a full list of materials needed to complete the installation of the field equipment. This equipment list is taken off the installation details.

Bill of material
4.1.7 Instrument location plans
The instrument location drawing is used to indicate an approximate location of the instruments and junction boxes. This drawing is then used to determine the cable lengths from the instrument to the junction box or control room. This drawing is also used to give the installation contractor an idea as to where the instrument should be installed.

Instrument location plan
Instrument location plan (2)
The detail shows how the location drawing guides the installation contractor in the placement of the field junction boxes and the field instrumentation. It must be remembered that this is only a guide. This drawing is created using experience and imagination, the installation contractor deals with the physical aspects and may find excellent reasons for changing the design.
4.1.8 Cable racking layout
Use of the racking layout drawing has grown with use of 3D cad packages; this drawing shows the physical layout and sizes of the rack as it moves through the plant.

Cable racking layout
4.1.9 Cable routing layout
Prior to the advent of 3D cad packages, the routing layout used a single line to indicate the rack direction as well as routing and sizes and was known as a ‘Racking & Routing layout’.

Cable routing layout
4.1.10 Block diagrams – signal, cable and power block diagrams
Cable block diagrams can be divided into two categories: Power and Signal block diagrams. The block diagram is used to give an overall graphical representation of the cabling philosophy for the plant.

Block diagram

Block diagram (2)
4.1.11 Field connections/Wiring diagrams
Function: To instruct the wireman on how to wire the field cables at the junction box
Used by: Installation contractor, when the cable is installed on the cable rack, it is left lying loose at both the instrument and junction box ends. The installation contractor now stands at the junction box and strips each cable and wires it into the box according to the drawing.
Field connections
4.1.12 Power distribution diagram
Function: There are various methods of supplying power to field instruments; the various formats of the power distribution diagrams show these different wiring systems. The diagrams below show the various options in greater detail. Note the difference between this diagram and the power block diagram
Used by: Various people depending on the wiring philosophy, such as the panel wireman, field wiring contractor.
Power distribution diagram
4.1.13 Earthing diagram
Function: Used to indicate how the earthing should be done. Although this is often undertaken by the electrical discipline there are occasions when the instrument designer may or must generate his own scheme – eg for earthing of zener barriers in a hazardous area environment.
Used by: earthing contractor for the installation of the earthing. This drawing should also be kept for future modifications and reference.
Earthing diagram
4.1.14 Loop diagrams
Function: A diagram that comprehensively details the wiring of the loop, showing every connection from field to instrument or I/O point of a DCS/PLC. The inclusion of a bubble diagram in the bottom left hand corner of the diagram quickly conveys to the reader the overall loop strategy.
Used by: maintenance staff during the operation of the plant and by commissioning staff at start up.

Loop diagram

Loop diagram (2)

Loop diagram (3)

Loop diagram (3)
4.1.15 PLC schematics
PLC schematics give an overview the interaction of the field device (and associated wiring) with the I/O of a PLC or DCS system.

PLC schematics
4.1.16 Installation detail – hook-up
Function: To detail how the instrument should be installed by the instrument fitter. Used to list the components required for the installation.
Used by: Instrument fitter to install instrument, estimator to total equipment for purchase.

Installation details
4.1.17 Other diagrams
Depending on the particular plant a range of other drawings, lists, schedules etc may be required to full document the instrumentation on a plant
Typical of these may be one or more of the following:
- Control Panel General Arrangement Drawings
- Ladder Logic Drawings
- Hazardous Area Drawings
- Installation Specification document
There are no specific standards covering the presentation of these documents and individual projects may differ in presentation although the information they communicate must be concise. An example of a simple general arrangement drawing for a Scada system is shown.

SCADA installation
5
Electrical documentation
5.1 Introduction
The electrical schematics section covers the layout of electrical schematic diagrams, lists and various symbols used. As with the instrumentation documentation each project will require an evaluation of which drawings are needed and appropriate and whether other key drawings would facilitate a clearer understanding of the overall electrical scope.
5.1.1 The Load List
A completed P&ID will show the number of motors on the plant as well as the function of each motor. A summary document called a load list provides an overall view of all users of power in a plant.
The load list therefore is used to total the power supply requirements for each device per plant area or process that will be supplied by a mini sub. Load lists are made for each voltage level on the plant.
Sample: The sample in Figure 5.1 shows a typical layout of a load list
| Device | Voltage | Amps | Watts | VA | Total | Feeder |
| 400-PMP-01 | 380 | 400-TAD-01 | ||||
5.1.2 The Single Line Diagram
The single line diagram (sometimes called the one line diagram) uses single lines and standard symbols to show electrical cables, bus bars and component parts of a circuit or system of circuits The single line diagram is completely different from a wiring diagram or schematic that shows wire numbers, terminal numbers connections etc. The single line diagram shows the overall strategy for system operation. Duplication of a 3-wire system is reduced by showing single devices on a single wire. A sample single line diagram is shown in Figure 5.2
5.1.3 The schematic diagram (main and circuit)
Continuing where the single line left off, the schematic diagram shows both the main circuit and the control circuit in far greater detail, here all three lines of a 3-phase system are shown. The schematic shows the detailed layout of the control circuit for maintenance and faultfinding purposes rather than the overall picture presented by the single line diagram. An example is shown in Figure 5.3

A schematic diagram therefore shows the following main features:
- Main circuits
- Control, signal and monitoring circuits
- Equipment identification symbols with component parts and connections
- Equipment and terminal numbering
- Cross references – indicating where on the diagram or sequential sheet, the related parts of the equipment can be found.
The above information should be sufficient to explain the function of the circuitry and allow the circuitry to be easily followed when tracing faults.
The main circuit
This is where the difference between a drawing and diagram must be understood; the diagram is not concerned with the physical location of the equipment but rather the functional aspects of the circuits.

Figure 5.4 above shows our motor with a local stop start station located in the field, while the contactor is in the motor control cubicle, the PLC in the control room and the local control panel in the field.
The quantity of circuitry (size or complexity of installation) usually determines the amount of circuitry to be shown on a single sheet. Where an installation has 4 motors in a related circuit, all 4 motors can be shown on the same sheet, while their respective control circuits can be shown on following sheets. These motors are referred to as the main circuit. An example is shown in figure 5.5
Main Circuit
Control circuit
Conventional switchgear circuits are drawn from the top down between the horizontal potential lines representing live and neutral. The components and wiring between these two lines is referred to as the control circuit and are as shown in figure 5.6. Whilst there are many variations on this theme they all contain the same level of information.

Control circuit
Electrical equipment
All electrical assemblies and sub assemblies are shown by symbols, with lines interlinking where necessary to show connections.
Switchgear components and contacts
These are shown in the standard reference position i.e. the de-energised or non-operated state, this would mean that NO contacts are shown open and NC contacts are shown in the closed position.
Markings and Designations
Using the letter code and a sequential number that is increased by 1 each time an additional component of the same type is added is the generally accepted method for numbering circuit components.
Component numbering
Components of an electrical circuit are numbered by means of a symbol or equipment designator coupled with a sequential number that is incremented by a digit each time a new component of the same type is inserted into the circuit.
Wire numbering
Wire numbering is dependant on system used, designers whim or company standard, there alpha numeric systems, numeric only and from to wiring. In most electrical schematics the use of the numeric system generally accepted as the standard, with a two or three digit number being increased by 1 each time there is a break in the circuit.
Cross-referencing
Cross-referencing uses a combination of sheet, column and row number to direct the reader to the location of the main or sub assemblies of the component.
5.1.4 Plant layout drawings
The plant layout drawing gives a physical plant layout, where equipment is drawn to resemble the plant item it represents. An example is shown in figure 5.7 and in blow-up detail (for clarity) in figure 5.8


This blow up shows the detail found in a plant layout drawing, these drawings normally consist of both elevation and plan views.
5.1.5 Racking and routing
These drawings are used to show the layout of the plant racking systems, the size of the racks and the cable numbers of all the cables running on that section of the rack. A typical example is shown in figure 5.9

From the blow up in figure 5.10 you can see that symbols have replaced the physical equipment.

5.1.6 Installation detail
The installation detail shows the layout of the equipment and gives an itemised list of all the equipment on the drawing as well as notes on the installation.

5.1.7 Panel layout
The panel layout drawing gives the dimensions of the panel, the layout of the equipment in the panel, an itemised list of all the equipment used as well as quantities. The notes detail various items like specification references (paint, powder coating) and general notes.

5.2 Other electrical documents
5.2.1 Cable schedule
Used mainly for installation purposes, gives a source and destination for each cable and specifies the type of cable.
5.2.2 Point to point schedule
Facilitates wiring installation by showing termination points at each end of every wire.
5.2.3 Hazardous area drawings
A plant location drawing (in both plan and elevation) which shows by means of overlays plant area classifications (by zone and gas group) for potentail leak hazrads throughout a plant.
5.2.4 Ladder Logic Schematics
Detailed schematics of a ladder structure where the discrete rungs represent control circuits in an overall scheme. Most often used a the basic IEC programming language in PLC’s but sometimes used in hard wired relay circuits.
5.3 Standardization of symbols
As with the previously discussed disciplines a set of recognized symbol sets must be used consistently throughout a project. The following pages list a wide range of electrical numbering and symbol sets with traceability to the IEC publications listed in Chaper 2.
| Letter Code | Type | Examples |
| A | Assemblies, subassemblies | Amplifier with transistors, magnetic amp, laser |
| B | Transducers, from mechanical to electrical and vice versa. | Thermo electric sensor, transducer, loudspeaker |
| C | Capacitors | |
| D | Delay / storage devices | Bi-stable, monostable, register |
| E | Miscellaneous | Lighting and heating devices |
| F | Protective devices | Fuse, arrestor |
| G | Generators, supplies | Battery, supply device |
| H | Signaling devices | Optical and acoustic indicators |
| J | ||
| K | Relays, Contactors | |
| L | Inductors | Induction coil, line trap |
| M | Motors | |
| N | Amplifier, regulator | |
| P | Measuring / Test equipment | Indicating, recording devices |
| Q | Mechanical switching devices | Circuit breaker/ isolator |
| R | Resistors | Potentiometer, rheostat, shunt, |
| S | Switches, selectors | Pushbutton, limit, selector |
| T | Transformers | Voltage, current transformer |
| U | Modulators, changers | |
| V | Tubes, semiconductors | Diode, transistor, |
| W | Transmission paths, waveguides, aerials | Jumper wire, cable, busbar, dipole |
| X | Terminals, plugs, sockets | Socket, testjack |
| Y | Electrically operated mechanical devices | Brake, clutch |
| Z | Terminations, hybrid transformers, filters, equalizers |


5.3.1 Sample schemtics
The following pages show a range of typical electrical drawing samples such that the reader can view a variety of layout styles which may be used.


6
Pneumatics and hydraulics
6.1 General drawing layout
The pneumatic diagram does not lend itself to cross-referencing in the same way that the electrical schematic does, for this reason a standard drawing sheet bereft of rows and columns is sufficient for producing accurate pneumatic or hydraulic diagrams. That said, the drawings should still be laid out according to the method stipulated in the earlier section of this manual.
There are generally 3 parts to a pneumatic or hydraulic circuit, the first is the pneumatic section, second comes the electrical circuit followed by the PLC/DCS portion if used. Any part not used can obviously be discarded. While the designers desire to save trees by putting all of the circuitry onto a single sheet is admirable, it should be discouraged in favor of clarity.
6.1.1 Main or supply circuit
In the electrical schematics we saw how the main circuit was displayed separately from the control circuit. In pneumatics or hydraulics we have a similar case where we require either air or oil as part of our main circuit that drives the remainder of the circuit. This portion of the circuit is fairly standard and as a result is usually reduced to a rather simple input symbol (composite) that is used to imply a full system.
From the initial supply, it is pretty much anything goes, though particular attention should be paid to the following points:
- Where pneumatic circuits have electrical connections, these connections are shown on a separate circuit on a separate page.
- Good circuit design should show the return path on hydraulic circuits and the use of baffles on pneumatic circuits.
6.2 Symbols
To master the art of reading, interpreting, or diagramming pneumatic circuits, one must master a few simple principles. One must begin by studying and understanding the significance of the basic building blocks of pneumatic circuits, the symbols and descriptors used by circuit designers. Historically, three types of symbols have been used to design fluid power circuits.
Pictorial symbols (Figure 6.1) may be as simple as a square, rectangle, or circle used to represent a component, or more commonly a direct physical representation of the external appearance of the component. These are more useful as a line layout as they do not adequately describe the function of the circuit.

Pictorial view
Cutaway symbols (Figure 6.2) have also been used for circuit drawing. These are far more difficult to draw and serve mainly to depict the construction of the component. Using this method, the circuit designer spends far too much time trying to properly depict the construction of a component that is likely to differ from manufacturer to manufacturer. We will not be using either of these outdated methods in our study, but will focus on the use of standard graphic symbols.
Cutaway view
In the late 60’s to early 70’s, time and effort was devoted to establishing a universal standard set of graphic symbols. These symbols can depict in simple, easy-to-diagram form the functional details of a component as well as the principle of operation of that component. Careful detail has been given to the design of these graphic symbols, allowing for simple depiction of all details that are essential for understanding and creation of pneumatic circuits.
The simplified symbols are made up of easy-to-produce figures consisting of circles, squares, triangles, rectangles, arcs, arrows, lines, dots, and crosses. Though some lettering and descriptive words can be used for clarity, they are usually unnecessary. The objective in omitting words from the diagram is an attempt to make a universal language that is able to cross national or cultural barriers. Once the basic figures are mastered, any composite symbol can be devised by using combinations of these figures.
Graphic symbols are designed to show connections, flow paths, and functions of components within a circuit. They can indicate conditions occurring during transition from one flow path arrangement to another. They are not intended to indicate construction, nor do they indicate values, such as pressure or flow rate. They are not intended to show locations of ports or the relative position of actuators on the actual component. While the symbols may be drawn to any suitable size, the size of the symbol is not intended to indicate differences in component size or port size. Following are the most widely used ANS symbols for pneumatic circuitry.
6.2.1 Lines


6.2.2 Basic symbols
The symbols are made up of circles, squares, triangles and lines.

- Symbols are shown in the de-energized state or at rest.
- Rotation is shown by an arrow symbol on the shaft.
- An arrow passing through a symbol at 45 degrees indicates that the flow through the component can be regulated.
6.2.3 Pipe symbols
The symbol does not indicate the material of the pipe

6.2.4 Couplings

6.2.5 Fluid storage and energy sources

6.2.6 Fluid conditioners

6.2.7 Linear devices


6.2.8 Actuators and controls
6.3 Rotary Devices
6.3.1 Instruments & accessories

6.3.1 Valves
The basic valve symbol consists of one or more envelopes containing internal lines used to indicate flow paths and conditions between the ports.


6.3.2 Two way valves

6.3.3 Three way valves

6.3.4 Four way valves

Snap action with transition: two position, four way valve. As valve element shifts position, it passes through an intermediate position. If this “in transit” condition is essential to circuit function it can be shown in the centre position, enclosed by broken lines.
Typical flow paths for centre positions are as follows:


6.3.5 Speed control valves

Adjustable with bypass speed control. Flow is controlled in the right hand direction, flow in the left hand direction bypasses the control. Representative composite symbols
Component enclosure: the enclosure surrounds a group of symbols to represent an assembly, conveying more information about component connections and functions. External ports are assumed to be on the enclosure line and indicate connections to the component.
6.4 Air preparation circuits
The size and relative position of filters, lubricators, and regulators within a pneumatic circuit are of primary importance for the proper functioning and maintenance of the circuit. Unfortunately, inadequate attention is often given to these details to the resulting detriment of the proper functioning of the circuit. It is wise, therefore, to establish some definite rules to follow in the application of these air-line accessories.
- They should be of adequate size to carry the maximum surge flow rate of the circuit or any portion thereof.
- They should be placed as close to the component being ‘controlled or protected as is practicable.
- They should be in an easily accessible location. This is particularly true for those units that require regular maintenance such as filling, adjusting, or cleaning.
- A shutoff valve should be placed in the pneumatic supply line ahead of the unit or units to facilitate replacement or maintenance of the unit. This shutoff valve will permit complete isolation of the component or components downstream from it.
- Whenever possible, lubricators should be located at a higher elevation than the points being lubricated in order to obtain gravity assist in delivering the lubrication to these points.
Figure 6.3 illustrates the use of a strainer-type filter preceded by a shutoff valve. Notice the open-head arrows indicating flow direction through the circuit elements.
Diagram of a strainer type filter preceded by a shutoff valve
Where more than one function is being performed in a circuit, it is not uncommon to have various combinations of filter, lubricator, and regulator, with these combinations varying in different portions of the circuit. Fig. 6.4 shows the use of an automatic drain-type filter ahead of a pressure regulator. Such a combination might be used where free air is exhausting and lubrication is not required, such as air-blast removal of parts. Another possible use of such a combination might be to precede a division of flow to more than one lubrication point within a circuit. This is particularly useful when there is more than one low-flow portion in a circuit as discussed later in this chapter.
Diagram showing use of an automatic drain-type filter ahead of a pressure regulator
Fig. 6.5 illustrates the use of a lubricator ahead of a two- way, normally closed, cam-operated valve that might be supplying intermittent lubrication to some point within a circuit. In this case, the cam-operated valve would probably be operated intermittently by a machine member.

Diagram illustrating use of a lubricator ahead of a two-way, normally closed, cam-operated valve
Figure 6.6 illustrates the combination of a filter and lubricator only, preceded by a shutoff valve. In this instance, we will assume either that a pressure value has already been established ahead of this portion of the circuit, or that a constant pressure is not essential for proper functioning downstream from this portion of the circuit
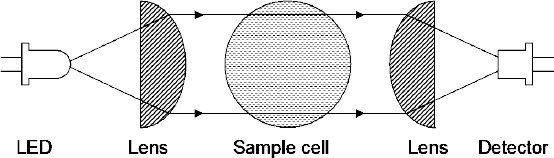
Diagram showing filter and lubricator only
The most common use of filters, regulators, and lubricators is in the form of a three-unit combination, commonly referred to as a trio unit. In Fig. 6.7, a trio unit is shown with an enclosure-type symbol. It might be well to note at this point that this particular unit illustrates the pressure gauge as being attached to the package and not a part of the package. It should also be noted that the pilot source to the pressure regulator is picked up downstream from the regulator. This is an inherent characteristic of a pressure regulator, inasmuch as the pressure being controlled is the downstream pressure. Even though it is a downstream signal, this signal source is tapped within the body of the regulator and does not entail external plumbing to accomplish. Fig. 6.7 also shows the simplified symbol for the trio unit.
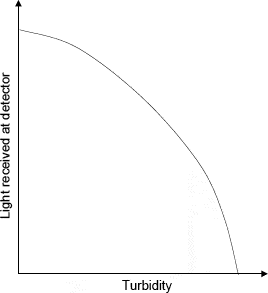
Combination of filter regulator, and lubricator in a trio unit
Figure 6.8 illustrates one method that may be used when more than one pressure is required within a circuit. Note that the auxiliary pressure regulator picks up its supply source from a point within the trio unit following the filter, but preceding the regulator of the trio unit. This combination permits the auxiliary pressure be either a higher or lower value than the main supply.

Two different pressures from a single source
6.5 Two pressure system
An example of using two different pressures in a system when a lower pressure system is required. Figure 6.9 shows a circuit that incorporates a single acting spring return clamping cylinder (A) that requires the ability to be adjusted according to requirements. By tapping into the downstream line from trio unit (D) and feeding the control valve (B) through a separate pressure regulator (C),

Two different pressures within one system
Independent control of the clamping force can be accomplished. Regulation of the pressure passing through the regulator of the trio unit will have no effect on the value of the clamping pressure as long as the pressure value of the regulator of the trio unit in excess of the desired pressure through the auxiliary regulator. The regulator within the trio unit controls the force of the double-acting work cylinder. (E).
6.5.1 Pressure switch sequencing circuits (Mechanical)
It is sometimes difficult to employ limit switches or limit valves to control a sequence. This may be due to the size of the components, the nature of the linkages, or the available space. When such a situation arises, the use of the pressure switch may offer a convenient solution to the problem.
Figure 6.10 illustrates a simple arrangement for pressure-switch sequencing of a double-acting cylinder. The four-way directional-control valve in this illustration is a two-position, double-solenoid valve.
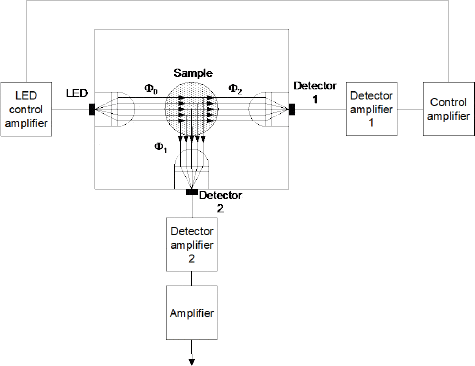
Use of pressure switch to sequence cylinder piston
Momentary actuation of pushbutton switch PB will energize solenoid A, shifting the directional-control valve to a position that will deliver air to the cap-end cylinder chamber, causing the extension stroke of the cylinder piston. As the stroke is completed, pressure builds up to a value sufficient to trigger pressure switch PS. An electrical signal is then sent momentarily to solenoid B of the four-way directional-control valve, thus returning the valve to its initial position for delivering air to the head-end cylinder chamber and causing the retraction stroke of the cylinder piston.
6.5.2 Sequencing circuit with electrical control
Figure 6.11 illustrates the sequencing of two double-acting cylinders, each controlled by a double-solenoid, four-way directional-control valve. The sequencing in this circuit is accomplished by the use of four pressure switches. The desired sequence is:
- Extension stroke of piston of cylinder C
- Extension stroke of piston of cylinder D
- Retraction stroke of piston of cylinder D
- Retraction stroke of piston of cylinder C
The cycle begins with the actuation of the start pushbutton, which energizes solenoid 1 of valve A (line 1 in Fig. 6.11). This causes air to be delivered to the cap-end chamber of cylinder C, causing its piston to complete its extension stroke. When the pressure builds up to trigger pressure switch E, an electrical signal is sent through a normally closed set of contacts of relay CRl (line 2 of Fig. 6.11) to energize solenoid 3 of valve B. This delivers air to the cap-end chamber of cylinder D, causing its piston to complete its extension stroke. At the completion of this extension stroke, the pressure build-up triggers normally open pressure switch F, thus delivering an electrical signal to the coil of relay CRl (line 7 of Fig. 6.11). This relay coil is then held energized through a set of its normally open contacts (line 6) in series with normally closed pressure switch H (line 7) .An electrical signal is then delivered through another set of normally open CRl contacts to solenoid 4 of valve B (line 4). This shifts valve B, causing air to be delivered to the head-end chamber of cylinder D and powering the retraction stroke of its piston. At the completion of this retraction stroke, a pressure build-up triggers normally open pressure switch G (line 5 in Fig. 6.11), thus delivering an electrical signal through a set of normally open CRl contacts to energize solenoid 2 of valve A. This returns valve A to its original position, delivering air to the head-end chamber of cylinder C, causing the retraction stroke of its piston. At the completion of this retraction stroke, the pressure build-up triggers normally closed pressure switch H (line 7 in fig 6.11), thus interrupting the holding current in the coil of CR1. As the control relay de-energizes, the signals to solenoids 4 (line 4) and 2 (line 5) are both interrupted. At this stage, the circuit is again in its idle state and ready for the start of another cycle.

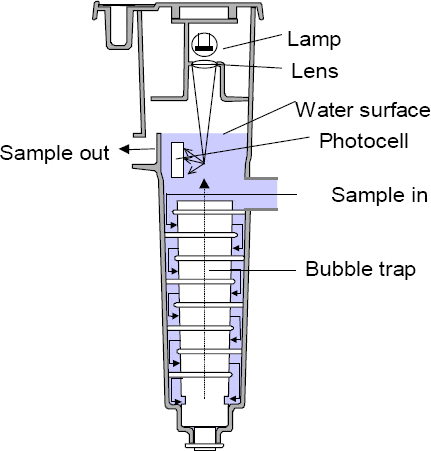
Sequencing of two double acting cylinders using pressure switches
The emergency stop pushbutton (lines 2 and 3) can be used to reverse the stroke of the piston of cylinder D, with the retraction stroke of the piston of cylinder C following in its normal sequence. Should it be desirable for the emergency-stop function to return both cylinder pistons simultaneously, a second set of normally open contacts could be incorporated into the emergency stop switch for the purpose of supplying an electrical signal to solenoid 2 (line 5) of four-way directional control valve A.
While such use of pressure switches offers no positional interlock signals, it does offer a convenient method of electrical switching without making mechanical switch mountings directly on a machine. If it is imperative to sense actual position rather than pressure sensing of the cylinder strokes, attention should be given to the method of sequencing by means of limit switches.

6.6 Ladder diagramming
6.6.1 Introduction
Ladder diagrams or ladder logic diagrams are specialized schematics used to document industrial control logic systems. The name “ladder” comes from the resemblance to a ladder with two vertical lines for the power and as many horizontal lines (rungs) as required for the circuit components. This section of the course will teach the reader how to compile a ladder logic diagram for a circuit, using good design principles.
6.6.2 General drawing layout
The use of cross-referencing is not required in ladder logic diagrams, what must be remembered is that ladder logic layout differs from electrical schematic layout. With ladder logic the power supply lines are vertical while in electrical schematics these lines are horizontal. All drawings should contain legends of symbols used as well as an index system.
6.6.3 Symbols
Switches
An electrical switch is a device used to interrupt the flow of electricity in a circuit. Switches are essentially binary devices, being either on (closed) or off (open).
Types of switches include hand, limit and process, we have a look at each of these in the symbols below:
Hand switches
As the name implies hand switches are operated by hand (hopefully belonging to a human).


Limit switches
These are switches that are operated by a mechanical movement. This movement could be the result of a relay energizing or current going too high.

Process controlled switches
Process controlled switches are switches that change status with a change in the status of the process.

Contacts
Contacts for switches come in one of two states, normally open or normally closed, this the non-energised position of the contact. This is position that the contact is in when it comes off the shelf
- Speed switch – Position at zero rotation
- Temperature switch – Position at room temperature
- Flow switch – Position at zero flow
- Pressure switch – Position at standard atmospheric pressure


6.7 Ladder Logic
6.7.1 ‘Ladder’ diagrams
Ladder diagrams or ladder logic diagrams are specialized schematics used to document industrial control logic systems. They are called ‘ladder’ diagrams because they resemble a ladder, with two vertical rails (supply power) and as many “rungs” (horizontal lines) as there are control circuits to represent. A simple ladder diagram showing a lamp controlled by a hand switch is shown in figure 6.12 below:

The L1 and L2 designations refer to the two poles of an AC supply, unless otherwise noted. L1 is the live conductor, and L2 is the grounded or neutral conductor. The circuit is reduced to its simplest form and does not go into detail regarding the source of power, this function is left to the single line diagram.
While ladder logic diagrams are shown in the standard operation voltage i.e. 120VAC or 220 V AC, depending on location, they can be used to depict circuits of any voltage, AC or DC.
6.7.2 Wire numbering
Wire numbering is a contentious issue the world over, with a lot of good, bad and downright ugly systems being used. As we dealing with ladder logic here we will look at what has become a fairly common practice regarding wire numbering.
In figure 6.13, the “1” between the contact and the lamp is used to indicate the wire number, while the L1 and L2 are used to indicate the wire numbers of the circuit supply.
Figure 2 shows how the circuit would be numbered, using wire markers.
Figure 6.14 gives an idea of the physical layout of the circuit.
The essential wire numbering criteria to remember is that, any one electrically continuous point in the circuit has the same number regardless of any changes in the conductor.

The following points must be borne in mind for wire numbering:
- Wire numbers are used to assist in construction and maintenance.
- Each conductor in a continuous circuit has a unique wire number.
- Wire numbers only change when there is a break in the continuity of the circuit.
- Every conductor should be labeled at both ends.
6.7 Electro-pneumatic circuits
Drawing layout
Figure 6.16 shows the layout of 5 different diagrams that make up the stable of Electro-pneumatic diagrams, what should become apparent to the reader is that these diagrams focus more on the design of the circuit than on any future maintenance requirements. You will notice that these diagrams do not contain wire numbers, cable numbers or terminal numbers.
Electrical control diagram
This diagram answers the question; “how do I incorporate instrumentation and PLC control into my diagrams?” The diagram shows how the circuit finally becomes an input to a PLC, we can look at this as being the instrumentation technicians “Ladder logic loop diagram”.
PLC ladder logic
This now gives an idea of the function of the circuit that was missing from the electrical control diagram, this is a functional diagram and not a maintenance or fault finding diagram.
I/O interface card
The I/O interface card does little more than give a description of each output, the led in the panel is either on or off depending on the status of the input or output. Next to each input or output is a written description of what the function of the input or output indicates or controls.
Hydraulic circuit
As we have covered in section 4, this circuit shows us the layout of the hydraulic circuit.
Electric power diagram
This shows the diagram of the main power circuit as discussed in section 2 electrical schematics.
As can be seen for the diagram, the world of pneumatics and hydraulics is far removed from that of electrical schematics and instrument loop drawings. The people who design electrical circuits are generally working on a large multi faceted installation that uses Motor Control Cubicles to distribute power to the plant. The same can be said of the instrumentation staff that also has a plant wide focus. Both these disciplines differ from the pneumatic – hydraulic discipline which is application specific and tends to run from a solitary control panel.

Circuit types for Electro – pneumatic circuits
6.8 Limit-Switch Solenoid-Valve Sequencing
The use of solenoid-operated directional-control valves for multiple-action sequencing requires some familiarity with electrical symbols and ladder diagramming. The end result may appear to be quite complicated, but when developed in a logical fashion, the process is not difficult. The air portion of such a circuit is quite simple, as indicated by Figure 6.17. In this application, the following sequence of steps is to occur:
- Cylinder piston 1 extends
- Cylinder piston 3 extends
- Cylinder piston 2 extends
- Cylinder piston 1 retracts
- Cylinder piston 4 extends
- Cylinder piston 5 extends
- Cylinder piston 6 extends
- Cylinder piston 2 retracts
- Cylinder piston 3 retracts
- Cylinder piston 5 retracts
- Cylinder piston 6 retracts
- Cylinder piston 4 retracts
The circuit must be capable of a single cycle from a manual start. The circuit must be capable of automatic restart at the completion of the cycle. Limit-switch interlocks must provide for the following conditions:
- Cylinder 1 must be fully extended before Step 2 begins (LS1)
- Cylinder 3 must be fully extended before Step 3 begins (LS2)
- Cylinder 2 must be fully extended before Step 4 begins (LS3)
- Cylinders 4 and 5 must be fully extended before Step 5 begins (LS4 and LS5)
- Cylinder 6 must be fully extended before Step 6 begins (LS6)
- Cylinder 3 must be fully retracted before Step 7 begins (LS7)
- Cylinder 5 must be fully retracted before Step 8 begins (LS8)
- Cylinder 6 must be fully retracted before Step 9 begins (LS9)
- Cylinder 4 must be fully retracted before cycle can repeat (LSI0)
Solenoid operated control valves, for multiple sequencing
To develop the electrical circuit from these requirements, the first step is to develop a truth table such as that shown in Fig. 6.18. The valve solenoids are listed A through F down the left side of the table. The sequence steps, 1 through 9, are listed across the top of the table. An X is placed in the square to the right of solenoid A in the step 1 column to indicate that this solenoid is to be energized at step 1. By referring to the sequence steps described previously, you will find that solenoid A must remain energized through step 3. Therefore, X’s are placed in the squares for steps 2 and 3. Since valve A is not to be actuated throughout the rest of the cycle, zeros can be placed in each of the other squares in the row for solenoid A. The squares for the other solenoids are marked similarly.

Directly beneath each step number is a space to indicate the switch that initiates that particular step. Since the cycle is to begin manually by operation of a push button switch, “PB” is entered directly below step 1. The sequence requirements state that the cycle must be capable of automatic restart; therefore, LS10 (limit switch 10) is indicated as an alternate to the push-button. A two-position selector switch labeled MAN-AUTO determines whether the sequence is single-cycle manual start or automatic recycle through limit switch LSI0. Each step is initiated by a switch at the completion of the previous step. Since the electrical signal from the pushbutton is momentary, some means must be employed to sustain that signal through step 3 in order to keep cylinder 1 extended for the required portion of the cycle. This is most easily accomplished by the use of a relay (CR1) 1-4 Limit switch LS1 presents the same problem; therefore, CR2 is employed to extend the signal of LS1. Since the signal requirement from LS2 is the same as its duration of actuation, no relay is needed to control valve B.
Relays are required for solenoids D, E, and F. The truth table now contains all the information necessary to develop an electrical ladder diagram (Fig. 6.19). The circled numbers indicate the step number to which each element relates.


7
Vendor
7.1 Introduction
The Vendor is the company that deals with the plant throughout the operating lifecycle of the plant.
Throughout the operating lifecycle of the plant, Vendors will change continuously for one or both of the following two reasons:
- The company feels that the Vendor is incompetent and or unreasonable or one of many similar adjectives. For this reason they stop dealing with the Vendor
- The Vendor chooses to stop dealing with the company because they feel the company is unfair or incompetent
More often than not, as with most things in life, the real culprit is just a lack of communication and understanding of the requirements. The purpose of our standards and specifications is to prevent the misunderstanding in the first place, otherwise to give a path for resolution of the problem.
Specification Case Study
Company A required a new MCC (Motor Control Centre). Company A had created a specification detailing the requirements to be met by the supplier. Part of this specification was to document the panel colour and method of painting. The colour specification was “Electric Orange”, company A went one step further and specified the supplier and the suppliers code number for the paint. The method for painting was that the panel be powder coated.
Vendor B won the contract and eventually delivered the completed MCC to site. Here it was discovered that the MCC was a much darker orange than the other MCC’s on the site. A wrangle now ensued where the client refused to accept or pay for the panel as it was the wrong colour.
The story panned out as follows:
- The company claimed the Vendor had not read the specification
- The Vendor countered with order numbers and delivery notes, which held the same suppliers code as that called for in the specification
- The company then claimed that the colour change was a result of the powder coating procedure being done incorrectly
- At the insistence of the Vendor, a company representative finally visited the powder coater to check the material and equipment used. On this site visit it was established that the paint in the can was the culprit
- After meeting with the supplier, it was discovered that the supplier had decided to change the tone of the paint to a darker tone
- The company and vendor decided to split the cost of transporting and re-spraying the panels to the correct colour
The problem here is that the company specified a code that was beyond their scope of control. This could have been resolved by including a sample with the specification that could be used for reference.
Who is the authority?
When you decide to use the services of a Vendor, keep in mind why you are going to the Vendor instead of doing the job yourself. Chances are, you are using the Vendor for his expertise in his field and because you cannot do the job yourself.
You are the expert on your company standards and specifications, while the Vendor has no idea of your standards and specifications. If you want him to conform to your standards and specifications then you are going to have to inform the Vendor up front of your expectations. Remember that the more closely the Vendor has to follow your standards and specifications, the higher his cost will be of producing documentation and plant to these specifications.
How critical is adherence to detail?
At the same time that the Process Flow Diagram is being developed so too should the process description be developed. This description should contain the following information:
7.2 Sample documentation specification for technical documents
7.2.1 Purpose
Describes the preparation of documents to the order of the plant. To inform the Vendors/Contractors of the Engineer’s requirements for the preparation, receipt, review and collection of technical information.
7.2.2 Scope
This specification covers the management of the flow of technical documentation necessary to facilitate the design supply, construction, commissioning, operation and maintenance of the Plant.
7.2.3 Objective
To ensure that all documentation submitted to the Engineer for review, approval and retention is properly prepared and submitted in. a uniform manner suitable for the Engineers needs.
7.3 The engineers documents
- The Engineer’s documents shall mean. all documents issued to Vendors/Contractors by the Engineer and shall include documents originated by the Employer or others
- Documents issued for tender or with purchase orders and installation contracts will be included in the enquiry/order documentation package. A listing of the technical documents transmitted will be included in the package (DL -Document List)
- Documents transmitted subsequent to the placement of order win be transmitted under the cover of a transmittal, a sample of which is attached as Annexure 1. On receipt, the Transmittal must be signed and dated and a copy returned, marked for the attention of the Engineer’s Lead Document Controller
- The purpose of issue of documents will be shown on the Transmittal
- All the Engineer’s drawings carry a revision control block on which the status of the drawing is indicated. Prior to approval for construction, the revision status is indicated by two alpha characters, starting at AA BA and progressing .A,G BB, BC etc. The “Approved for Construction” version then carries revision 00 and subsequent revisions progress numerically 01, 02 etc
7.3.1 The engineer’s documentation requirements
The Engineer’s requirements for documentation for each procurement package will be shown on the Documentation Requirement Schedule included with each order (DR-Documentation Requirements). This indicates the number of copies required, the submittal dates and the categories of documents required. Individual documents must be supplied in all instances (Annexure 2A), unless the DR is modified to show only a B Column in the weeks column.
The Engineer’s requirements for documentation for each procurement package will be shown on the Documentation Requirement Schedule included with each order (DR-Documentation Requirements). This indicates the number of copies required, the submittal dates and the categories of documents required.
7.3.2 Vendor/contractor document register
Vendors/Contractors are required to generate a register listing all documents that will be submitted against the Engineer’s requirements The Document Register is Item 01 of the Documentation Requirements Schedule and must be the first document to be received by Document Control.
For each document, the register shall show:
- The title of the document {description)
- The vendor document number {the vendor document no.. and its file names must be identical)
- The document category
- The due date for first submission to the Engineer
All documents shall carry a revision control block on which the revision, status and date of revision is entered. All documents submitted shall. have a unique document number allocated by the Vendor/Contractor. If the document is submitted in electronic format, the file name must be identical to the document number.
The title/description of the document shall clearly identify the facility, and equipment where applicable and shall adequately describe the document.
Changes or additions shall be identified by <x>, The Register must be re-submitted for approval to reflect any changes. {e.g. <5> ).
One document may be submitted to satisfy more than one category of the Documentation. Requirements Schedule provided that it is submitted to suit the earliest date of all the categories it covers and that this is clearly noted on the Vendor Documentation Register.
Two paper and one electronic copy of the register shall be addressed to the Engineer’s Lead Document Controller for approval. After review, one copy, either bearing the Engineer’s comments or marked “Status D” as approved, will be returned to the Vendor/Contractor .
Once the register has been approved to a minimum of status “C” (at the Engineers discretion), the information contained on the register will be entered into the Engineer’s document control system.
7.3.3 Review of vendor contractor documents
On or before the due submission date, the Vendor/Contractor shall. submit the copies of the document or document package to the Engineer’s Document Controller under cover of his official transmittal note.
The transmittal note must state the purpose of the submission.
Each individual document must be identified by Its number and revision on the transmittal and where electronic files are attached, the file names including the size. Documents for different purposes must be sent on different transmittals. If documents are submitted via e~mail; the transmittal must be included.
One electronic fife plus two paper copies of each document (except for hand produced documents, material certificates or similar where three hard copies shall be supp1ied) shall be submitted for review.
The electronic file sha1l be in AutoCAD or one of the MS Office Suite of software. Each 3” disk or CD ROM shall contain an index identifying the file name/document number/the Engineer’s document number and the revision of all documents included on the disk or CD ROM.
After review, one copy of each document bearing the Engineer’s comments and with the document status marked on the review sticker will be returned to the Vendor/Contractor under the cover of a Transmittal.
Fourteen (14) calendar days.. except where otherwise specified in the contract shall be . allowed between the receipt by the Engineer of documents for review and the generation of the return transmittal for dispatch of the reviewed documents.
On receipt of the reviewed documents, the Vendor/Contractor shall make any modifications requested and re-submit one electronic file plus two paper copies within 14 (fourteen) calendar. days. Queries regarding comments/changes shou1d be addressed with the relevant SLE staff, prior to resubmittal.
Any re-submittals, which have not included the changes/comments modified, will be returned to the vendor for further revision to the document.
Drawings that are required to be brought to “As-Built” by the Documentation Requirements Schedule must be submitted within 5 working days of applying for a Works Completion Certificate.
7.4 Submission of final documents
7.4.1 The engineer’s record drawings ~ “As-Built”
The Contractor shall record on two (2) set of the Engineers construction drawings all changes and deviations from the latest revision of the construction drawings issued by the Engineer. Upon Works Completion, the Contractor shall deliver these marked-up record prints in “As built” condition to the Engineer after certification as such by the Engineer’s Site Engineer.
7.4.2 Requirements for vendor as-built or final drawings
The Documentation Requirement Schedule will indicate the documents which are required to be brought to “As-Built’ status.
The hard copies shall be stamped with the Vendor/Contractors “Certified” “Final” or ‘’As-Built” stamp (as appropriate} or the revision block suitably updated. The stamp shall also include the certifying signatures of the prime parties responsible, namely the Installation Contractor and the Engineer’s responsible Site Engineer.
The Engineer’s requirements for “As-Built’, Certified, or Final drawings are:
- All manual drawings: 2- paper prints (original or full size) All CAD drawings: 2- original plots (full size)
- 1-electronic file on CD ROM or 3X ” disk Format: AUTOCAD
All “As-Built automation functional analysis documents shall be submitted as follows:
- 1 paper (A4) copy bound in book form 1 CD ROM or 3″ disk; documents to be prepared using one of the Microsoft Office Suite of software.
7.5 Electronic requirements
Databases
Databases shall be presented in Access compatible format on CD ROM or 3″ disk.
Spreadsheets
Spreadsheets shall. be presented in MS-Excel or compatible format on CD ROM or 3″ disk.
Other documents
All other documents shall be submitted in hard copy, in a form suitable for photocopying.. AND in electronic form on Microsoft Office Suite.
Drawings shall be presented in Autocad 14
A concession may be requested to supply drawings on a different format, providing it is in Microstation or DXF format and according to a CAD procedure to be approved by the Engineer. Standard fonts shall be used. The Vendor shall suppJy his Pen Table Settings for Autocad to Document Control (re: colour to pen width relationship) All Cad drawings shall comprise of a single file. If the drawing is made up of a master file and reference files, the reference files must be imported into the master file so that all the information is stored in one file.
7.6 Sample Documentation specification for compiling manuals
7.6.1 Scope
This specification covers the requirements for the preparation of Installation, Maintenance, Operating Instruction, and Training material which shall be submitted when required in the package Documentation Requirement Schedule by the Contractor/Vendor for all equipment supplied for the Plant.
7.6.2 Objective
To ensure that all documentation submitted to the Engineer for review and retention is properly prepared in a uniform manner suitable for the Employer’s needs. The Vendor/Contractor shall submit a separate set of documents for Installation Instructions, Maintenance and Operating Instructions, and Training materials.
A separate set of documents shall be submitted for each group of equipment which must function to perform a specific task – for example, a belt conveyor system which comprises of motor control centers, motors, gearboxes, pulleys, bearings, belts, dust collectors, speed switches, lighting, etc.
Each separate set of documents or training material is referred to as a manual in the following text.
7.6.3 Reference documents
| NUMBER | TITLE |
| ** | Documentation |
| ** | Spare parts |
| ** | Lubricant Standardisation |
7.6.4 Submission for review
The initial submission shall be made as specified in the Documents Requirements Schedule. The Contractor/Vendor shall correct all errors and deficiencies and resubmit the manuals within three weeks after the Engineer has reviewed the initial and further submissions. The final submission shall be made after all data has been gathered but shall in no case be later than;
Four (4} weeks prior to commencement of installation.
Six copies of each manual shall be submitted for review, except for Training documents for which only one copy is required for initial review and six copies for final.
7.6.5 Assembling of manuals
Installation, Maintenance and Operating Instruction shall be supplied as manuals in off white plastic covered 2 or 4 D-Ring binders with a clear front overlay and a clear spine pocket. 4 D-Ring shall always be used if document contains more than 100 pages. Use of other binders including vendor/contractor’s standard will be at the absolute discretion of the Engineer. In all instances binders shall have spine sheets and front overlay insert. (Refer annexure 1)
Coloured dividers shall separate each section of the manual and shall be manufactured from plastic (PVC) and shall be marked numerically to correspond with the index.
Each section of the manual shall be sub-divided and indexed to facilitate quick referencing.
Unless for reasons of clarity, where a larger size is warranted, drawings included in the manual shall be A4 or A3 size. Drawings shall be able to fold out without removal from the manual
Drawings and charts larger than A3 size shall be folded and enclosed in a plastic pocket of A4 size of adequate strength.
The originals of all brochures shall be furnished. Photocopies will not be acceptable, Where a general brochure is applicable to a range of equipment., then the specific item, catalogue number or model number shall be stated.
Exploded views and pictorial descriptions shall be used wherever possible.
Refer to Annexure 1 of this specification for details of the inserts for the front. Overlay and spine pocket. Each volume shall be numbered (e.g. 1 of 1, 1 of 2, 2 of 2,.etc.)
7.6.6 Contents of manual
Installation instruction manuals
The contents of these manuals shall include the following minimum requirements in the order they appear below:
Index
Each volume of a manual shall have an index listing the contents of volumes which comprise the complete manual.
Section 1 – Contact personnel
This section shall be reserved specifically for addresses, phone numbers, fax numbers and contact names of technical personnel who have knowledge and expertise on the installation of the equipment.
The address, phone numbers, Fax number and reference number of all sub-suppliers shall be provided.
Section 2 – Health and safety precautions
This section shall highlight the Health and Safety hazards which may be encountered and precautions to be taken during the installation of the plant and shall include the following:
Isolation procedures shall comply with the Electrical Machinery Regulations of the OHS Act. Special safety precautions or health related equipment required for the installation of the plant.
Section 3 – Installation instructions
This section sha11 provide complete insta11ation instructions, including the following:
- Storage of components prior to installation.
- Lifting points and weights of components including cranage requirements. Critical lifting points shall be noted.
- Complete details of erection and installation sequence including extent of shop and site assembly.
- Detailed Installation drawings.
- Details of specialised labour required for Installation.
- Details of corrosion protection systems used and method of repair or recoating.
- Warnings regarding procedures or practices likely to cause damage to equipment during erection, installation. and maintenance.
- Lubrication details
Operating and maintenance manuals
The contents of all manuals shall include detailed operation maintenance and repairs, parts lists, test certificates, data sheets, specifications, calculations, etc covering all parts and components as well as the whole of the plant or equipment forming the works.
The contents of these manuals shall include the following minimum requirements in the order they appear below:
Index
Each volume of a manual shall have an index listing the contents of all volumes that comprise the complete manual.
Section 1 – Contact personnel
This section sha.11 be reserved specifically for addresses, phone numbers, fax numbers and contact names of the Contractors/Vendors and all sub-suppliers.
The address, phone numbers,. Fax number and reference number of all. sub-suppliers shall be provided.
For Training material the contact details of the training personnel or training coordinator shall be supplied.
Section 2 – General description
This section shall give the Operator a brief overview of what the plant does, how it operates, what its main performance characteristics are, etc. It also serves to assist with training of operators.
Section 3 – Health and safety precautions
This section shall highlight the Health and Safety hazards which may be encountered and precautions to be taken during the operation and maintenance of the plant and , shall include the following:
- Isolation procedures shall comply with the South African Health and Safety Act. Occupational Health and Safety in Industrial Premises, Statute No 48173
- Special safety or health related equipment required for the operation, e.g. ear protection, special gloves, face shields, etc
Section 4 – Operation instructions
This section shall give the Operator the detailed, step-by-step instructions to start-up and operate the plant under all conditions and shall include the following:
- Pre-commissioning and commissioning check list
- Detailed step-by-step, safe working procedure for the operator
- The performance specification of the plant, giving details of the operating parameters, limits, capacity, settings, etc
Pre-operation checklist
- Fault diagnosis and instructions (at Operator level)
- Emergency shut-down procedures.
- Special operating procedures for abnormal conditions e.g. after emergency shut-down, during stand-by mode and manual mode
- Relevant disposal instructions for consumable items
- Trouble shooting reference list
Section 5- Maintenance instructions
This section shall give a detailed step-by-step instructions to maintain the plant under all conditions and shall include the following:
- Isolation procedures which shall comply
- Details of the operating parameters, tolerances, limits, capacity, etc
- Fault diagnosis instructions (at all levels)
- G.A. drawings with principal dimensions, interface dimensions and recommended clearances for removal of equipment and/or assemblies
- Electrical Wiring I Connection Diagram
- Electrical Schematic Diagrams
- Hydraulic Schematic Diagrams
- Pneumatic Schematic Diagrams
- Piping and Instrumentation Diagrams
- Supplier Manuals and Document
- Protection relay settings and coordination
- Instrumentation documentation as defined in the package Documentation Requirement Schedule
- All control system document deliverables as defined in the package Documentation Requirement Schedule
This section shall also include a list of daily, weekly, monthly and yearly tasks for scheduled maintenance. Standard durations for each task shall be indicated. The maintenance schedule shall include the following:
Drawing Part No. Description Maintenance Duration of Maintenance Reference of Plant Actions Maintenance Frequency Where applicable. Condition Monitoring Programmes and Reliability Centred Maintenance principles shall be included.
Special tools and equipment required for the maintenance of the plant which are not commonly used or available shall be tabled as follows:
- Part No.1 Description Quantity Size/ Rating Supplier/
- Reference Specification Manufacturer
A lubrication schedule shall be included to give full details of lubrication points, lubrication, and intervals for lubrication of the plant or equipment. The lubrication schedule shall be accompanied
By a lubrication chart or diagram showing the location of all lubrication points and filters referred to in the schedule.
Section 6 -Commissioning Spares
A list of commissioning spares shall be completed and included in the manual.
Section 7- Spare parts for two years operation
A list of spares shall be completed and included in the manual.
Section 8 – Control documents
This section shall include the following documents:
- Conformity certificate issued by the appropriate authority
- Test curves and certificates
- Factory test certificates
- Warranty
Section 9 – Index of drawings
This section. shall provide a master reference list of a!l relevant drawings including those which are not bound in the manual, which shall be required for maintenance and operation of the plant.
Drawings which are included in the manual shall be tagged as such in the index and similarly drawings which are not included in. the manual shall also be tagged as such in the index.
A drawing list with SLE Nos. and Vendor Nos. shall be enclosed and the following drawings shall be provided in the manual:
- All drawings necessary for installation, operation and maintenance of the equipment
- Where applicable, match marked erection drawings. All drawings used in manufacture of the: equipment shall be listed and referred to on the installation drawings. Where components are proprietary manufactured items they shall be identified on the drawings and manufacturer’s model number and size stated in the bill of materials
Section 11 – Suppliers spares lists and catalogues
This section shall provide a complete list of spares available from the Original Equipment Supplier as well as manufacturer’s catalogue information, pamphlets, data or specifications sheets which are relevant to the plant. Specific items which are relevant to the plant must be clearly indicated or highlighted.
7.6.7 Training material
The material shall be supplied in software compatible with Windows and shall be Year 2000 Compliant.
The material shall include sections covering the topics listed above.
With reference to Clause 6.2.6, Maintenance .Instructions, Contractors Vendors shall note that for PLC programs the training material shall include complete Level 1 PLC training documentation which shall include:
- Leve1 PLC narrative functional specification
- Fully documented hard copy printout of the PLC program
- Electronic copy of the PLC program
- Copy of logic diagrams as applicable
7.7 Training
Upon receipt of an order from the Employer, in addition to supplying a Training Program and Training material, the Contractor Vendor shall train the Employers personnel in all operations and maintenance practices to ensure the longevity and good performance of all plant supplied.
Training shall be outcome based. Competency evaluation sheets will be supplied by the Employer as a guideline, to establish the trains level of competency at the end of the training course. The Contractor Vendor shall add to them as appropriate but shall obtain the Engineer’s approval before removing any item. Where no such sheets are available the Contractor Vendor shall compile the sheets.
The Contractors Vendors shall evaluate each of the trainees on completion of the training and submit the evaluations to the Employer. If the required level of .competency has not been attained the personnel shall be re-trained to improve the level to that required.
Training shall include mechanical, electrical automation and production operations and the plan shall include the expected duration of training in each of these disciplines. For turnkey contracts the Contractor shall be responsible for obtaining the required training programs from all sub-contractors/vendors.
Employees in Production Departments shall be trained in the theory and practice of how to operate the equipment. Maintenance personnel shall be trained in maintenance of the equipment as well as how to interpret the electrical., hydraulic and pneumatic drawings and maintenance manuals.
8
Practical Exercises
General Note: As this is a Basic Course in Technical Documentation students should recognize that the practical exercises are designed to focus more on layout and content than exact technical correctness of a design – please do not spend large amounts of time looking for the correct technical solution – spend time on presentation and completeness of the document.
Practical 1 – Basic Drawing Template
Practical 1 is a simple exercise in building a Master Drawing Template.
- Using a blank A3 sheet (with border) create a master template. Refer to the sample but the layout is up to you. Blank A3 sheets with border are contained in the drawing appendix. A sample solution is shown below.
- Make sure your template has provision for the following:
- Company Name
- Project Name or No.
- Drawing Title
- Drawing No.
- Revision No.
- Drawn By/Checked By and Date
- Scaled
- Issued For
- Issue History Box
- Other relevant details

Practical 2 – Title Block Details
Practical 2 is an exercise in completing the relevant title block details of the PFD and P&ID drawings contained in the drawing appendix. The PFD example is shown below without the Title box completed.
- Make any observations about the drawings in the form of notes at the bottom left hand corner

Practical 3 – Process Drawings (P&ID’s)
Practical 3 introduces the student to a basic P&ID and requires the completion of a range of details typical found on such drawings. A partially constructed P&ID is provided in the drawing appendix for the student to complete.
- The attached partially completed P&ID shows a holding tank (300-TNK-001) feeding a jacketed heat exchanger (300-VSL-001) with a motor driven stirrer (300-MTR-001). The 4 instrument bubbles on the left of the vessel are a level control loop. The 2 bubbles on the right are for pressure recording.
- The level indicating controller (LIC) and pressure recorder (PR) are electronic discrete instruments which are to be placed in the main control room where the operator can see and operate them.
- Please complete the drawing – tagging all instruments, interconnecting all instruments (using electrical signals except for the pneumatic signal to the control valve) and add other details such a line nos., flange details etc as well as any other detail you may think relevant to the completion of the P&ID.
- When you have finished please complete the title block in full.
- You may wish to refer to the P&ID used in practical 2 to get some ideas on what else could go on this drawing.


Practical 4 – Instrumentation Drawings & Schedules
Practical 4 introduces the student to a few of the drawings and schedules to be found in an Instrumentation drawing package. Using the previously completed P&ID in practical 3 the student is asked to complete the following:
- Complete a Loop List for the P&ID
- Generate a Loop Drawing for the level control loop
- Complete an Instrument Data Sheet for the pressure transmitter
Loop List, Loop Drawing and Instrument Data Sheet templates are included in the drawing appendix. A sample blank data sheet is shown below.

Practical 5 – Electrical Drawings
Practical 5 introduces the student to a typical electrical schematic wherein the aim is to ensure an understanding of how to lay out both the Main and Control Circuits of a Cooling Fan motor on the one sheet.
- In the Main Circuit show the motor, the 3 phase breaker and the 3 current transformers for the phase current ammeters.
- In the Control Circuit, use 24 VAC as the control voltage and show the stop and start pushbuttons, the high and low temperature trips, the winding temperature trip. Use a conventional (non-latching) relay as the control relay.
- The sample drawing contained below and in the appendix will provide some ideas for layout and symbols.
Blank drawing templates with title boxes are included in the drawing appendix.


Pre-Workshop Questionnaire
PROCESS, ELECTRICAL & INSTRUMENTATION DRAWINGS AND DOCUMENTATION
Full Name _________________________________________________________
City/Country _____________________________________________ Date _____
Would you kindly answer the questions below.
Please answer all questions to the best of your ability.
- What are the main reasons for your attendance at this training workshop? Please provide two.
__________________________________________________________________
__________________________________________________________________ - Briefly describe your main responsibilities in your current job.
__________________________________________________________________
__________________________________________________________________
__________________________________________________________________ - Where/How did you hear about this workshop?
 Other ______________________________
- Have you been on a previous IDC Technologies workshop? No
- In which area do you work? Other(s)_____________________________
- How many people are in your organization? Greater than 100
- Have you previously worked in the field of this training course? If so, in which area?
__________________________________________________________________

Technical Questions
- What is the difference between a drawing and a diagram ?
____________________________________________________________________________________________________________________________________
__________________________________________________________________
__________________________________________________________________
- What is a process flow diagram ?
____________________________________________________________________________________________________________________________________
__________________________________________________________________
__________________________________________________________________
- What are the main components of an I/O List ?
____________________________________________________________________________________________________________________________________
__________________________________________________________________
__________________________________________________________________
__________________________________________________________________
- In a drawing context, what is the “normal” state of a relay contact? “Energised” or “De-energised”?
____________________________________________________________________________________________________________________________________
__________________________________________________________________
__________________________________________________________________
- What does “fail Safe” design mean ?
____________________________________________________________________________________________________________________________________
__________________________________________________________________


Professional Certificate of Competency in Advanced TCP/IP-Based Industrial Networking
Designed for engineers and technicians who need practical knowledge in…Read more
Professional Certificate of Competency in Allen Bradley Controllogix / Logix5000 PLC Platforms
Designed for engineers and technicians who need practical knowledge in…Read more
Professional Certificate of Competency in Arc Flash Protection
Designed for engineers and technicians who work in the electrical…Read more
Professional Certificate of Competency in Chemical Engineering and Plant Design
Designed for engineers and technicians who need practical knowledge in…Read more
Professional Certificate of Competency in Circuit Breakers, Switchgear and Power Transformers
Designed for engineers and technicians who need practical knowledge regarding…Read more
Professional Certificate of Competency in Control Valve Sizing, Selection and Maintenance
Designed for engineers and technicians who need a solid understanding…Read more
Professional Certificate of Competency in Electrical Power System Fundamentals for Non Electrical Engineers
Designed for engineers and technicians who need to understand the…Read more
Professional Certificate of Competency in Electrical Power System Protection
Designed for engineers and technicians who need practical skills and…Read more")
Professional Certificate of Competency in Electrical Wiring Standards: AS/NZS 3000:2018 (Australia and New Zealand Only)
This professional development course is designed for engineers and technicians…Read more
Professional Certificate of Competency in Fundamental E & I Engineering for Oil and Gas Facilities
Designed for engineers and technicians who need to update their…Read more
Professional Certificate of Competency in Gas Turbine Engineering
Designed for engineers and technicians who need practical skills in…Read more
Professional Certificate of Competency in Hazardous Areas and Intrinsic Safety For Engineers and Technicians
Designed for engineers and technicians who need to understand the…Read more")
Professional Certificate of Competency in Heating, Ventilation and Air-Conditioning (HVAC)
Designed for engineers and technicians from a wide range of…Read more
Professional Certificate of Competency in IEC 61850 Based Substation Automation
Designed for engineers and technicians who need to understand the…Read more
Professional Certificate of Competency in Industrial Data Communications
Designed for engineers and technicians who need to understand how…Read more
Professional Certificate of Competency in Instrumentation, Automation and Process Control
Designed for engineers and technicians who need to gain practical…Read more
Professional Certificate of Competency in Machine Learning and Artificial Intelligence
This professional development course is designed for engineers and technicians…Read more
Professional Certificate of Competency in Mechanical Engineering
This professional development course is designed for engineers and technicians…Read more
Professional Certificate of Competency in Onshore and Offshore Pipeline Systems
Designed for engineers and technicians who need to gain an…Read more
Professional Certificate of Competency in Power Distribution
designed for engineers and technicians who need to gain a…Read more
Professional Certificate of Competency in Practical Machine Learning Using Python for Engineers and Technicians
Designed to use Python Programming to work with machine learning…Read more
Professional Certificate of Competency in Practical Python for Engineers and Technicians
Designed for engineers and technicians who need to understand the…Read more & SCADA Systems")
Professional Certificate of Competency in Programmable Logic Controllers (PLCs) & SCADA Systems
Designed for engineers and technicians who need to get practical…Read more
Professional Certificate of Competency in Project Management for Engineers & Technicians
This professional development course is designed for engineers and technicians…Read more
Professional Certificate of Competency in Safety Instrumentation Systems for Process Industries
Professional development course designed for engineers and technicians who want…Read more
Professional Certificate of Competency in Sewage and Effluent Treatment Technologies
Designed for engineers and technicians who need practical skills and…Read more
Professional Certificate of Competency in Structural Design for Non Structural Engineers
Professional development course designed for engineers and technicians who need…Read more")
Professional Certificate of Competency in Substation Design (Main Equipment)
Professional development course is designed for engineers and technicians who…Read more")
Professional Certificate of Competency in Substation Design (Control, Protection and Facility Planning)
Designed for engineers and technicians who need to gain practical…Read more
Professional Certificate of Competency in the Fundamentals of Process Plant Layout & Piping Design
Professional development course is designed for engineers and technicians who…Read more
Professional Certificate of Competency in Practical Mechanical Sealing
This professional development course is designed for engineers and technicians…Read more
Professional Certificate of Competency in Road Construction
This professional development course is designed for engineers and technicians…Read more
Professional Certificate of Competency in Specification and Technical Writing
Master the art of writing clear, accurate, and professional technical…Read more
Professional Certificate of Competency in Hydraulics and Pneumatics
Overview of all aspects related to the construction, design, operation,…Read more
Professional Certificate of Competency in Big Data and Analytics in Electricity Grids
This course explores the use of big data & data…Read more
Professional Certificate of Competency in Renewable Energy Systems
This course covers various renewable energy systems that are popular…Read more
Professional Certificate of Competency in Smart Grids
A smart grid is an electricity network that uses digital…Read more
Professional Certificate of Competency in Hydrogen Energy – Production, Delivery, Storage and Use
Hydrogen energy short course designed for engineers and professionals interested…Read more")
Professional Certificate of Competency in Building Information Modelling (BIM)
This professional development course is covering practical aspects of using…Read more
Professional Certificate of Competency in Industrial Internet of Things
Internet of Things (IoT) is the most sort after technology…Read more